| Oracle® Retail Predictive Application Server Cloud Edition User Guide Release 19.0 F24877-28 |
|

 Previous |
 Next |
| Oracle® Retail Predictive Application Server Cloud Edition User Guide Release 19.0 F24877-28 |
|
Previous |
Next |
Measure filtering feature allows users to build filters on the fly letting the users narrow down the data to solve a focused set of business problems. Measure Filtering provides the ability to apply dynamic filters based on the simple arithmetic conditions which makes day to day planning process for user much easier.
For example, when you are working on in-season item planning process, to quickly filter the stores having markdown percentage greater than 25%, you can use measure filtering feature. Measure filtering allows you to create and apply ad hoc filters right from the application without configuration support.
With the flexibility of Measure Filtering, you can apply:
Multiple measure filter on a selected view.
Filters on measure with different data types on the selected view.
Measure filters in combination with special filters and attribute filters.
You can apply the following conditions to various measures depending on the measure data type:
Numeric Measures: Greater than, Less than, equal to, greater than or equal to, less than or equal to, not equal to, between, not between, top values, bottom values
Boolean Measures: equal to
Date Measure: Greater than, Less than, equal to, greater than or equal to, less than or equal to, not equal to, is between, is not between
String Measure: Contains, begins with, ends with, equal to, not equal to.
This section describes the basics of Measure Filtering:
Measure filter is accessible through the context menu when you right-click on measure column header. To apply a measure filter, ensure all the positions you have selected in wizard are available on the pivot table. Measure filtering is enabled when you place the measure dimension tile on x-axis and one of the position dimension tile on y-axis, with the remaining position dimensions to be placed on z-axis. Measure filters function by filtering the positions of the dimension on the row axis.
|
Note: A measure filter is applied only on the measure dimension, meaning that the measure filter option is not available on other position dimensions.After applying filters, if you move the placement of the measure dimension or position dimension then the applied filters will be reset. |
Perform the following steps to create a measure filter on the selected measure.
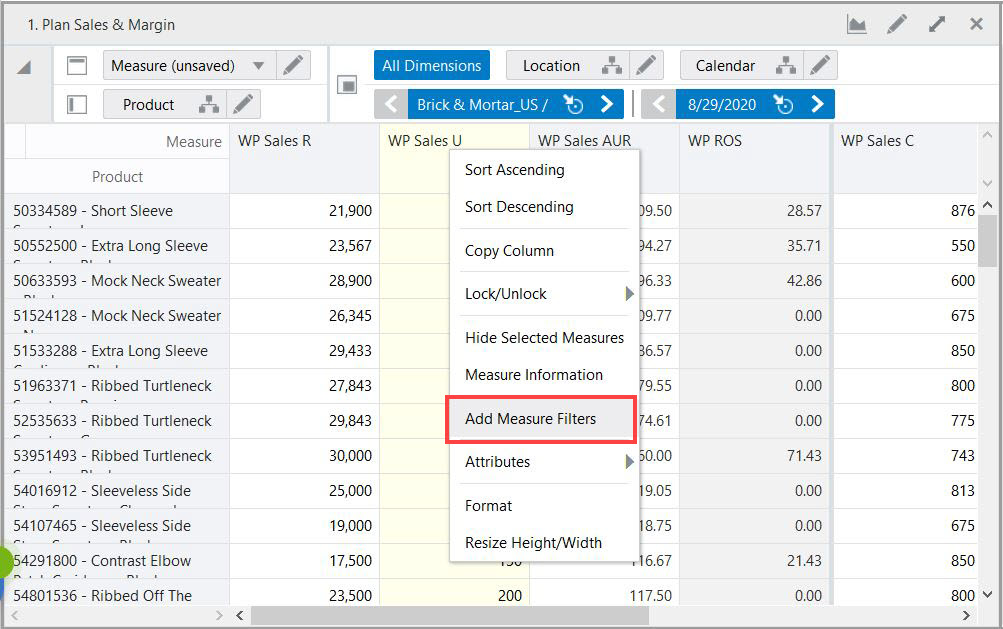
Select the measure header and then select the Add Measure Filters option from the right-click context menu.
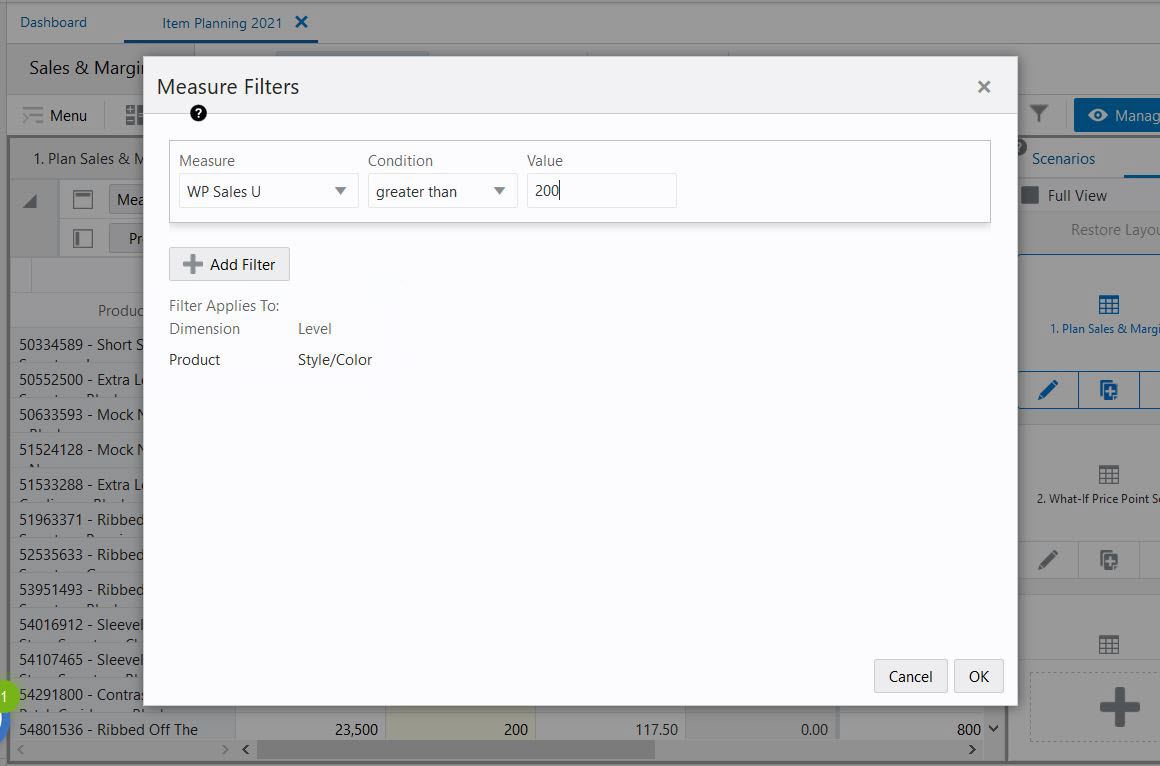
From the Measure filter dialog box, select Condition from the list and enter the value for which you need to apply a filter. The dimension and level are selected by default if you have a single level selected on the view.
|
Note: If you have multiple levels selected for position dimension, then you can select the dimension level from the list. |
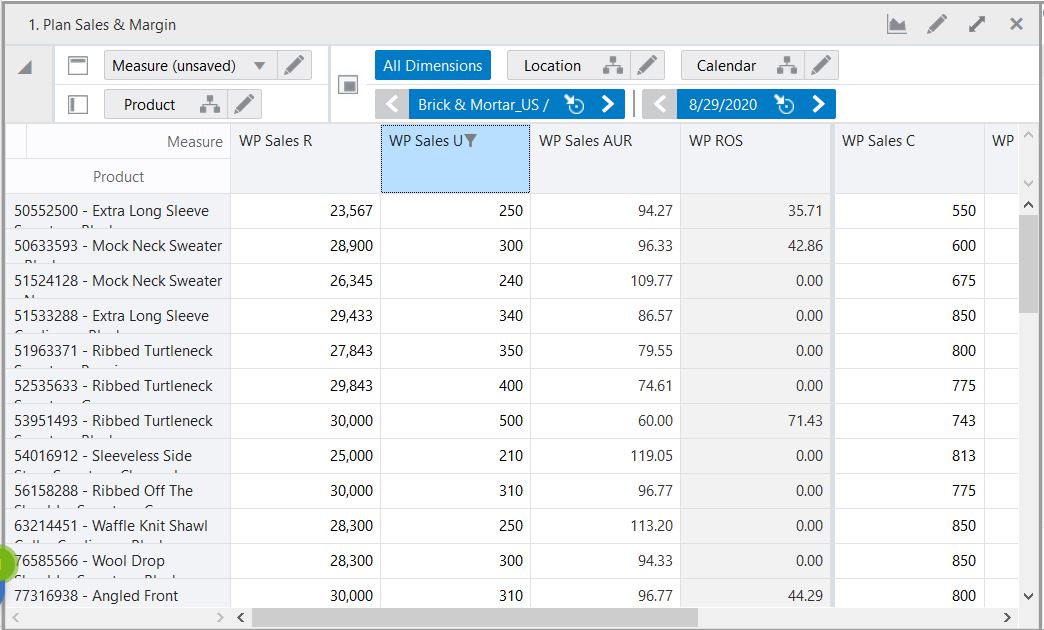
You can see the filter results with the position matching the filter condition. In Figure 16-3, you can see the measure filter result applied on the Sales U measure. The filter icon shows that the filter is applied on the measure column.
The result shows the position where Sales U is greater than 200 units.
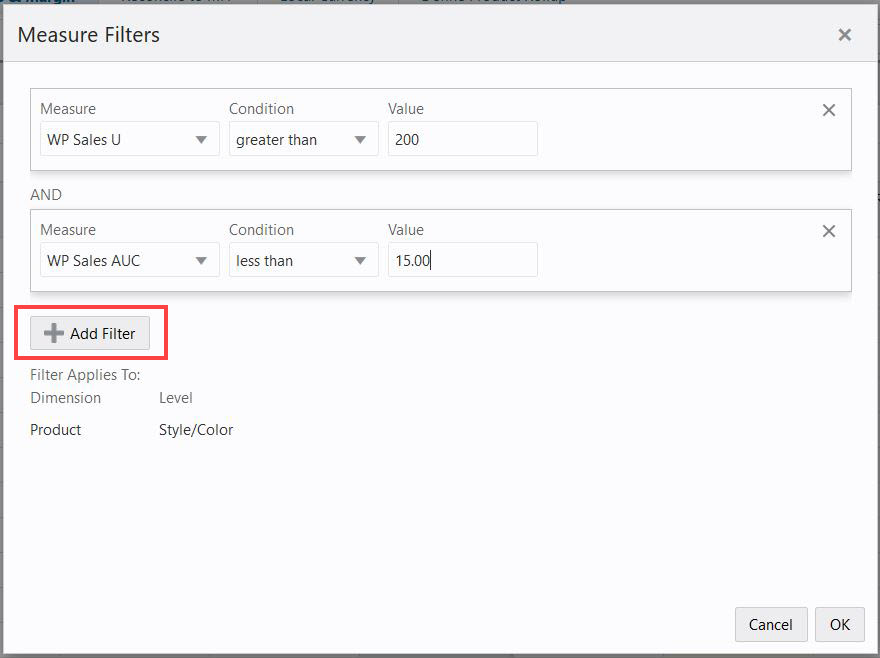
You can apply filters on multiple measures and edit the existing measure filter. You can apply up to five measure filters on a view all at once. To apply more than one measure, use the right-click context menu option Add Measure Filters as shown in Figure 16-4. When two or more filters are applied, the positions matching with both the filters display as the result. To apply more than one filter, then also use Add Filter located on the Measure Filter dialog box as shown in Figure 16-5.
To edit the existing measure filter, select the measure on which the filter has been applied and use the right-click context menu option Edit Measure Filters. With the same measure filter dialog box you can edit filters as per requirement.
Figure 16-4 Add or Edit Measure Filter Options
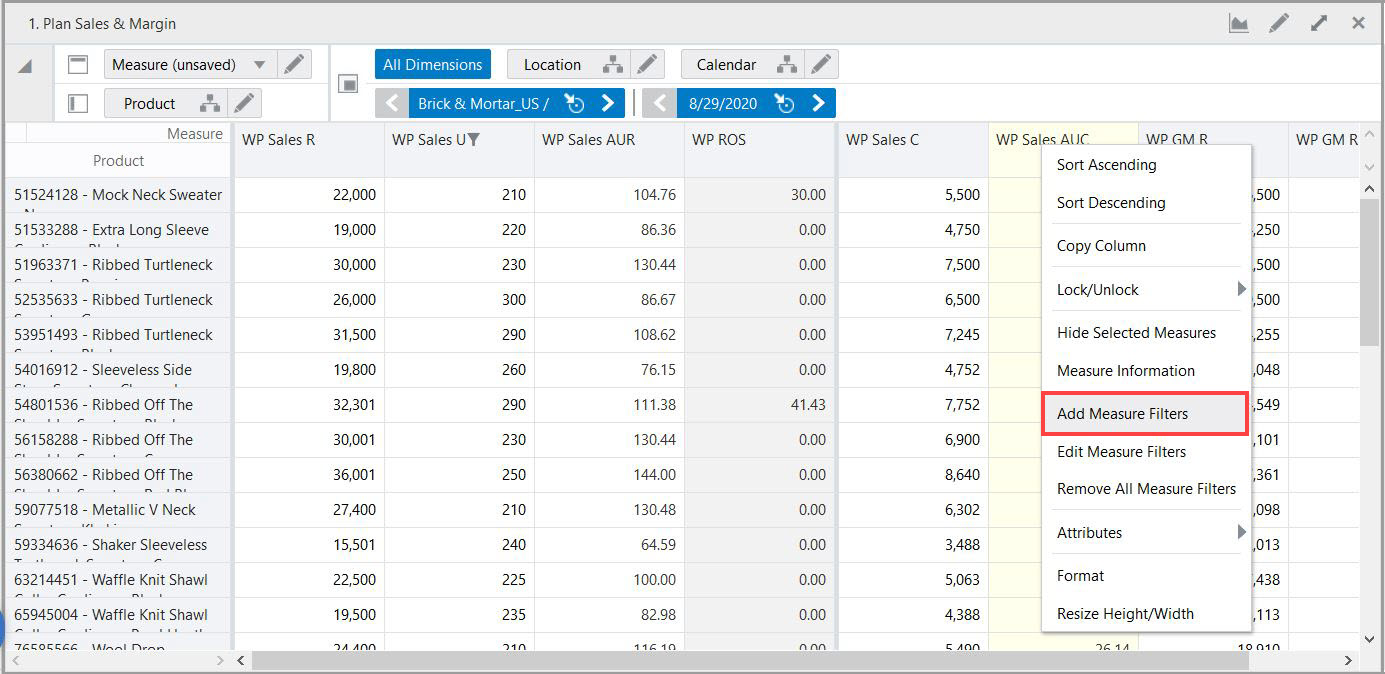
Figure 16-5 Apply More Than One Filter Using Add Filter
|
Note: Any measure that cannot qualify using the following rules will not have the Add Measure Filter context menu and will not be included in the condition's measure drop-down list. Measure filtering is not applied for spacers and display only measures.For the Resultant Dimension or Target level:
For the driving levels on the page edge:
|
When a measure filter is applied, the information in the page edge is also filtered. When you scroll on the position dimension on the page edge, then the measure filter is applied and displays the filtered results.
If you apply a measure filter and no position meets the requirements of the measure filter, then all positions in the view are displayed and a notification displays the message, No matching positions in some or all of the views. All positions will be shown for the view(s): list of views.
Figure 16-6 Notification for No Matching Positions

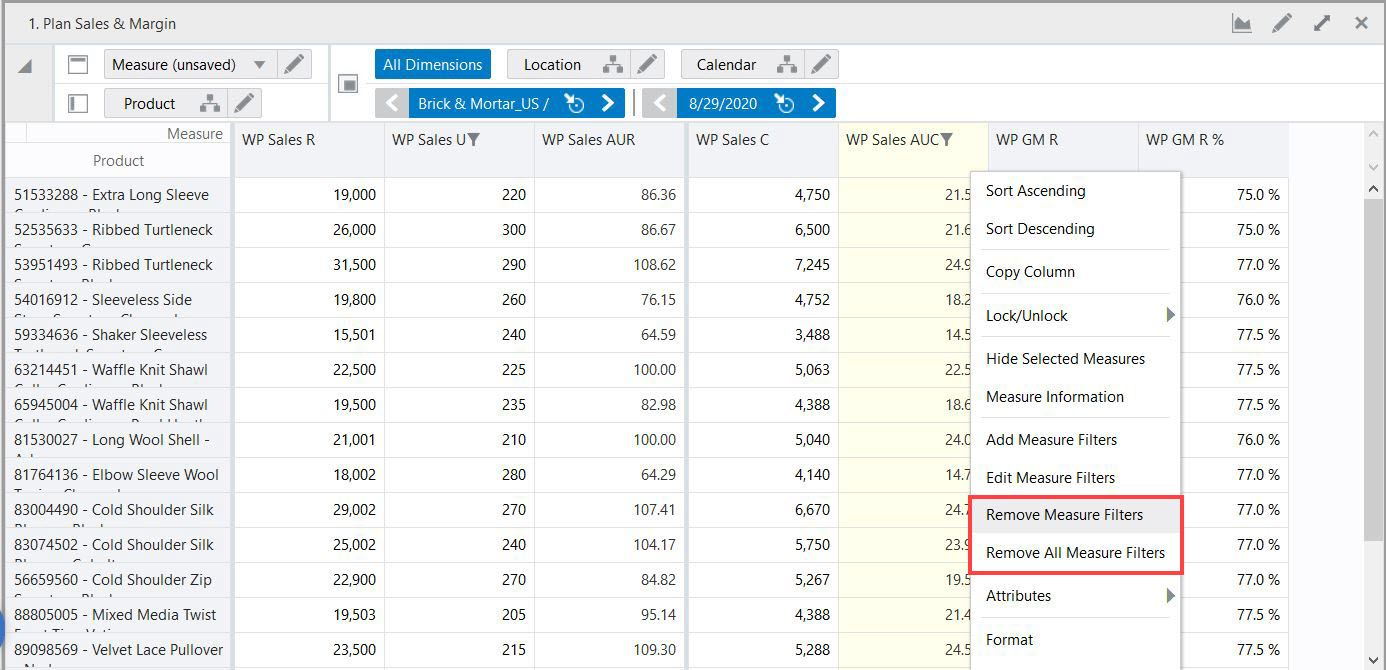
You can remove the applied measure filter using the right-click context menu option, Remove Measure Filters. When you remove the measure filter, all of the positions display on the pivot table.
You can remove multiple filters one by one from each measure. You can also use the Remove All Measure Filters option to remove all the filters from the view. When a measure filter is removed, a notification displays on the screen.
Figure 16-7 Remove Measure Filters and Remove All Measure Filters
The following RPASCE functionality can affect the use of Measure Filters:
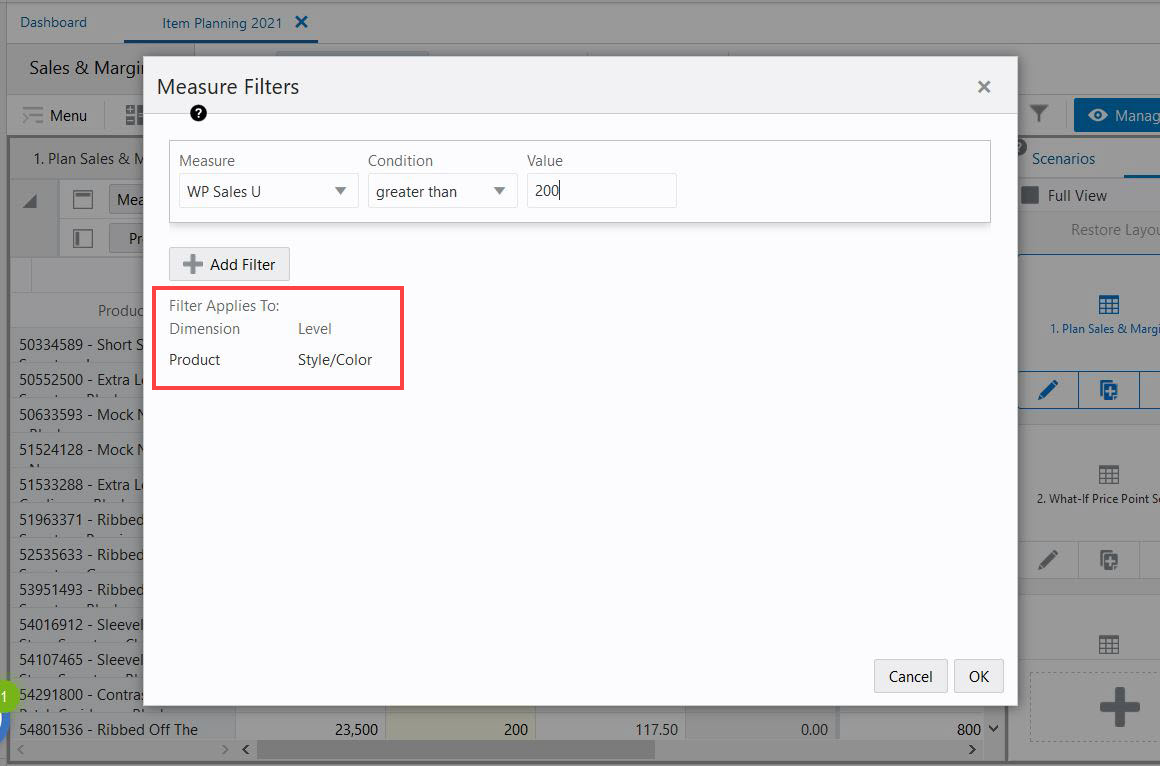
The dimension at which the filter is applied should be on the row or y-axis. The dimension and level should be selected at the time when you create the measure filter to apply the filter.
|
Note: When you have a single position level displayed on pivot table, the selection is made by default on the Measure Filter dialog box. |
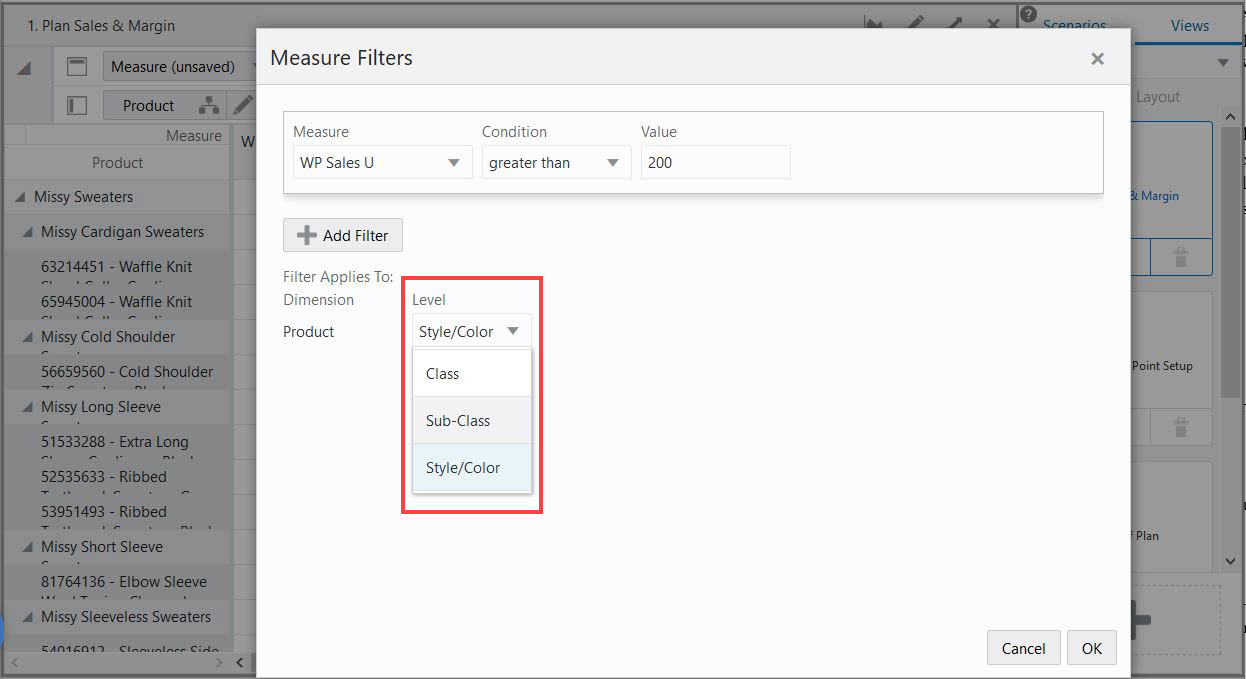
Figure 16-8 Apply Measure Filter to Dimension and Level
When multiple position levels are displayed on the y-axis dimension, then you need to make a selection of the level when the measure filter was created. Based on the level selected, the measure filter is applied. If you apply the filter at the parent level, then results show the matching parent positions along with all the children. If you apply the filter to the base or child level, then results show the matching child positions along with respective parent positions.
Example:
If you are filtering the product dimension tile and on y-axis with the sub-class and SKU displayed, then while creating the filter you can make a selection to either apply the filter on the sub-class or SKU's positions.
If you apply the filter on Sub-class level, the position matching the filter criteria at sub-class level displays as the result. If you apply the filter to the SKU level, then the position matching the filter criteria at SKU level displays as the result.
Measure filtering operates on all the positions selected by you in the wizard. In addition, if the positions are hidden when the filter is applied, they display if they match the applied filter criteria.
If you apply a manual show or hide from the Edit View on the measure filter result, then the measure filter is removed. In order to see the position selections, you can open the Edit view for the required positions.
When you make cell edits on the measures where filters are applied, the filters are re-run with Calculate. The cell edits the measures where the filters are not applied and makes no change with Calculate.
You can add placeholder positions when there is measure filter applied. The placeholder positions are added along with the resulting positions of the measure filter. Once you run actions like Calculate or Page scroll, then the placeholder positions may not display based on the measure filter criteria.
RPASCE offers various filters such as Special Filter, Attribute filters, and Position Filter. This section describes using the combination of Measure Filter with these other RPASCE filters:
During the planning process, there are views where you need to apply special filters. Along with special filters you can apply a measure filter to further narrow down the data to perform analysis and make quick decisions. Special filters takes precedence over a measure filter.
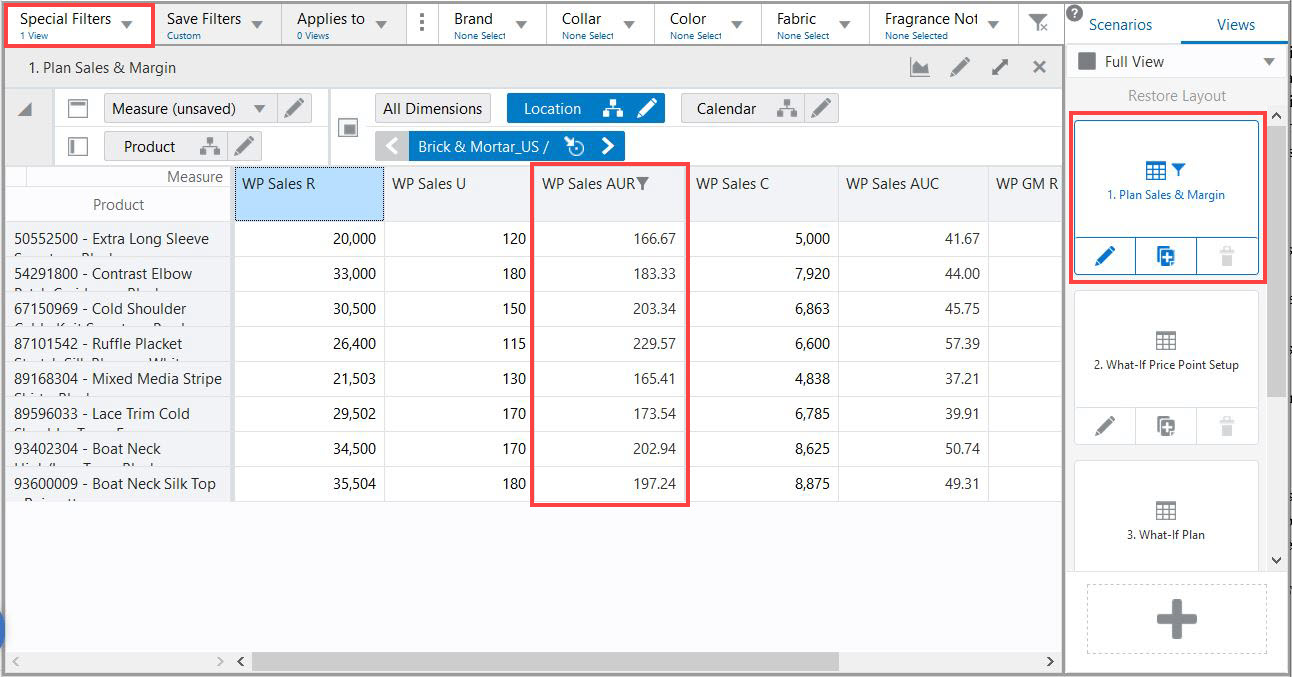
When you apply a measure filter over special filter you can see the position matching with measure filter and special filter criteria. Figure 16-10 shows the combination of special filter (Filter by Assorted Items) and a measure filter (Sales AUR greater than 150).
Figure 16-10 Special Filters and Measure Filters
Notes:
Applying a special filter over a measure filter removes the measure filter and only resulting positions of the special filter are displayed on the screen.
When a special filter is applied along with a measure filter and the special filter is out of sync, then the removal of the measure filter reverts to the special filter results.
When a special filter is applied along with a measure filter, then the page edge scroll shows the resulting positions of the combination of two filters.
If you remove a special filter out of the combination of special filters and measure filters, then the results of the measure filter displays.
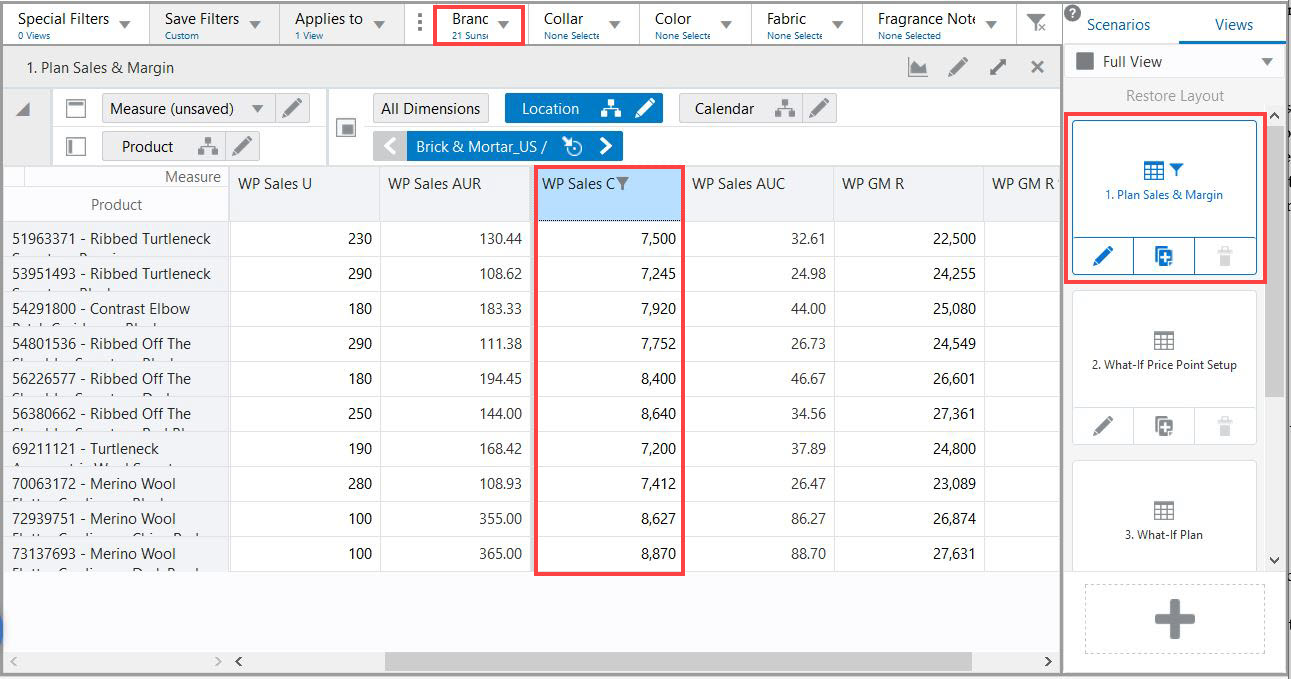
You can apply measure filters along with attribute filters which helps you focus on a sub-set of data in the planning process. You can apply attribute filters and measure filter on top of each other as per your requirements. For example, you can filter Product SKUs for a brand and then apply a measure filter to products that have sales whose cost is greater than and equal to 7,000. A combination of measure filtering and attribute filters provides multiple options to place emphasis on a smaller data set during planning. Figure 16-11 shows an example of using a combination of attribute filters and measure filters.
Figure 16-11 Attribute Filters and Measure Filters
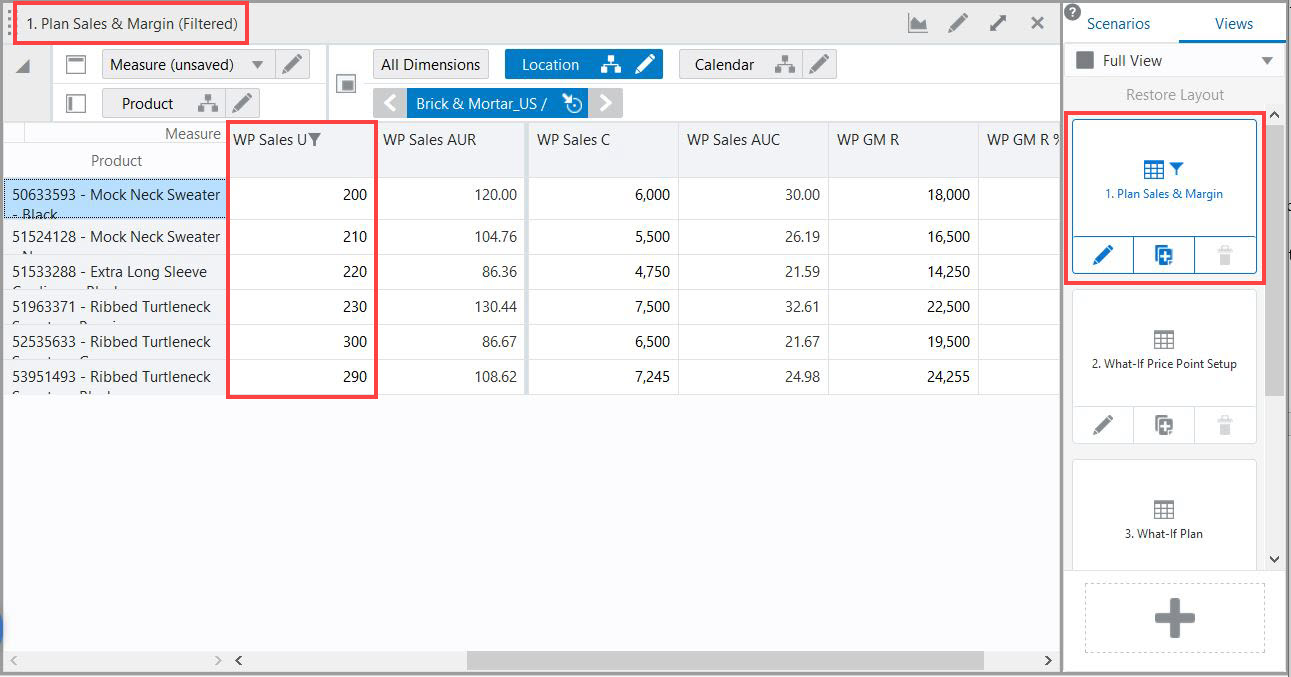
Apply a measure filter with a position filter to the view of a pivot table. You can apply a position filter over a measure filter to the view to bring down the number of positions and concentrate on the subsection of data. When you apply a measure filter over the position filter, then the position filter is removed and the measure filter is applied over all of the available positions.
Figure 16-12 Position Filter Applied Over a Measure Filter
Note:
Ordering of various filters combination is as follows:
Special filters takes precedence over all of the filters.
The measure filter and attribute filters are applied over special filter with AND operators.
Position filtering overrides all other filters, as a temporary state that can be lifted with right-click context menu option, Remove Position Filter.
When workbooks are copied or saved with measure filtering applied, then the following rules apply:
Copying View
If a workbook view is copied, any measure filters are copied as well. This means that the copied view is identical to the original. You can remove the measure filter in the copied view to show all positions.
Closing Workbooks
When the workbook is closed and reopened, it opens in the same state with measure filtering as it was closed in. The applied measure filter is retained and the respective measure displays the measure filter icon.
Saving with Format
A measure filter is saved with formats. You can save the measure filters with these Save Format options:
Only For Me
For My Group
Workspace Template