| Oracle® Retail Predictive Application Server Cloud Edition User Guide Release 19.0 F24877-28 |
|

 Previous |
 Next |
| Oracle® Retail Predictive Application Server Cloud Edition User Guide Release 19.0 F24877-28 |
|
Previous |
Next |
Placeholder maintenance enables planners to dynamically create, modify, or delete placeholder positions at selected hierarchy levels so that they can plan for future expected items and locations that do not currently exist in the system. As part of system configuration, Placeholder Maintenance must be enabled for the required dimensions and levels. The planner is able to choose the options Use Like Item and Assign Attributes in order to create a placeholder position.
When an informal position is to be made formal, the position's name (a label is not necessary for the update to occur) must first be updated to reflect the correct position name that will be loaded during the load process. Prior to the load, an administrative utility run against the environment to change the status of a position from informal to formal (see the Oracle Retail Predictive Application Server Administration Guide for the Fusion Client for more information on the updateDpmPositionStatus utility). This process enables the loading and purging of that position through the hierarchy load process and disables further placeholder maintenance activities on the position.
Note that Placeholder Maintenance is also referred to as Dynamic Position Maintenance (DPM).
The DPM can be launched from the main menu or the context menu to both add and modify positions.
To add new positions to a dimension, complete the following steps:
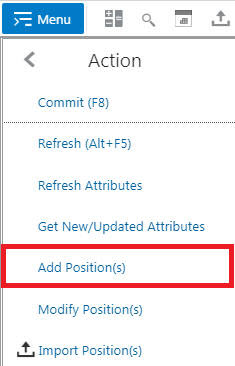
From the Action menu, select Add Positions. The Add Position window opens.
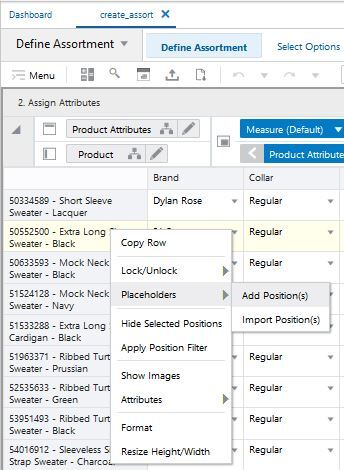
Alternatively, you can right-click the position level to access the Add Positions context menu.
From the context menu, the dimension positions are pre-selected based on the launch context.
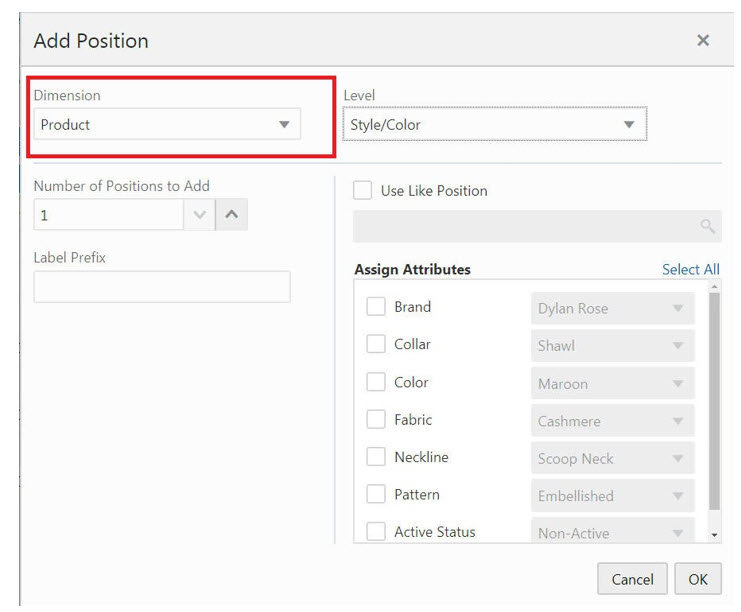
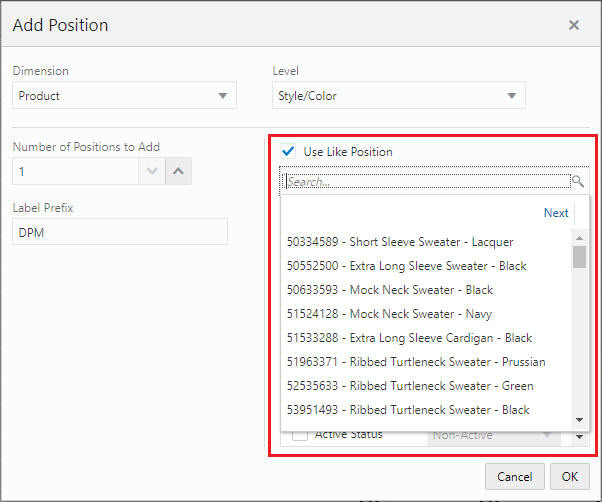
The Add Position window opens with values that defaults to first option available. The Dimension and Level selection options are always available.
Selecting Dimensions
You can select the dimension for which you want to create the placeholder positions. Only the list of dimensions for which the DPM functionality is enabled displays.
You can select the level at which you want to create the placeholder positions. The list of levels depends on the dimension selected and also on the user's ability to create new levels.
You can either:
Enter the number of positions to add in the Number of Positions to Add field.
Select the number of positions to add by using the up and down arrow keys.
Create placeholder positions with when you enter details in the Label Prefix field. The label is used for all of the number of positions specified in the Number of Positions to Add field.
Modifying the Values of the Parent Positions
The parent positions of the newly added dynamic positions are shown in the tabular layout of the Add Position window. The planner can modify the values of the parent positions if required.
You can choose either of the options:
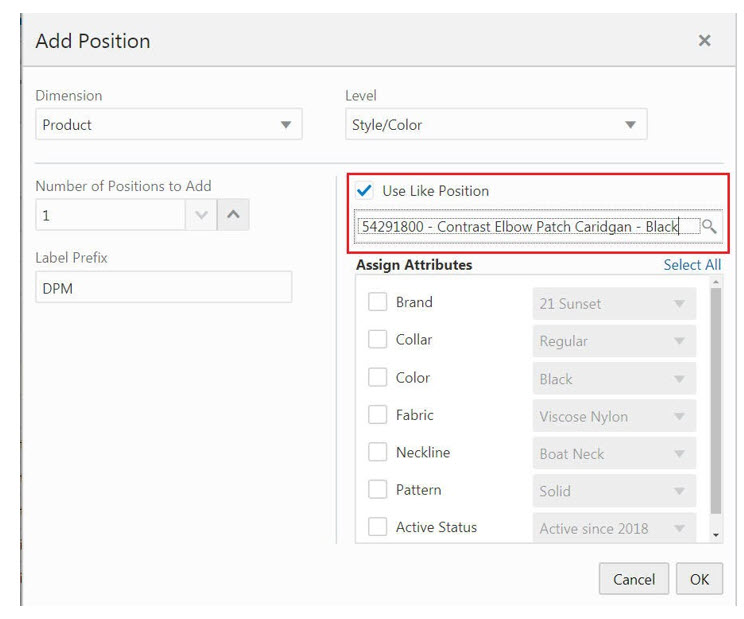
Use Like Position
Assign Attributes.
| When you Choose the Option | Then |
|---|---|
| Use Like Position | You select a like position by choosing a position from selection list of existing items. |
| Assign Attributes | Default attribute values are assigned and the attributes enabled in configuration for that level are displayed. |
Specify Attribute Information
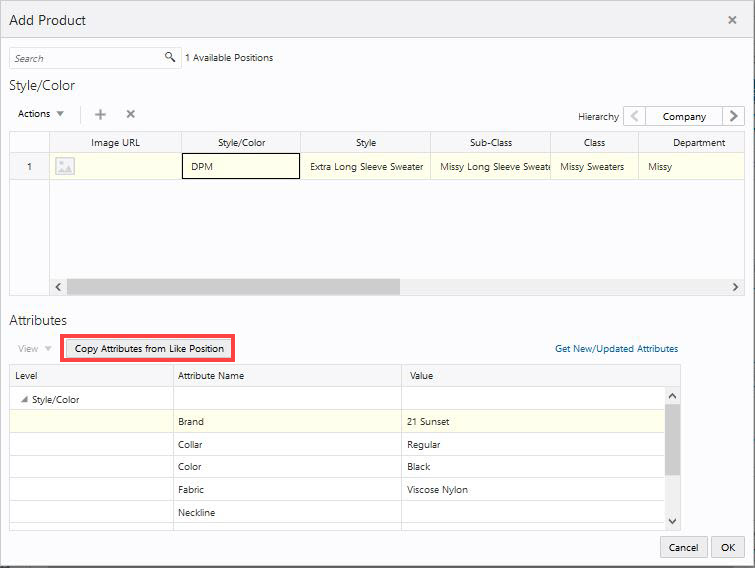
If you select the Use Like Position option and then select a position from the list of existing items, you can simplify the process of specifying attribute information for new positions. You can copy the attribute information in part or whole from the Like Position to the new positions using the Copy Attributes with Like Position. This prevents you from having to manually enter the information on an attribute-by-attribute basis.Using Edit Mode.
A row becomes editable with you either:
Press Enter and then press F2.
Double-click the current row.
Press Tab to navigate to the next cell. Exit Edit mode by pressing either Esc or F2 again.
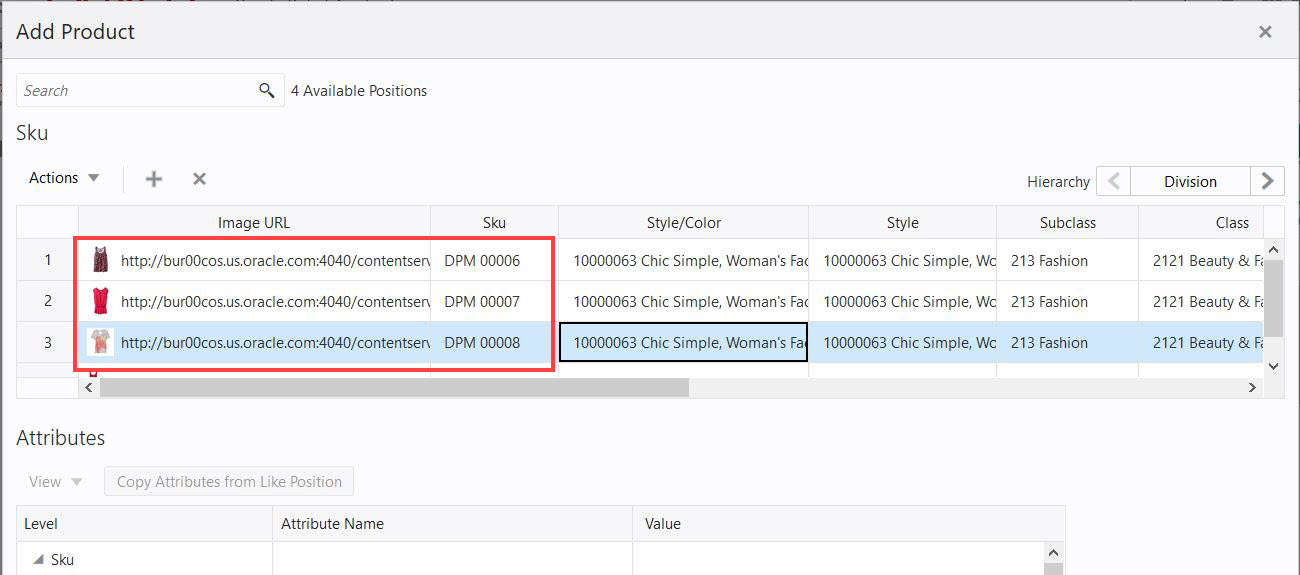
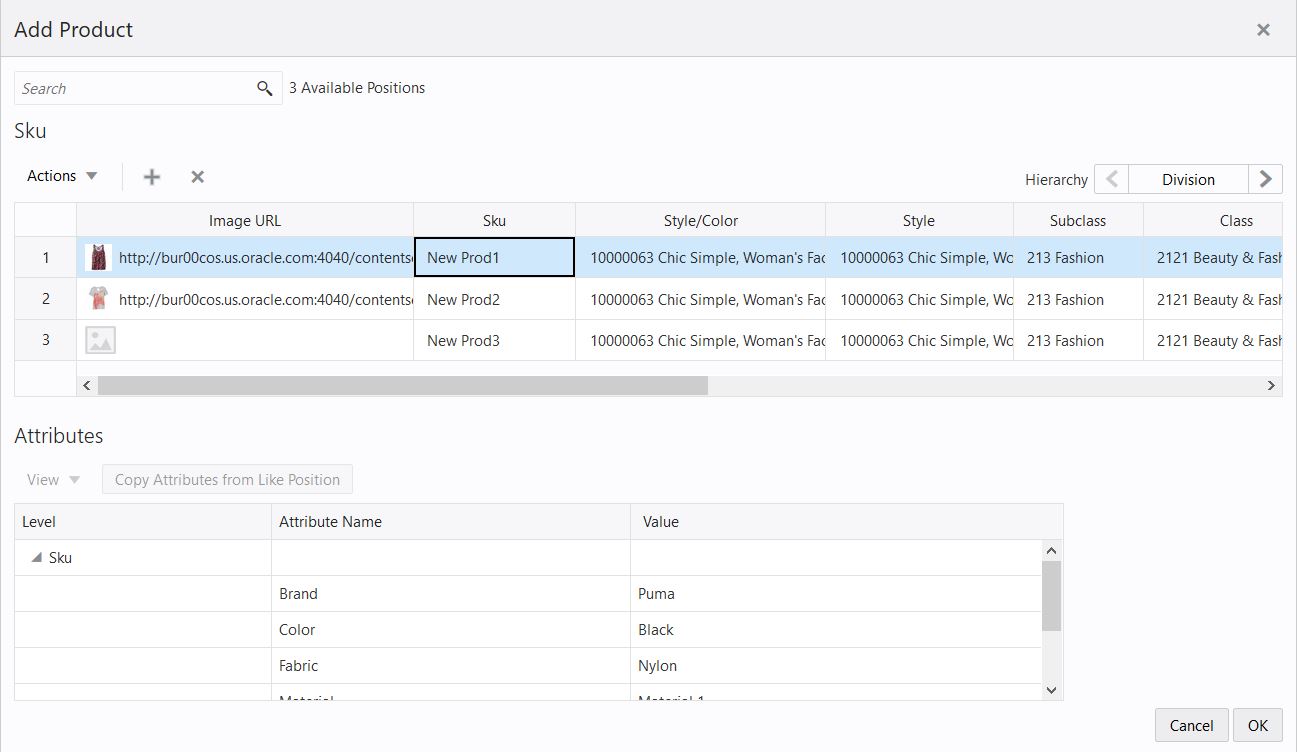
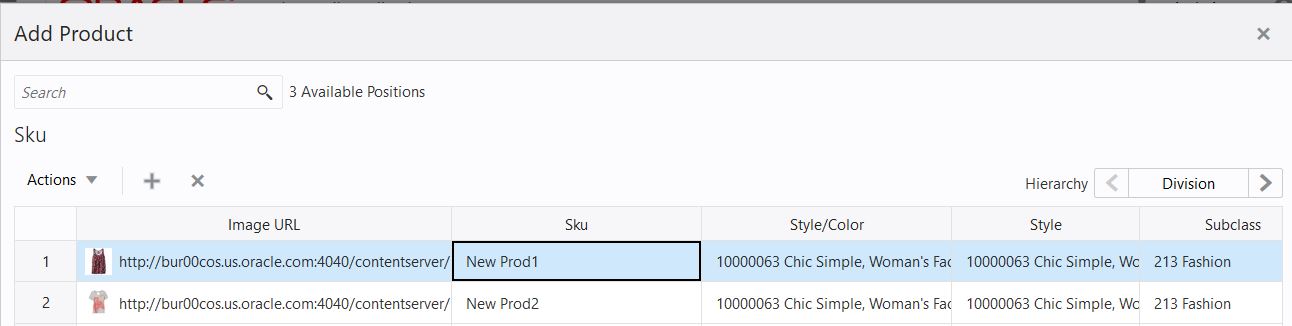
The Add Product window adds the positions at the launched dimension position level. A unique number is added to the duplicate position labels in the Add Product window. This unique number is to avoid the addition of duplicate informal positions. You can edit the position label in the Add Product window
When adding informal positions, a validation error appears in case of duplicate values with the Add Product or Modify Product windows.
You can add an image for the informal position added from the Add Product window. The first column shows the image and URL text input field. The images added for the informal position defaults to both the thumb and full image designated to main facet for the first media attribute. The Image URL field is not mandatory field, so you can skip addition of an image.
Copy the attribute information from the like position selected to the new positions and click Copy attributes from Like Position. In this way, you do not have to enter the information manually on an attribute-by-attribute basis.
Click the left and right arrow keys to update alternate hierarchy details of the newly created placeholder position.
Click OK and review the new placeholder position that has been created. The placeholder positions are links to help you quickly identify placeholders. The link opens the Modify Position window.
|
Note: The aggregate information (district, region, company, and so on) is populated only if the Add Dynamic Position window is accessed from the right-click menu. If you accessed this window from the Edit menu, these positions are emptyIf there are alternate hierarchies, the value can either be selected or added as new if the alternate hierarchy supports dynamic positions. After multiple positions are added for a level in the position tree, the levels above that level can only support single position add or edit. |
You can use Placeholder Maintenance to copy the information from a similar position (Like Item) to the new positions. It facilitates the copying of attribute and metric information from Like Positions to the New positions, under the assumption that the new position will perform in a manner similar to the source of the copied metric data. For details on choosing the level of history cloning and defining a measure on that level for each dimension that supports Placeholder Maintenance, see the Oracle Retail Predictive Application Server Cloud Edition Configuration Tools User Guide.
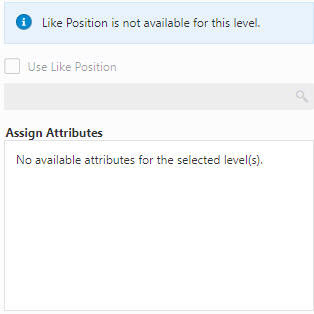
When a measure is not defined, the message Like Position can only be used to copy attributes for the currently selected level displays. When both the measure and the attributes are not present, the message Like Position is not available for this level displays and the Use Like Position check box is not available.
After dynamic positions are added to the hierarchy, the DPM process allows you to:
Change the parent of a dynamic position to a different formal or dynamic parent.
Update the position name and position label.
Change the image associated with the informal position
|
Note: Only dynamic positions can be modified using the DPM feature. The Modify menu is not visible if there are no dynamic positions in the workspace. |
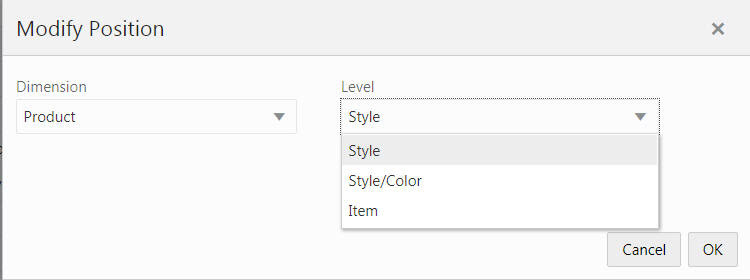
Launch Modify Position(s) from the Action menu. Select the dimension and level in the Modify Position window for the placeholder positions that must be modified.
Figure 13-10 Action Menu -Modify Positions

The Modify Dynamic Position window opens. Select the desired dimension and level where you want to modify the dynamic position.
Alternatively, you can right- click one of the positions and select Modify Positions in the right- click menu, or simply click the placeholder position link. The Modify Position window shows the positions for modifying at the launched dimension.
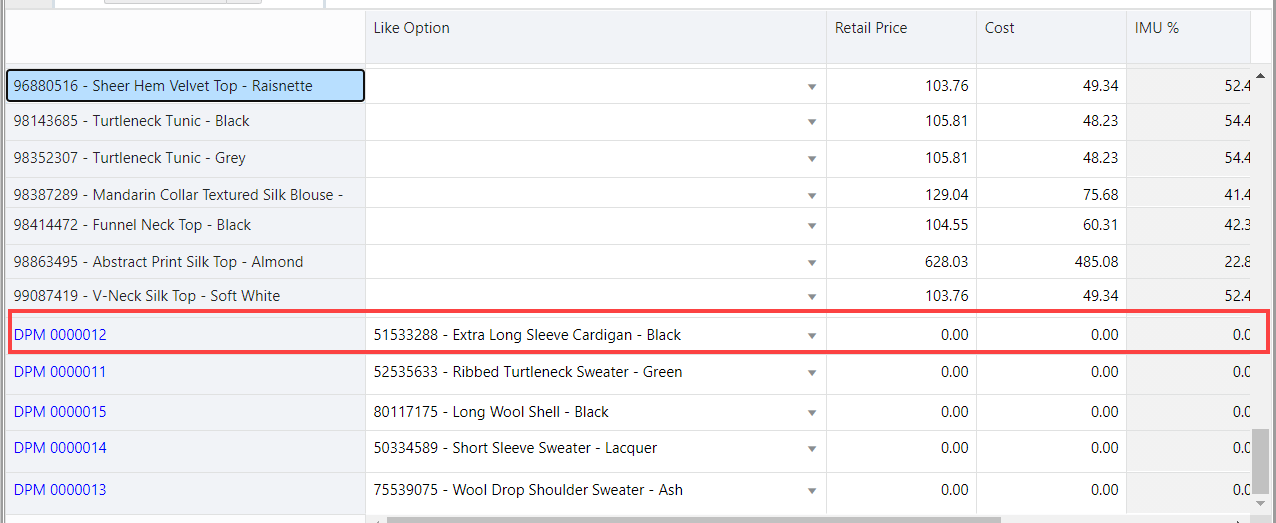
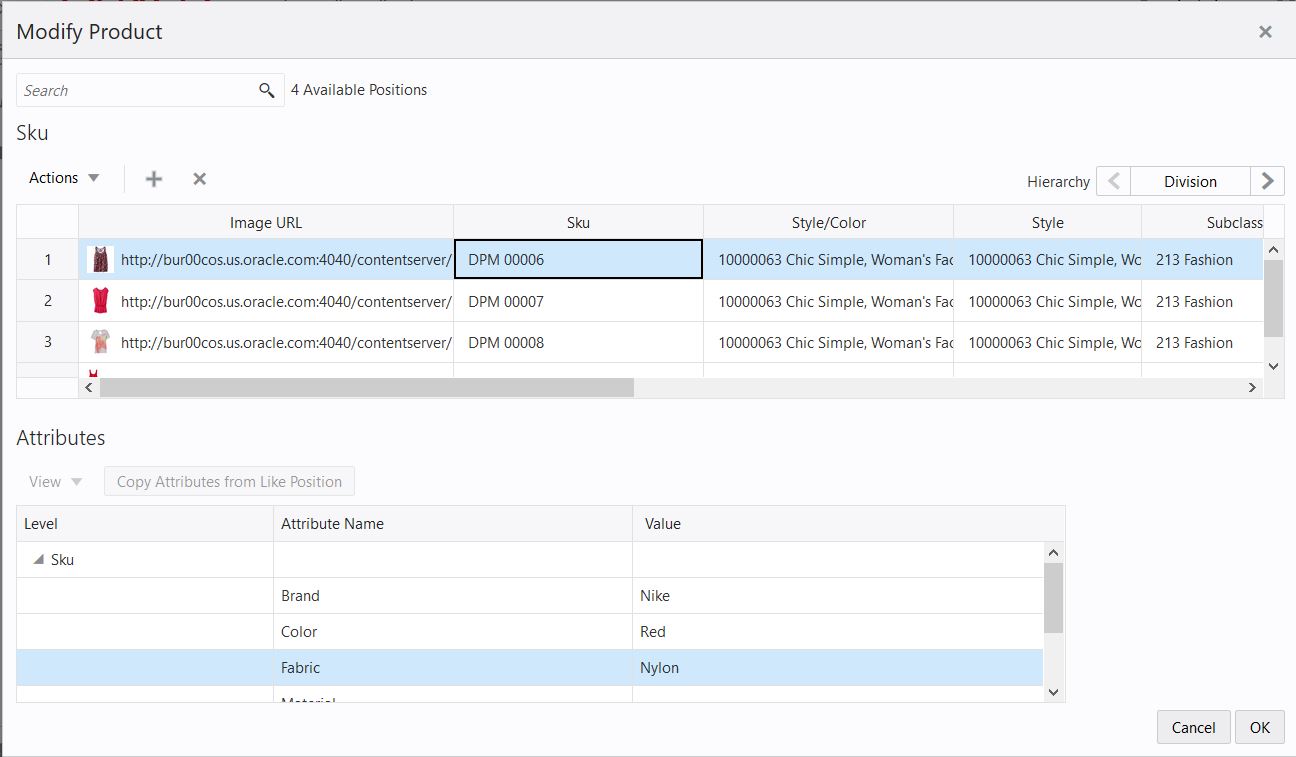
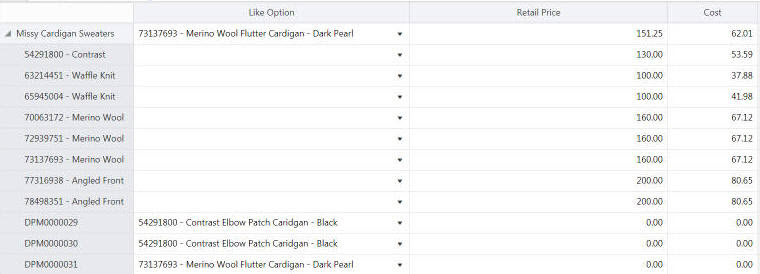
The Modify Product window opens. Select the existing dynamic position and then modify the position window label or position name. Alternately, select any parent to change the parent values of the dynamic position that has been created. The parent can be Style/Sub-Class/Class and so on, or an alternative hierarchy. You can the image URL to update the image associated with position. You can also see that the Like Position column of the window contains the like position you set during the position creation.
When finished, click OK to save and close.
|
Note: You can modify the parent position for an informal position only if the parent belongs to the same sub-domain. If you try to modify a parent level for an informal position and if the selected parent does not belong to the same sub-domain, then RPASCE displays an error message:Position [position_name] on [level] does not exists in current sub domain. DPM process cannot continue. |
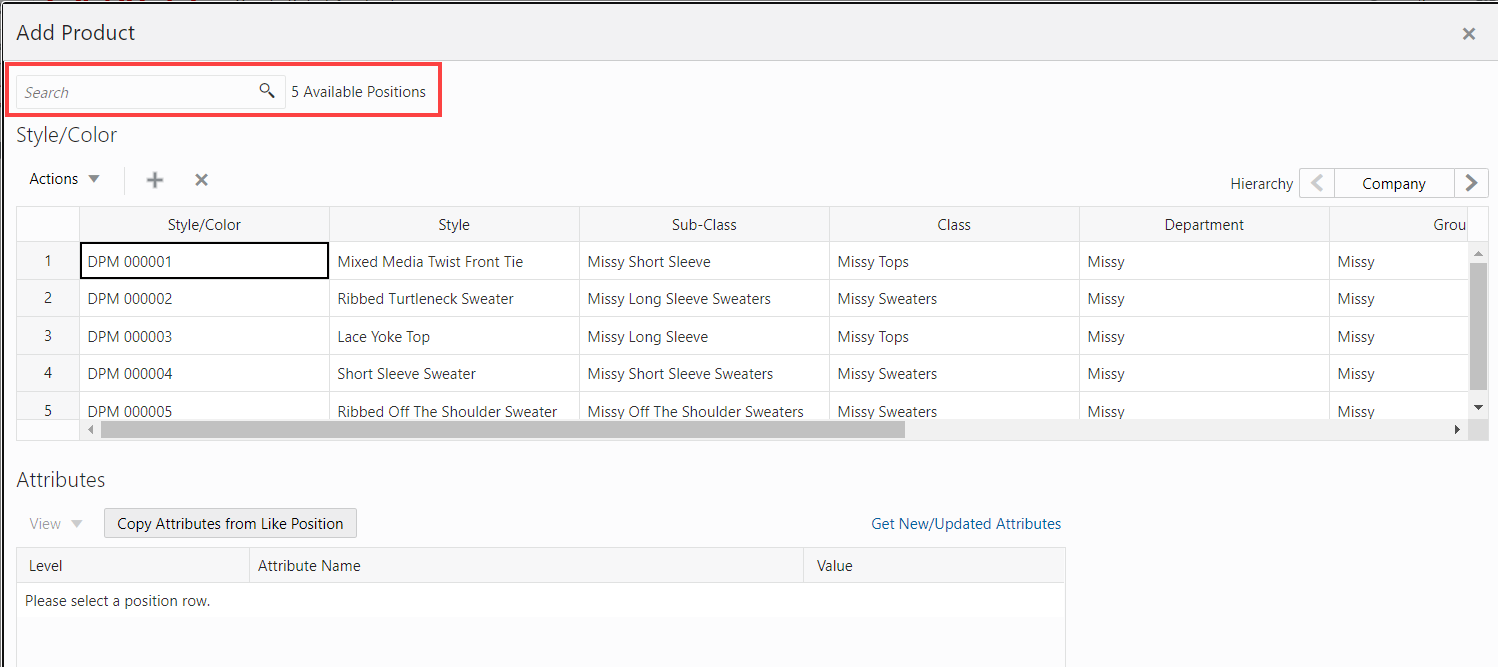
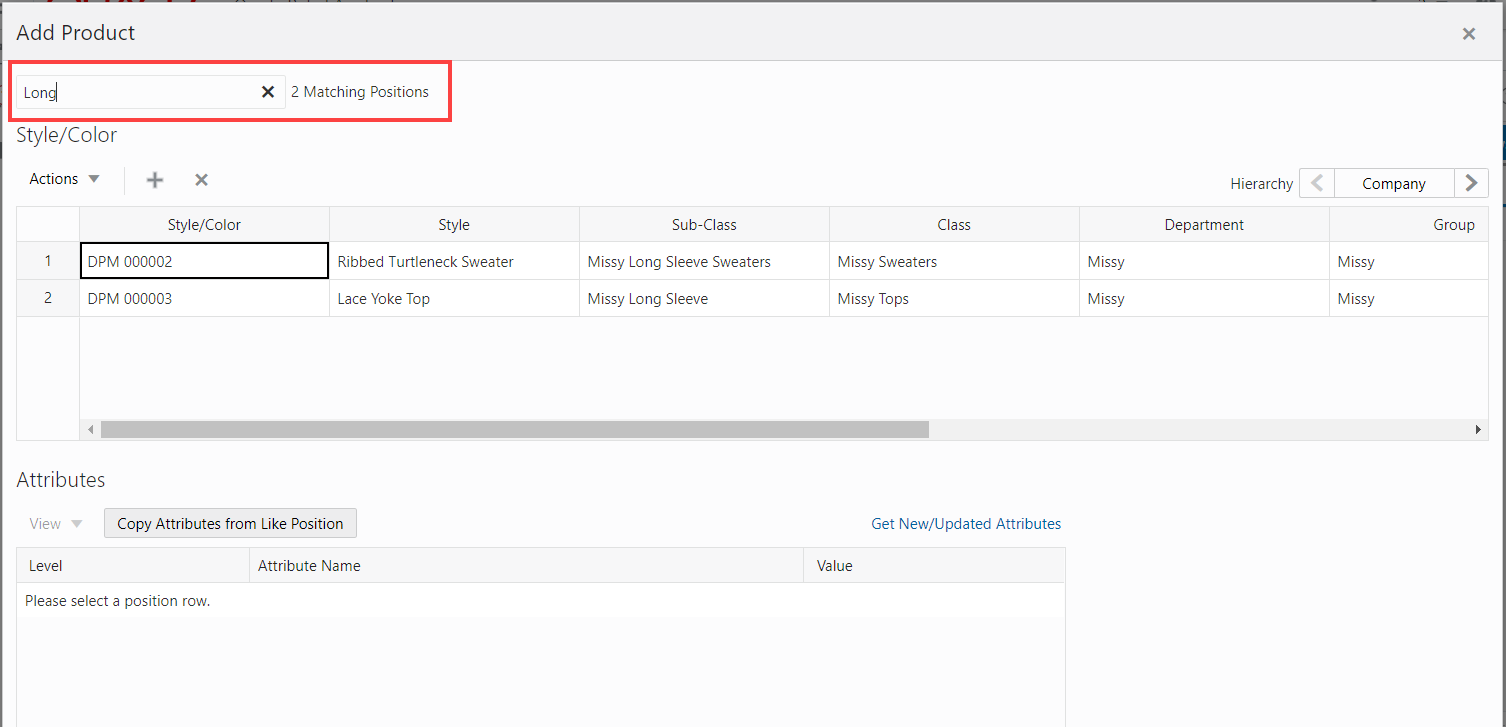
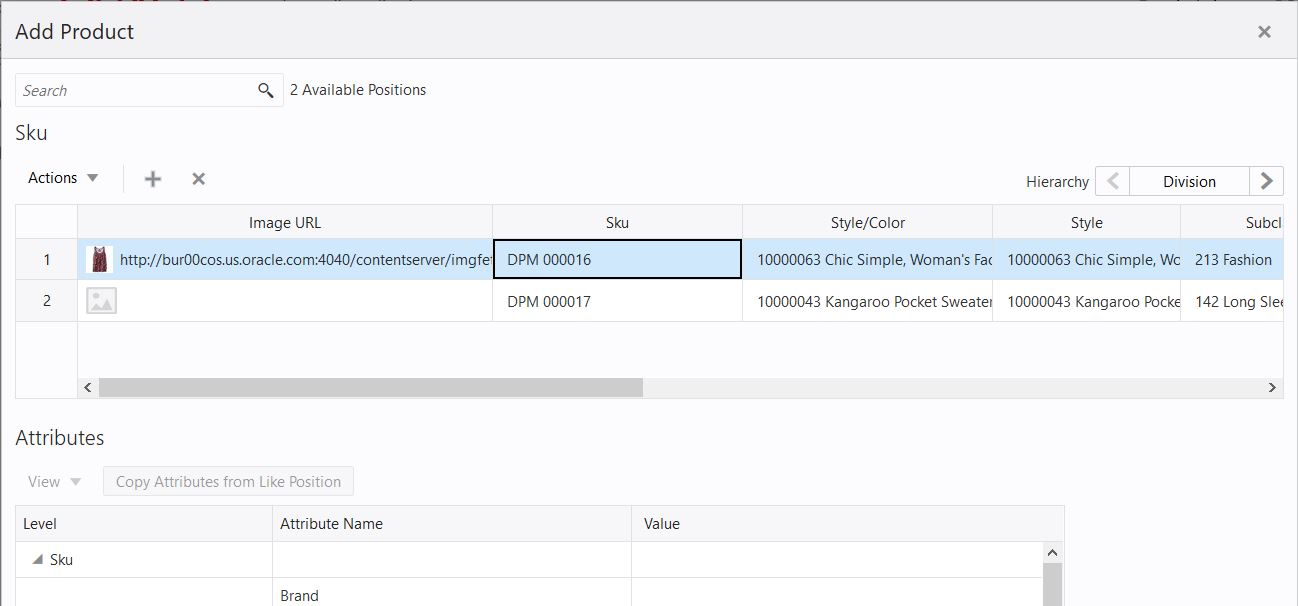
You can search for a position in the list of the informal positions added. In the Add Product or Modify Product window a search text box is available to locate the required position. The total number of informal positions available are displayed next to search text box. The search functionality makes it easy for you to find the required position and make modifications.
Perform the following steps to search for an informal position in either the Add Product or Modify Product window.
Enter your text characters in the search box to locate the position. You can search for position by position label or related parent position label. While entering characters, the matching results display in the list of positions.
The number of matching positions available are displayed next to the search box. To remove the search result either delete the entered characters or click X within the search box.
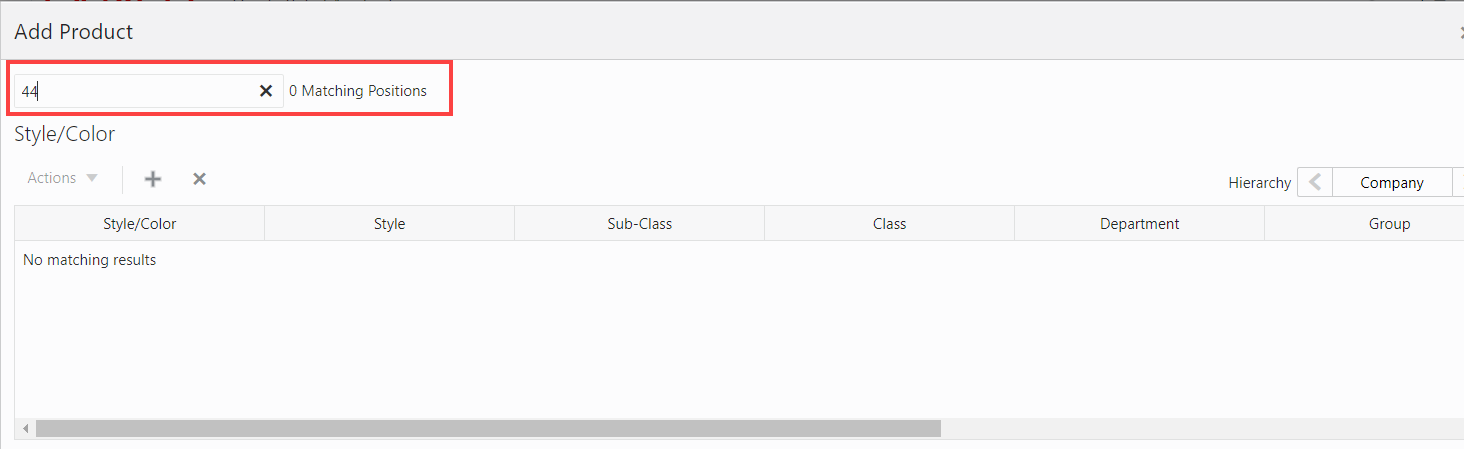
If there are no matching positions, then the number of matching positions available displays 0 Matching Positions as shown in Figure 13-15
Figure 13-15 Search Position – No Matching Position
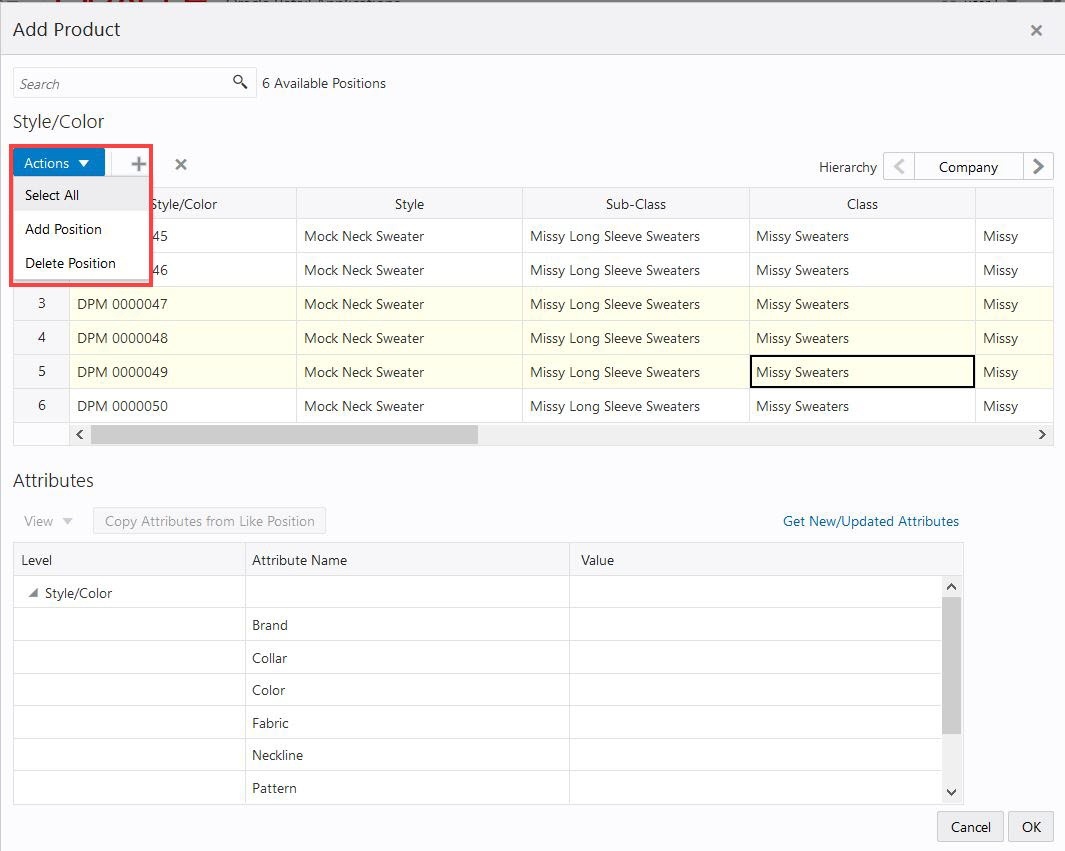
You can select all positions in the Add Product and Modify Product windows with Select All from the action Menu. This option helps in selecting all the informal positions in the Add Product and Modify Product windows.
Select the Action menu and then select the option, Select All to select all the informal positions in the Add Product and Modify Product windows.
After a dynamic position is added, you can delete it and all of its child positions to which it is a parent.
|
Note: Only dynamic positions can be deleted using the DPM feature. The delete option is not visible if there are no dynamic positions in the workbook. |
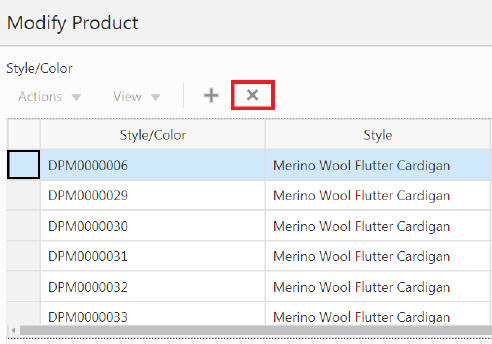
Right-click the informal position you want to delete.
From the right-click menu, select Modify Position and then click X to delete the specific placeholder position.
The Delete Dynamic Position window opens to indicate the dynamic position that will be deleted and any child positions associated with it are also deleted. Click OK.
Click OK to save and close the window. The dynamic position is removed from the view.
Figure 13-19 Placeholder Position Removed
Use Import Positions to manually import a list of placeholder positions and associated images that you have already entered in an Excel (.xslx) file format. It loads the positions listed in the file to the Add Product Window for validation and highlights errors when corrections are required. This functionality can be used for the bulk creation of placeholder positions and adding images for the informal position.
When buyers have clarity regarding the placeholder positions that must be created, including items, styles, attributes, and attribute values, they can enter these details into an Excel file. Then they can create the placeholder positions in the system by importing the file created earlier.
Perform the following steps to import placeholder positions.
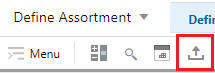
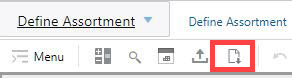
To import placeholder positions, click the Import Positions icon on the Quick Access Toolbar as shown in Figure 13-20.
Alternately, select the Import Positions menu item in Action Menu or perform a contextual launch of Import Positions.
Figure 13-21 Imported Placeholder Positions
After selecting the Import Positions icon or menu, you are redirected to select the file for upload. The selected file is uploaded to the server and processed.
If the import fails, this error message displays: The file import failed. Check the file format and try again.
If the import is successful, this message displays: Item list imported successfully.
The Add Positions window opens populated with the imported files positions. You can edit, modify, or delete the imported informal position records. If a validation failure occurs, an additional message displays.
Download and Update the DPM Import File Template
Perform the following steps to download and update the DPM Import File template.
To download the file template, click the Download DPM Import File Template icon as shown in Figure 13-22.
Figure 13-22 Download DPM Import File Template Icon
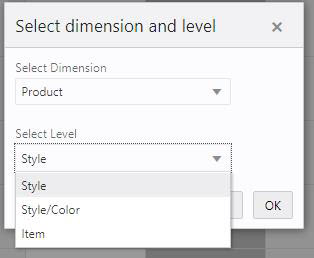
Select the dimension and level.
After clicking the Download DPM Import File Template icon, you are presented with the Select Dimension and Level dialog box. Select the dimension you want to import (for example, Product, location) and then select the level for the specific Dimension (for example, the Product dimension levels can be Style, Style/Color, Item).
Click OK to download a template for the selection dimension and level. You can import up to the lowest level of the dimension supported by the workbook.
To add multiple positions, complete the downloaded Excel template and then upload it using Import Placeholder Position. This helps in easy addition of multiple placeholder positions.
The downloaded template has a pre-defined format for each level with various fields to entre. Depending on your selected level, the format of the template changes. The downloaded template presents an example to show how to fill out the template. To add more positions, copy the example and create new line items in an Excel template.
Table 13-1 Template Level Descriptions
| Template Level | Template Description | Template Sheets | Template Columns | Input Fields |
|---|---|---|---|---|
|
Style Color |
Consists of two sheets. This template requires you to fill in details related to the style color and its parent style. |
Company |
Dimension |
Dimension at which you need to add position. |
|
Level |
Dimension level at which the position is added. |
|||
|
Label |
Name of the new style color position added. |
|||
|
Is Parent New |
To specify if the parent is new or existing for the new position. |
|||
|
Parent Level |
Dimension level of the parent to which the new position belongs to. For style color it is Style. |
|||
|
Parent Label |
Name of the parent to which the new position belongs. It can be either new or existing. For new parent style, additional row is provided for adding in the same template |
|||
|
Attribute Name |
Name of the attribute, such as Brand, Color, and so on. |
|||
|
Image URL |
Image URL for the style color position. |
|||
|
Attribute Value |
Value of the attribute with respect to the new position. For reference, few examples are mentioned in template. |
|||
|
Style UDA 1 |
Parent Label |
Style UDA value |
||
|
Style |
Consists of two sheets. This template requires you to fill in details related to the style only. |
Company |
Dimension |
Dimension at which you need to add position. |
|
Level |
Dimension level at which the position is added. |
|||
|
Label |
Name of the new position added. |
|||
|
Is Parent New |
To specify if the parent is new or existing for the new position. |
|||
|
Parent Level |
Dimension level of the parent to which the new position belongs. It can be either new or existing. For style color it is always Style. |
|||
|
Parent Label |
Name of the parent to which the new position belongs to. |
|||
|
Style UDA 1 |
Parent Label |
Style UDA value |
||
|
Item |
Consists of three sheets. This template requires you to fill in details related to item and style/color. |
Company |
Dimension |
Dimension at which you need to add position. |
|
Level |
Dimension level at which the position is added. |
|||
|
Label |
Name of the new item position added. |
|||
|
Is Parent New |
To specify if the parent is new or existing for the new position. |
|||
|
Parent Level |
Dimension level of the parent to which the new position belongs. It can be either new or existing. For style color it is always Style. |
|||
|
Parent Label |
Name of the parent to which the new position belongs to. |
|||
|
Attribute Name |
Name of the attribute style/color, such as Brand, Color, and so on. |
|||
|
Attribute Value |
Value of the attribute for style/color. For reference, a few examples are mentioned in template. |
|||
|
Image URL |
Image URL for the style color position. |
|||
|
Vendor |
Parent Label |
Name of the vendor for the new item position. |
||
|
Brand |
Parent Label |
Name of the brand for the new item position. |
As the upload occurs, it loads the position list to the Add Product Window where you can validate and correct any errors.
To add the positions, click OK.
Points to Remember when Importing Placeholder Positions
The item level position adding is enabled only in Item planning.
The entry in format for Dimension, Level, and Attribute name should be same as given in format. If the value entered is incorrect the DPM import will fail and it shows an error describing which row has the issue.
The image uploaded for the position defaults to both the thumb and full image. The image is designated as the main facet for the First Media Attribute.
The value of attributes, parent label can be added or changed post uploading the template in the Add Product Window.
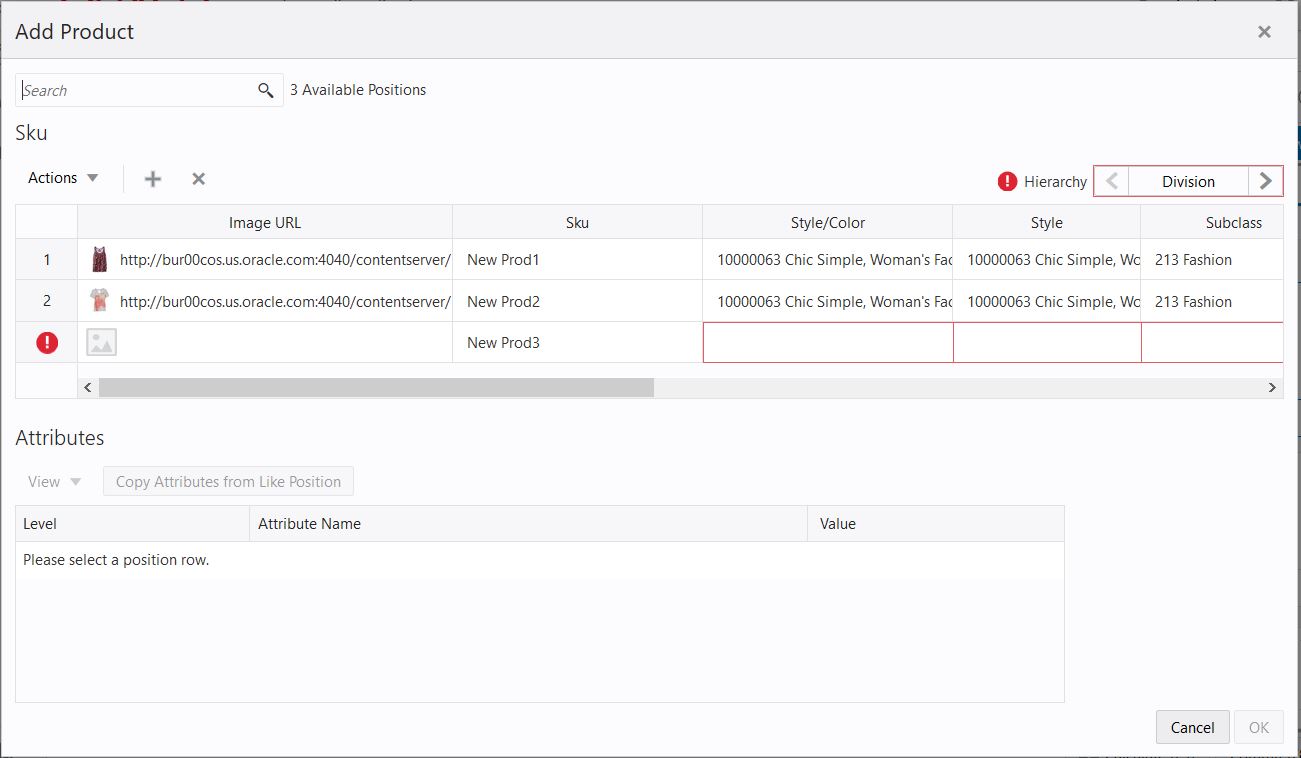
The DPM import shows an error if there is an attribute value not entered or faulty while uploading. Figure 13-25 displays an example of import errors. Fields with errors can be modified on the Add Product dialog window
Figure 13-25 Highlighted Errors in the Add Product Window
Depending on the hierarchy, the file is validated for the rows to select levels and attributes accordingly. You can only create the new levels for which DPM is enabled.
You can add an image URL for informal positions from the Add Product window. The image URL added for the position defaults to both the thumbnail and full size image designated to the main facet for the first media attribute. The image URL field is an optional field, so you can skip the specification of an image.
You can add bulk images along with the Excel template while importing the placeholder position. The Excel template for DPM has the field for entering the image URL. The image associated with the placeholder position helps in visual reference for the planner.
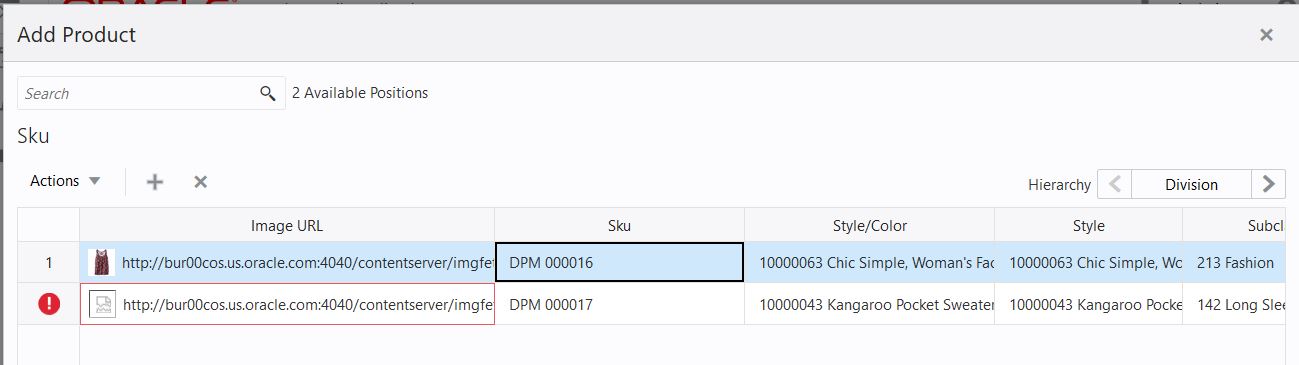
To add an image from the Add Product window, then enter the valid image URL in the first input text field provided. Along with the text field, you see an error icon at the row header when the image URL is not valid. The image URL field is also highlighted by a red boundary when there is an error as shown in Figure 13-27.
Figure 13-27 Error Validation in Image URL
With the placeholder positions you are trying to import, add, modify or delete, you can see an error icon at the row header for any validation errors on the product hierarchy or attributes associated to the placeholder item. The fields that have errors are highlighted by red boundaries. When you hover over the error icon, a tool tip with the following message appears: Some options are not valid. Check the spelling or ensure your workspace is up-to-date.
If the attribute values entered are not valid, the following message appears, Some of the Attribute values entered are not valid. Please select a valid attribute value or remove the invalid value.