| Oracle® Retail Predictive Application Server Cloud Edition User Guide Release 19.0 F24877-28 |
|

 Previous |
 Next |
| Oracle® Retail Predictive Application Server Cloud Edition User Guide Release 19.0 F24877-28 |
|
Previous |
Next |
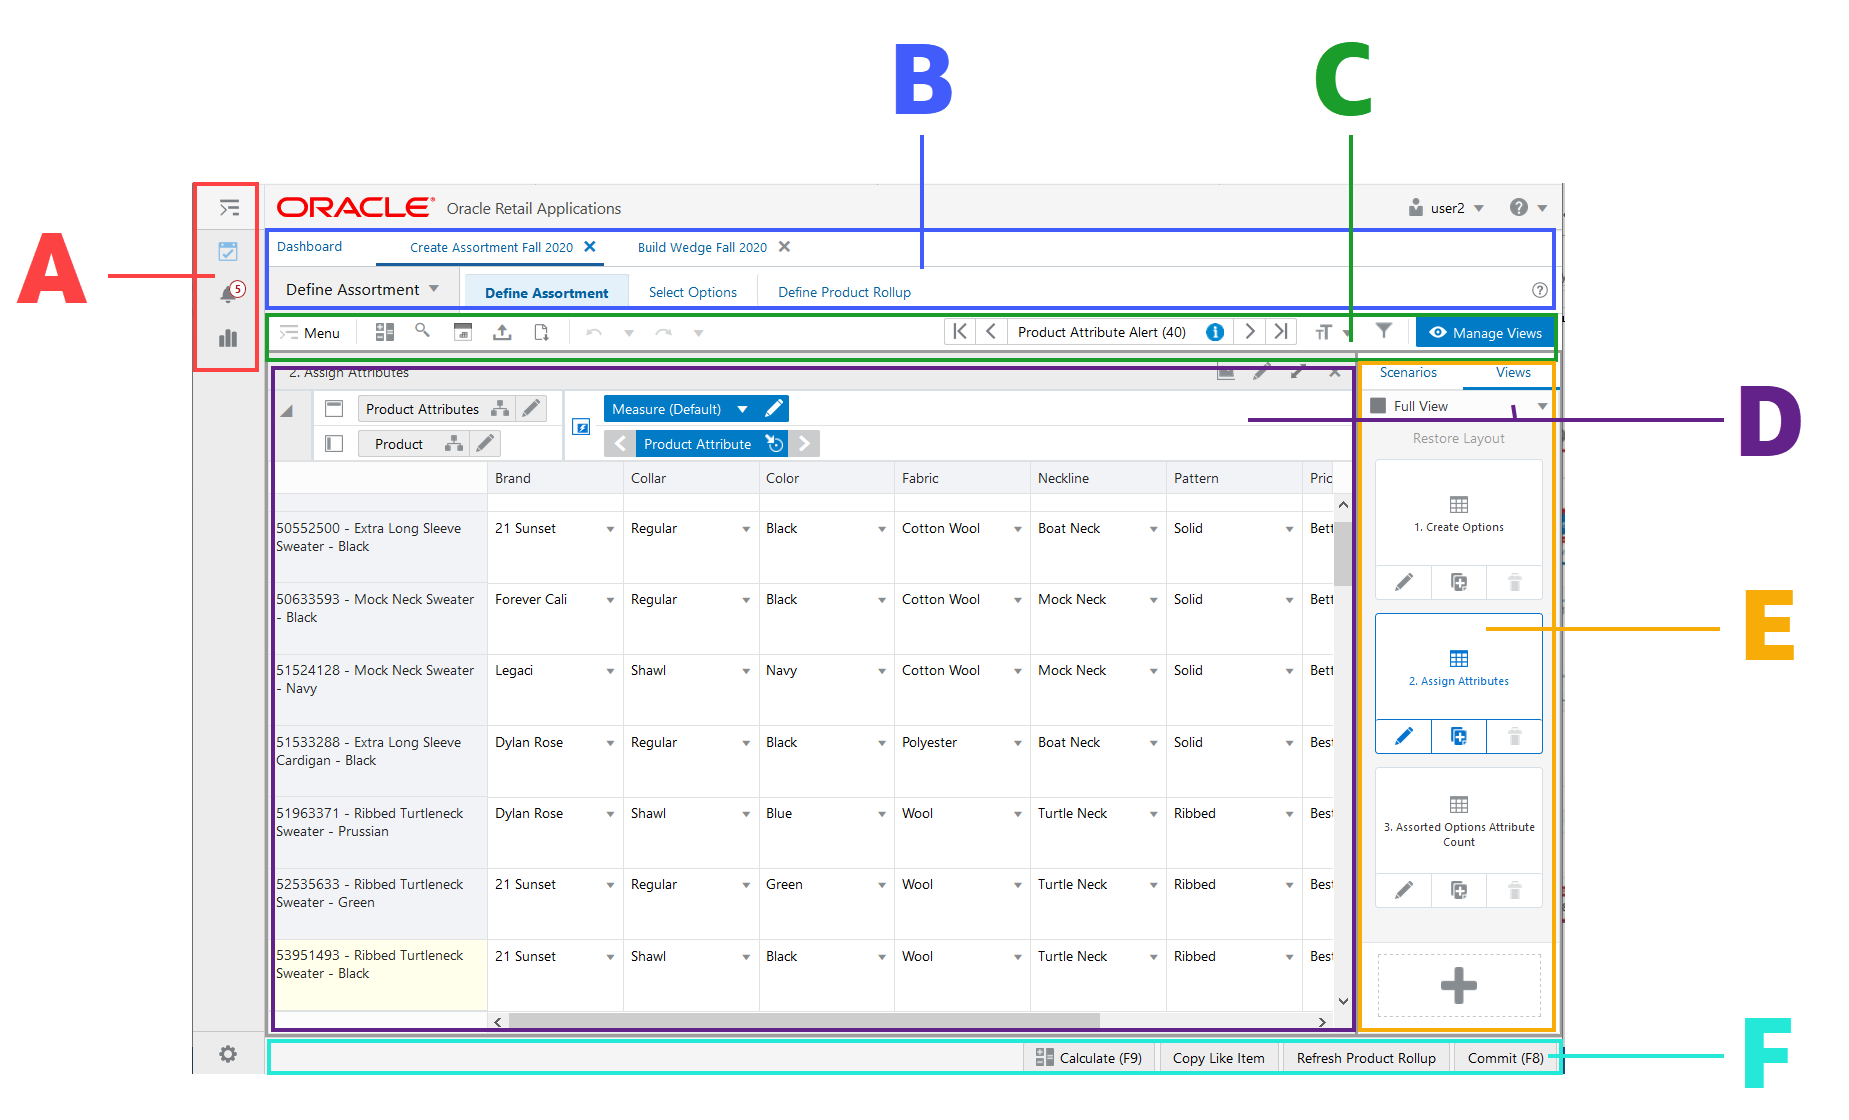
This chapter introduces you to the user interface for the workspace and describes the screen components labeled in Figure 2-1.
Key for Figure 2-1:
A: Left Sidebar Menu
B: Mega Menu
C: Quick Access Toolbar
D: Content Area
E: View Management
F: Action Buttons
The Left Sidebar menu contains the following options:
The Task Module provides access to the Segments window that you use to open existing workspaces or create new workspaces to complete the different tasks per role.
Figure 2-2 Task Module for Access to Segments Window
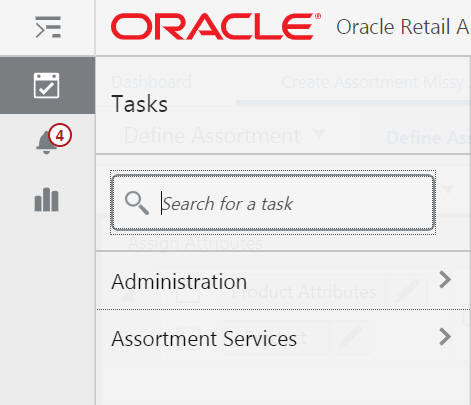
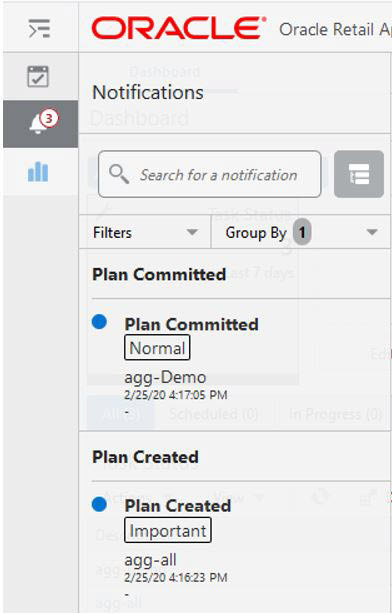
You can use the Notifications module to determine the status of different RPASCE activities, such as Online Administration Tasks, segment build completions or failures, segment commit completions or failures, approvals and rejections, and so on.
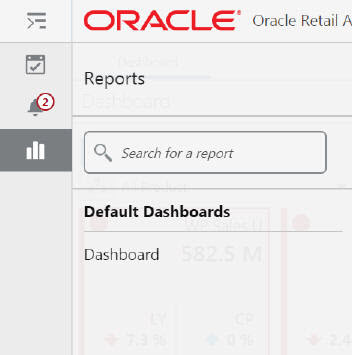
You can use the Reports module to view the reports or dashboards available with in the application.
You can use the settings to update UI property files easily and quickly. This provides self service capability for administrator users.
|
Note: For more information, see the Oracle Retail Predictive Application Server Cloud Edition Administration Guide. |
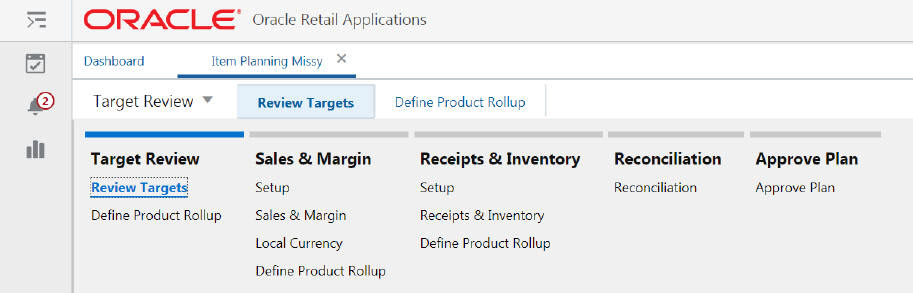
Once a task or workspace is open, you can use the Mega Menu to access the different workflow steps for each task.
You can move between the different steps within a task without reopening a segment or going through the wizard process again.
Each step has different views to choose from in the View Manager on the right side of the screen. You can use each view to complete a different type of activity.
The Quick Access toolbar contains Menu, Calculate, Find, Export, Import Positions, Download DPM Import File Template, Undo, Redo, Real Time Alert Exceptions List, Text Size, Filter, and Manage Views. These are all described in this section.
Menu contains the following menu options:
Action menu
Edit menu
View menu
Format menu
Figure 2-7 Quick Access Toolbar Menu Options

Table 2-1 lists the options within each menu.
Table 2-1 Toolbar Menu Options
| Menu | Submenu | Sub-Submenu |
|---|---|---|
|
Action - - - - - - - |
Commit (F8) |
- |
|
Refresh (Alt + F5) |
- |
|
|
Refresh Attributes |
- |
|
|
Get New/Updated Attributes |
- |
|
|
Add Positions |
- |
|
|
Modify Positions |
- |
|
|
Import Positions |
- |
|
|
Edit - - - |
Calculate (F9) |
- |
|
Find (Ctrl + F) |
- |
|
|
Undo (Ctrl + Z) |
- |
|
|
Redo (Ctrl + Y) |
- |
|
|
View |
Synchronize Z-Axis |
- |
|
View Layout |
||
|
Format - - - - - - - - - |
Edit Styles and Exceptions |
- |
|
Save Format - - |
Only For Me |
|
|
For My Group: Group Name |
||
|
Workspace Template |
||
|
Restore Format - |
From Template |
|
|
From My Group: Group Name |
||
|
Delete Format - - |
Only For Me |
|
|
For My Group: Group Name |
||
|
Workspace Template |
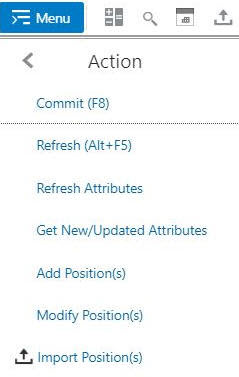
This section describes the Action Menu options.
Table 2-2 Action Menu Options
| Menu Option | Description |
|---|---|
|
Commit (F8) |
Use to commit the changes to the master domain. After the changes are committed, all other users with access to the workbook will see the changes as well. |
|
Refresh (Alt + F5) |
Use to update a workspace with the data that is currently stored in the domain. This allows you to work with the most current data without having to rebuild the workspace. Workspaces can be refreshed with a single refresh rule group or multiple ones. Make sure to switch on the FnLock key if present on your keyboard in order to use this shortcut. |
|
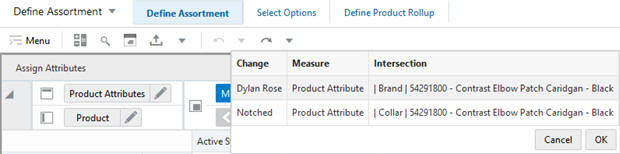
Refresh Attributes |
Use to update the attribute values displayed in the pivot table. Manually trigger this action to get the latest attribute values in order to plan more accurately. This action is separate from the Refresh action. |
|
Get New/Updated Attributes |
Newly created or updated attributes and attribute values using Placeholder Maintenance will be made available for use throughout the workspaces. |
|
Add Positions |
Use to add new placeholder positions using the Placeholder Maintenance functionality |
|
Modify Positions |
Use to modify or delete the already created placeholder positions using the Placeholder Maintenance functionality |
|
Import Positions |
Use to manually import a list of placeholder positions that you have already entered into an Excel file format. |
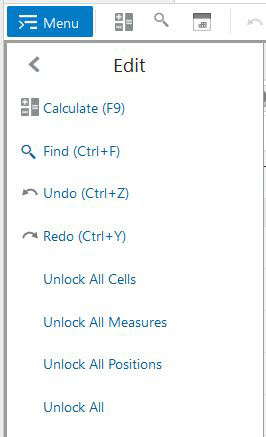
This section describes the Edit Menu options.
Table 2-3 Edit Menu Options
| Menu Option | Description |
|---|---|
|
Calculate (F9) |
After you edit the cells within the workspace, use the Calculate menu to calculate and update the associated cells within the workspace. |
|
Find (Ctrl + F) |
Use to search for a string within the rows and columns of the current view. The search does not include the data within the cells of the view. |
|
Undo (Ctrl + Z) |
Use to undo the last action performed within the workspace (not just the current view). |
|
Redo (Ctrl + Y) |
Use to redo the last action undone within the workspace (not just the current view). |
|
Unlock All Cells |
Use to unlock all the locked cells on the current view. |
|
Unlock All Measures |
Use to unlock all the locked measures on the current view. |
|
Unlock All Positions |
Use to unlock all the locked positions on the current view. |
|
Unlock All |
Use to unlock all the locked cells, measures and positions simultaneously on the current view. |
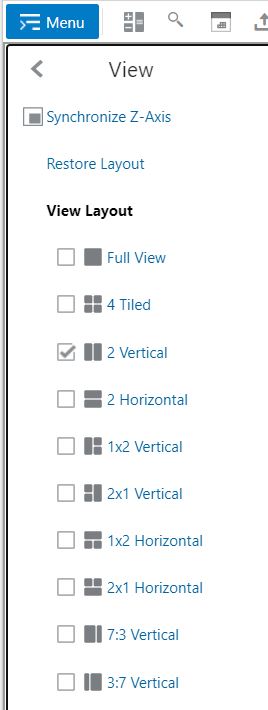
This section describes the View Menu options.
Table 2-4 View Menu Options
| Menu Option | Description |
|---|---|
|
Synchronize Z Axis |
Use to simultaneously scroll through the page edge of multiple views. It is useful when you want to compare multiple views containing the same page or slice dimension. |
|
Restore Layout |
Use to restore view layout size to default. Restore Layout will be enabled only when you resize the view manually. |
|
View Layout |
Select a view layout from the options available to see a single or multiple views at a time. |
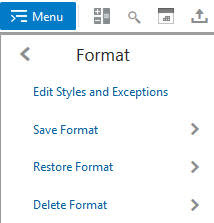
This section describes the Format Menu options.
Table 2-5 Format Menu Options
| Menu Option | Sub-Menu | Description |
|---|---|---|
|
Edit Styles & Exceptions |
Opens the Format window. Here, you can set and clear formats that apply to measures or dimensions. You can make changes to single or multiple measures and dimensions and apply those changes across one, many, or all views in the workspace. For more information, see Chapter 10, "Formatting." |
|
|
Save Format |
Only For Me |
Save the format only for my use. |
|
For My Group: Group Name |
Save the format for my group. All the users in the group will be able to see the formatting. |
|
|
Workspace Template |
Save format to the workspace template. |
|
|
Restore Format |
From Template |
Restores my current formatting to the workspace template. |
|
For My Group: Group Name |
Restores my current formatting to my group's format. |
|
|
Delete Format |
Only For Me |
Deletes the format only for me. |
|
For My Group: Group Name |
Deletes the format for all the users in my group. |
|
|
Workspace |
Deletes the workspace template. |
After you edit the cells within the workbook, use the Calculate button to calculate and update the associated cells within the workspace. You can also access this option from the Edit menu.
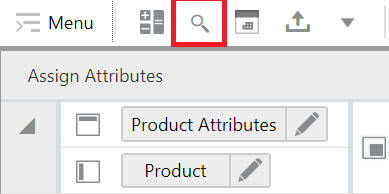
You can use the Find button to find any specific string within rows and columns of the current view. You can also choose to search the string in all open views or current view of the workspace or all dimensions or specific dimensions available in the current view.
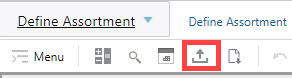
You can use the Export functionality to export slices of data to a text file or to a Microsoft Excel file by using different format and export options. You can print data to an Excel spreadsheet using the Print option in the Export window.
Import Positions is used to manually import a list of Placeholder positions that you have already entered in an Excel (.xslx) file format. It loads the positions listed in the file to the Add Product window for validation and highlights errors for corrections that are required. This facilitates the easy and quick bulk creation of placeholder positions.
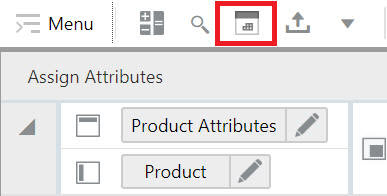
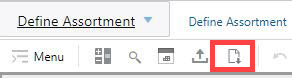
Click Download DPM Import File Template button to download the file template that you can use to populate an Excel file with placeholder positions and their information.
Figure 2-16 Download DPM Import Template File
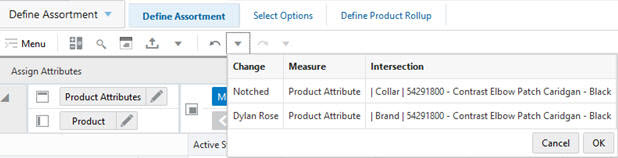
You can use the Undo functionality to undo the list of actions performed within the workspace until the last calculate operation. All the actions performed are displayed in descending order, and you can choose to undo the latest action or the series of actions one step at a time or all the actions performed (until the last calculate operation) by choosing the first action (the last one in the list).
You can use the Redo functionality to redo the list of actions undone within the workspace previous to the last calc operation. All the actions undone are displayed in descending order, and you can choose to redo the latest action, the series of actions one step at a time, or all the actions undone (previous to the last calc operation) by selecting the first action (the last one in the list).
|
Note: If either an SHS or a picklist measure has an NA value, the measure's cells will display an NA value after a worksheet load. When the user edits either the SHS or the picklist measure cell value, the previous value (in this case NA) will be displayed in the Undo list.If either an SHS or a picklist measure does not have an NA value, the measure's cell will not display a value. (That is, the cell will be blank or have an empty string.) When the users edits either the SHS or the picklist measure, the previous value (that is, null/empty string) is displayed in the Undo list. For a string measure, if there is no NA value, then the empty string is the NA value. For other types of measures (an int measure or a float measure), if there is no NA value, then the default value is 0. |
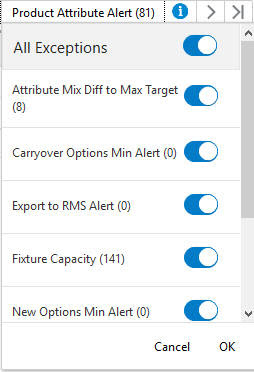
Real time alerts are interactive alerts that are displayed within a workspace. The alerts are then updated each time you edit data and click Calculate. You can see the alert count and other information about the alerts as required. Clicking > or < launches the alert navigation mode.
Figure 2-19 Real Time Alerts Exception List
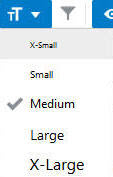
Once you open the workspace, click Text Size and select the text size in order to control how much data is displayed on the screen.
You can use the Workspace Filter Icon to view/hide the workspace filters. You can choose to enable/apply the special filters and attribute filters in a view or selected views of the workspace.
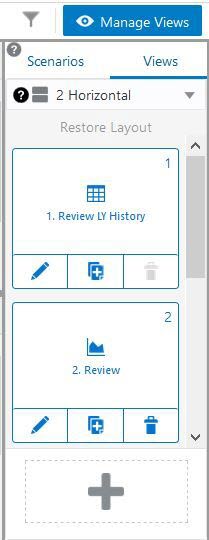
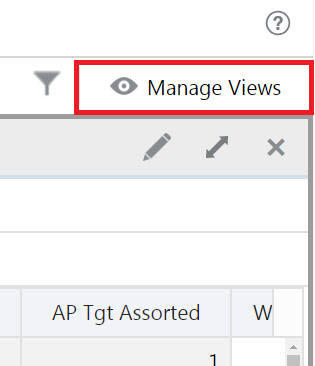
Click Manage Views to display the view management drawer. It allows you to show or hide the view management drawer if you need more area to view the content.
Figure 2-22 View Management Drawer: Show
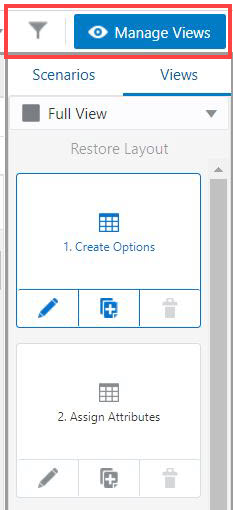
Figure 2-23 View Management Drawer: Hidden
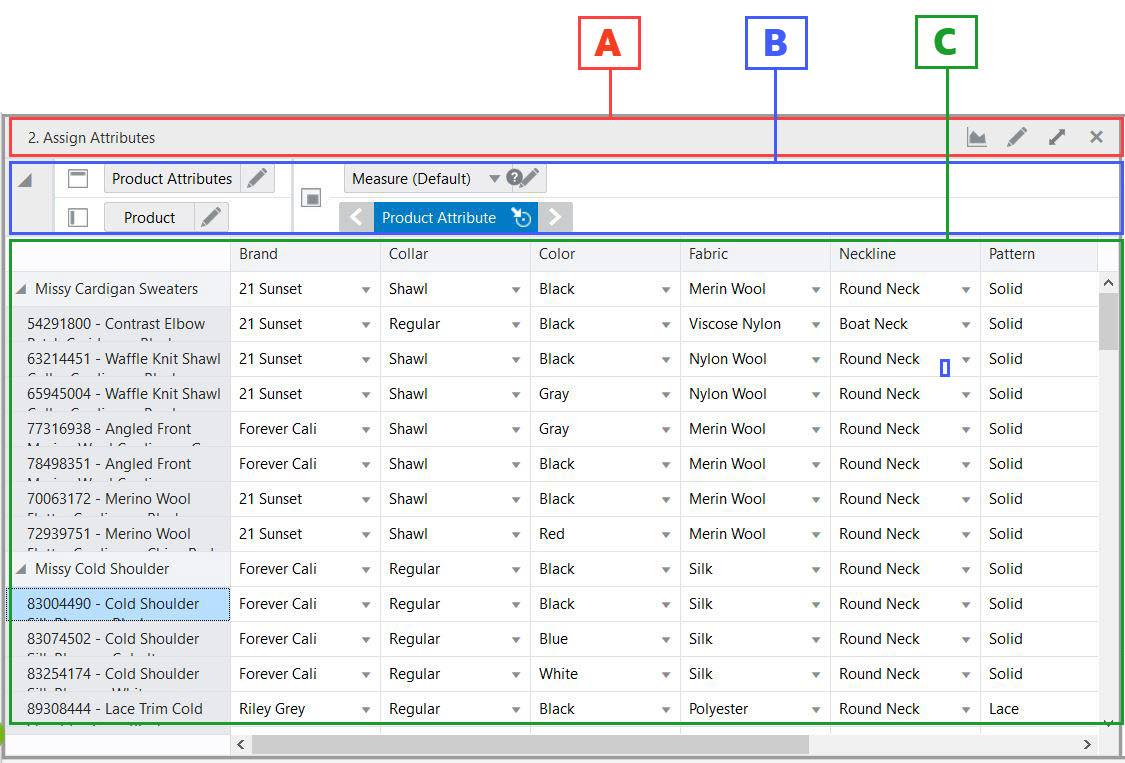
The content area appears on the center of your screen and includes the views associated with each step within the business workflow. It provides a spreadsheet-like view or a chart type view that displays multidimensional data selected at the dimension levels in Edit view. Each view includes a set of measures relevant to the step that help you view, analyze information, and make decisions.
Figure 2-24 shows the various components in the content area.
Table 2-6 describes the Content area.
Table 2-6 Content Area
| Legend | Area | Description |
|---|---|---|
|
A |
View Title Bar |
Displays the name of the view and includes view-level features such as Switch to Chart, Edit, Expand, and Close View Options. |
|
B |
Page Edge and Dimension Tiles Area |
Use to move or swap individual dimensions to view the information in a more effective manner. See Page Edge and Dimension Tiles Area. |
|
C |
View Area |
Displays the data either in a pivot table view or a graphical view with the help of different chart types. The data represented here is at the dimension levels and axes selected in the Page Edge and Dimension Tiles area. |
This area displays all the dimensions involved in the view. The information in the view is organized based on the dimension positions set up at the page edge, row, and column axes.
The RPASCE Client is designed to help you to work with the easy selection of dimension levels within the Edit view. You can manage the way the information is presented in a view. You can arrange and present the information in a layout you want by rotating or pivoting dimensions across the axes, changing the data roll ups and measure profiles and showing or hiding measures. You can view the information at a low level of detail or aggregate to view the information at summary levels.
Figure 2-25 Page Edge and Dimension Tiles Area

In the View area, you can rotate or pivot the dimensions across the axes to display data in different orientations. You can pivot the dimensions in two ways.
Dimension Move: Moves a dimensional layer to another position on an axis. To perform a dimension move, in the Dimension Tile Area click and hold the dimension tile you want to move. Then, drag the tile next to the area you want and release the mouse.
Figure 2-26 Dimension Move - Drag & Drop

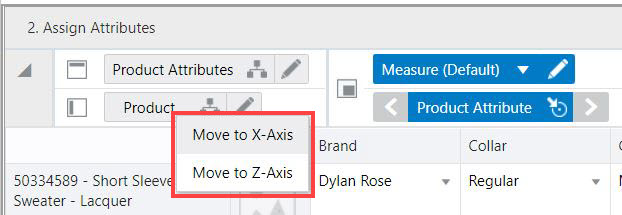
Alternatively, you can move dimension by right- clicking the dimension tile. To move dimension tile, right- click on tile you want to move and select the destination axis option to which you require to move the dimension tile.
To move the dimension tile along the axis, right- click on the tile you want to move and select the move along axis option. This option will move the tile along the axis when two dimension tiles are placed at same axis.
Dimension Swap: Swaps a dimension with another dimension on the axis. To perform a dimension swap, in the Dimension Tile Area, click and hold the dimension tile you want to move. Then, drag the dimension tile over the one you want to swap it with and release the mouse.
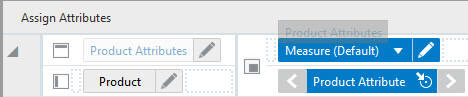
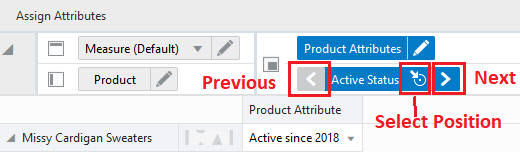
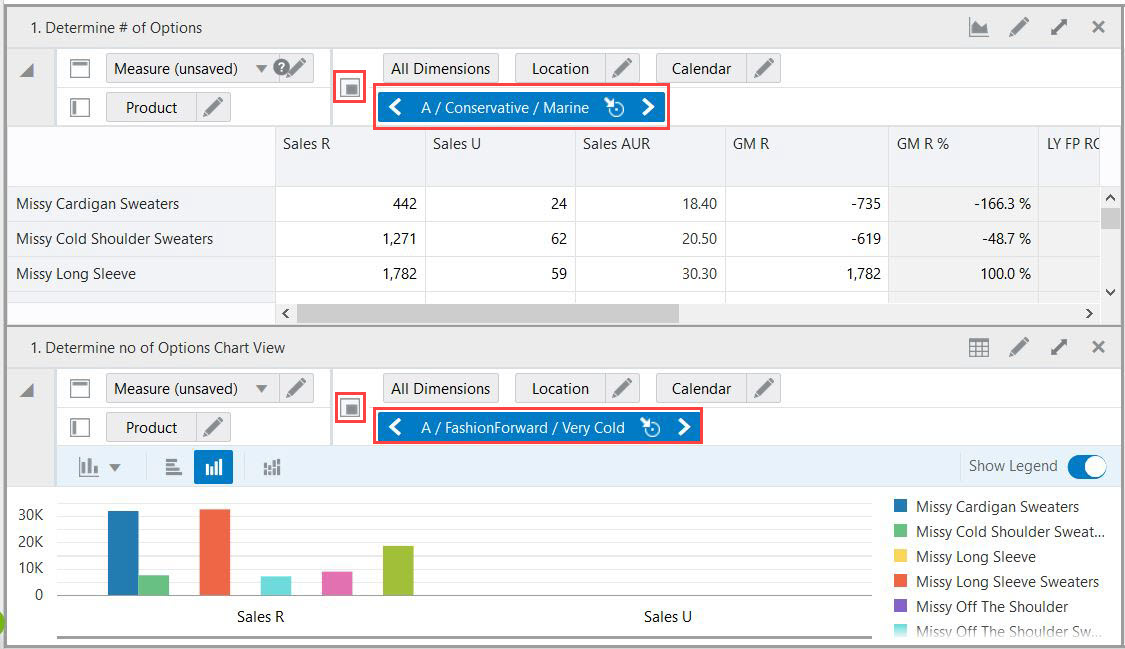
On the Page Edge area, you can select any position displayed and page through or navigate to the positions using the navigation icons (Previous, Next, Select Position) available below the dimension tiles. In the view, data relevant to each position is displayed in the content area when you navigate to a new position in a level.
Use the Previous and Next icons to navigate to the previous and next position in the level that is selected. The position to which you navigate depends on the current position. When you navigate to a new position, all associated positions at the higher and lower visible levels of the same dimension are updated recursively.
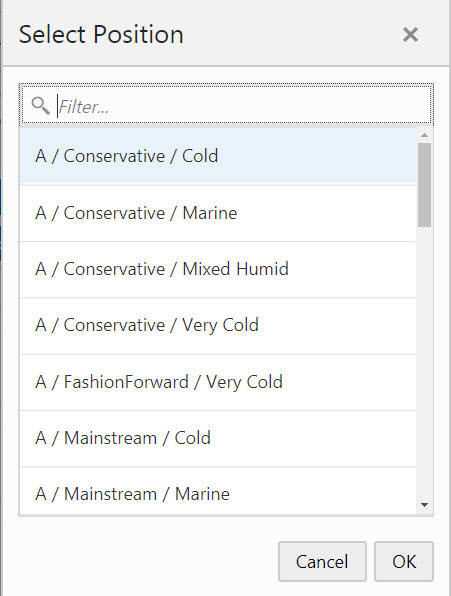
The Select Position icon opens a Select Position pop-up, which you can use to directly select the required position from the available list of positions.
Using the Edit View window, you can change the way data is presented to you by moving and reordering the dimension tiles, selecting the dimension levels for the data rollups, and selecting the measure profiles.
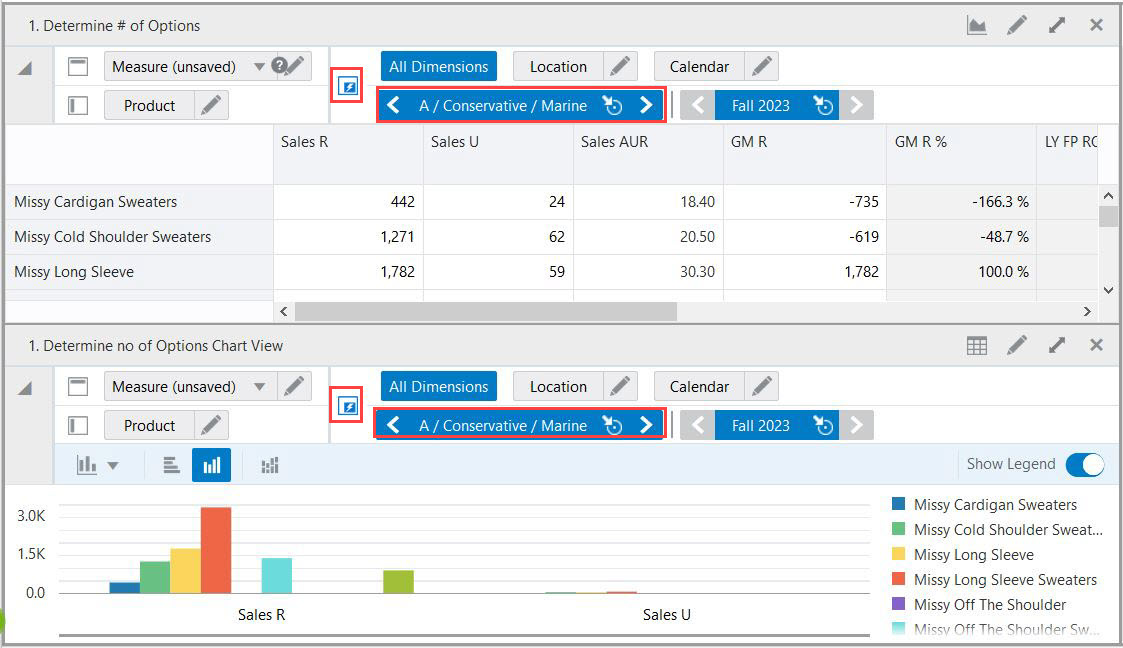
Synchronized Z Axis scrolling lets you simultaneously scroll through the z axis of multiple views. When Synchronized Z Axis scrolling is enabled, all views that contain the same slice dimension scroll to the new slice position when one of those views is scrolled to a new position. When scrolling is disabled, scrolling through slice positions in one view does not affect the slice position display of other views.
Synchronized Z Axis scrolling works for all views within a single workspace, and it remains enabled as you move through the tasks and steps within that workspace. Synchronized Z Axis scrolling is useful when you want to compare multiple views containing the same page or slice dimension.
To enable synchronized Z Axis scrolling, click Synchronize Z Axis icon in the z axis and Dimension Tiles area, as shown in Figure 2-32.
Figure 2-31 Before Synchronizing Page Edge (Z-Axis)
The View Management Drawer shows the different views available for the tasks and steps. You can drag an existing view into the Content area to activate that view. You can choose to display one, two horizontal, two vertical, or four views at one time to view in the content area. You can also click Plus to create a new view, modify an existing view, or delete an existing view.
The Action Tray includes Application Actions and System Actions. Application actions are specific to different applications configured in RPASCE. System actions are common across all the views, irrespective of the application.
Examples of Application Actions include Seed, Refresh Fulfillment, Submit Plan, Approve Plan, Copy Approved Plan, and so on in MFP R CS and Seed Sales, Calculate What-If, Flow Receipts, Approve Plan, and so on in IP CS. Application Actions are highlighted in red in Figure 2-34 and Figure 2-35.
The System Actions include Calculate, and Commit. System Actions are highlighted in green in Figure 2-34 and Figure 2-35. As you can see, they are common across different applications, in this example across both MFP R CS and IP CS.
Figure 2-34 Example of Application Actions and System Actions in MFP R CS

Figure 2-35 Example of Application Actions and System Actions in IP CS