| Oracle® Retail Predictive Application Server Cloud Edition User Guide Release 19.0 F24877-28 |
|

 Previous |
 Next |
| Oracle® Retail Predictive Application Server Cloud Edition User Guide Release 19.0 F24877-28 |
|
Previous |
Next |
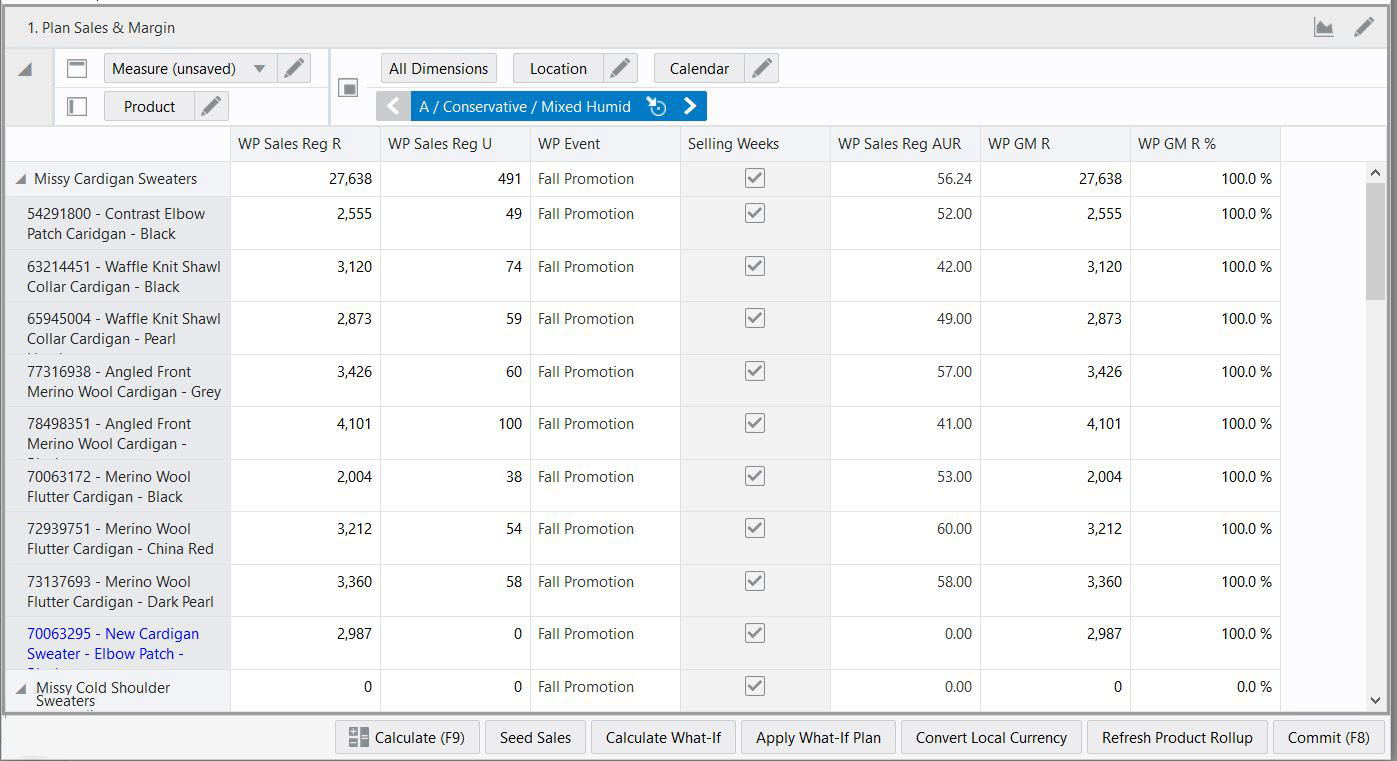
The view area includes the multidimensional pivot table or chart that displays information for the relevant task. Each task may include more than one view, and each view can appear in the contents area. The information in the view is organized based on the dimension positions set up at the x, y, and z axes.
RPASCE is designed to help you to work with the data within the view. You can manage the way the information is presented in a view. You can arrange and present the information in a layout the way you want by rotating or pivoting dimensions across the axes, changing the data roll ups, or showing or hiding measures. You can view the information at a low level of detail or aggregate to view the information at summary levels. For more information, see Chapter 7, "Editing Views.".
You can also choose to present the information in many types of charts using the charting functionality.
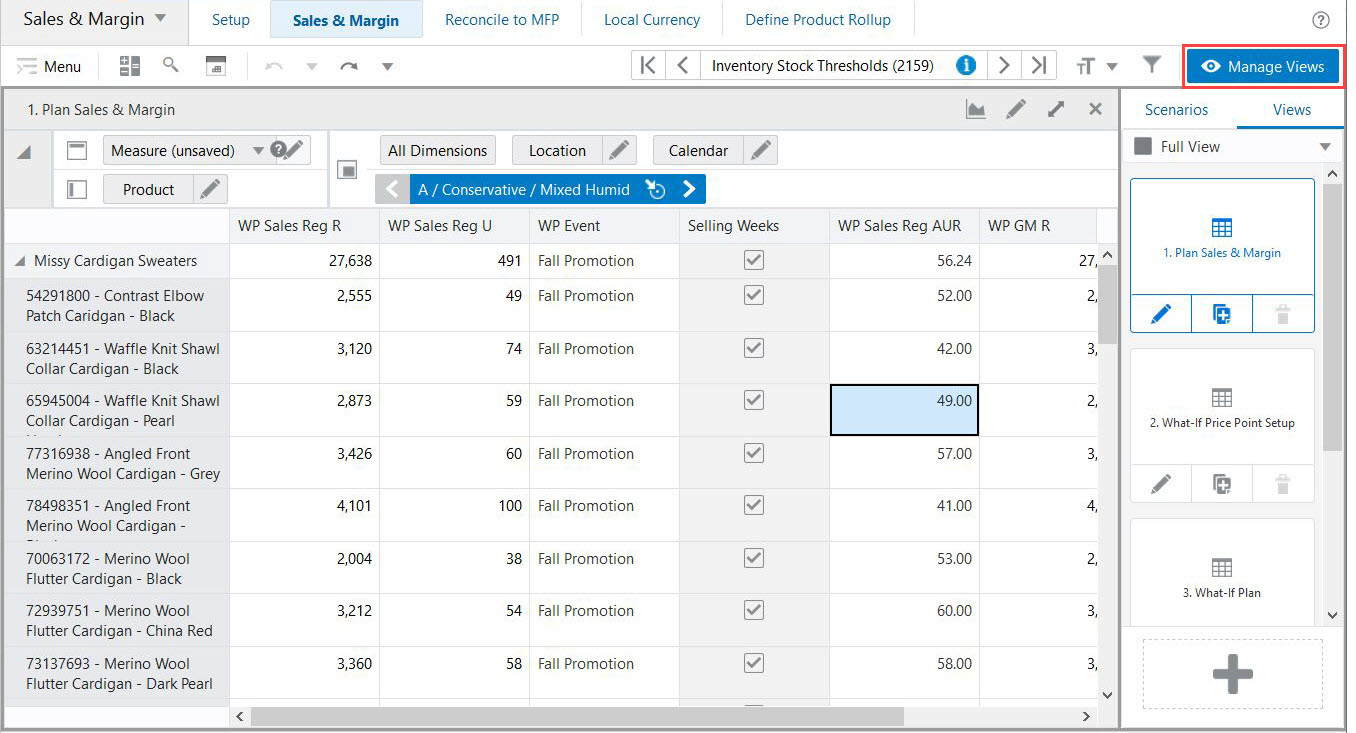
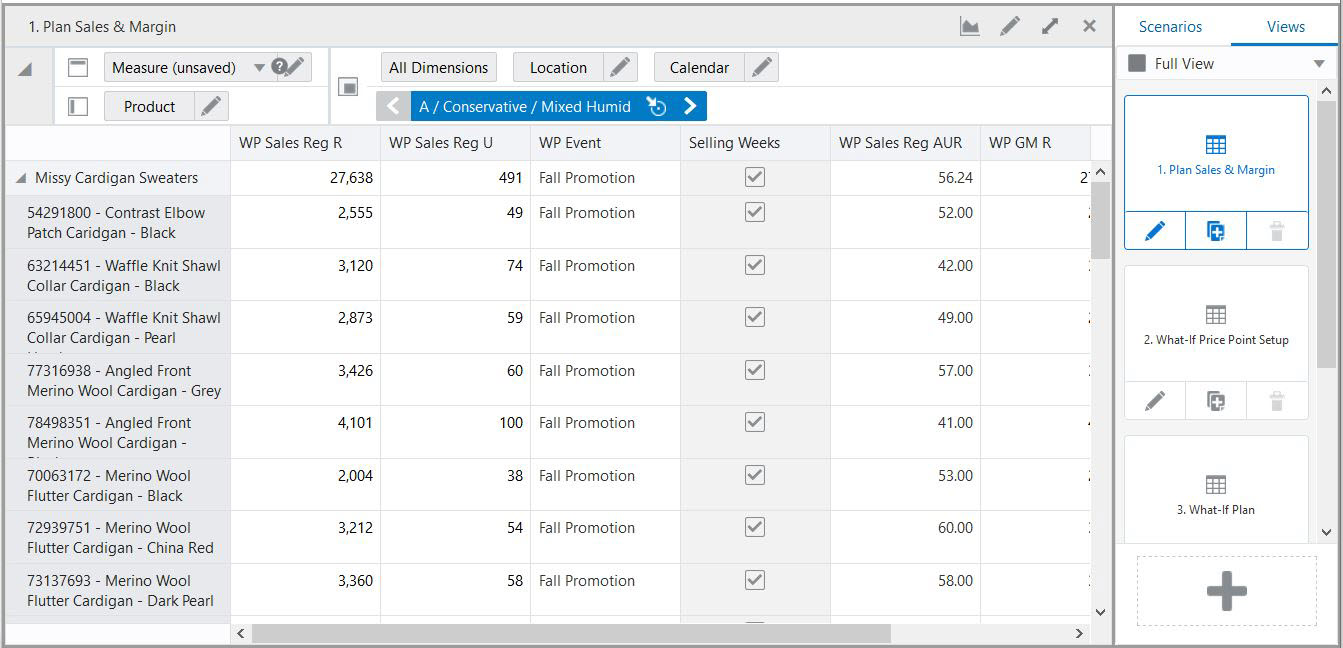
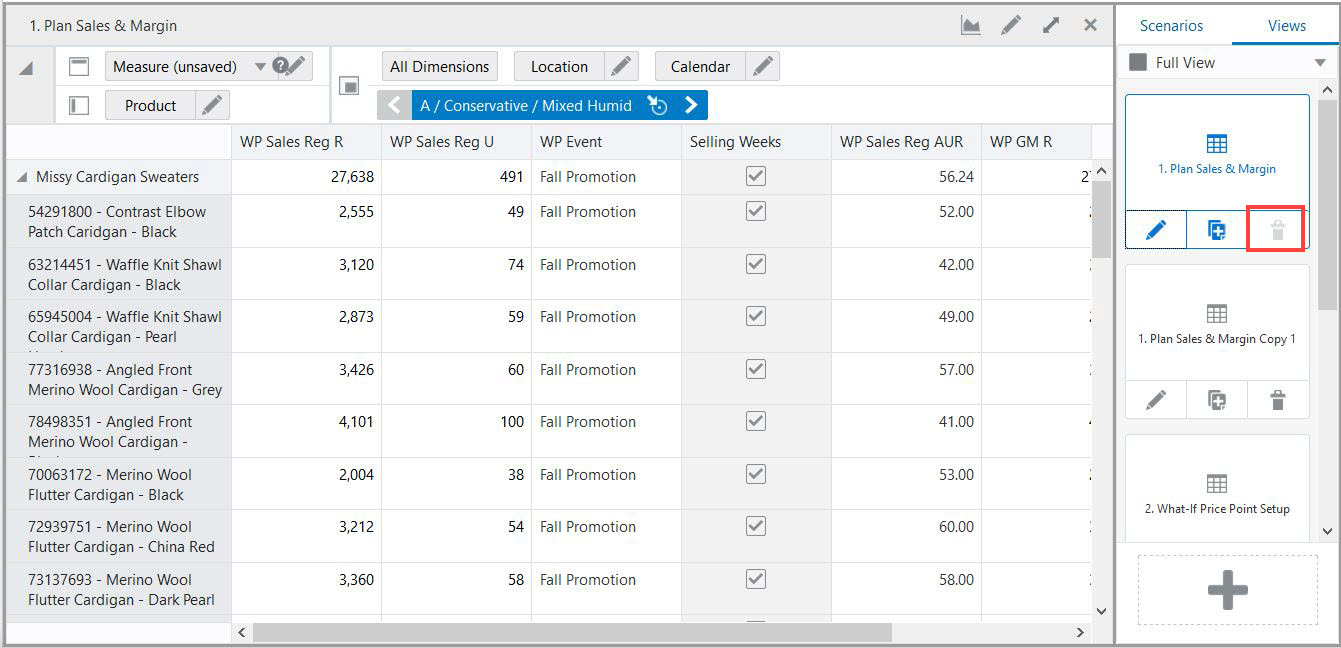
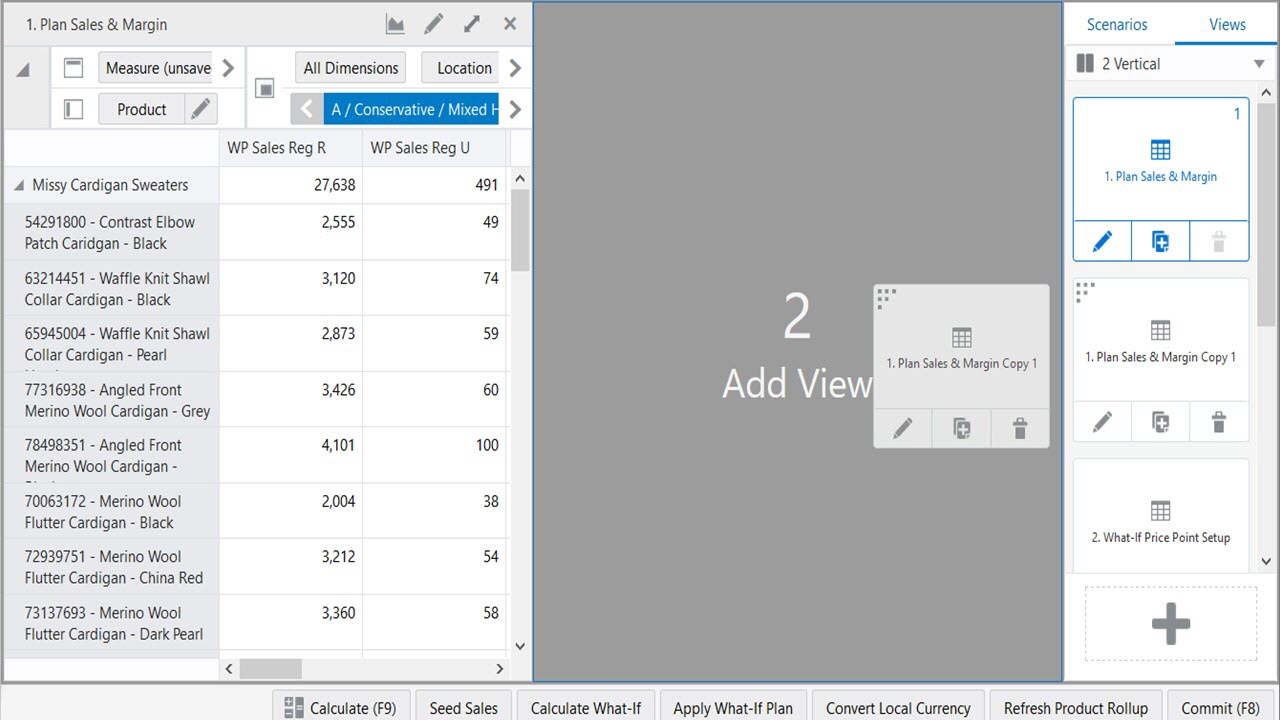
Use the View Management Drawer to select the visible views, add new views, modify or delete an existing view, and change the view layout. Click Manage Views to show or hide the View Management Drawer.
You can display your views in one of the following layouts:
Full View
Click the View Layout list to control the layout.
Figure 8-4 (7:3) Vertical Layout (70:30)

Figure 8-5 (3:7) Vertical Layout (30:70)
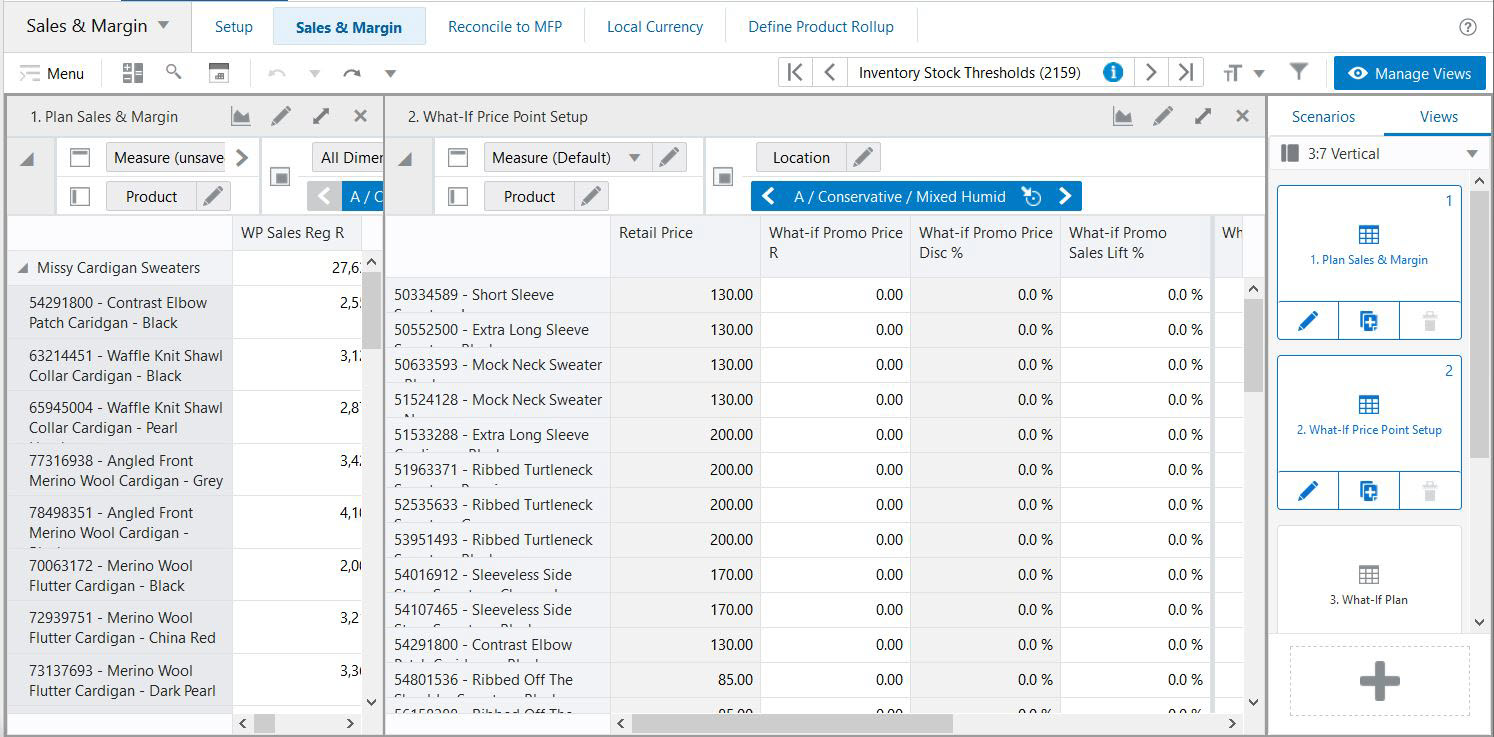
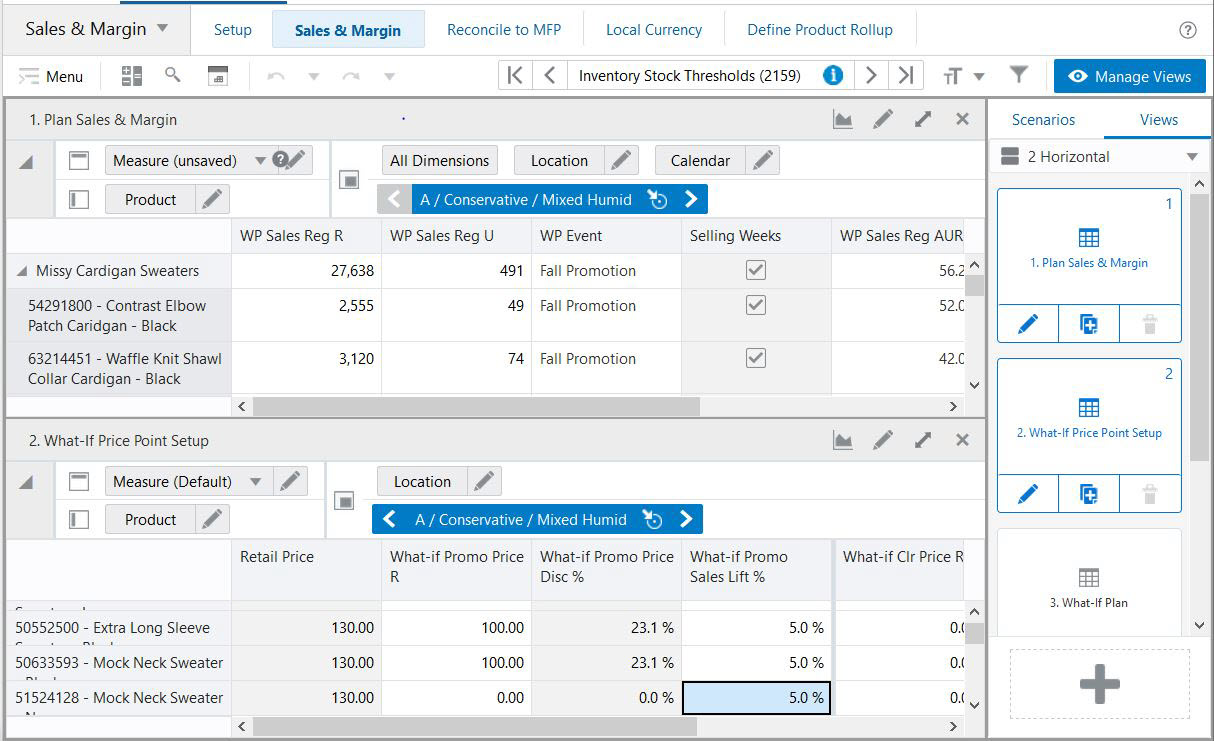
Figure 8-10 1 x 2 Horizontal (7:3) Layout
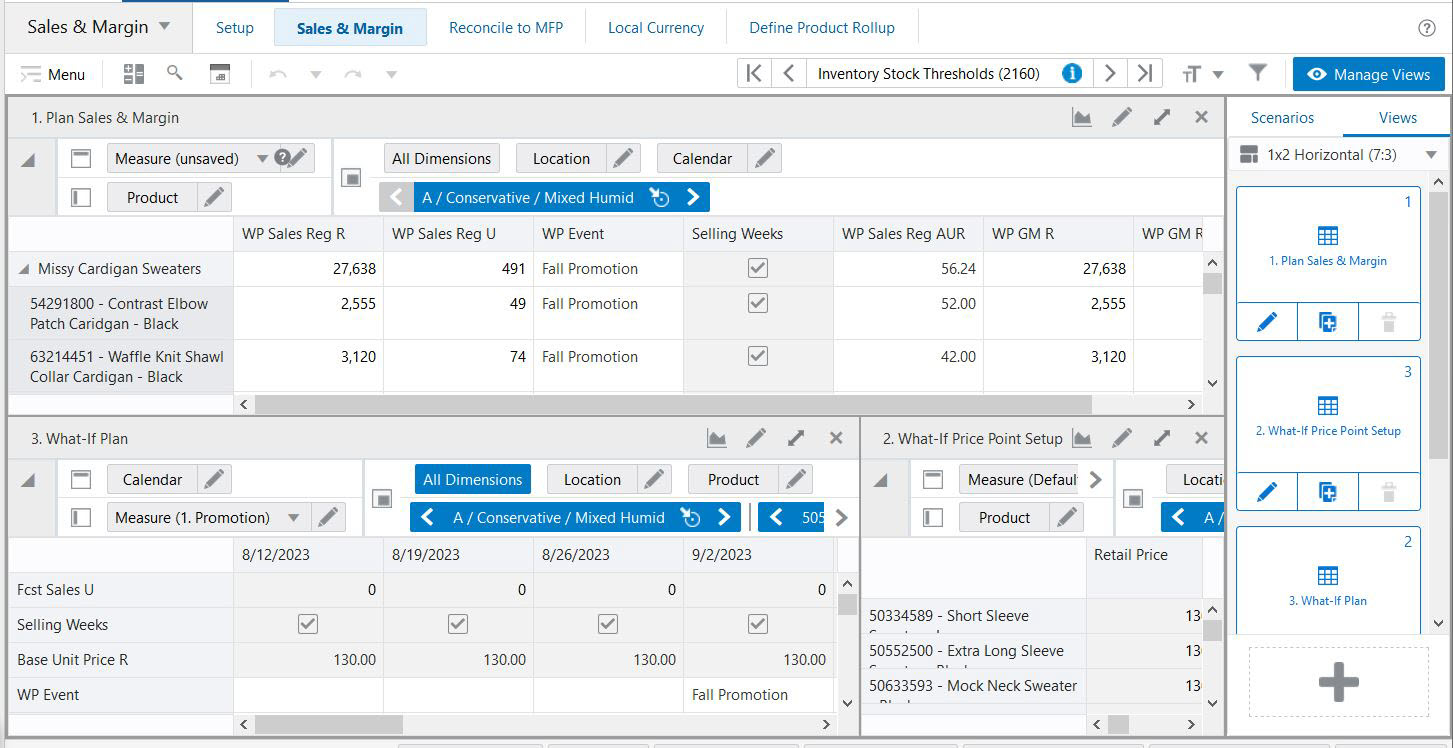
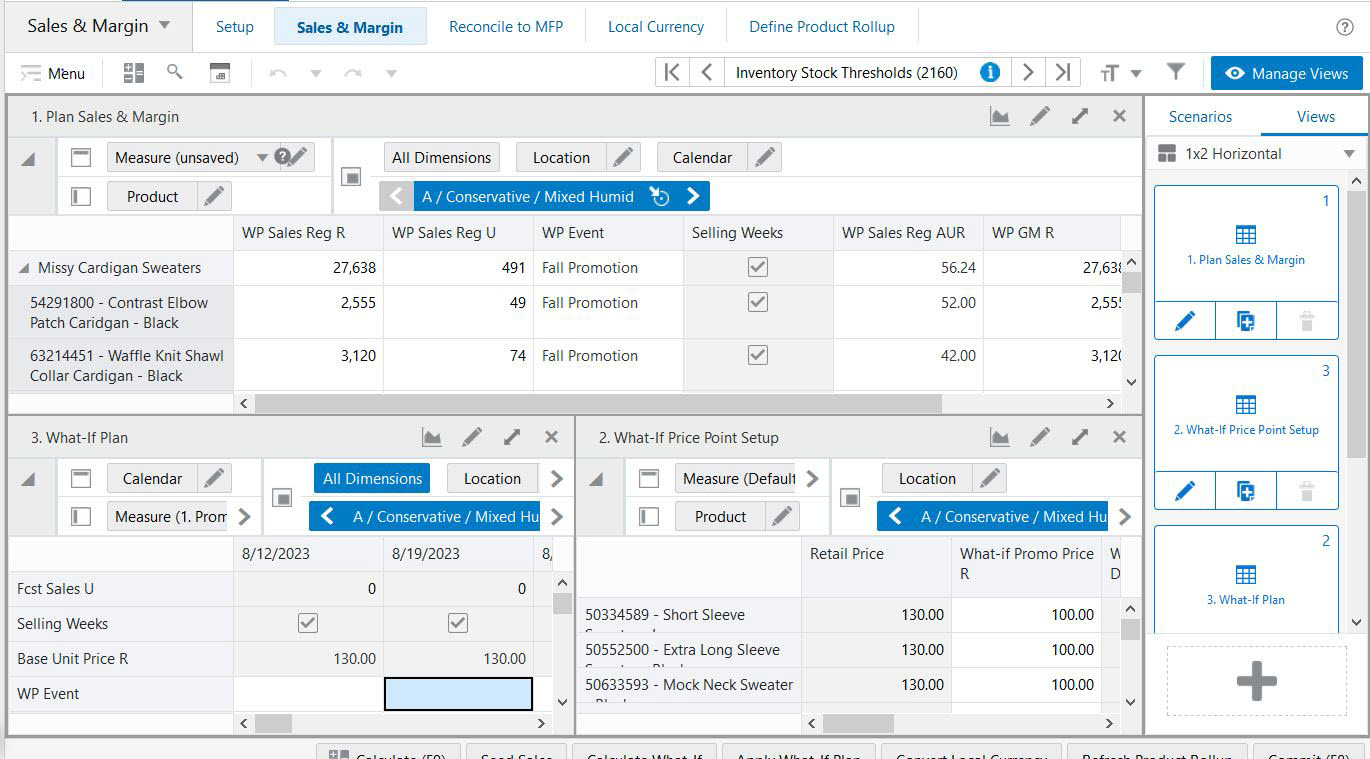
Figure 8-11 1 x 2 Horizontal (3:7) Layout
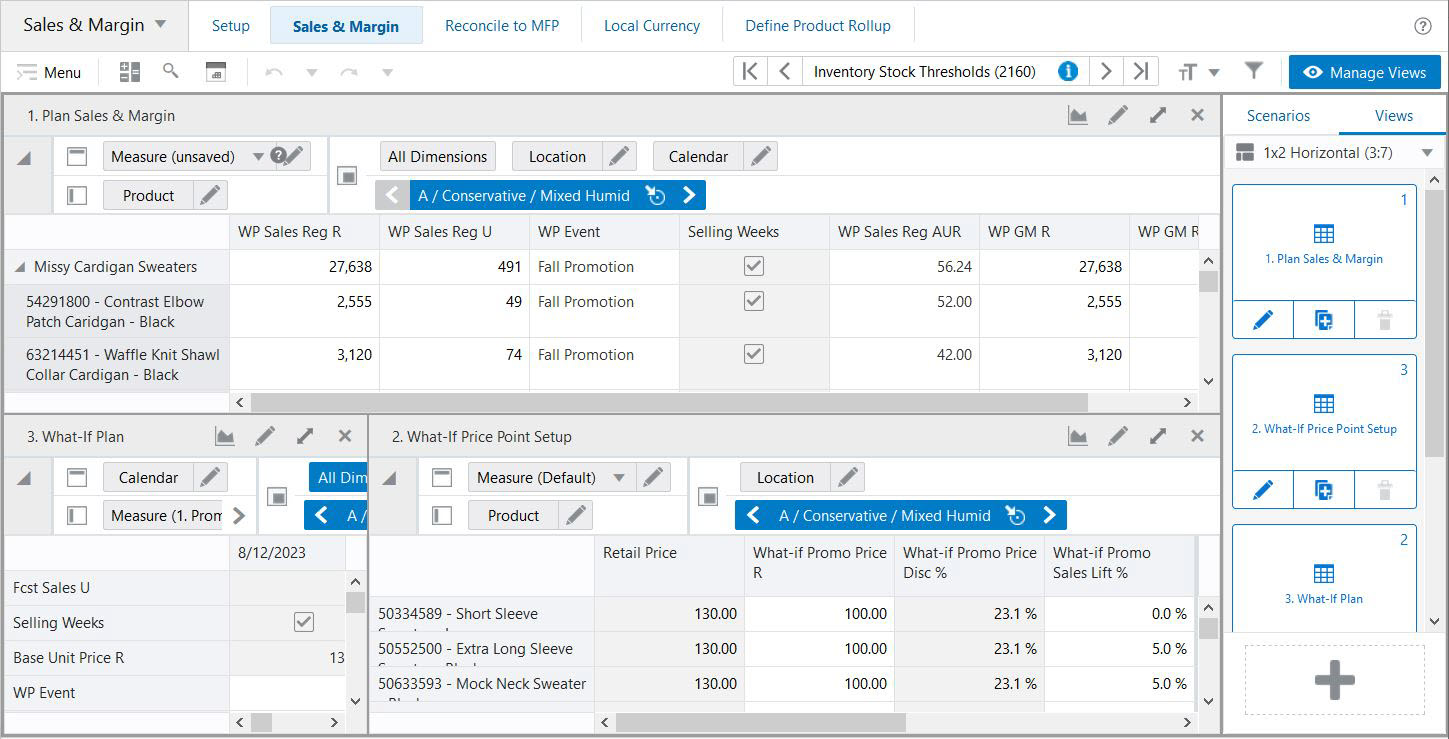
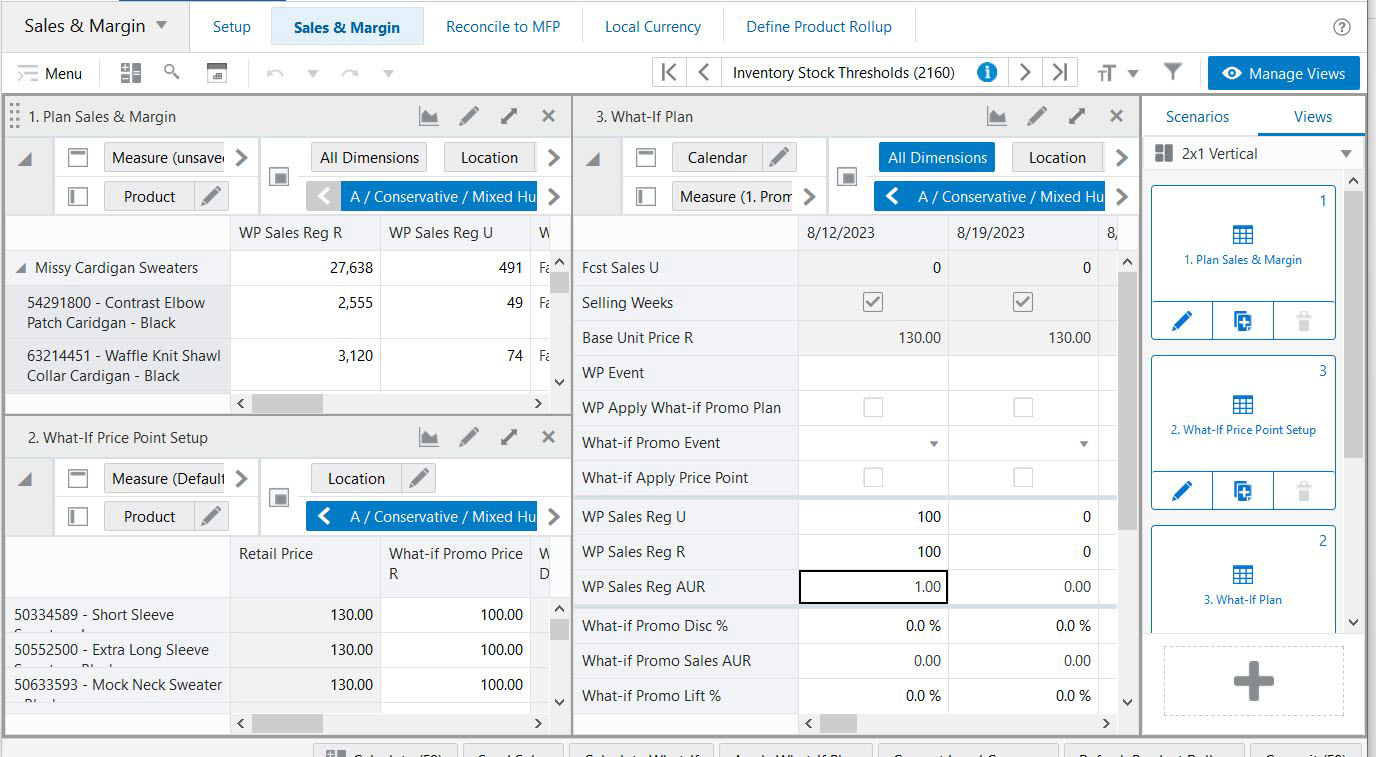
Figure 8-13 2 x 1 Horizontal (7:3) Layout
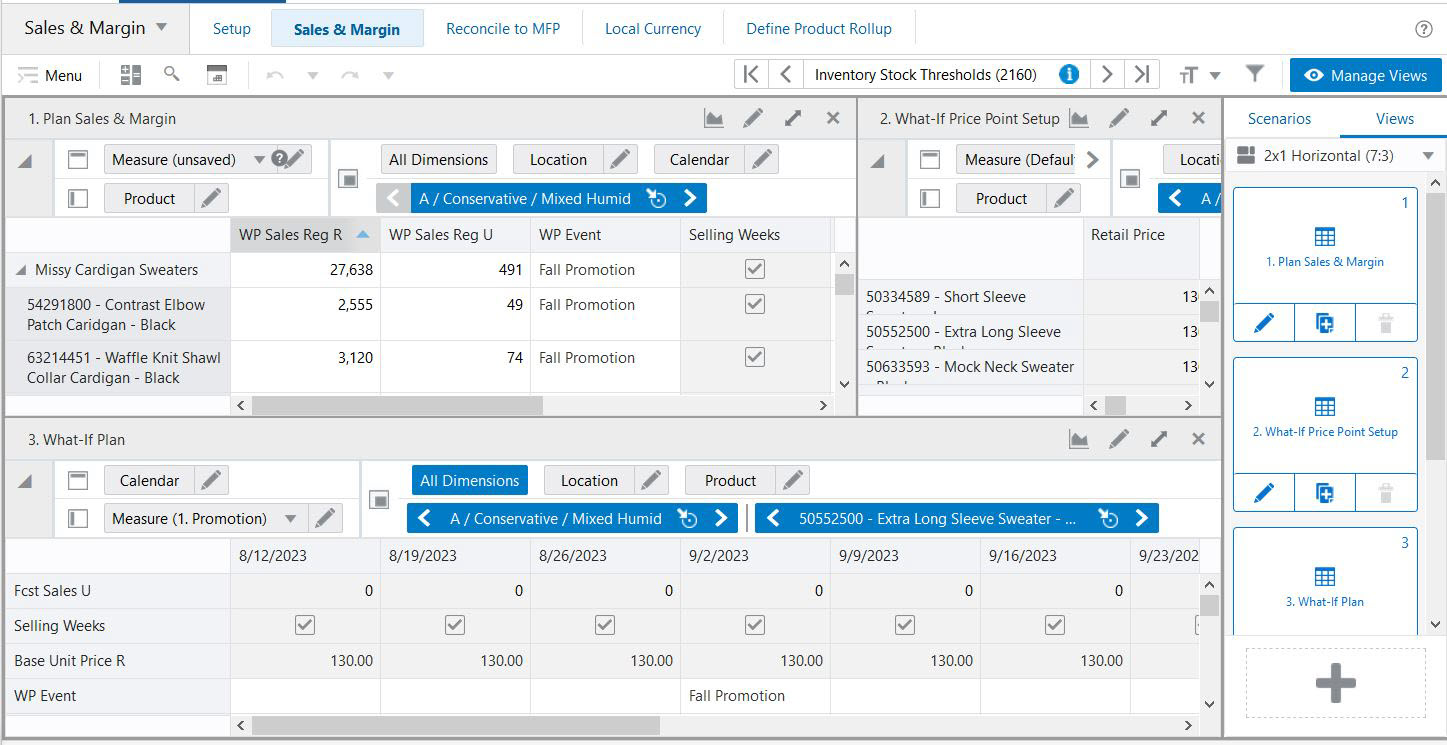
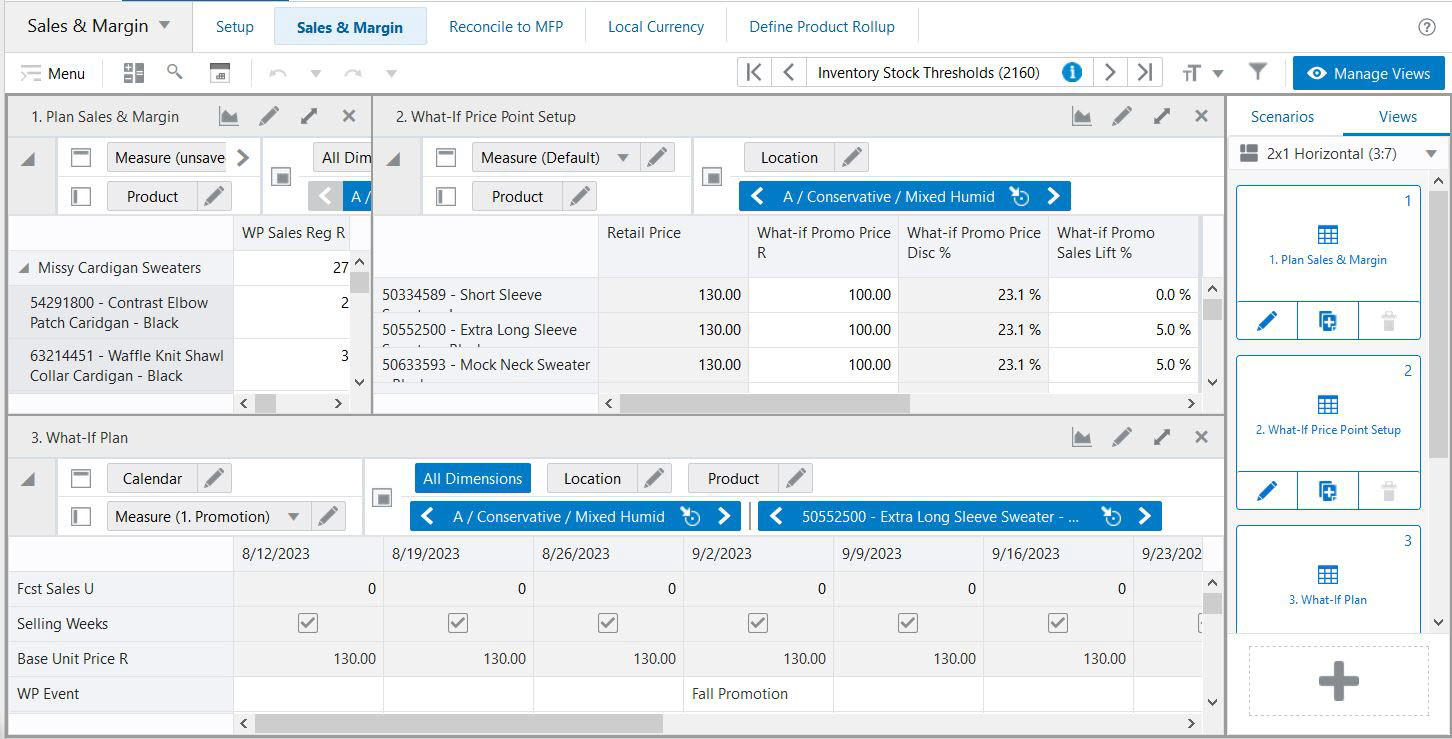
Figure 8-14 2 x 1 Horizontal (3:7) Layout
The view layout size can be adjusted manually to make the layout optimal for data review. Views can easily be adjusted when you select then hold and drag the vertical or horizontal dividing space between the views. When moving the horizontal diving space, the minimum height of each view can be no less than 20% of the width. When moving vertical diving space, the minimum height of each view can be no less than 15% of the width.
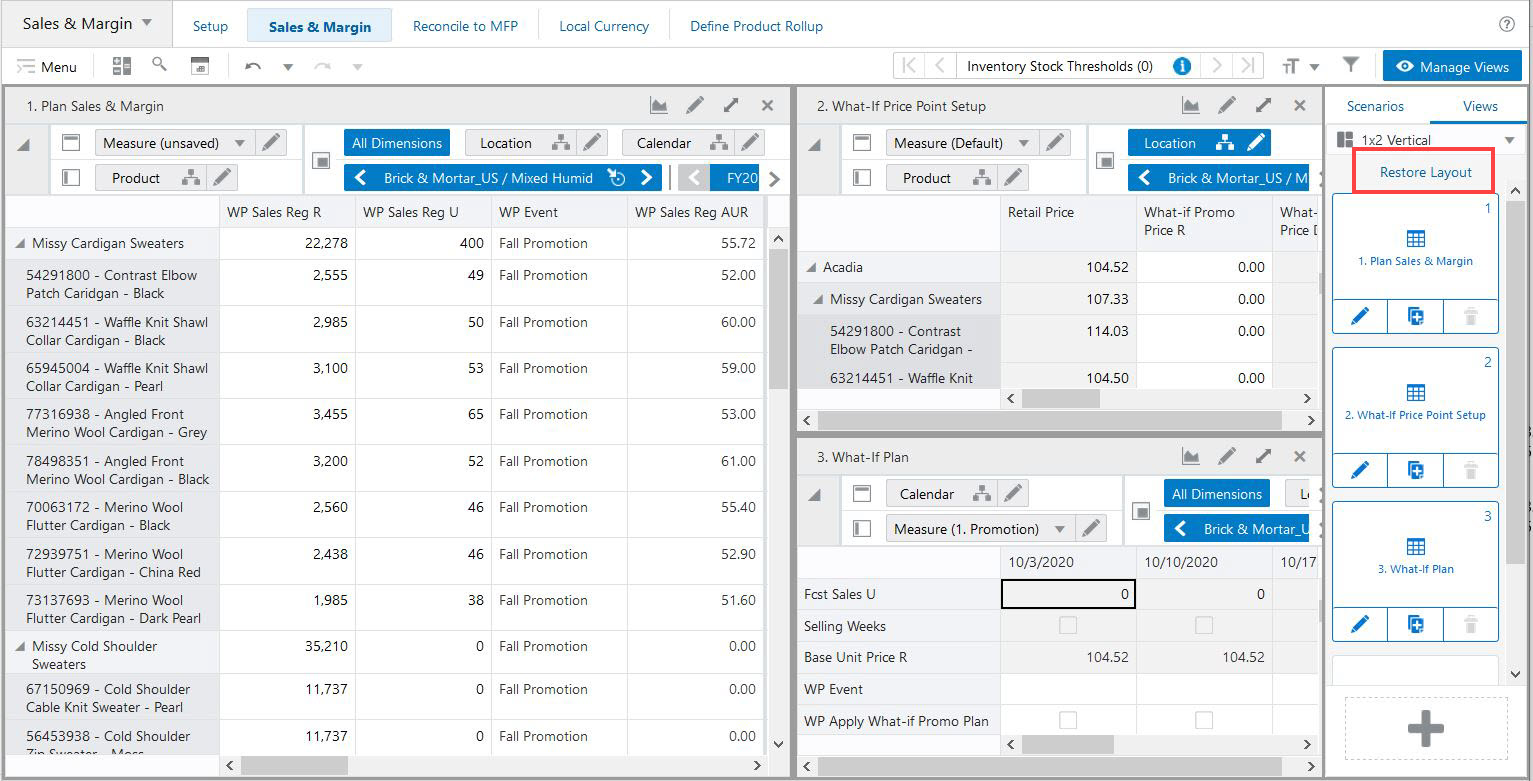
Use the Restore Layout link to reset views back to the default size of the selected view option. Restore Layout is accessed from Global menu Views option or directly from top of the view tile. Figure 8-15 shows the link for Restore Layout.
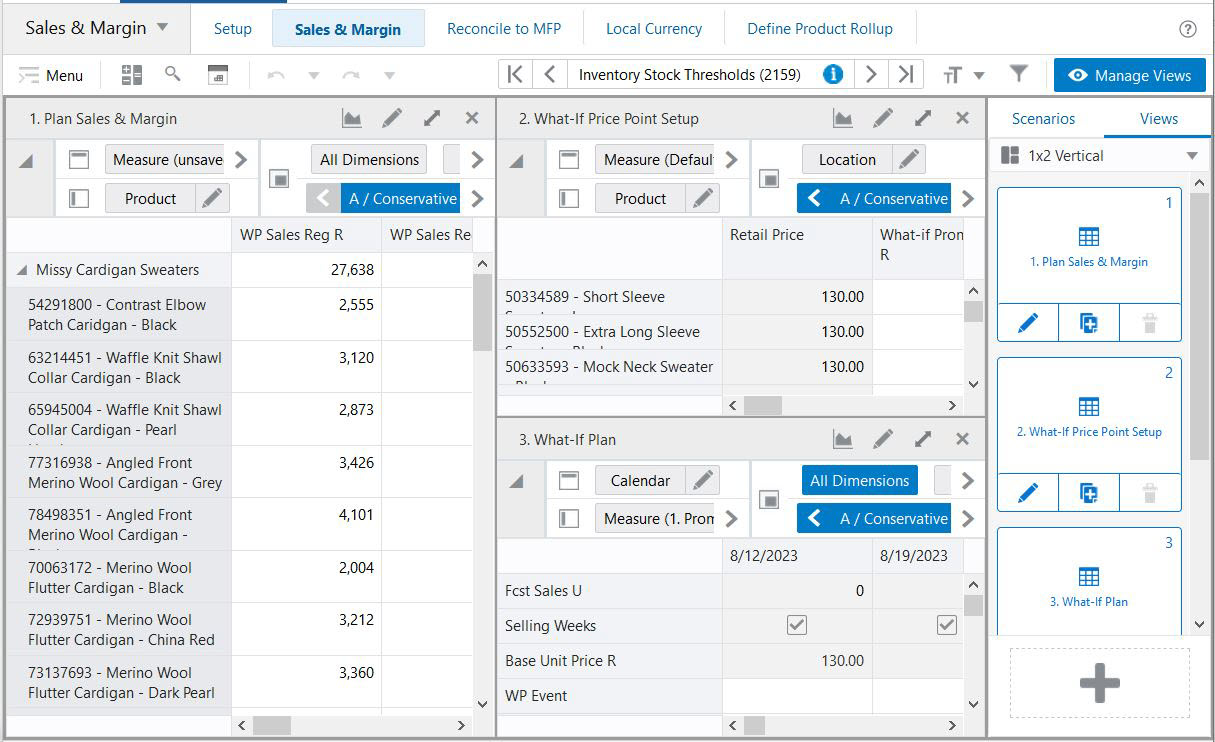
The available views are listed on the right side of the screen in the View Management Drawer, as shown in Figure 8-16.
You can create a new view containing a new selection of measures in the form of a pivot table or many chart views.
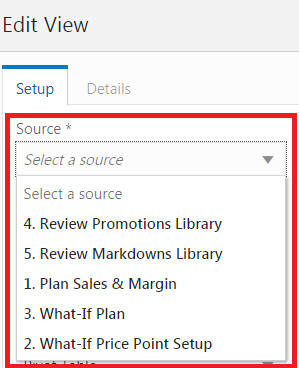
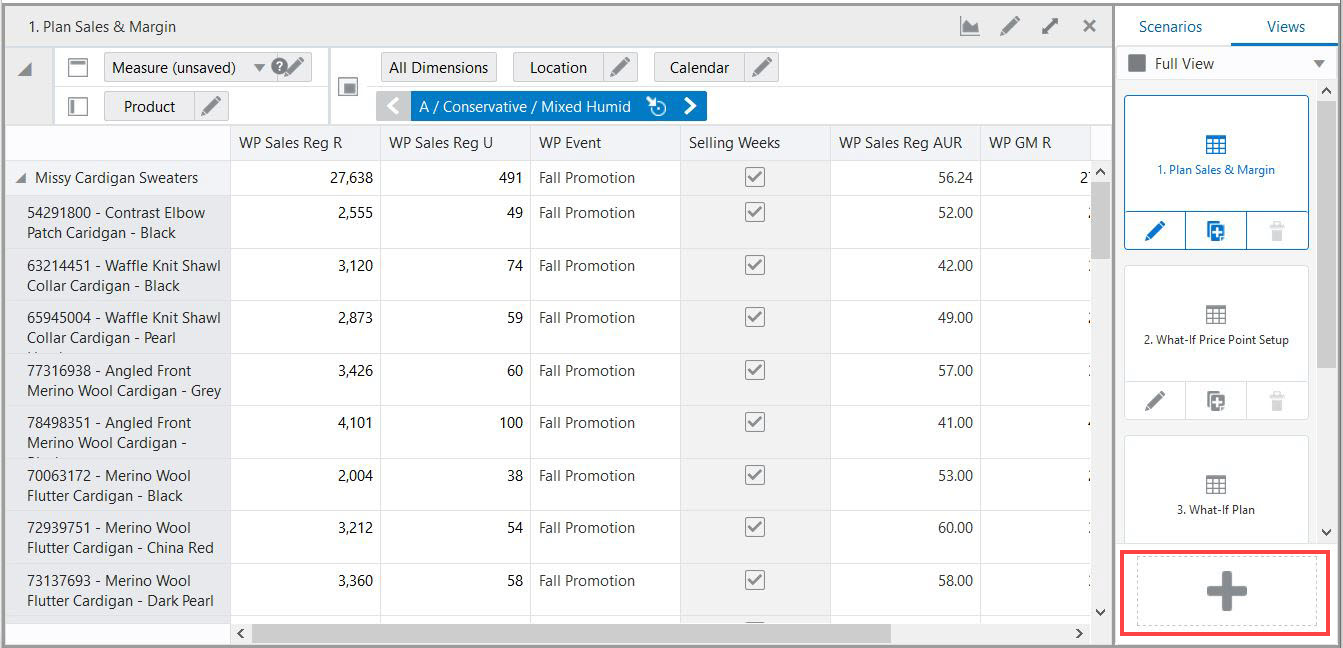
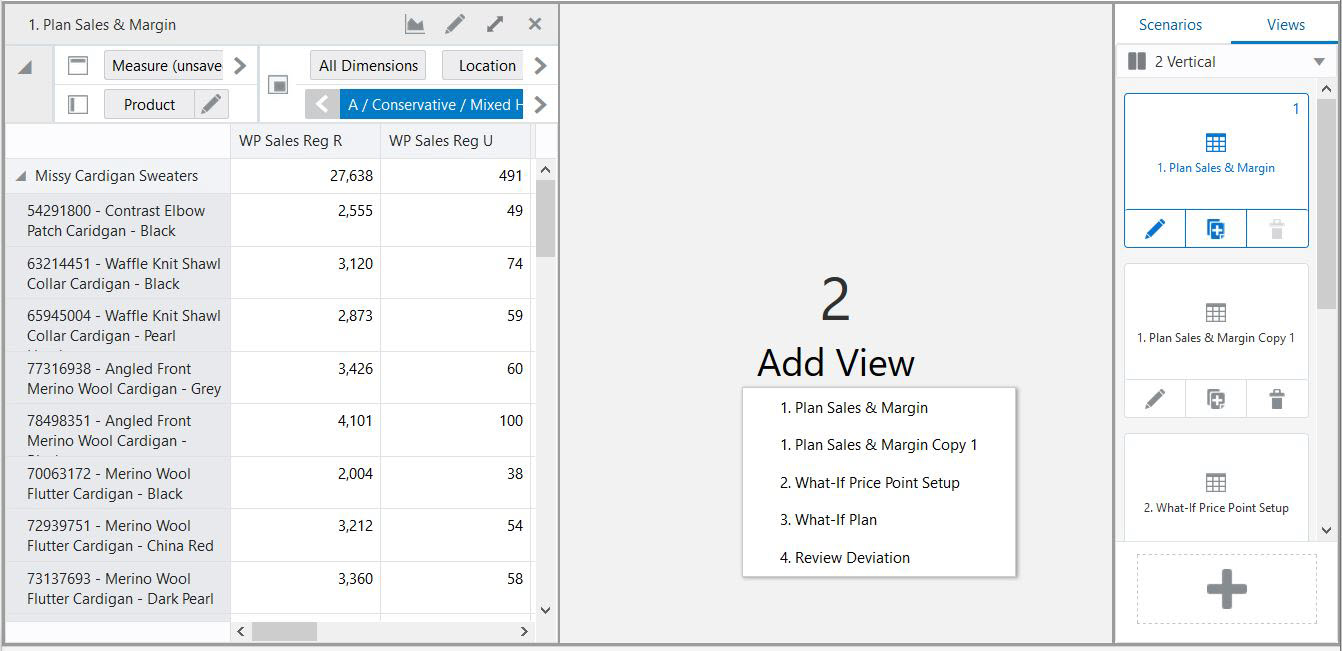
To create a new view, click Plus in the View Management Drawer.
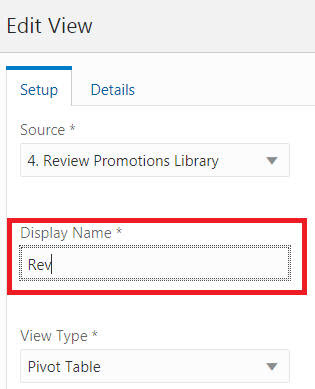
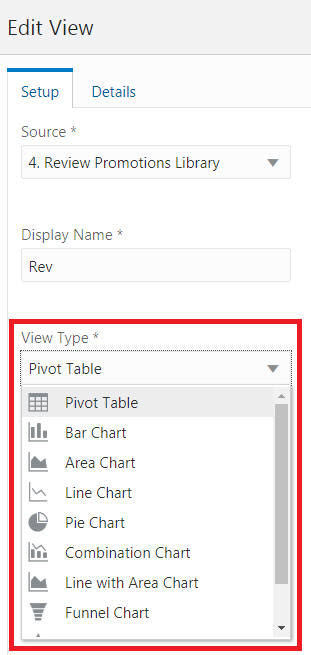
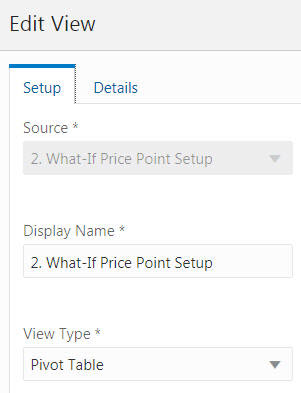
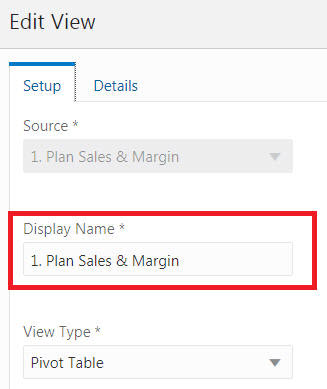
In Edit View, on the Setup tab, select a Source from the list. The options are limited to the other existing views in the View Management Drawer.
Enter a Display Name. If creating a chart view, consider using a similar name to the source view.
Select the type of view to be created, such as Pivot Table, Line Chart, Pie Chart, and so on.
In the Edit View window, on the Details tab, you can do the following:
Assign dimensions to the x, y, and z axes
Select the levels and positions for the Calendar, Product, and Location Dimensions
Select the measures for the Measure Dimension
For more information on how to perform above steps, see Chapter 7, "Editing Views.".
To modify a view, complete the following steps:
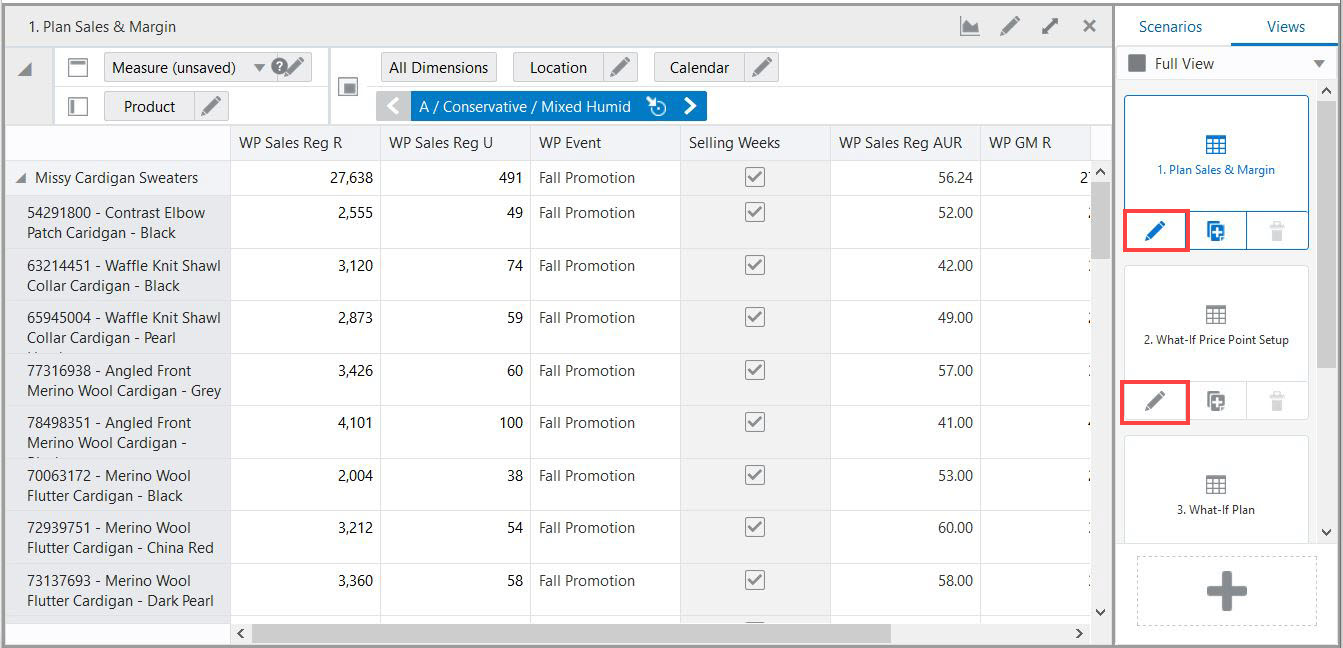
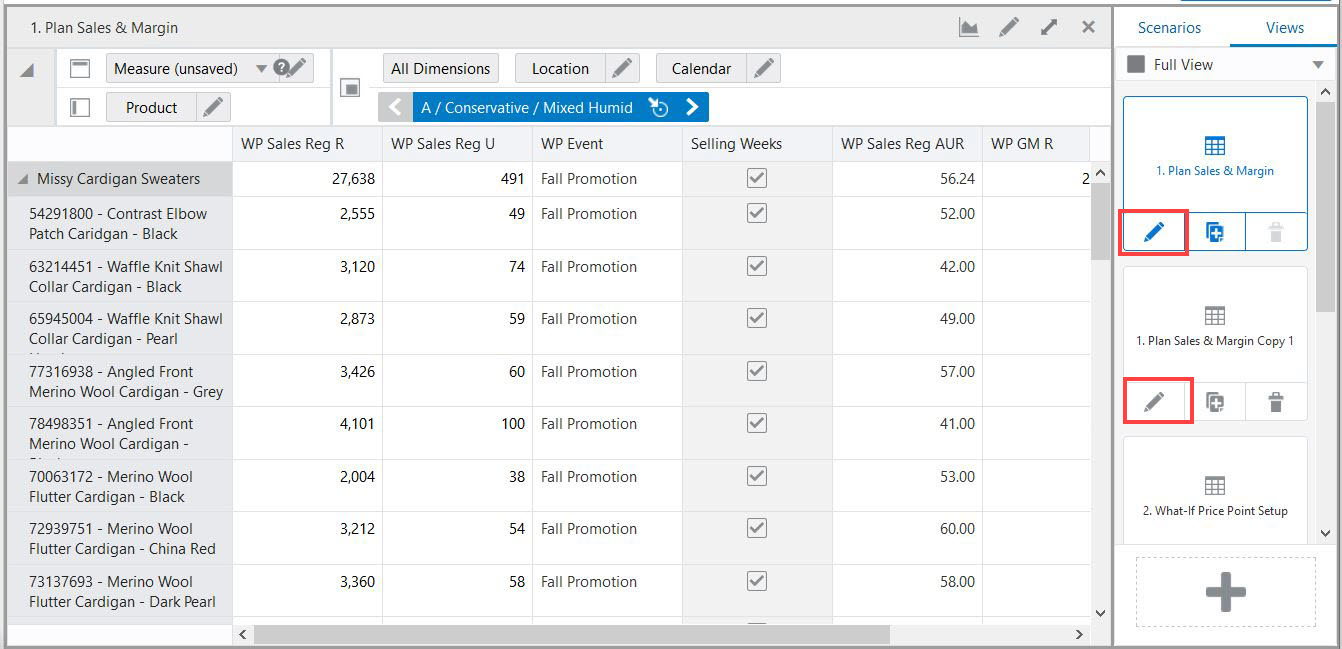
Click the Edit view icon on the View tile in the View Management Drawer.
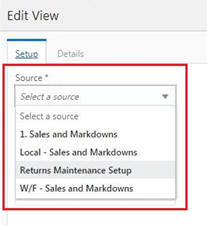
Follow the same steps as in "Creating a View", excluding selecting a Source. Since the view has already been created, the Source list is unavailable.
Figure 8-22 Edit View > Source Menu (unavailable)

To make a copy or a duplicate of a view, you can click the Duplicate View icon on the View tile in the View Management Drawer. It creates a duplicate of the view with the Display name of View Name> Copy 1.You can create a new view and use the original view as the source.
Click Plus to open Edit View.
In the Source list, select the view to make a copy of. Complete the rest of the required fields.
Views are associated with each step within the business workflow. Views are displayed as a spreadsheet-like or a chart type with the multidimensional data selected at the dimension levels in Edit view. Each view includes a set of measures relevant to the step that help you view and analyze information, and make decisions.
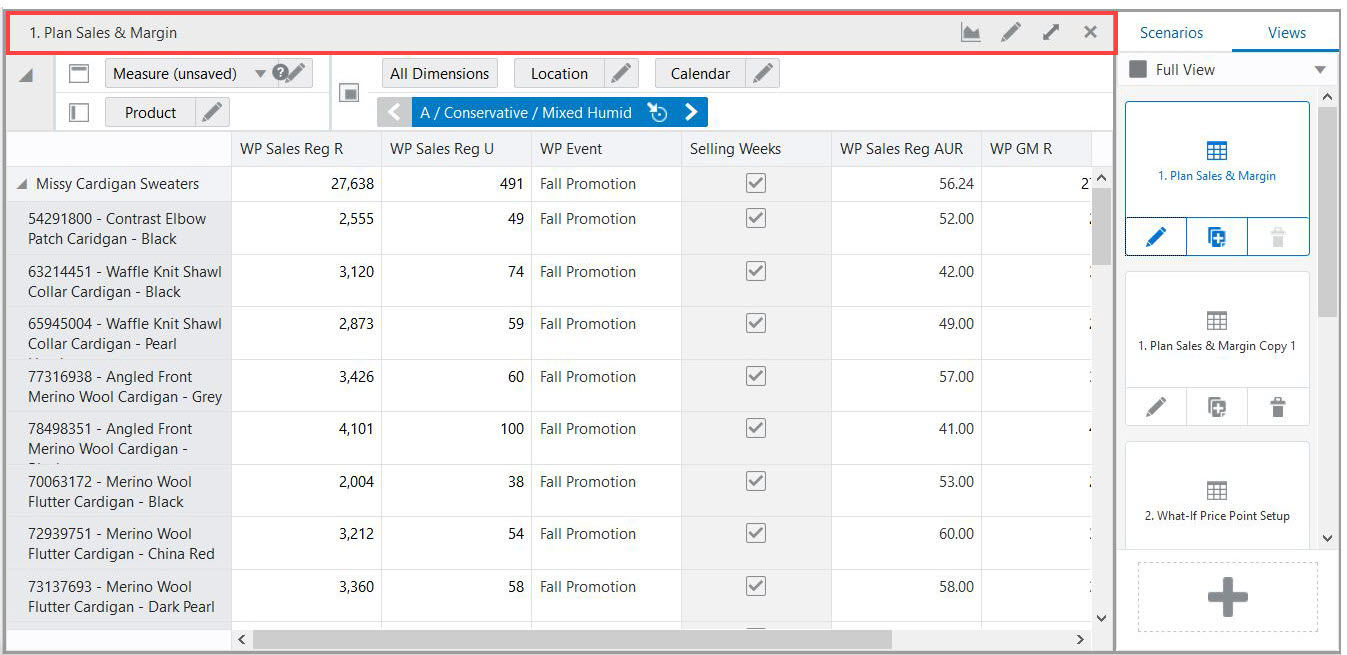
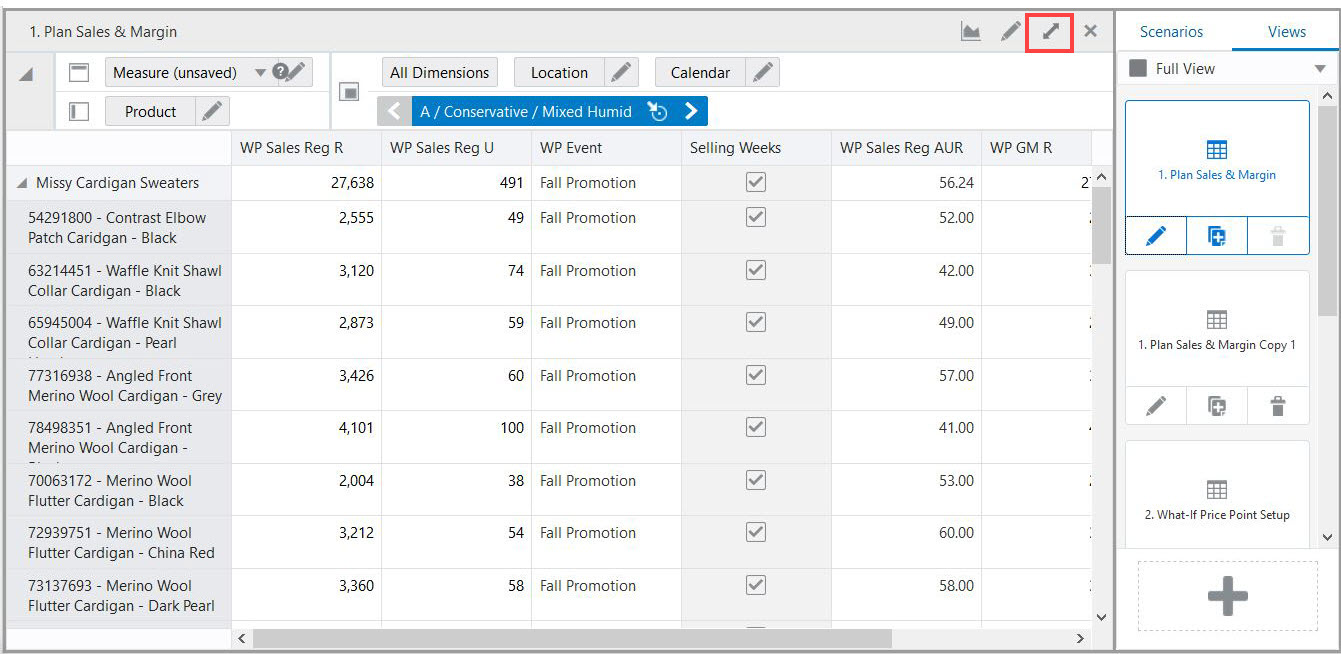
The View Title Bar contains the name of the view being displayed and the buttons for Edit, Expand, and Close.
Edit opens the Edit View window where you can change the view name, change the view type, rearrange the axes, modify the dimension levels, choose the measure profile, add or remove measures, hide and unhide positions, and so on. For more information on how to perform the previously mentioned steps, see Chapter 7, "Editing Views."
Expand maximizes and detaches the view.
The detached view has Edit and Close buttons.
Figure 8-30 Detached View with Edit and Close Buttons
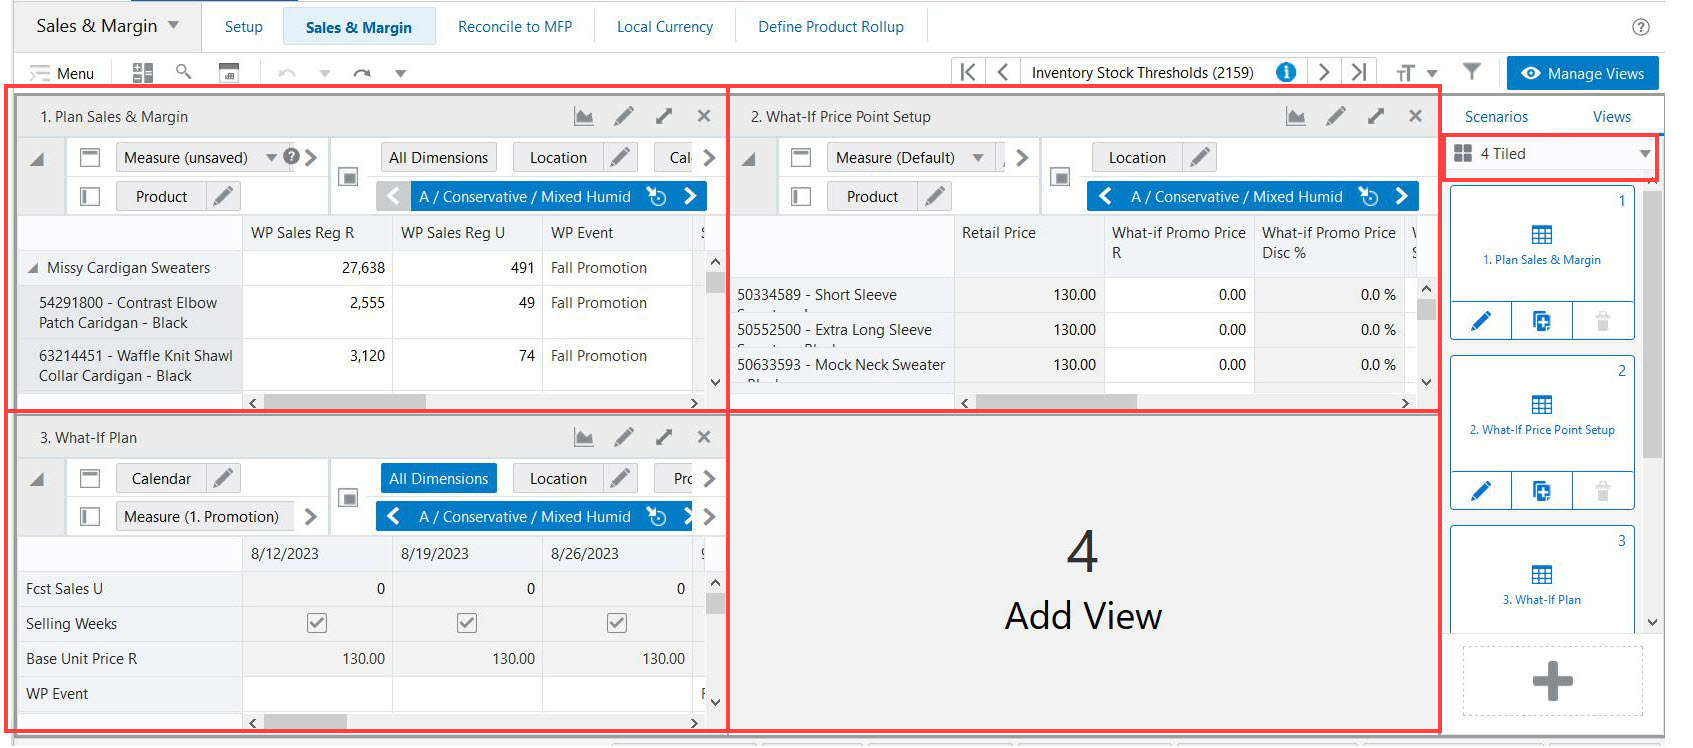
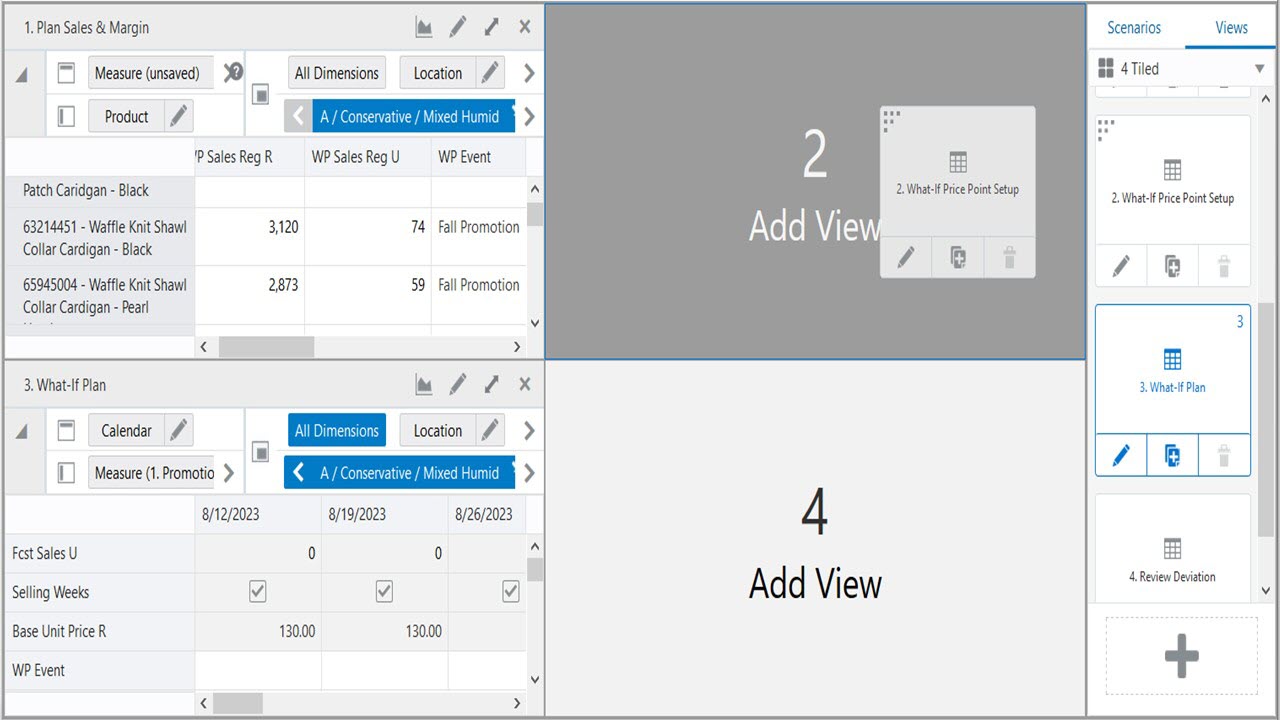
To add a view to a layout, click the view to replace the current active full view or drag the view from the View Management Drawer to a location on the layout. If the layout is 4 Tiled, 2 Horizontal, or 2 Vertical, you can drag multiple views to the different locations on the layout.
You can click the view you want to see to add it to a blank layout section. It will fill the sections sequentially. To see a different view later, drag and drop the view in the required section.
Figure 8-31 Adding a View to a Layout (Drag and Drop)
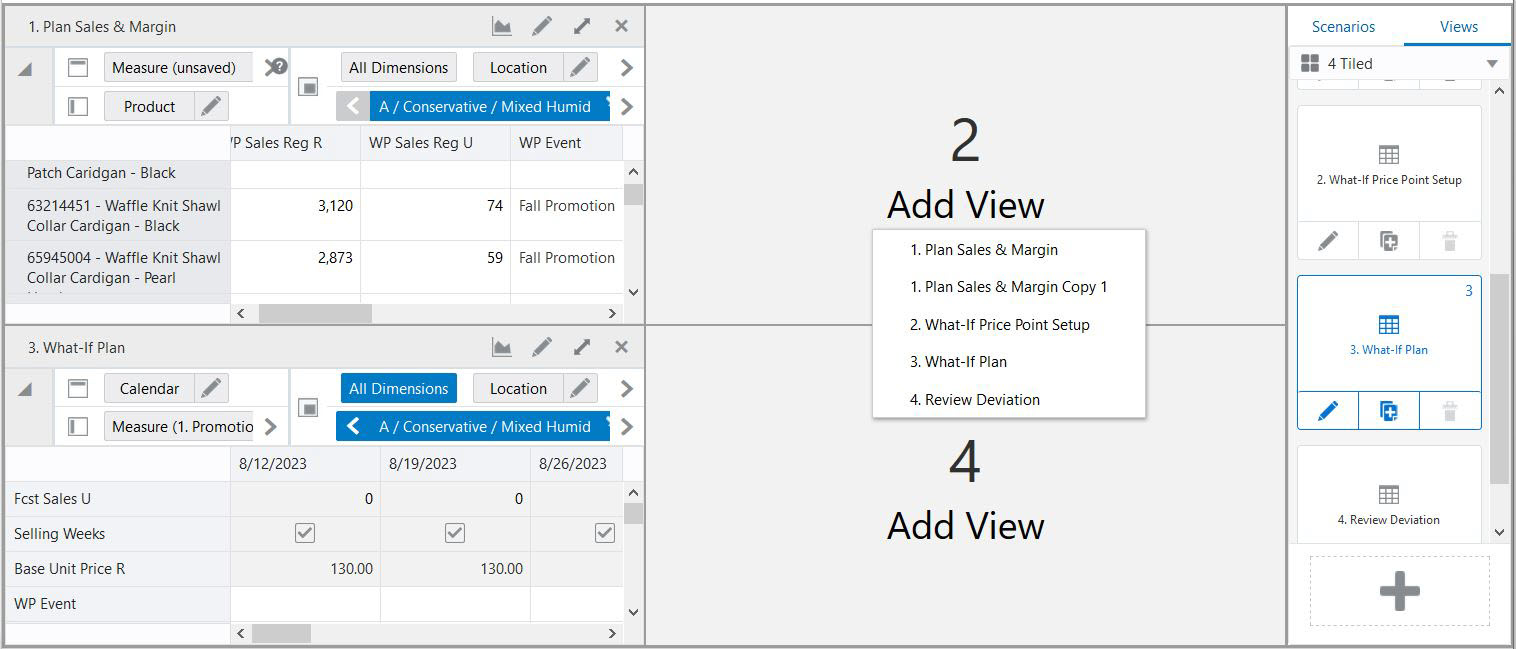
You can also add a view in a layout section by clicking the Add View button and selecting the required view from the list.
To remove a view from a layout, click the X in the upper right corner of the view.
If a view is already displayed in the layout, drag that view from the View Management Drawer to any different location in the layout, then left click the location to drop the view.
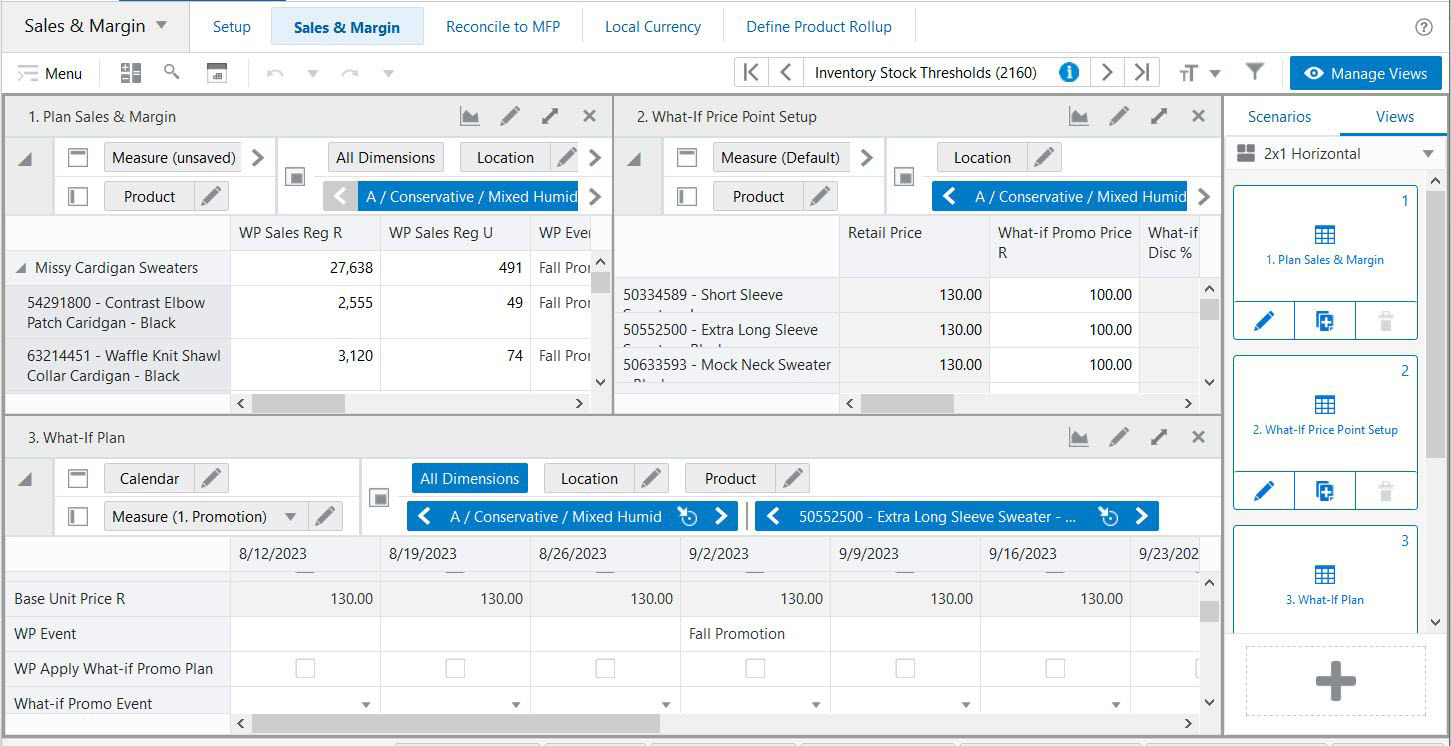
In the example shown in Figure 8-34, to move the view What-If Price Point Setup from layout location 3 to layout location 2, drag the view What-If Price Point Setup from the View Management Drawer to layout location 2.
Figure 8-34 Moving a View (Drag and Drop)
You can also click the Add View button in layout location 2 and select What-If Price Point Setup from the list in order to move the view from location 3 to location 2.
Figure 8-35 Moving a View (Add View Button)
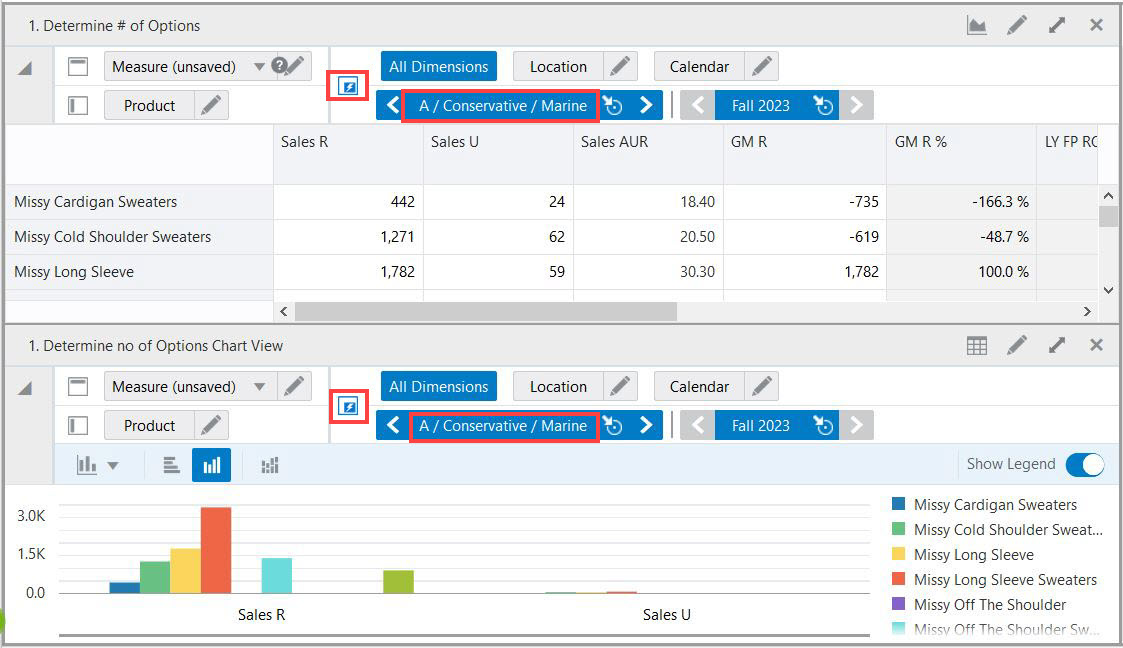
Synchronized Z Axis scrolling lets you simultaneously scroll through the z axis of multiple views. When synchronized Z Axis scrolling is enabled, all views that contain the same slice dimension scroll to the new slice position when one of those views is scrolled to a new position. When scrolling is disabled, scrolling through slice positions in one view does not affect the slice position display of other views.
Synchronized Z Axis scrolling works for all views within a single workspace, and it remains enabled as you move through the views, tasks, and steps within that workspace. When Synchronize Z-Axis is enabled, and if the same dimensions (one or all) exist on the page edge of another view, you will see the values for the current position on the synchronized dimension that is on page edge of this view. This means that the page edge of the current view is in sync with the page edge of the view on which you enabled page edge synchronization. The Page Edge and Dimension Tiles area will not be visible.
Synchronized Z Axis scrolling is useful when you want to compare multiple views containing the same page or slice dimension.
To enable synchronized Z Axis scrolling, click Synchronize Z Axis in the Z Axis and Dimension Tiles area, as shown in Figure 8-38 and Figure 8-39.
Figure 8-38 View Before Page Edge Synchronization
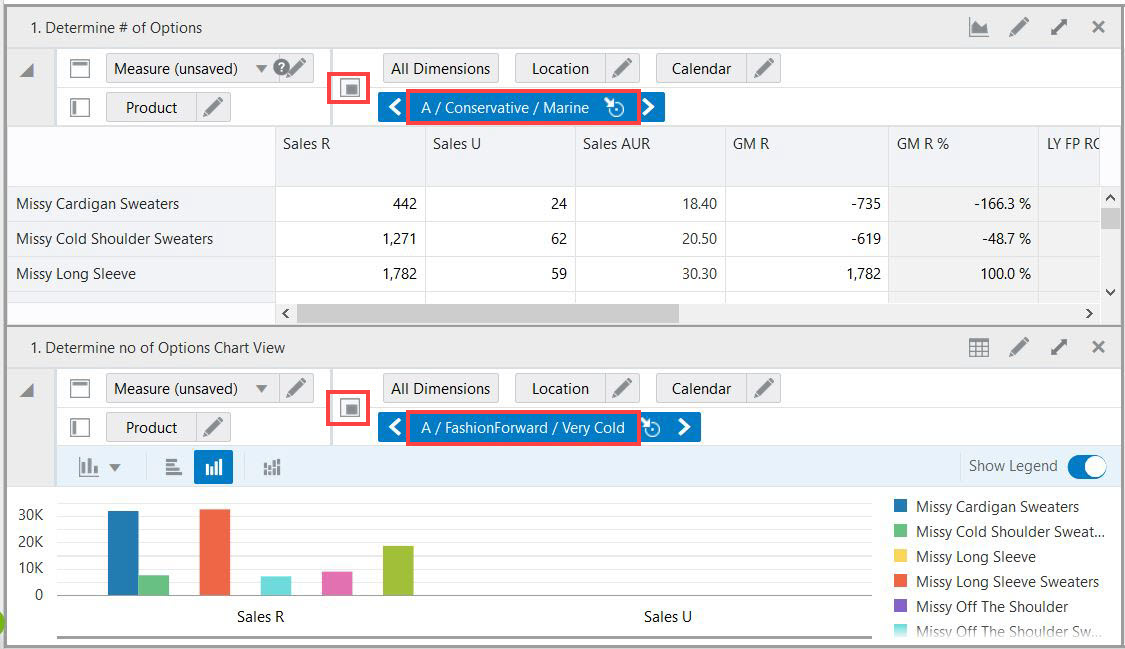
Figure 8-39 Enabling Z-Axis Synchronization
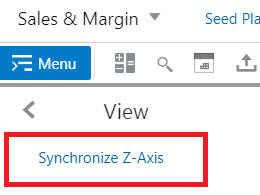
You can also Enable Synchronize Z-Axis by clicking on Menu -> View -> Synchronize Z-Axis, as shown in Figure 8-40.
Figure 8-40 Synchronize Z-Axis from View Menu
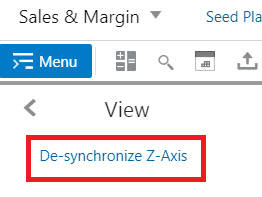
You can also Disable Synchronize Z-Axis by clicking on Menu -> View -> De-Synchronize Z-Axis, as shown in Figure 8-41.
Figure 8-41 Desynchronize Z-Axis from View Menu