| Oracle® Healthcare Precision Medicine User's Guide Release 1.0 E75998-01 |
|
|
PDF · Mobi · ePub |
| Oracle® Healthcare Precision Medicine User's Guide Release 1.0 E75998-01 |
|
|
PDF · Mobi · ePub |
This chapter describes how to perform various tasks to create reports. It includes the following topics:
This task can be performed only by molecular pathologists.
Before saving your report, it appears with the default name Untitled. It is auto-saved with an auto-generated name. Your report is a draft and is private to you until it is published.
The report name should be unique. It should not consist of alphanumeric characters and . - _ + : $ symbols.
Perform the following steps to name a draft genomic report:
When you first open a draft report, the name appears as shown:

Click the downward arrow next to the default user name.

Enter the report name. Click anywhere outside the box or presenter key to save the report.
The system validates the report name and saves it. It appears in the draft report section on the Home page.
You can overwrite a draft report by:
Note:
A draft report cannot be overwritten if the Target Report has an external N-of-1 report associated with it.
Published reports cannot be renamed.
Create a new report for an order.
Enter a name of an existing report that you have created. Click anywhere outside the box or presenter key.
The following confirmation box appears:
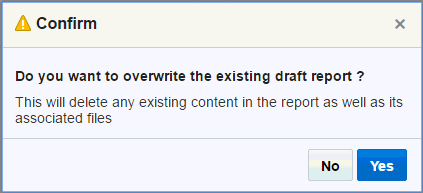
Click Yes to overwrite the existing report. This will delete all content from the existing report and its associated files.
To view a report, click it in the Draft report section on the home page. On opening a draft report, the gene panels are not preselected.
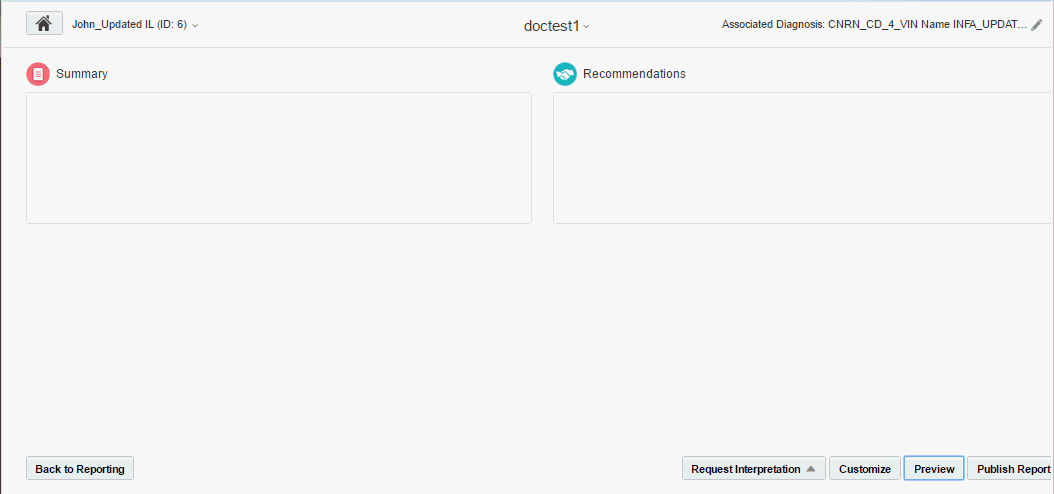
The following options are available:
Summary - Lets you enter a report summary.
Recommendations - Lets you enter recommendations, if any.
Back to Reporting - This option navigates to the Reporting pane where you can work with the report.
Request Interpretation - This option lets you request external interpretation for selected variants in the report. Currently, the only external interpretation integrated in OHPM is N-of-One.
Customize - This option lets you select the information that will appear when you publish the report.
Preview - This option lets you preview the report before publishing it.
Publish - This option publishes the report. Depending on whether you have set up the EHR integration, the report may also be sent to EMR and published there. While you will not see any difference, the actual report is sent to EMR and the physician can log in there to view the report.
To edit a report, perform the following steps:
Click a draft report to open it in the Report Review pane.
If you are in the Variant Filtering pane, click Review Report on the top right corner of the Variants list, to navigate the Report Review pane.
Click the pencil icon shown below to edit each section for a variant.
You can use this option to customize the published report and the Nof1 report when published standalone by clicking Customize on the bottom right of the draft report. The Customize Report screen appears.
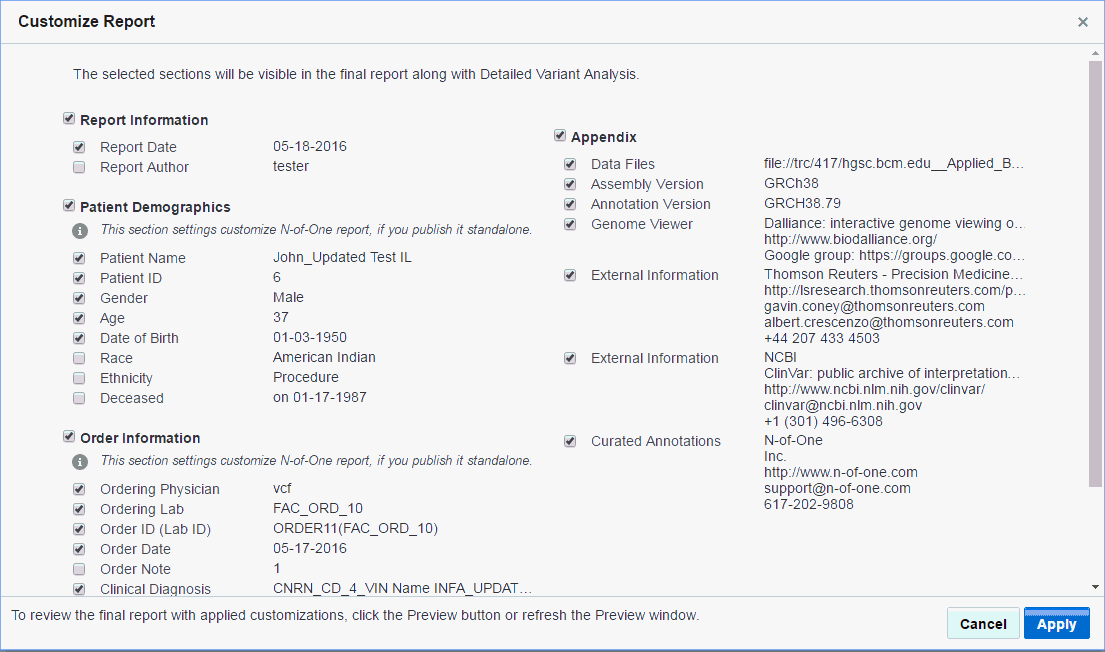
Select the information that you want to add into the report and click Apply.
To delete a report, click the trashcan icon in the draft reports section. 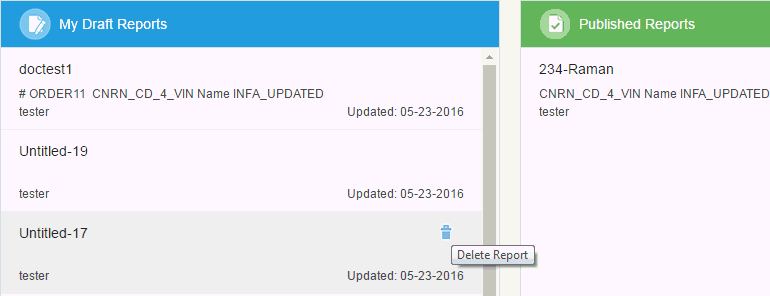
Description of the illustration fig51.gif
Note:
You cannot delete a draft report that has an N-of-One report associated with it.You can preview a report before publishing it by clicking Preview on the bottom right of a draft report. A PDF version of the report opens in a new window.
You can customize the report header and footer logo and text. For details, see the Oracle® Healthcare Precision Medicine Administrator's Guide.
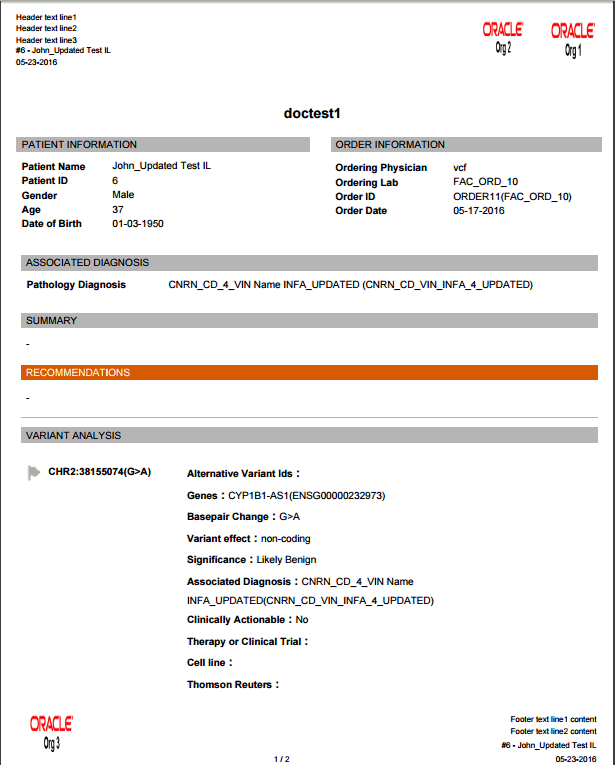
You can request third party interpretation (for example, Nof1) for your report. Perform the following steps to request interpretation.
Open a draft report.
Click Request Interpretation.
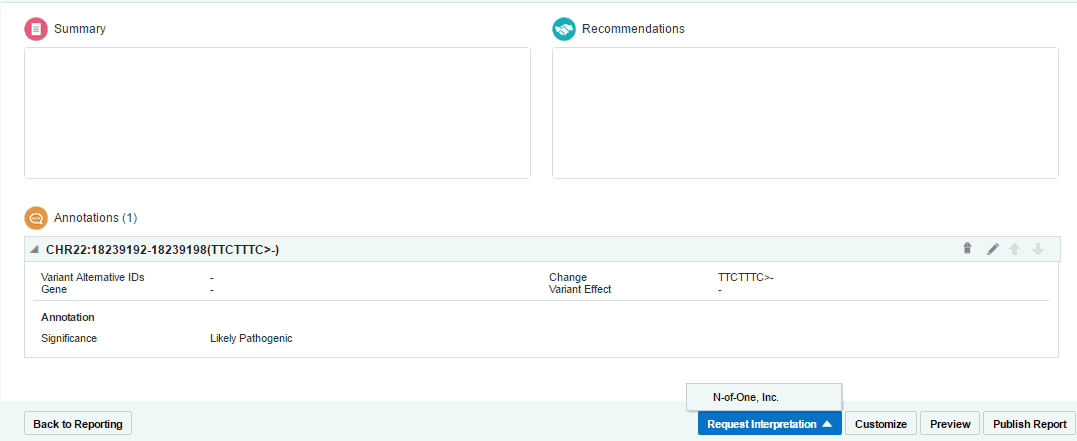
Select N-of-1. The Request Interpretation screen appears.
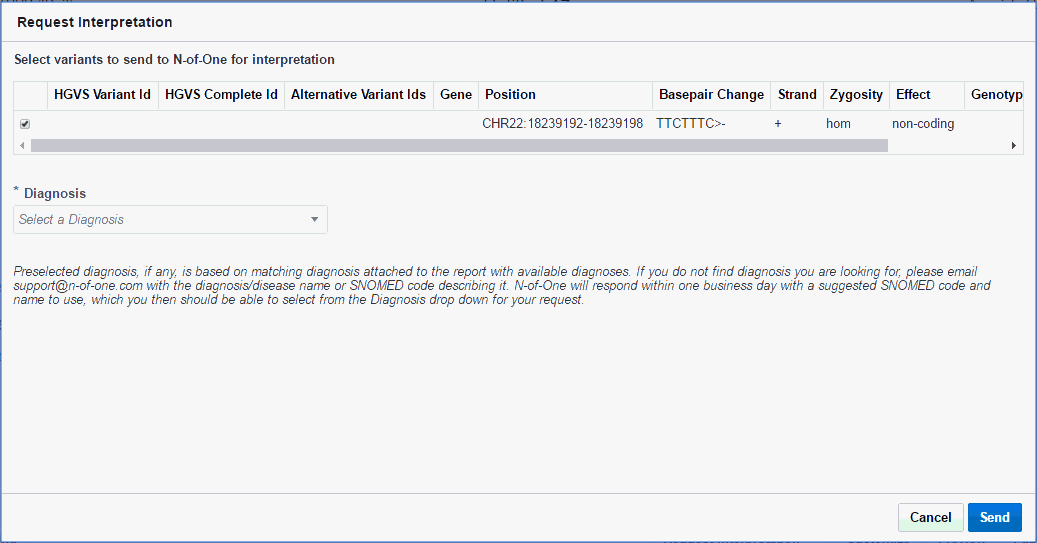
Select variants to send to N-of-1 interpretation.
Select a Diagnosis. If the diagnosis in the parent report matches ones from N-of-One, it gets automatically selected.
Click Send. You will receive a confirmation that your report has been submitted along with a reference number.

Also an entry is made in the Review Report view as follows:

You can cancel this interpretation request by clicking Cancel Request on the top right of the above entry. You will receive a confirmation message. Click Yes.
Also, the following icon appears in the draft reports section after requesting an external report. Clicking it displays the external report details.

You can publish your report by clicking Publish on the bottom right of the report. The published report then appears in the Published Reports section of the Home page. The report moves out of the Draft Report section once it is published.
Once published, your report will be visible to everyone with full access to the corresponding patient.
You can include your summary and recommendations for the clinician in the report. To edit these fields, open the report in the Report Review view. Click the field and enter your input.