Replacing a Drive Module Assembly

Procedure - Replace Drive Module Assembly

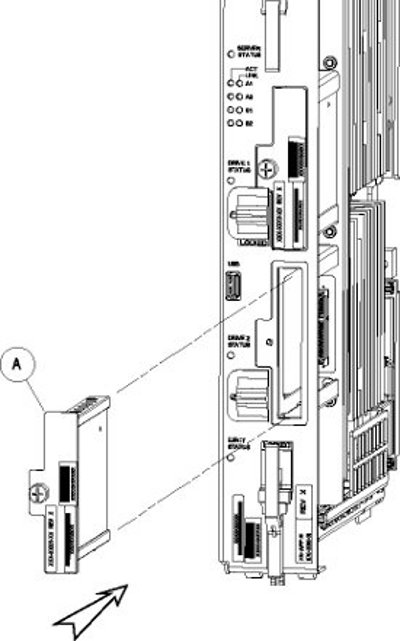
  1. Slide a new drive(s) module into the drive slot on the card (see Figure 1).

    Drive Module Replacement

  2. Gently push the drive (A) in slowly until it is properly seated.
  3. Tighten the mounting screw until the Drive Status LED is in a steady red state ((B), from Figure 3).
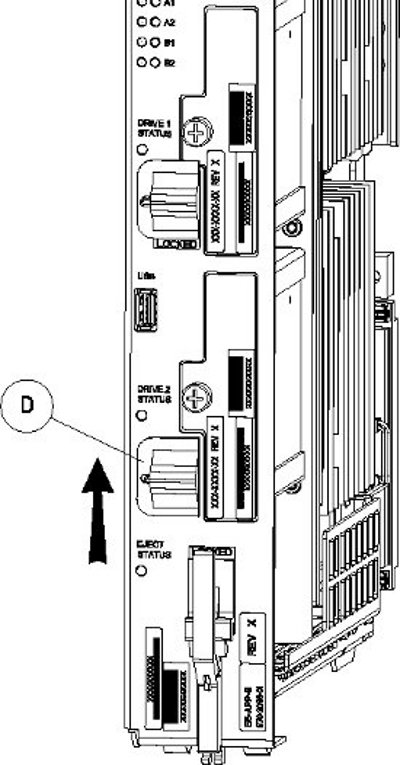
  4. Move the drive module locking switch (D) from the unlocked to the LOCKED position.

    When drive module locking switch (D) is transitioned from unlocked to locked, the LED will flash red to indicate the drive is locked and in process of coming online (see Figure 2).

    Drive Module Locked

  5. When the LED turns off, log in as root and run the cpDiskCfg command to copy the partition table from the good drive module to the new drive module.

    # /usr/TKLC/plat/sbin/cpDiskCfg <source disk> <destination disk>
    For example:
    # /usr/TKLC/plat/sbin/cpDiskCfg /dev/sdb /dev/sda

  6. After successfully copying the partition table, use the mdRepair command to replicate the data from the good drive module to the new drive module.

    # /usr/TKLC/plat/sbin/mdRepair
    This step takes 45 to 90 minutes and runs in the background without impacting functionality.

  7. Use the cat /proc/mdstat command to confirm whether RAID repairs are successful.

    After the RAID is repaired successfully, output showing both drive modules is displayed:

    Personalities : [raid1]
    md1 : active raid1 sdb2[1] sda2[0]
          262080 blocks super 1.0 [2/2] [UU]
     
    md2 : active raid1 sda1[0] sdb1[1]
          468447232 blocks super 1.1 [2/2] [UU]
          bitmap: 1/4 pages [4KB], 65536KB chunk
     
    unused devices: <none>