| Agile Product Lifecycle Management Import/Export User Guide Release 9.3.6 E71157-01 |
|

 Previous |
 Next |
| Agile Product Lifecycle Management Import/Export User Guide Release 9.3.6 E71157-01 |
|
Previous |
Next |
This chapter includes the following:
About Preferences
Setting Parsing and Validation Options
Accepting/Rejecting Non-Existing Data
Setting Business Rule Options
Persisting Import Settings in User Sessions
Persisting Import Preference Settings in File Systems
Setting Default Types
Setting Default Autonumber Sources
The Import Wizard has several preference setting options that you can set from any step in the Wizard. These preferences set the behavior of the Import Wizard while importing data. Import Wizard preferences persist as long as you are in an active Agile PLM client session, but they are not permanently saved with the user's profile when the user exits the session.
To set import preferences:
In Web or Java Client, open the Import Wizard and select the Preferences button in the bottom left corner of the Import Wizard. The Import Preference dialog appears.
You can set these import preferences before or after selecting the import file. For these to persist in future sessions, you must check the Persist preference settings to be shared by other users check box. See "Enabling Users to Save (Persist) Preference Settings".
Select one of the following preferences groups from the list: Parsing and Validation Options, Business Rule Options, Default Types, or AutoNumber Sources.
Set your preference settings from the available options for Parsing and Validation Options, Business Rule Options, Default Types, or AutoNumber, and then select Save. This chapter provides the necessary information on available options and procedures to set these options.
When you select the Parsing and Validation Options preference group, the following options appear: Log Transformations
Table 3-1 Parsing and Validation options preferences
| Action | Validation option |
|---|---|
|
Log Transformations |
The Log Transformations checkbox sets whether to record all value transformations in the import log file. If you are importing an extremely large file, uncheck the Log Transformations box to achieve faster results. |
|
Multilist Delimiter Character |
The MultiList Delimiter Character list specifies the character used in the import file to delimit values for MultiList fields. You can select a semicolon (the default), a comma, or a vertical bar. |
|
Cascade Delimiter Character |
The Cascade Delimiter Character list specifies the character used in the import file to delimit values for cascading list fields. You can select a vertical bar (the default), a comma, or a semicolon. |
|
Whitespace Validation Action |
The Whitespace Validation Action preference sets how the Import Wizard handles a value with whitespace characters (space, linefeed, new line, or tab) in a field that does not allow them. Select Reject (the default) to reject the value or Strip to remove the whitespace characters. |
|
Case Validation Action |
Some Agile fields can be configured to require upper case or lower case values. The Case Validation Action preference sets how the Import Wizard handles a value that has the wrong case for a field. Select Convert (the default) to convert the value to the proper case or Reject to reject the value. |
|
Length Validation Action |
The Length Validation Action preference sets how the Import Wizard handles a value that exceeds the maximum length for a field. Select Reject (the default) to reject the value or Truncate to remove any characters from the value that exceed the maximum length. |
|
Blank Data Action |
The two options and the resulting actions are: Retain Data - This option retains the pre-9.3.3 behavior where empty cells do not overwrite data in Agile PLM. Overwrite Data - With this option, empty cells will overwrite data in Agile PLM. |
|
Log Transformations |
The Log Transformations checkbox sets whether to record all value transformations in the import log file. If you are importing an extremely large file, uncheck the Log Transformations box to achieve faster results. |
|
Multilist Delimiter Character |
The MultiList Delimiter Character list specifies the character used in the import file to delimit values for MultiList fields. You can select a semicolon (the default), a comma, or a vertical bar. |
|
Cascade Delimiter Character |
The Cascade Delimiter Character list specifies the character used in the import file to delimit values for cascading list fields. You can select a vertical bar (the default), a comma, or a semicolon. |
Because this feature only supports adding new table rows and does not support updating existing table rows, it does not support tables are derived from other tables, or require updating existing rows. Supported tables and those that are not, appear in the following lists.
Item's BOM table
Item's AML table
Item's Supplier table
Item's Site table
Item's Compliance table
Item's Instance table
Publish Price's Price line table
Quote History's Quote History line table
Manufacturer Part's Specifications table
Manufacturer Part's Approved Supplier List table
Part Group's Compliance table
Part Group's Supplier table
Declaration's Item table
Declaration's Part group table
Declaration's Manufacturer part table
Declaration Specification table
Specification's Substance table
Substance Composition table
Some of the following tables are not supported because they require updating existing table rows or attribute values were acquired from other objects.
Relationship table - This table does not support updating blank data values, but it does supports updates
Action Items and Discussion tables - Adding new rows is supported for the tables, and updating existing rows is not supported.
Part Group part table - Only the editable Conversion Factor is supported and blank values are not supported.
User Group Jobfunction table - It has only three attributes and already support blank data overwrite.
User Group Users Table - There are only two attributes and they are acquired from the user object
UserGroup and FunctionalTeams User tables - There are only three attributes for this table and they are acquired from the UserGroup or FunctionalTeams objects
PSR Affected Item table - For this table, only adding new rows is supported and updating existing rows is not.
PSR Related PSR table - For this table, all attributes are acquired from the related PSR object.
QSR Affected Item table - For this table, only adding new rows is supported and updating existing rows is not.
Supplier Commodities/Manufacturer offering tables - These table's attributes do not support editing blank values.
Project Schedule table - This table's attributes do not support editing and are acquired from other substances.
This option was introduced and briefly described in "Setting Business Rule Options."
The choices are:
Accept/reject all non-existing objects during import
Selectively accept/reject non-existing objects after import validation.
The following will occur when importing data that does not exist in a PLM database:
If the data is validated before it is imported, whether you select Accept or Reject, warning messages are displayed in the Validation summary page for all non-existing objects (BOM/AML/Others) followed by a checkbox giving you the option to Accept or Reject importing the object.
|
Note: During import validation, you must select the Accept check box. |
If the data is imported directly without validatation and you select Accept, the Import summary page will display the non-existing objects that are created after Import.
If you select Reject, all PLM objects that are not in the system before import validation are rejected during import. The Import solution will list the non-existing objects that are rejected in the import status message.
|
Note: During import validation, you must de-select the Accept check box for all non-existing objects. |
To accept/reject importing non-existing objects into Agile PLM:
In PLM Web Client, select Tools and Settings > Import. The Import Wizard opens in the Import page.
In Import Wizard, select Preferences. The Import Preference dialog opens.
In Import Preference, select Business Rule. The Business Rule options list appears.
In Business Rule, select Behavior upon non-existing objects and then select either Accept or Reject.
Click Save to proceed to the remaining import tasks. To validate, see Chapter 4, "Validating Source Data before Importing."
|
Note: The import Validation feature is supported for PC and PQM objects. |
When you choose to selectively import or reject PLM objects that are not in the system after validation, Import will list the non-existing objects in the Validation summary page. You then have the option to import or reject the objects that are not present in the PLM database.
|
Note: The import Validation feature is supported for PC and PQM objects. |
To selectively accept/reject importing non-existing objects after validation:
Assume the import file is a text file that contains the following data:
In PLM Web Client, select Tools and Settings > Import. The Import Wizard opens in the Import page and prompts you for the import file.
In Import Wizard, click Browse and select the above text file and click Preference. The Import Preference dialog opens.
In Import Preference, select Business Rule > Behavior upon non-existing objects.
Select Accept for purposes of this example.
Click Save.
In Import Wizard click Next. The Specify File Contents appears.
Select Bill of Materials > Next. The Select Content Options step opens.
Make your selection depending on your input and requirements and click Next. The Specify Attribute Mapping page opens.
In Specify Attribute Mapping dialog, map the fields.
Click Next. The Review Import Definition step appears.
Select Validate. The Validate Log dialog opens.
Select Import. The Import Log dialog displays the results. See Figure 3-3.
When you select the Business Rule Options preference group, the following options appear:
Smart Rules Warning Violation Behavior
Reference Designator Quantity Mismatch Behavior
Behavior upon non-existing objects
Change Mode
Redline Mode Behavior
BOM & AML Import Behavior
Multi Row Update Mode
Price Quantity Break Default
Sourcing Project QTY Rollup
Reference Designator Range Character
Reference Designator Delimiter Character
These options are described in the following paragraphs.
These are the Smart Rules that are set to Warning in the Java Client. It does not apply to Smart Rules that are set to other values, such as Allow or Disallow.
DuplicateFindNumbers
DuplicateItemNumbers
DuplicateRefDes
MultipleItemsPerManufPart
Overlap Published Price Lines Effectivity Periods
Workflow Matching Criteria Attribute Modification
Reject Objects (the default), any object that triggers a Smart Rules warning is rejected
Accept Objects, the Smart Rules warnings are logged, but objects are imported
The Reference Designator Quantity Mismatch Behavior drop down list provides the option to Accept/Reject imports as follows:
If you select Accept, Import will ignore the Reference Designator Quantity Mismatch warnings and will import the data
If the you select Reject, Import will fail when there is a Reference Designator Quantity Mismatch warning and will save the warnings in the Import log file
When importing a non-existing PLM object, you have the option to:
Accept importing all PLM objects that are not in the system before performing import validation
Reject importing all PLM objects that are not in the system before performing import validation
Selectively Accept or Reject importing PLM objects that are not in the system's databases after performing import validation. To support this option, Import will list the non-existing objects in the Validation summary page.
For more information, see "Accepting/Rejecting Non-Existing Data."
The Import Wizard enables you to import Items, BOMs, and AMLs, Price, and Published Price Lines in Redlining or Authoring mode.
In Redlining mode, the default setting, the Import Wizard uses the redlining process to update BOM, AML, and Published Price Lines rows. Any fields that have changed are highlighted in red. A change order is required regardless of the revision state. Redlining mode is required to import data to any item or price with a pending change or a released revision.
In Authoring mode, the Import Wizard does not use the redlining process to update BOM, AML, and Published Price Lines rows. It therefore does not require a change order. Authoring mode is useful if you are importing data to preliminary items and you do not want to roll the revision.
The Redline Mode Behavior preference allows you to determine which items get added to the Affected Items tab of a change when you import them in Redlining mode. You can choose to add all items to the change, add only new items, or add new items and existing items that require redlining.
Select one of the following options:
New/Redlined items onto the change (default) - adds items that are not associated with any change (pending or released) or items that have redlines to the Affected Items tab of the change.
All items onto the change - adds all items listed in the import data to the Affected Items tab of the change, regardless whether the items are new, or are redlined.
New items only onto the change - adds only items that are not associated with any change (pending or released) to the Affected Items tab of the change.
|
Note: You can redefine BOM and AML fields, and Title Block fields that are under change control, such as Title Block > Description, Title Block > Lifecycle Phase, and Title Block > Rev. |
The BOM & AML Import Behavior preference specifies the behavior to use when importing BOMs and AMLs. You can import all items (including BOM components) or only items that have BOMs or AMLs. Select one of the following options:
Import assys, amls, and components (default) - imports all items, including BOM components.
Only import assys and amls - imports only items that have BOMs or AMLs. BOM components are not imported.
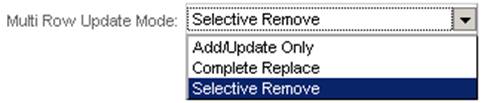
The Multi Row Update Mode preference determines how source data is used to update target tables such as BOMs, AMLs, Published Price Lines, and Relationships. You can choose from the following fields:
Complete Replace (the default) - If you choose Complete Replace, the target data is completely replaced with the source data. Any rows in the target data that do not appear in the source data are also deleted.
|
Note: This option is available for BOM, AML, Price Line, and Relationships tables. |
Add/Update Only - If you choose Add/Update Only, new rows in the source data are added and existing rows are modified and no rows are deleted. The Add/Update Only setting is helpful if you want to import partial BOM, AML, Published Price Lines, or Relationships data.
|
Note: This option is available for BOM, AML, Published Price Lines, and Relationships data imports. It is always Add/Update mode for other table types. |
Selective Remove- If you choose Selective Remove, you are able to specify the row that you want:
Removed
Imported/added
Updated
|
Note: This option is only available for importing BOM, AML, and Relationships data and is always Add/Update mode for other import types. The process involved in invoking this option to import BOM, AML, and Relationships data is further explained with the aid of the example in "Setting the Selective Remove Option." This option is supported when importing BOM and AML data through level template and PDX or aXML data formats. |
This example uses Import Wizard's Selective Remove in Business Rule Options' Multi Row Update Mode to add, delete, and update a BOM. The current BOM, the import data, update requirements, procedures, and results appear below.
Parent, bom, qty,isDelete
P00130, P00133,1,Yes
P00130, P00131,10,NO
00130, P00135,1,NO
Modify the BOM by updating P00131, adding P00135, and in the process, deleting P00133.
In PLM Web Client, select Tools and Settings > Import. The Import Wizard opens and prompts you for the import file.
In Import Wizard, click Browse, select the above file, and click Preferences to open Import Preference dialog.
In Import Preference, select Business Rule > Multi Row Update Mode > Selective Remove > Save.
In Import Wizard click Next. Import Wizard advances to step two to specify file content.
Select Bill of Materials > Next. Import Wizard advances to step three for data mapping selection.
Set your Data Mapping, Data Transmission, and Redline Options.
In Redline Options click the New button.
In Create New Changes, select ECO. When the ECO is created, click Save.
In Step 3 of the Wizard, click Next to proceed to Wizard's Specify Attribute Mapping step.
Map the attributes. You can click Next to proceed to Step 5, Review Import Definition, and then select Import, or select Import. When you select Import, the Import Log dialog opens.
In Web Client, view the P00130 BOM changes. P00131 is updated, P00134 remains unchanged, P00135 is added, and P00133 is removed. Web Client, view the P00130 BOM changes. P00131 is updated, P00134 remains unchanged, P00135 is added, and P00133 is removed
A price object has a General Information field named Allow Qty Breaks that determines whether prices are broken out by different quantities. If the Import Wizard automatically creates a new price object while importing Published Price Lines data, it sets the value of the Allow Qty Breaks field based on the Price Quantity Break Default preference.
If you want to allow quantity breaks for new price objects created by the Import Wizard, select Yes. Otherwise, select No (the default).
This rule applies to PCM only. The quantity values are set in the PCM table menus. For example, you can set ”QTY Rollup” values for:
Sourcing Project item import
Imports in Supplier Response
RFQ Response Status for non-web suppliers
|
Note: In Import/Export, you can set this rule to Yes/No. |
Select either Hyphen (-) (the default), Backward Slash (\), Forward Slash (/), or Vertical Bar (|). The range character separates reference designator values that expand to a sequence of values. For example, R4-R6 expands to R4,R5,R6.
If you are importing BOMs from a PDX package or an aXML file, the reference designator range character must be a hyphen. For more information about reference designators, see "Using BOM Reference Designators."
Select either Comma (,) (the default), Semicolon (;), or Vertical Bar (|). The delimiter character separates reference designator values that do not need expansion, for example: R1,R2,R3.
If you are importing BOMs from a PDX package or an Agile XML (aXML) file, the reference designator delimiter must be a comma.
When you use the Import Wizard in Web Client, the current settings persist as long as you maintain the session. Persisted Import Wizard settings include:
Import preferences
Source file configuration (but not the file name and path, which are not persisted)
Selected content to import
Selected mapping file
Selected transformation file
If you choose a different type of source file, the Import Wizard resets the selected content, mapping file, and transformation file. If you log out of Web Client and then log back in, the Import Wizard resets to the default settings.
Unlike User Sessions, an authorized administrator can enable a user to set and save Import preferences on a global basis. In this process, this administrator defines/selects a user in Java Client and then enables the Save Import Preferences Setting option for the selected user. Then this user can set and save Import preferences setting from Web Client. Moreover, these settings, unlike settings in user sessions, are not lost if, and when, the user logs out and logs back in. The necessary procedures are provided in the following paragraphs.
In the following example, the Administrator defines a user called Test_Admin and enables the Save Import Preference Setting option for this user. This user is then able to save (Persist) preference settings in PLM Web Client.
|
Note: Because this operation saves import preferences in the file system, the user requires the Get file, Create file folder, Discover file folder, Read file folder, Modify file folder, Check in file, and Check out file privileges. Users who view/read these Preferences, require the Discover file folder, Read file folder, and Get file privileges. |
To define a user and enable Save Import Preference Setting for the user:
In Java Client, log in as Administrator and select Admin > Privileges > Administrator. The Privileges for Administrator panel opens.
In Privileges for Administrator, click the New button. The Create Privilege dialog appears.
In Name field, type Test_Admin and in Applied to click the Down Arrow button. The following selection box appears.
In this selection box, move Save Import Preference Setting from Choices to Selected, and then click OK.
To assign roles and privileges:
In Java Client, select Admin > Privileges.
In Privileges, select, define, and apply the following privilege masks (actions). Be sure to save the settings after each step. For procedures, refer to the Agile Product Lifecycle Management Administrator Guide.
Table 3-2 Privileges and Privilege Masks
| Privilege | Privilege Mask Name | Applied Criteria |
|---|---|---|
|
Checkin |
Test_Check_in |
All File Folders |
|
Checkout |
Test_Check_out |
All File Folders |
|
Delete |
Test_Delete |
All File Folders |
|
Discovery |
Test_Discovery |
All File Folders |
|
Import |
Test_Import |
NA |
|
Modify |
Test_Modify |
All File Folders |
|
Read |
Test_Read |
All File Folders |
|
Checkin |
Test_Check_in |
All File Folders |
|
Checkout |
Test_Check_out |
All File Folders |
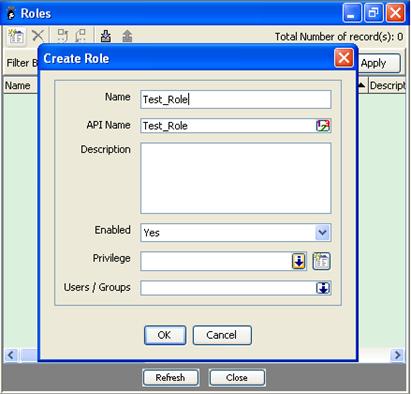
In Admin, select User Settings > Roles > New button. The Create Role dialog appears.
In Create Role dialog, define a role called Test_Role and click the down arrow in the Privilege field. The Select Privileges dialog opens.
In Select Privileges dialog, locate the privileges you defined earlier (They all had Test_ in their names).
Make your selection and then click OK.
The user Test_Admin created in "Assigning Roles and Privileges" can set and save Import preference settings as follows:
Log in to Web Client as Test_Admin
In the Tools drop-down menu select Import.
In the lower left corner, click Preferences. The Import Preferences dialog opens.
In Import Preferences check the Persist preference settings to be shared by other users box.
|
Note: Verify these settings will persist, log off and log back on as Test_Admin. |
To create a new object in the PLM system, you must specify the subclass of the object. Every Agile PLM system can be configured to have different subclasses. To simplify the importing of new objects, you can specify the default subclass to use for each object type that can be imported. If the subclass is not specified by one of the mapped fields (such as Parts Class > Title Block > Part Type), the Import Wizard creates the new object using the default type.
The default type is also used when the Import Wizard automatically creates parent items for BOMs, AMLs, and Published Price Lines data.
To set default types for the Import Wizard:
Click the Preferences button in the bottom left corner of the Import Wizard. The Import Preference page opens.
Select Import Preference > Default Types.
Specify default subclasses for each object type, and then click Save.
An AutoNumber source is a predefined, consecutive sequence of positive integers that is used to automatically number objects for many Agile classes. The Import wizard enables you to set AutoNumber sources for the subclasses of the following Base Classes when the Number field is not required, or it is not provided in the source data.
Items
Quality Change Requests
Customers
Substances
Part Groups
Prices
Declarations
Specifications
Suppliers
Other Base Classes such as Quality Change Requests that have more than one subclass, the Wizard will assign a number to each imported Quality Change Requests and the same number to its subclasses that require a number. In this case, SCAR # and Vendor Qual #. Other fields such as Audit Number, CAPA Number and External Audit Number are already available and imported for each Quality Change Requests.
|
Note: The Agile PLM administrator defines AutoNumber sources in the Java Client. If these new objects are PSR Affected Items, see "Importing PSR Affected Items." |
To set default AutoNumber sources for the Import wizard:
In Import Wizard, select Preferences in the bottom left corner of the Wizard. The Import Preferences page opens.
In the Base Class drop-down list, select the Base Class and any sub class fields complete the fields that require input and select the fields that are available for selection.
|
Important: For example, for the Issues Base Class, you must complete the FQA Issue, First Article Inspection, and Test Yield Report fields. Similarly, for the Items Base Class, in addition to fields that you must complete, in the Document field, you must select from Document Number, Go No Go #, or Temp Number. The Go No Go # is populated by the AutoNumber source for each imported record and the Document Number and Temp Number values are imported for each imported Items record. |
Click Save.
To set default AutoNumber sources for the Import wizard:
Click the Preferences button in the bottom left corner of the Import Wizard. The Specify Preference Settings window appears.
Select AutoNumber Sources.
Specify default AutoNumber sources for each class, and then click OK.