Setting Up the Electronic Product Code Information Services Repository
This chapter covers the following topics:
- Understanding the Electronic Product Code Information Services Repository Setup Process
- Maintaining Electronic Product Code Information Services Preferences
- Maintaining Policies
Understanding the Electronic Product Code Information Services Repository Setup Process
Before you can capture Electronic Product Code Information Services (EPCIS) events and post them to the EPCIS repository or query the EPCIS repository you must first set up the EPCIS repository preferences and policies. The EPCIS Capture and the EPCIS Query web services use this setup information during their processing of data.
For more information on the Capture and Query web services, see Web Services and PL/SQL Services Overview.
Setting Up the EPCIS Repository
Follow this high-level process flow to set up the EPCIS repository:
-
Set up EPCIS Preferences.
For more information, see Maintaining EPCIS Preferences.
-
Create EPCIS policies.
For more information, see Maintaining Policies.
Maintaining Electronic Product Code Information Services Preferences
Before you can begin to interact with the Electronic Product Code Information Services (EPCIS) repository you must first set up EPCIS preferences. Use the Maintain EPCIS Preferences page to define the preferences used by the EPCIS Capture web service when capturing and storing data in the EPCIS repository and the EPCIS Query web service when querying the EPCIS repository.
Use these procedures to view, set, and modify EPCIS preferences:
-
Navigate to the Maintain EPCIS Preferences page.
Maintain EPCIS Preferences page
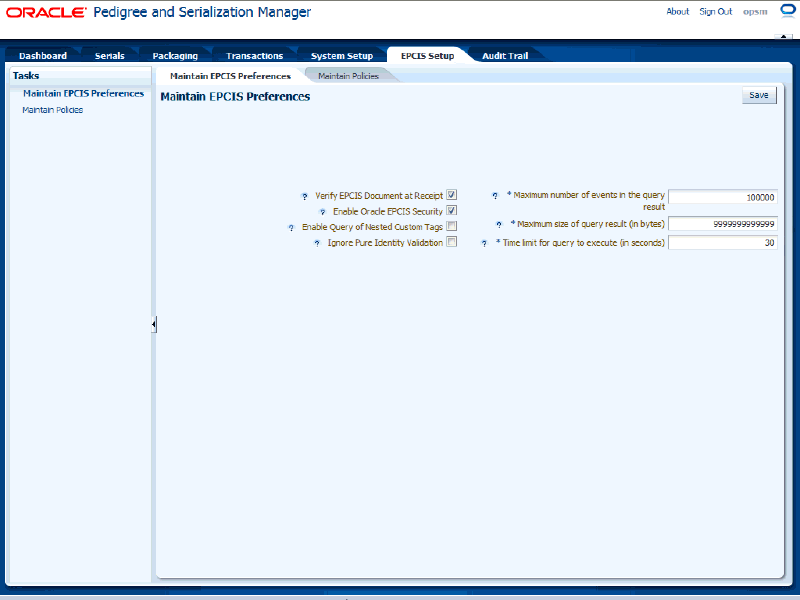
The Maintain EPCIS Preferences page appears displaying the current settings for the EPCIS preferences.
-
View the EPCIS preferences and their current settings.
-
Navigate to the Maintain EPCIS Preferences page.
Maintain EPCIS Preferences page
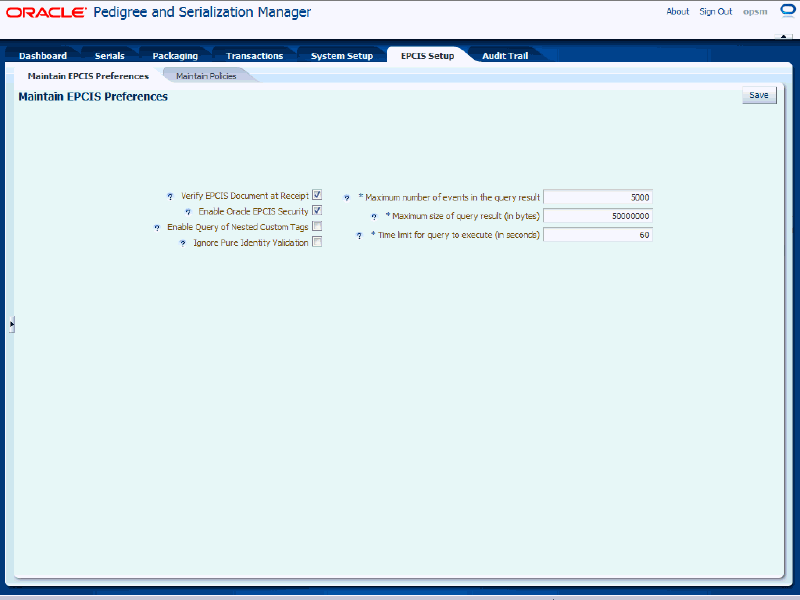
-
Select the settings for the following preferences:
Field Name Description Verify EPCIS Document at Receipt check box (Optional) Select this check box, if you want the EPCIS event sent into the EPC Capture web service to be validated against EPCglobal's XSD prior to any additional processing taking place. Note: The event is always validated and this check box just controls the timing of that validation. If this check box is unchecked, and the format is invalid, the system throws an error when it gets to the invalid section of the XSD. Having the validation happen up front can potentially increase performance.
Enable Oracle EPCIS Security check box (Optional) Select this check box, if you want the system to check for EPCIS policies to verify that the user has access to the data being queried. Enable Query of Nested Custom Tags check box (Optional) Select this check box, if the system allows the query of data in nested custom tags provided in the file extension. Ignore Pure Identity Validation check box (Optional) Select this check box, if you want the system to not validate that the EPC codes provided are in compliance with the GS1 standard. Maximum number of events in the query result Enter the number of events that can be returned in one query. If the number of events returned by the query exceeds this value, the result is not returned.
50 appears by default.
If you enter zero or a negative value upon saving the system changes the value back to the default value. Zero and negative values are not allowed.Maximum size of query result (in bytes) Enter the file size in bytes that can be returned in one query. If the size of the file exceeds this value, the result is not returned.
50000000 appears by default.
If you enter zero or a negative value upon saving the system changes the value back to the default value. Zero and negative values are not allowed.Time limit for query to execute (in seconds) Enter the allowed duration in seconds for processing a query. If the processing time exceeds this value, the result is not returned.
30 appears by default.
If you enter zero or a negative value upon saving the system changes the value back to the default value. Zero and negative values are not allowed.
-
Navigate to the Maintain EPCIS Preferences page.
-
Modify any of the preferences.
-
Click the Save button.
Maintaining Policies
Use the Maintain Policies page to define the policies and there associated users used by the Electronic Product Code Information Services (EPCIS) Query web service when querying the EPCIS repository. You only have to set up policies if the Enable Oracle EPCIS Security check box is selected on the Maintain EPCIS Preferences page. These policies determine which data an external user has the ability to access through the EPCIS Query web service.
Use these procedures to search for (basic and advanced), view, create, edit, and delete policies:
To Search for Policies (Basic Search)
-
Navigate to the Maintain Policies page.
Maintain Policies page (Basic Search)
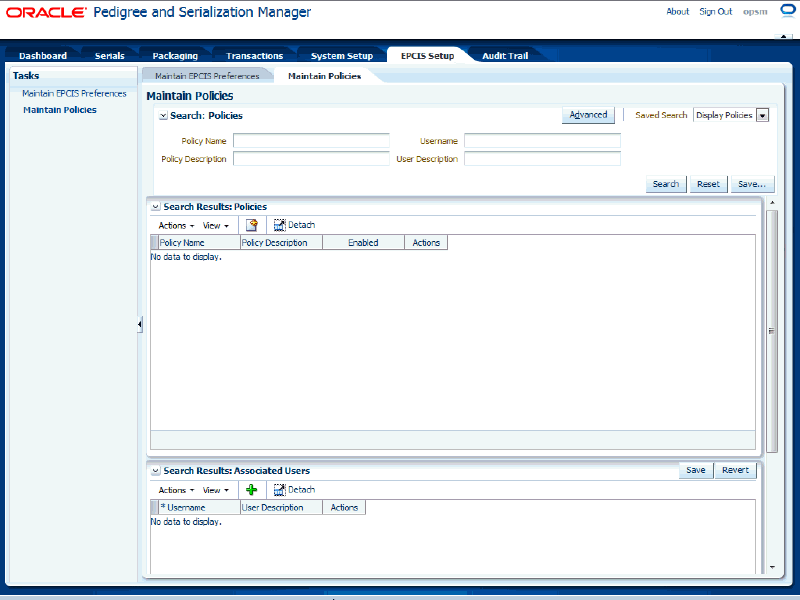
-
In the Search: Policies region, enter the search criteria for the policies using one or more of these fields:
Field Name Description Policy Name (Optional) Enter the policy name. Policy Description (Optional) Enter the policy description. Username (Optional) Enter the username associated with the policy. User Description (Optional) Enter the description for the user associated with the policy. Otherwise, you can click the Search button without entering any search criteria and all available policies appear.
-
Click the Search button.
Maintain Policies page (Basic Search)
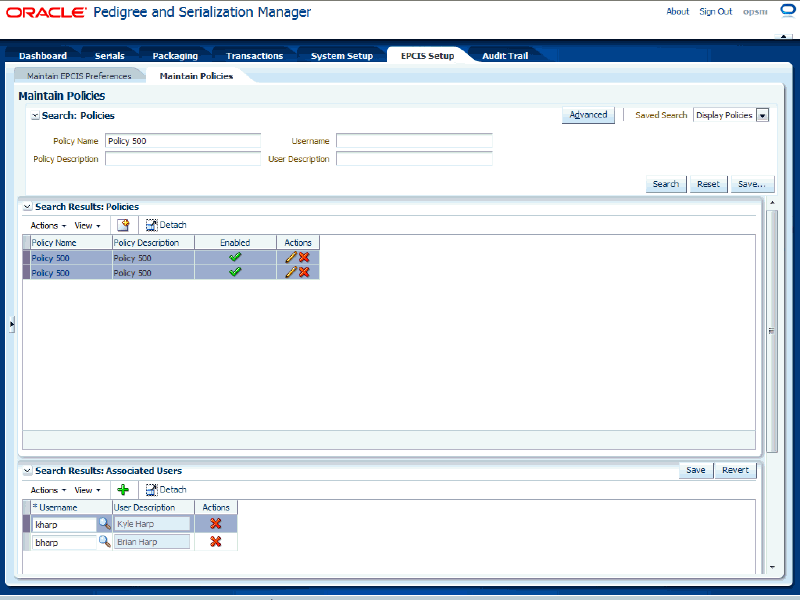
All of the policies that match the search criteria appear in the Search Results: Policies region in a table format.
Plus, the Search Results: Associated Users region appears at the bottom of the page. Using this region you can view and maintain the users associated to the policies. When you select a policy in the Search Results: Policies table the system automatically displays the users associated to that policy in the Search Results: Associated Users region.
Users are created using the Maintain Users page.
For information on creating users, see Maintaining Users.
-
Click the Advanced button to perform an advanced search.
To Search for Policies (Advanced Search)
-
Navigate to the Maintain Policies page.
-
Click the Advanced button.
Note: Clicking the Advanced or Basic button keeps the values in the base criteria fields.
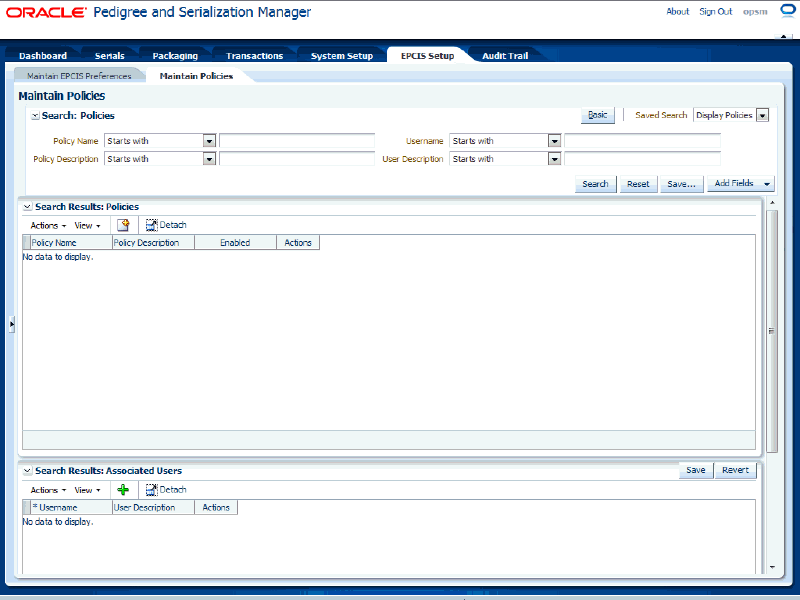
Maintain Policies page (Advanced Search)
-
In the Search: Policies region, enter the search criteria for the policies using one or more of these fields:
Field Name Description Policy Name (Optional) Select the field operator and then enter the policy name.
Operators are:-
Starts with
-
Ends with
-
Equals
-
Does not equal
-
Less than
-
Greater than
-
Less than or equal to
-
Greater than or equal to
-
Between
-
Not between
-
Contains
-
Does not contain
-
Is blank
-
Is not blank
Policy Description (Optional) Select the field operator and then enter the policy description.
The field operators are the same as that for the Policy Name field.Username (Optional) Select the field operator and then enter the username associated with the policy.
The field operators are the same as that for the Policy Name field.User Description (Optional) Select the field operator and then enter the description for the user associated with the policy.
The field operators are the same as that for the Policy Name field.Otherwise, you can click the Search button without entering any search criteria and all available policies appear.
-
-
(Optional) To enter additional search criteria fields, click the Add Fields button and select the field you would like to add to the search criteria.
The selected field appears as a search criteria field.
Note: To remove the additional field, click the Remove icon next to the field. The field is removed from the search criteria.
-
(Optional) Enter search criteria for the additional fields.
-
Click the Search button.
Maintain Policies page (Advanced Search)
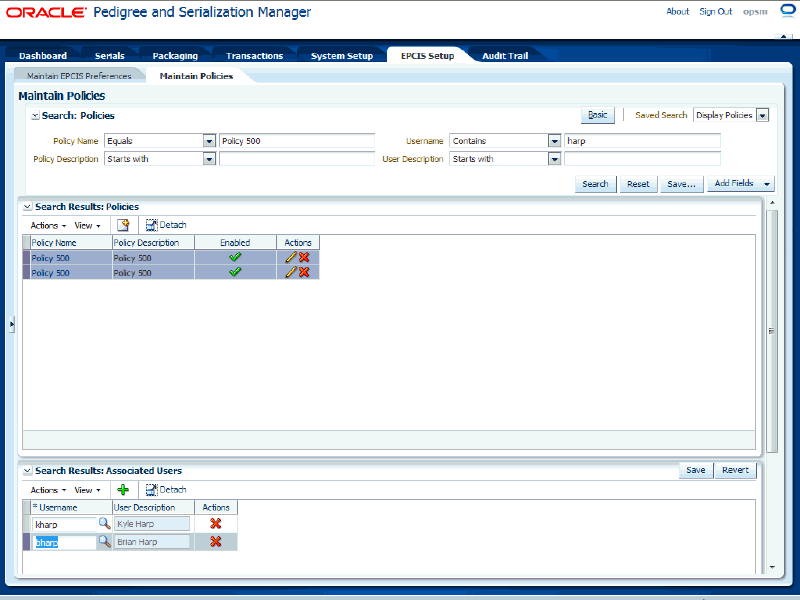
All of the policies that match the search criteria appear in the Search Results: Policies region in a table format.
Plus, the Search Results: Associated Users region appears at the bottom of the page. Using this region you can view and maintain the users associated to the policies. When you select a policy in the Search Results: Policies table the system automatically displays the users associated to that policy in the Search Results: Associated Users region.
Users are created using the Maintain Users page.
For information on creating users, see Maintaining Users.
To View Policies
-
Navigate to the Maintain Policies page.
-
Enter search criteria for the policies you want to view and click the Search button.
All of the policies that match the search criteria appear in the Search Results: Policies table.
-
Click the Policy Name link for the policy in the table that you want to view.
View Policy page
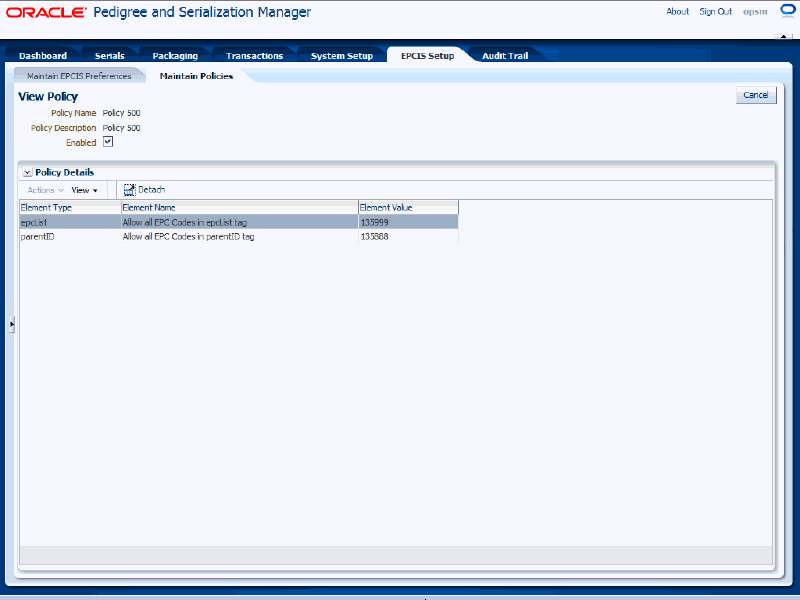
The View Policy page appears displaying the policy details.
-
Navigate to the Maintain Policies page.
-
Select Create from the Actions menu or click the Create Policy icon located at the top of the Search Results: Policies region.
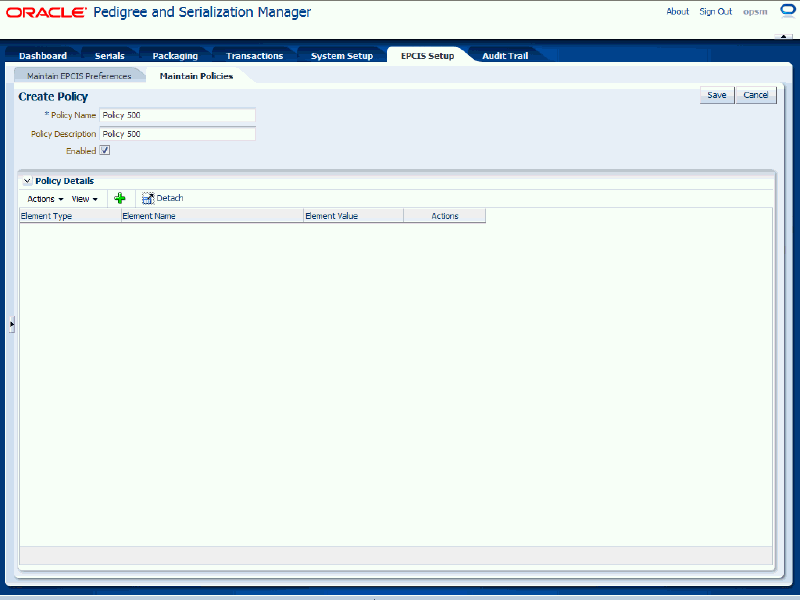
Create Policy page
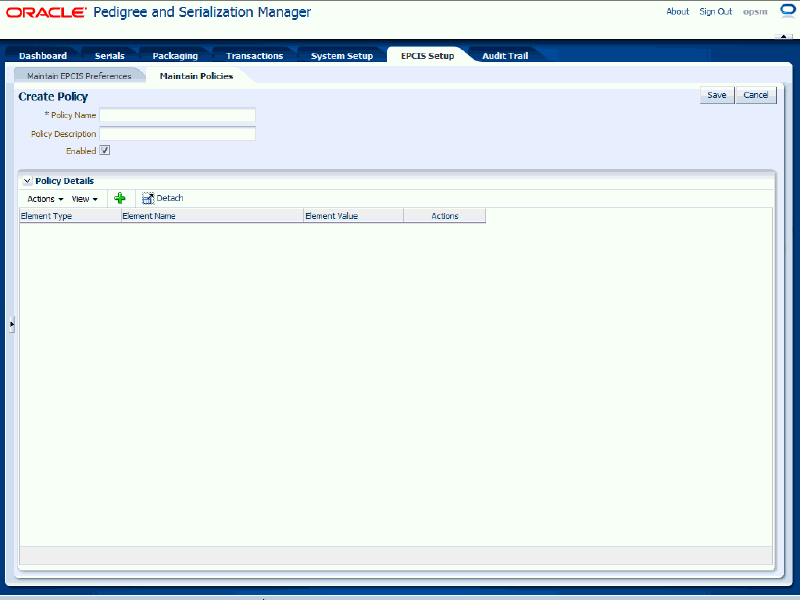
The Create Policy page appears.
-
Enter the following information:
Field Name Description Policy Name Enter the name of the policy. Policy Description (Optional) Enter a description of the policy. Enabled check box Select this check box to enable the policy for use. This check box appears selected by default. Create Policy page
-
Add policy details.
-
Select Add from the Actions menu or click the Add Policy Element icon located at the top of the Policy Details region.
Create Policy page
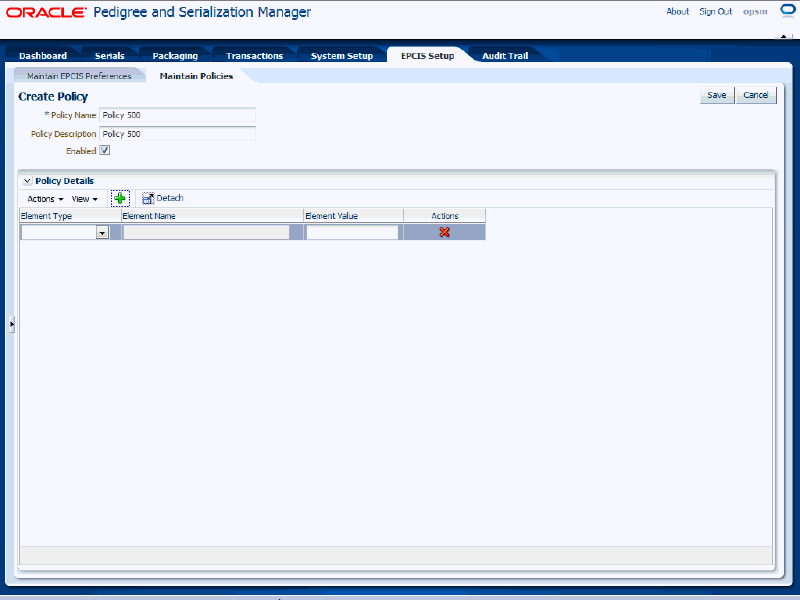
A new row appears in the Policy Details table.
-
Enter the following information:
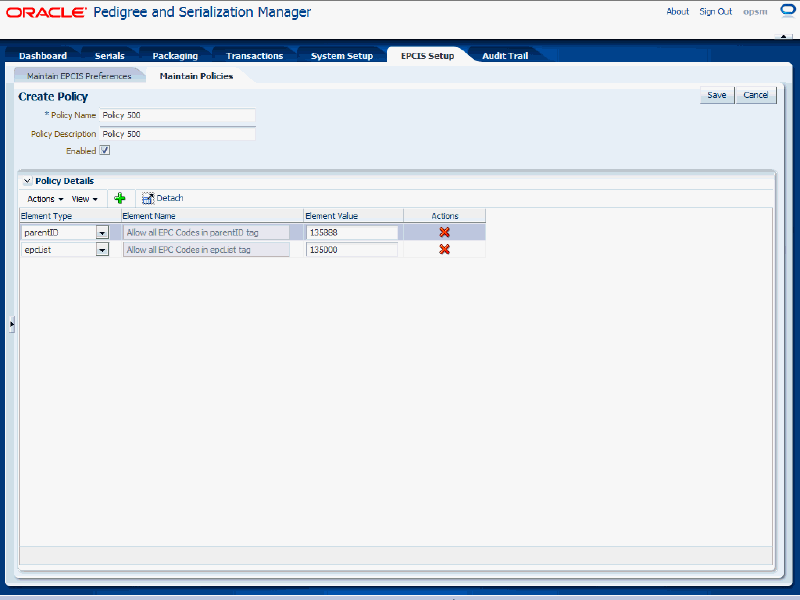
Field Name Description Element Type Select the type of element you want to add to the policy. Element Types are: -
parentID (Allow all EPC codes in parentID tag)
-
epcList (Allow all EPC codes in epcList tag)
-
noepc (Allow all entries without EPC codes)
-
childEPCs (All EPC codes in childEPCs tag)
-
epcClass (Allow all EPC codes in epcClass tag)
Element Name The name of the element displays after you select an Element Type. You cannot update this field. Element Value Enter an element value. Values must be a 6-12 digit number or an asterisk (*). -
-
Repeat steps 1 through 2 until you have added all of the policy details for the policy.
Note: At least one Policy Detail record is required for each policy.
Create Policy page
-
Select the policy detail (Element Type, Element Name, and Element Value) that you want to delete in the table.
-
Select Delete from the Actions menu or click the Delete Policy icon associated with the policy detail in the Action column of the Policy Details table.
The policy detail row is deleted from the policy.
-
-
Click the Save button to save the policy and to return back to the Maintain Policies page.
To Add Users to a Policy
Before you can add users to a policy you must have already created the users.
For information on creating users, see Maintaining Users.
-
Navigate to the Maintain Policies page.
-
Enter search criteria for the policies you want to add users to and click the Search button.
Maintain Policies page
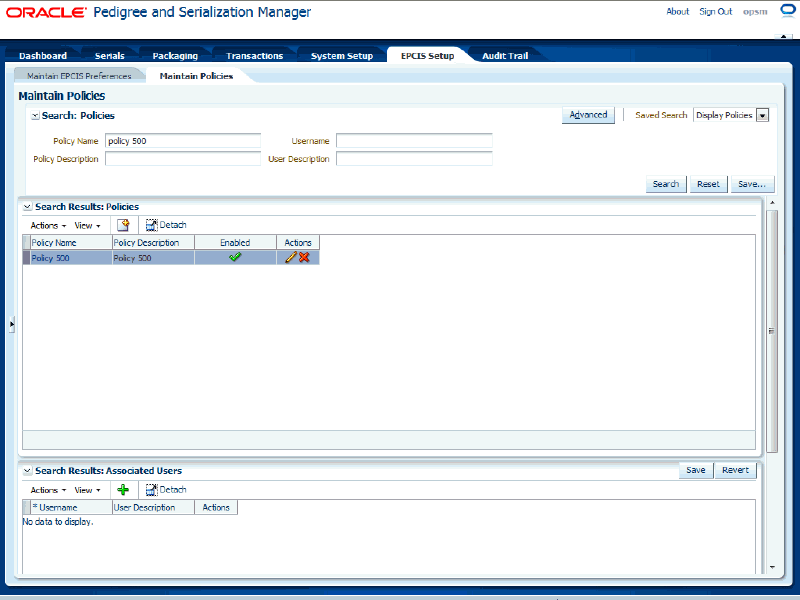
All of the policies that match the search criteria appear in the Search Results: Policies table.
-
Select the policy in the table that you want to add users to.
The Search Results: Associated Users region displays the users that are associated to the policy that you selected. If there are no users associated to the policy the region does not contain any information.
-
Select Add from the Actions menu or click the Add User (“+” plus sign) icon located at the top of the Search Results: Associated Users region.
Maintain Policies page
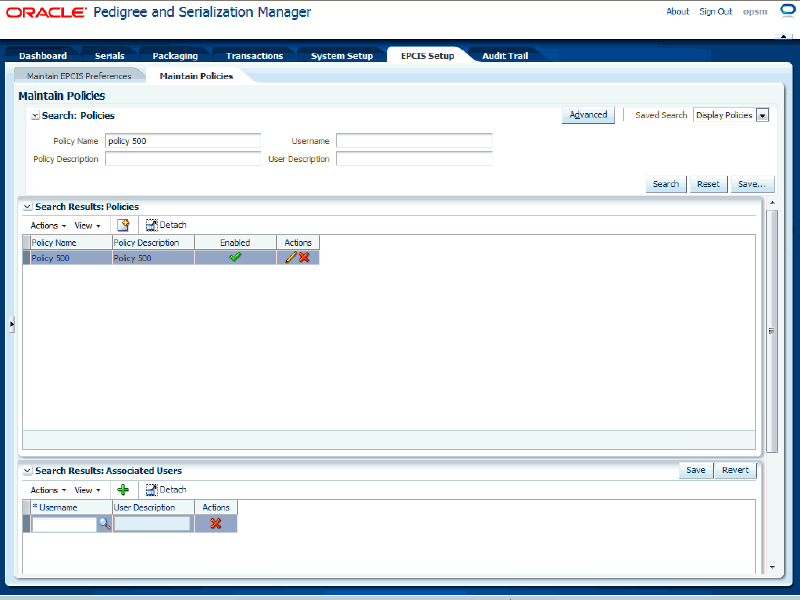
A blank row appears in the associated users table.
-
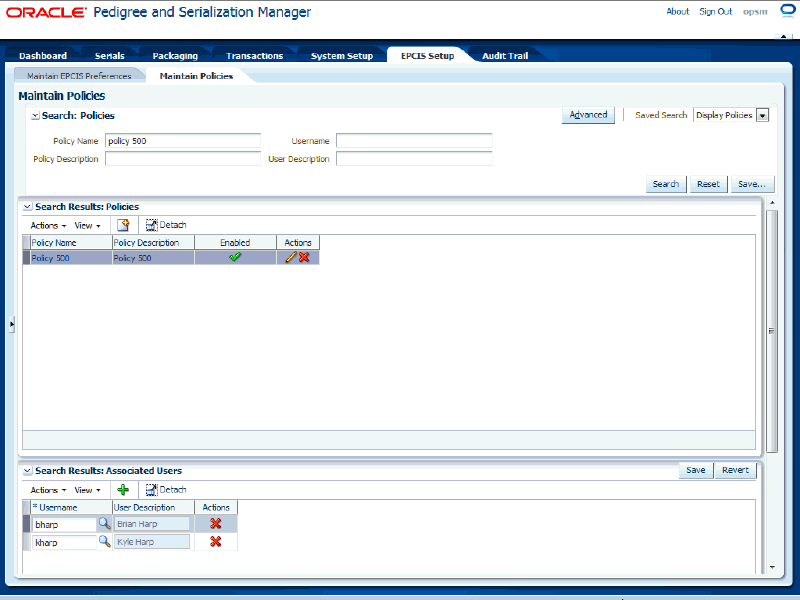
Select the user you want to associate to the policy in the Username field.
After you select a username, the User Description field appears by default from the username you selected.
-
Repeat steps 4 through 5 until you have associated all of the users that you want to the policy.
Maintain Policies page
-
Click the Save button.
-
Navigate to the Maintain Policies page.
-
Enter search criteria for the policies you want to edit and click the Search button.
All of the policies that match the search criteria appear in the Search Results: Policies table.
-
Select the policy in the table that you want to edit.
-
Select Edit in the Actions menu or click the Edit Policy icon associated with the policy in the Actions column of the results table.
Edit Policy page
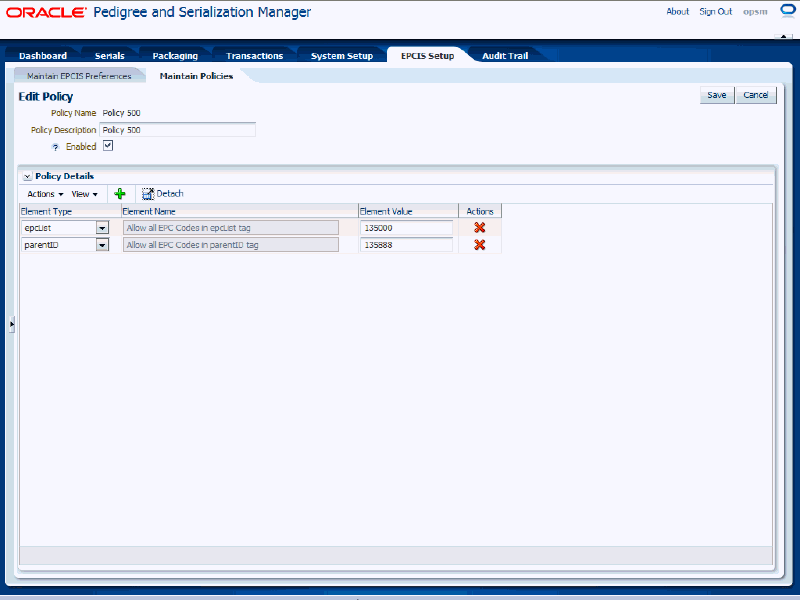
The Edit Policy page appears displaying all of the existing information for the policy.
-
Edit the policy.
-
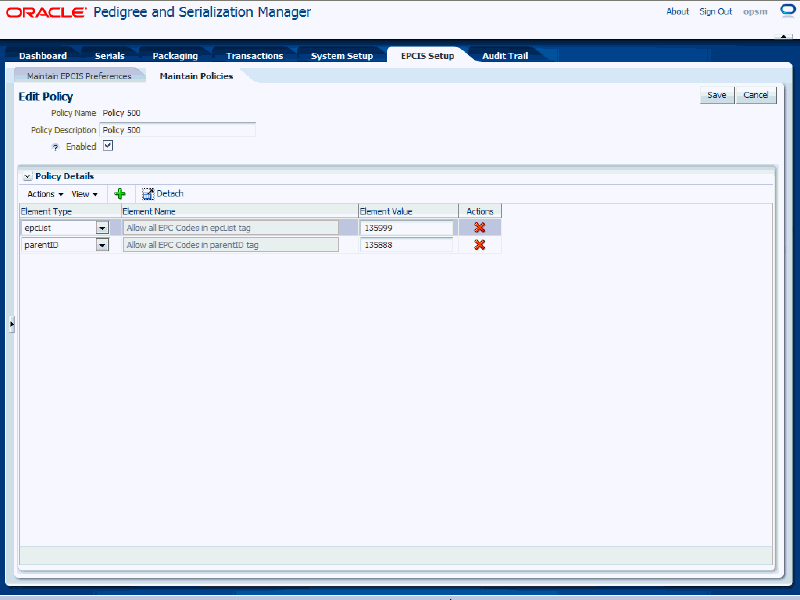
Modify any of the existing details associated with the policy.
Edit Policy page (Element Value Changed)
-
Select Add in the Actions menu or click the Add Policy Element icon located at the top of the Policy Details region.
-
Add the additional policy information.
-
Select Delete in the Actions menu or click the Delete Policy icon associated with a policy detail in the Actions column of the Policy Details table.
-
Click the Yes button to confirm
-
-
Click the Save button to save the changes you made to the policy information and to return back to the Maintain Policies page.
Note: At least one Policy Detail record is required for each policy.
-
Navigate to the Maintain Policies page.
-
Enter search criteria for the policies you want to delete and click the Search button.
All of the policies that match the search criteria appear in the Search Results: Policies table.
Note: You cannot delete a policy if it is has users associated to it. You either need to delete the associated users or assign a new policy to the users and then you can delete the policy.
For more information on deleting users associated to a policy, see Procedure: To Delete Users Associated to a Policy.
-
Select the policy in the table that you want to delete.
-
Select Delete in the Actions menu or click the Delete Policy icon associated with the policy in the Actions column of the results table.
The system displays a message stating are you sure you want to delete this policy?
-
Click the Yes button.
The policy is deleted from the system.
To Delete Users Associated to a Policy
-
Navigate to the Maintain Policies page.
-
Enter search criteria for the policies you want to delete users from and click the Search button.
All of the policies that match the search criteria appear in the Search Results: Policies table.
-
Select the policy in the table that you want to delete users from.
The Search Results: Associated Users region displays the users that are associated to the policy. If there are no users associated to a policy the region does contain any information.
-
Select the user in the Search Results: Associated Users region table that you want to delete.
-
Select Delete from the Actions menu or click the Delete icon associated to the user in the Actions column of the associated users results table.
A message appears asking if you are sure you want to delete this user from the policy.
-
Click the Yes button.
The user is deleted from the policy.