10 Managing Networks

Use the Web Console to view, create, update, and delete networks on your Oracle Database Appliance.

Topics:

Related Topics

Viewing Configured Networks

Use the Oracle Appliance Manager Web Console to display a list of configured networks and network details.

  1. Open a browser and enter the following URL to launch the Web Console:
    https://ip-address:7093/mgmt/index.html
  2. Enter the following credentials:
    • User name: oda-admin
    • Password: welcome1
  3. Click the Network tab.Description of GUID-3C6BDF69-80D8-4C8F-8B09-899AA2EB27D7-default.png follows
    Description of the illustration GUID-3C6BDF69-80D8-4C8F-8B09-899AA2EB27D7-default.png
    You can view network details, create a new network, update an existing network, and delete a network.

Creating a Network

Use the Oracle Appliance Manager Web Console to create networks in Oracle Database Appliance.

The Web Console provides a quick and easy method of creating networks. You can create the following types of networks: Public, Private, Dataguard, Backup, and Other.
  1. Open a browser and enter the following URL to launch the Web Console:
    https://ip-address:7093/mgmt/index.html
  2. Enter the following credentials:
    • User name: oda-admin
    • Password: welcome1
  3. Click the Network tab.
  4. Click Create Network to display the Create New Network page.
  5. Enter the following information on the Create New Network page to configure the network:
    1. In theIP Address field, enter the network’s IP address.
    2. In the Interface field, select an interface from the menu.
    3. In the Subnet Mask field, enter the subnet mask.
    4. In the Network Type field, select an option from the drop-down list. The options are: Public, Private, Dataguard, Backup, and Other.
    5. In the Gateway field, enter the gateway. The gateway is required for the default network.
    6. For the Default Network, select Yes or No to identify whether or not the network is the default network.

    In this example the fields are completed to create a new Other type network that uses an sfpbond1 interface with a defined IP address, subnet mask, and gateway.

    Description of GUID-DEAB1F57-68F6-41B0-AD5A-E10CBCEA10BF-default.png follows
    Description of the illustration GUID-DEAB1F57-68F6-41B0-AD5A-E10CBCEA10BF-default.png
  6. Click Create. When prompted, click Yes to confirm that you want to start the job to create the network.

Updating a Network

Use the Oracle Appliance Manager Web Console to update an existing network configuration.

  1. Open a browser and enter the following URL to launch the Web Console:
    https://ip-address:7093/mgmt/index.html
  2. Enter the following credentials:
    • User name: oda-admin
    • Password: welcome1
  3. Click the Network tab.
  4. Select Update from the Actions menu next to the network you want to update.
  5. Edit the fields, as needed, on the Update Network page to update the network configuration:
    1. In the IP Address field, enter the network’s IP address.
    2. In the Interface field, enter the name of the network interface.
    3. In the Subnet Mask field, enter the subnet mask.
    4. In the Network Type field, select an option from the drop-down list. The default is Other.
    5. In the Gateway field, enter the gateway. The gateway is required for the default network.
    6. For the Default Network, select Yes or No to identify whether or not the network is the default network.
  6. Click Update. When prompted, click Yes to confirm that you want to start the job to update the network.

Deleting a Network

Use the Oracle Appliance Manager Web Console to delete a specific network.

Note:

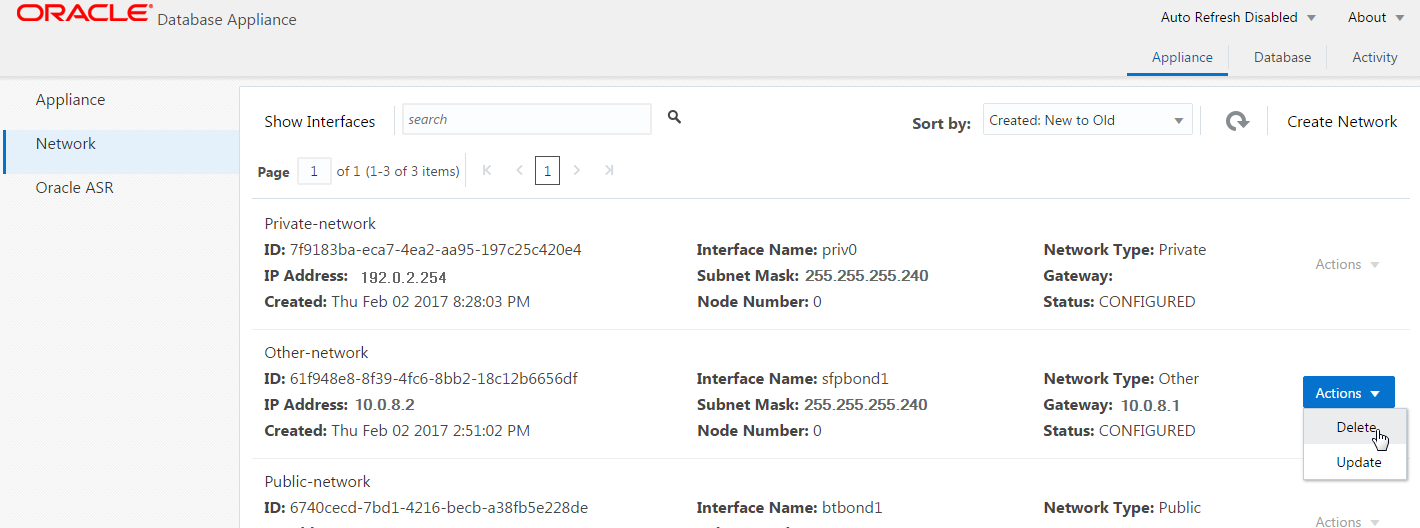
You can only delete networks that are not public or private networks. The delete option is disabled for the private and public networks.
  1. Open a browser and enter the following URL to launch the Web Console:
    https://ip-address:7093/mgmt/index.html
  2. Enter the following credentials:
    • User name: oda-admin
    • Password: welcome1
  3. Click the Network tab.
  4. Select Delete from the Actions menu next to a network entry.