A STA Graphical Installer, Upgrade, and Deinstaller Screen Reference
This chapter includes the following sections:
Graphical-mode Display Requirements
The STA graphical-mode installer, upgrade, and deinstaller require X Window System, version 11 (X11). X11 configuration is outside the scope of this guide; however, the following general guidelines apply. For additional information, contact your system administrator.
For you to run the graphical-mode installer, upgrade, and deinstaller, the X11 service must be running on the STA server and configured to allow X11 forwarding. If Linux was installed as instructed in Chapter 2, "Installing Linux," these conditions should already be met.
In addition, X11 authorizations and display must be set correctly for the Oracle user. This is handled differently depending on whether you are logging in through a local or remote connection.
See the following sections for details.
Note:
Response time for remote connections depends on your network and VPN configurations and performance.Note:
When you launch the STA graphical installer, the Oracle Universal Installer displays messages in the terminal window as it performs some basic environment checks. These are only minimal checks, and requirements for running the STA graphical installer may exceed them.Local Connections
For direct connections to the STA server, you must log in as the Oracle user and then set the DISPLAY variable manually. For example:
$ export DISPLAY=hostname:0.0
You may also need to verify that the Oracle user has the proper X11 authorization. Contact your Linux administrator for assistance.
Remote Connections Using a Secure Shell (SSH)
If you use a secure shell (SSH) with X11 forwarding enabled, X11 authorization and display are handled automatically for the login user. For example, if you use this method and log in as oracle, the SSH service on the STA server automatically sets up the proper X11 authorization and display for the oracle user. You should not set the DISPLAY variable manually.
However, if you log in as a different user (root, for example) and then su to oracle, the X11 authorizations and display will not be set correctly for the oracle user and you must set them manually. Instructions for doing this are outside the scope of this guide; contact your Linux administrator for assistance.
Connecting From a Linux Machine
To enable X11 forwarding on a Linux machine, use the ssh command with the –X or –Y options. For example:
$ ssh –X oracle@sta_server
Connecting From a Microsoft Windows PC
Your PC must be running an X11 server, such as Xming or Cygwin/X, and an SSH client, such as PuTTY or WinSCP. Following is a sample procedure for connecting using PuTTY:
-
Verify that the X11 server is running on your PC. Contact your system administrator for assistance, if necessary.
-
Start PuTTY, and proceed as follows:
-
In the main Session window, make the following entries:
-
In the Host Name field, type the name or IP address of the STA server.
-
In the SSH Connection type field, select SSH.
-
-
In the Category menu tree, expand Connection, then expand SSH, then select X11. In this window, make the following selections:
-
In the X11 forwarding field, select the Enable X11 forwarding check box.
-
In the Remote X11 authentication protocol field, select MIT-Magic-Cookie-1.
-
Leave the other fields blank.
-
-
Remote Connections Using Desktop Sharing
To run the STA installer through desktop sharing, both the STA server and your local computer must be running a desktop sharing application, such as VNC Server on the STA server and VNC Viewer on your local computer. In addition, your local computer must be able to connect to the STA server through a private network, such as Virtual Private Network (VPN).
Following is a sample process for connecting using VNC.
-
Install and configure the VNC Server on the STA server.
-
Install and configure the VNC Viewer on your local computer.
-
Connect to the STA server through the private network. Contact your IT administrator for instructions.
Troubleshooting Graphical Display Issues
The STA installer, upgrade, and deinstaller verify that X11 is properly configured for the Oracle user. If these prerequisite checks fail, contact your Linux system administrator for assistance. You can use the following steps to help troubleshoot problems.
-
Log in to the STA server as the Oracle user, and display the currently installed RPM packages.
$ yum list installedThe xorg-x11-util entry should be included in the displayed list. For example:
xorg-x11-utils.x86_64 7.5-6.el6
-
Display the current display settings for the Oracle user. For example:
$ echo $DISPLAY :0.0 -
Verify the display has the proper X11 configuration. For example:
$ xdpyinfo –display :0.0Example A-1 is a sample of the first part of the command output showing a properly configured display.
Example A-1 Sample Properly Configured X11 Display
$ xdpyinfo
name of display:    :0.0
version number:    11.0
vendor string:    The X.Org Foundation
vendor release number:    11300000
X.Org version: 1.13.0
maximum request size:  16777212 bytes
motion buffer size:  256
...
Example A-2 shows some examples of the command output from displays that are not configured correctly.
General Screen Layout
All STA installer, upgrade, and deinstaller screens follow the same basic layout. The main parts are illustrated and described below.
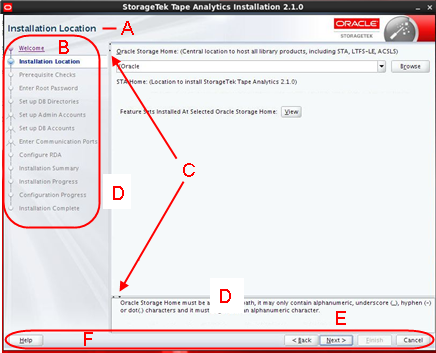
Description of the illustration ''instscrlayout.png''
| Item | Name | Description |
|---|---|---|
| A | Screen title | Title of the STA installer screen |
| B | Navigation tree | Displays your current position in the installation sequence. Screen titles become active links as you complete each screen. You can click any active link to return directly to that screen and review or change your entries |
| C | Expand and Collapse icons | Click to hide or display the Navigation tree and the Message pane. |
| D | Resize control bar | Click and drag to resize the Navigation tree or the Message pane. |
| D | Message pane | Included only on selected screens. Displays status messages relevant to processes performed on that screen. |
| E | Common buttons | The following buttons are common to all STA Installer screens:
|
How an Automatic Upgrade is Invoked
Whenever you run the STA graphical installer, it checks to see whether STA is already installed on the server and proceeds as follows:
-
If STA is not already installed, the installer proceeds in installation mode. See "STA Graphical Installer Screens" for details.
-
If STA is already installed, the installer determines whether that version of STA can be upgraded automatically or whether a manual post-installation upgrade is necessary. See "Upgrade Paths for STA 2.3.0" for details on when each type of upgrade is required.
-
If an automatic upgrade is possible, the STA installer switches to upgrade mode. See "STA Graphical Upgrade Screens".
-
If an automatic upgrade is not possible, the installer quits with an error message. To upgrade STA, you must perform a manual post-installation upgrade. See "Understanding Post-installation (Manual) Upgrades" for details.
-
STA Graphical Installer Screens
This section provides detailed reference for each screen of the STA graphical installer.
Installation and Inventory Setup
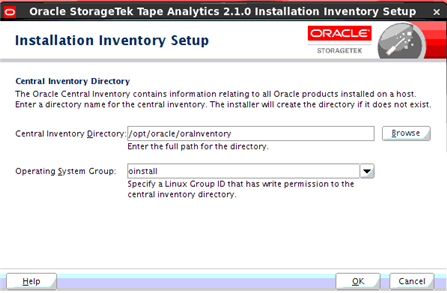
Description of the illustration ''instinventory.png''
This screen is part of the Oracle Universal Installer. The Oracle central inventory directory is used to keep track of the names and locations of all Oracle software installed on this server. All STA installation and deinstallation logs are saved automatically to this location.
If you follow the recommended practices for registering the Oracle central inventory, this screen appears only the first time you install STA on this server, and subsequent installations and upgrades automatically find the location without prompting you. See "Register the Oracle Central Inventory Location" for details.
If this screen appears after STA has already been installed at least once, either the Oracle central inventory was not registered, or the inventory pointer file has been deleted. See "Display the Oracle Central Inventory Location" for instructions on determining the correct location to enter.
Screen Fields
- Inventory Directory
-
Enter the full path to the Oracle central inventory directory. To ensure that other users in the Oracle group have access to this directory, it should be separate from the Oracle user's home directory. Home directories may not have proper permissions for the Oracle group.
The default is $USER_HOME/oraInventory. You must specify an absolute path, or click the Browse button to navigate to an existing directory.
-
If you specify an existing directory, the Oracle user must have full permissions to it.
-
If you specify a directory that does not exist, the installer will create it automatically if the Oracle user has full permissions to the parent directory.
-
- Operating System Group
-
Select the Linux group you want to designate as the Oracle group. All members of this group will be able to install Oracle software on this server.
The menu lists all groups to which the Oracle user belongs. The default is the Oracle user's primary group.
Welcome
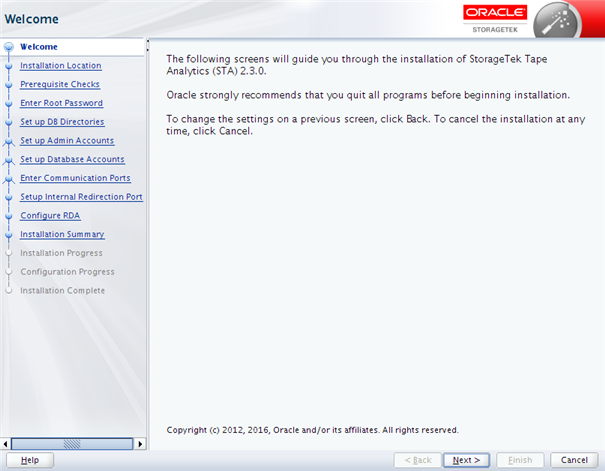
Description of the illustration ''welcome.png''
This screen provides some general information for running the STA installer. Read the text, then click Next to begin the installation.
Note:
System changes are not implemented until you have completed all the STA installer input screens and clicked Install in "Installation Summary". Anytime before then, you can return to a previous screen and modify your entries.Installation Location

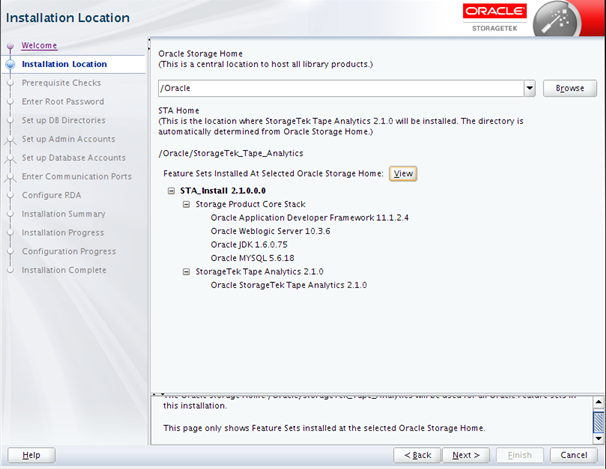
Description of the illustration ''instloc.png''
This screen allows you to specify the location where STA and associated Oracle software will be installed on the server.
To determine whether STA has already been installed in a particular location, you can enter a directory in the Oracle Storage Home field and click the View button.
-
If no STA software has been installed in that location, the list is blank.
-
If STA software has been installed, it is listed as shown in Figure A-1, "Sample Listing of Oracle Storage Home".
Screen Fields
- Oracle Storage Home
-
Enter the directory where STA and associated Oracle software will be installed. Each software package will be installed in its own subdirectory within this directory.
See Table 2-1, "Recommended File System Layout" for technical recommendations about this directory.
Depending on whether this directory already exists, the Oracle user and group must have the following permissions:
-
If the directory does exist, they must have full permissions to it.
-
If the directory does not exist, they must have full permissions to the parent directory, so the STA installer can create the Oracle Storage Home directory.
You must enter an absolute path, or click the Browse button to navigate to the directory you want to specify.
-
- STA Home
-
Display only. This is the subdirectory within Oracle Storage Home where STA will be installed. This subdirectory is assigned the name StorageTek_Tape_Analytics, and it will be created automatically during the installation.
Screen-specific Buttons
- Browse
-
Click to navigate to the directory you want to specify.
- View
-
Click to display a list of all software currently installed in the Oracle Storage Home directory you have specified. For new installations this list is blank. Figure A-1 is an example of the display after STA has been installed.
Figure A-1 Sample Listing of Oracle Storage Home
Description of ''Figure A-1 Sample Listing of Oracle Storage Home''
Prerequisite Checks
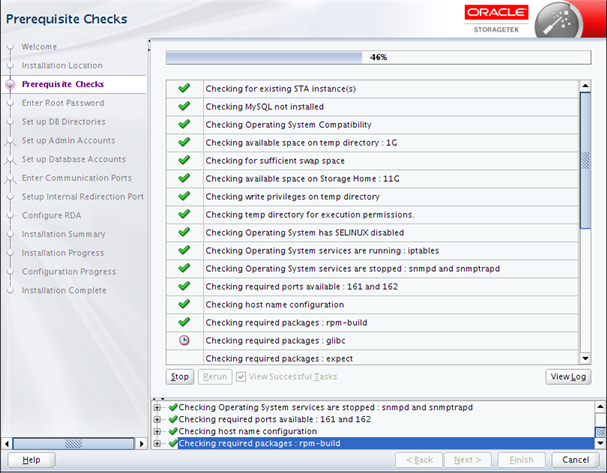
Description of the illustration ''prereqchecks.png''
The installer performs a series of tasks to verify that the server environment meets all required and recommended prerequisites. This process may take several minutes.
The possible outcomes of each verification task are as follows:
-
Success
 —The prerequisite passed successfully.
 -
Warning
 —The recommended prerequisite did not pass.
 -
Failure
 —The required prerequisite did not pass.
You cannot continue the installation if there are any Failure outcomes. Additionally, it is recommended that you resolve all Warning outcomes before continuing. You can keep the installer up at this screen while you resolve any issues, and then return and click Rerun to run the verification process again.
Depending on the nature of a prerequisite, you may need to stop a service, change user privileges, or install a yum package to resolve issues. You can use either of the following methods to display expanded detail to help you troubleshoot issues and determine what action to take:
-
Select the task in the main window. The task is highlighted in the Message pane with expanded detail. Figure A-2 is an example.
Figure A-2 Task Detail Displayed by Selecting the Task in the Main Window
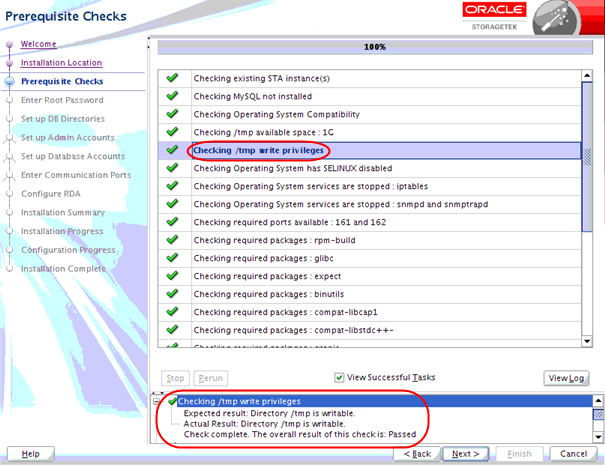
Description of ''Figure A-2 Task Detail Displayed by Selecting the Task in the Main Window''
-
In the Message pane, click the Expand (+) icon next to the task for which you want to display detail. Figure A-3 is an example. Click the Collapse (–) icon to hide the detail again.
Figure A-3 Task Detail Displayed by Selecting the Expand Icon
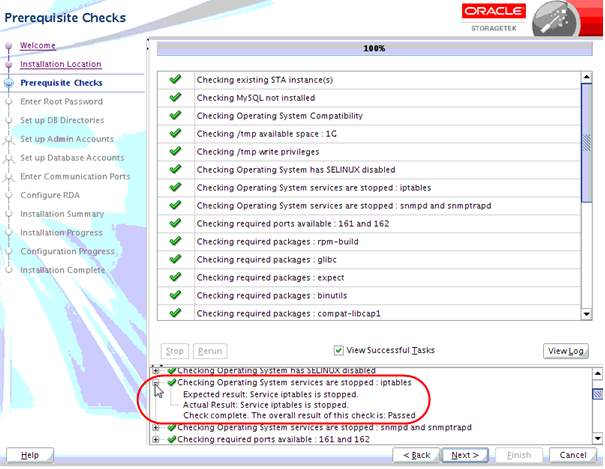
Description of ''Figure A-3 Task Detail Displayed by Selecting the Expand Icon''
Screen-specific Buttons
- Stop
-
Click to stop the verification process at the current task. You may want to do this so you can display detail for a selected task that has already completed.
- Rerun
-
Click to run the verification process again from the beginning. This allows you to resolve any Failure or Warning outcomes without exiting and restarting the STA installer.
- View Successful Tasks
-
Select the check box to include Success outcomes in the display; this is the default.
Clear the check box to display only Failure or Warning outcomes. This allows you to filter out successful tasks, so you can focus on the ones requiring attention.
- View Log
-
Click to display the prerequisite verification log in a separate window. Figure A-4 is an example. Click Close to dismiss the log window.
Figure A-4 Sample Prerequisite Verification Log Display
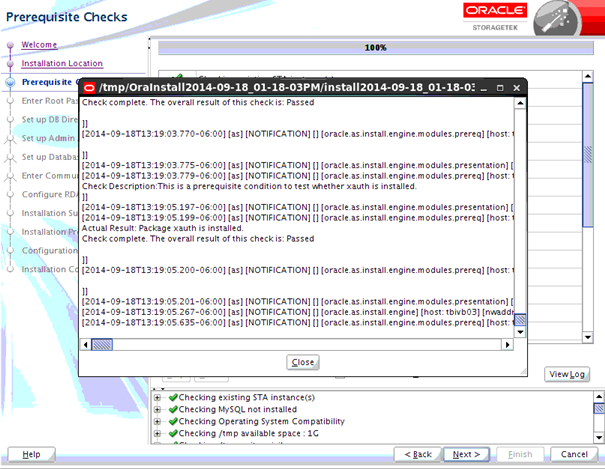
Description of ''Figure A-4 Sample Prerequisite Verification Log Display''
You can also view the log from the Linux command line. While the installer is running, logs are kept in a subdirectory within /tmp. See "STA Installation, Upgrade, and Deinstallation Logs" for details.
Enter Root Password

Description of the illustration ''rootpwd.png''
The STA installer requires system root access to perform some parts of the installation.
Set Up DB Directories
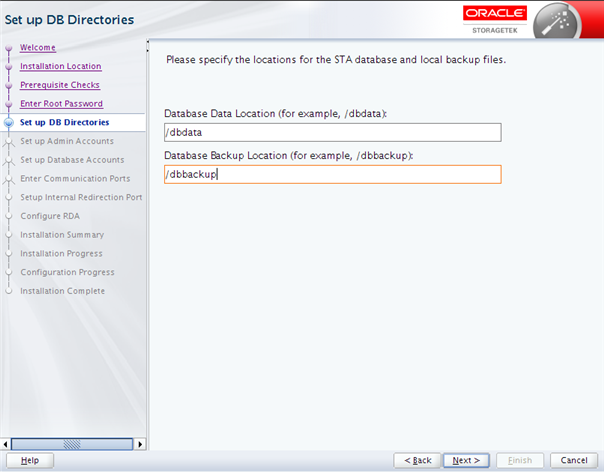
Description of the illustration ''dbdirs.png''
This screen allows you to specify locations for the STA database and local STA database backups. The STA installer will create these directories if they do not already exist.
See Table 2-1, "Recommended File System Layout" for recommendations about these locations.
See the STA Administration Guide for information on managing the database services and backups.
Screen Fields
- Database Data Location
-
Required field. Enter the directory where the STA database will be located. This directory cannot be the same as the Database Backup Location. You must specify an absolute path.
If the directory you specify already contains a database subdirectory (mysql), a warning message is displayed. You can either specify a different database location or accept the current entry, in which case the database subdirectory will be removed during the STA installation.
- Database Backup Location
-
Required field. Enter the directory where STA database backups will be located on the server. This directory cannot be the same as the Database Data Location. You must specify an absolute path.
If the directory you specify already contains a database backup subdirectory (local), a warning message is displayed. You can either specify a different backup location or accept the current entry, in which case the backup subdirectory will be removed during the STA installation.
Set Up Admin Accounts
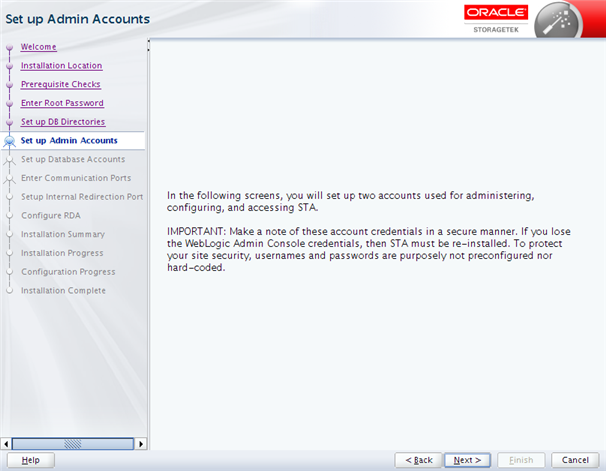
Description of the illustration ''adminacinfo.png''
This screen describes the types of information you will define on the next two screens. Read the text, then click Next to continue.
WebLogic Administrator
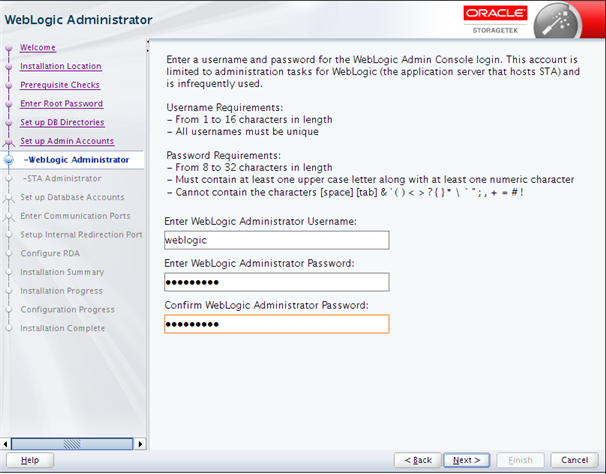
Description of the illustration ''adminwl.png''
WebLogic is the application server that hosts STA. You use the WebLogic Administrator account to log into the WebLogic administration console to configure and manage the WebLogic server. This account is used infrequently.
The account will be created during the installation with the credentials you specify.
Caution:
Make a secure record of these account credentials; if you lose them, you will not be able to log into the WebLogic administration console and STA must be re-installed.To protect your site security, usernames and passwords are purposely not preconfigured nor hard-coded.
Screen Fields
See "Username and Password Requirements" for detailed requirements.
- Enter Username
-
Type the name you want to assign to the WebLogic Administrator account.
- Enter Password
-
Type the password you want to assign to this account. The entry is masked as you type.
- Confirm Password
-
Type the password again to ensure you have entered it correctly.
STA Administrator
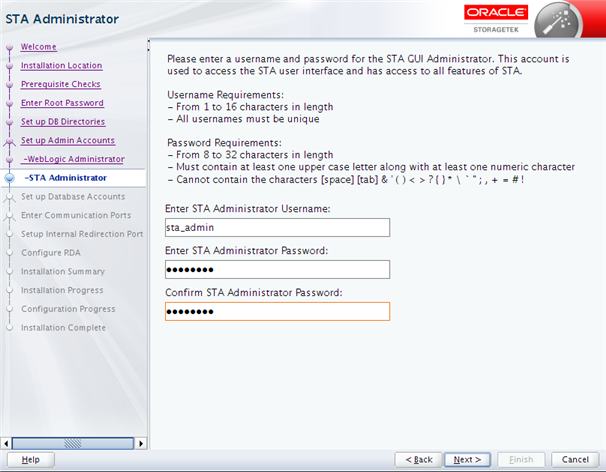
Description of the illustration ''adminsta.png''
You use the STA Administrator account to log into the STA user interface. This user has administrator privileges for the STA application and therefore access to all STA screens.
The account will be created during the installation with the credentials you specify.
Caution:
Make a secure record of these account credentials; if you lose them, you will not be able to log into the STA user interface.To protect your site security, usernames and passwords are purposely not preconfigured nor hard-coded.
Screen Fields
See "Username and Password Requirements" for detailed requirements.
- Enter Username
-
Type the name you want to assign to the STA Administrator account.
- Enter Password
-
Type the password you want to assign to this account. The entry is masked as you type.
- Confirm Password
-
Type the password again to ensure you have entered it correctly.
Set Up Database Accounts
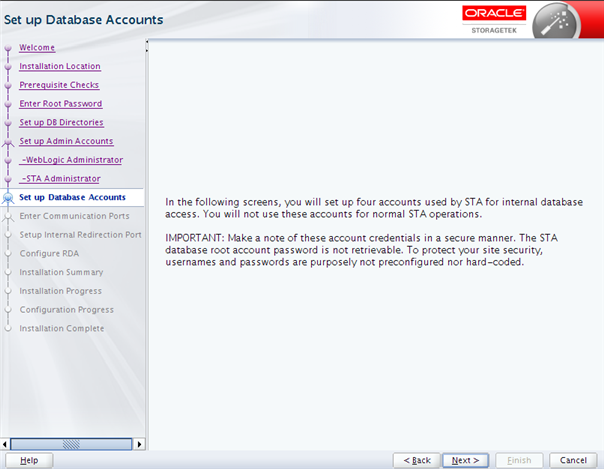
Description of the illustration ''dbacinfo.png''
This screen describes the types of information you will define on the next four screens. Read the text, then click Next to continue.
Database Root User
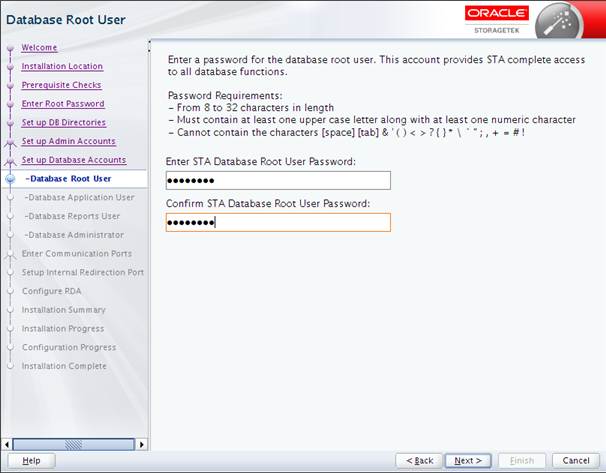
Description of the illustration ''dbacroot.png''
The STA database root user owns the STA database. This account is used internally by the STA application to create the database, and it provides full access to all database tables. You will not use this account for normal STA operations.
The username for this account is automatically set to root and cannot be changed. This is a MySQL account and is separate from the system root user. This account will be created during the installation with the credentials you specify.
Note:
Make a secure record of these account credentials.To protect your site security, usernames and passwords are purposely not preconfigured nor hard-coded.
Screen Fields
See "Username and Password Requirements" for detailed requirements.
- Enter Username
-
Type the name you want to assign to the STA database root user account.
- Enter Password
-
Type the password you want to assign to this account. The entry is masked as you type.
- Confirm Password
-
Type the password again to ensure you have entered it correctly.
Database Application User
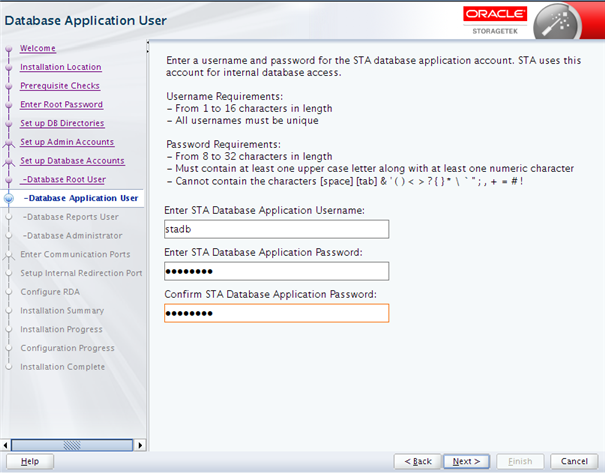
Description of the illustration ''dbacapp.png''
The STA database application account is a MySQL account used internally by the STA application to connect to and update the STA database. The account provides create, update, delete, and read access to all database tables. You will not use this account for normal STA operations.
This account will be created during the installation with the credentials you specify.
Note:
Make a secure record of these account credentials.To protect your site security, usernames and passwords are purposely not preconfigured nor hard-coded.
Screen Fields
See "Username and Password Requirements" for detailed requirements.
- Enter Username
-
Type the name you want to assign to the STA database application account.
- Enter Password
-
Type the password you want to assign to this account. The entry is masked as you type.
- Confirm Password
-
Type the password again to ensure you have entered it correctly.
Database Reports User
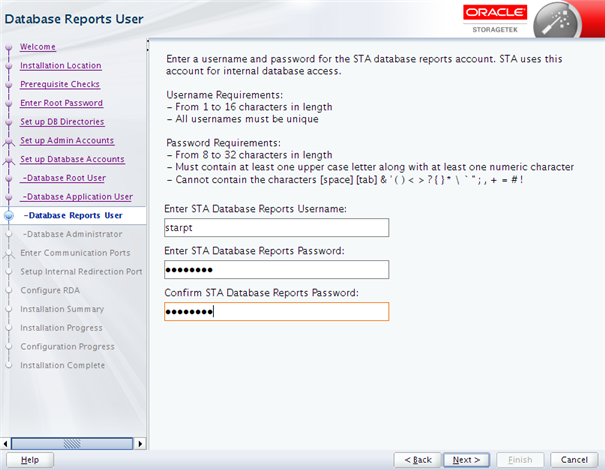
Description of the illustration ''dbacreport.png''
The STA database reports account is a MySQL account used by non-STA and third-party applications to connect to the STA database. The account provides read-only access to selected database tables. You will not use this account for normal STA operations.
This account will be created during the installation with the credentials you specify.
Note:
Make a secure record of these account credentials.To protect your site security, usernames and passwords are purposely not preconfigured nor hard-coded.
Screen Fields
See "Username and Password Requirements" for detailed requirements.
- Enter Username
-
Type the name you want to assign to the STA database reports account.
- Enter Password
-
Type the password you want to assign to this account. The entry is masked as you type.
- Confirm Password
-
Type the password again to ensure you have entered it correctly.
Database Administrator
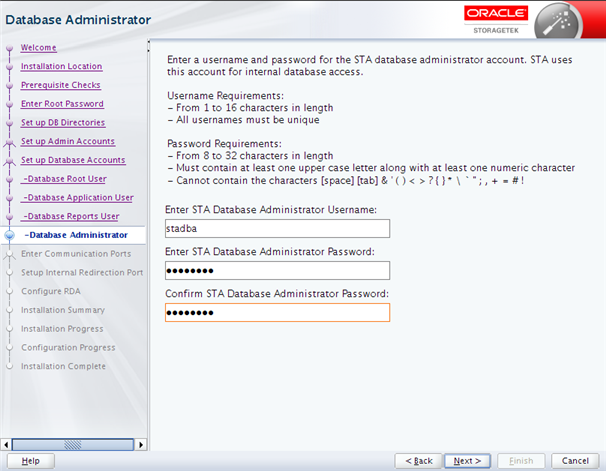
Description of the illustration ''dbacadmin.png''
The STA database administrator account is a MySQL account used internally by STA administration and monitoring utilities to connect to the STA database and configure and run scheduled backups. The account provides full access, except the "grant" option, to all database tables. You will not use this account for normal STA operations.
This account will be created during the installation with the credentials you specify.
Note:
Make a secure record of these account credentials.To protect your site security, usernames and passwords are purposely not preconfigured nor hard-coded.
Screen Fields
See "Username and Password Requirements" for detailed requirements.
- Enter Username
-
Type the name you want to assign to the STA database administrator account.
- Enter Password
-
Type the password you want to assign to this account. The entry is masked as you type.
- Confirm Password
-
Type the password again to ensure you have entered it correctly.
Enter Communication Ports
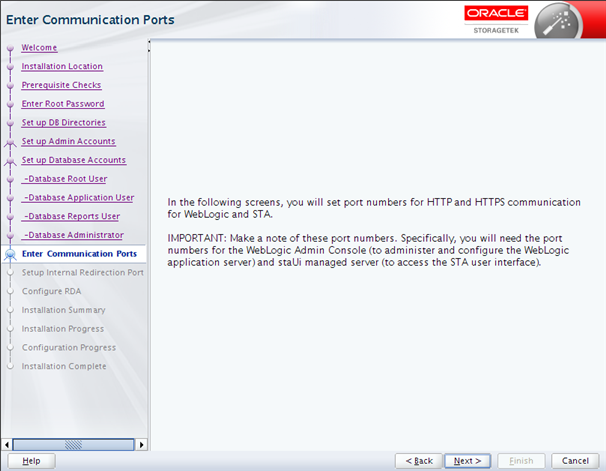
Description of the illustration ''portsinfo.png''
This screen describes the types of information you will define on the next four screens. Read the text, then click Next to continue.
You will provide values for the configurable internal and external WebLogic and STA ports. The ports will be configured and enabled during the installation with the values you specify. The port numbers you specify must be unique, and the ports must remain available and dedicated to STA.
Note:
Before completing these screens, verify the correct port number values with your network administrator. Once STA has been installed, the port numbers can only be changed using the STA Port Change Utility. See the STA Administration Guide for details.WebLogic Admin Console
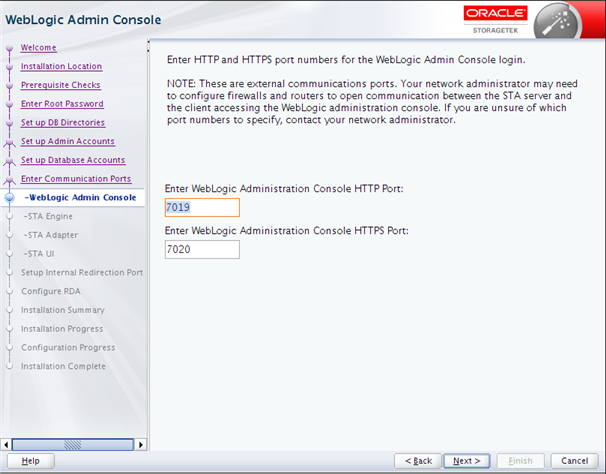
Description of the illustration ''portswl.png''
You specify the WebLogic Administrator console port number when you log into the WebLogic Administrator console, which is used to administer and configure the WebLogic application server.
Note:
These are external communication ports. Your network administrator may need to configure firewalls and routers to open communication between the STA server and the client accessing the WebLogic Administration console.Note:
Make a secure record of these port numbers. Once STA has been installed, the port numbers can only be changed using the STA Port Change Utility. See the STA Administration Guide for details.To protect your site security, these numbers are purposely not preconfigured nor hard-coded.
Screen Fields
- Enter HTTP Port
-
Enter the HTTP port number for unsecure access to the WebLogic Administrator console login. Typically this port number is 7019.
Port numbers must be unique and available.
- Enter HTTPS Port
-
Enter the HTTPS port number for secure access to the WebLogic Administrator console login. Typically this port number is 7020.
Port numbers must be unique and available.
STA Engine
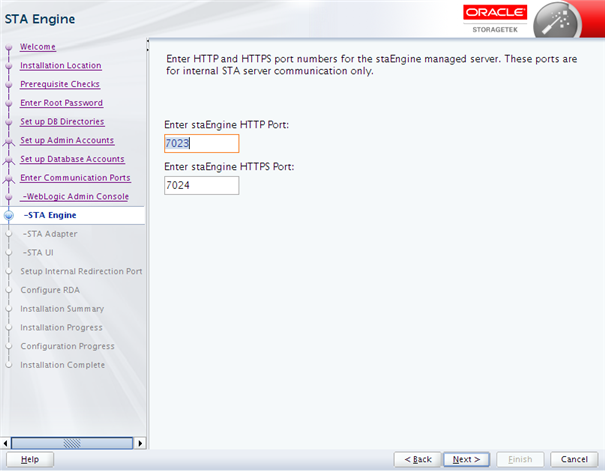
Description of the illustration ''portsstaengine.png''
The staEngine managed server ports are used for internal STA server communication only.
Note:
Make a secure record of these port numbers. Once STA has been installed, the port numbers can only be changed using the STA Port Change Utility. See the STA Administration Guide for details.To protect your site security, these numbers are purposely not preconfigured nor hard-coded.
Screen Fields
- Enter HTTP Port
-
Enter the HTTP port number for unsecure access to the staEngine managed server. Typically this port number is 7023.
Port numbers must be unique and available.
- Enter HTTPS Port
-
Enter the HTTPS port number for secure access to the staEngine managed server. Typically this port number is 7024.
Port numbers must be unique and available.
STA Adapter
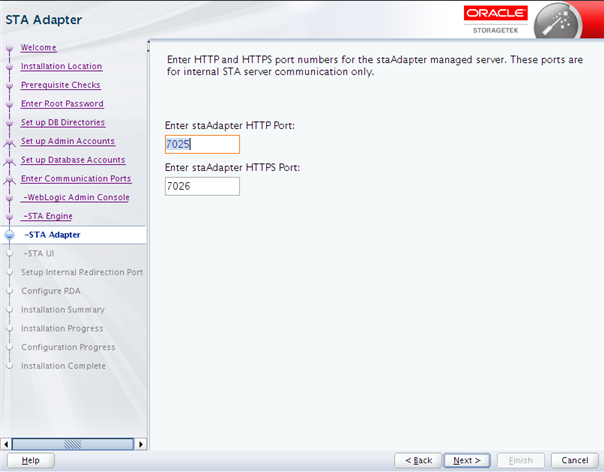
Description of the illustration ''portsstaadapter.png''
The staAdapter managed server ports are used for internal SNMP communication only.
Note:
Make a secure record of these port numbers. Once STA has been installed, the port numbers can only be changed using the STA Port Change Utility. See the STA Administration Guide for details.To protect your site security, these numbers are purposely not preconfigured nor hard-coded.
Screen Fields
- Enter HTTP Port
-
Enter the HTTP port number for unsecure access to the staAdapter managed server. Typically this port number is 7025.
Port numbers must be unique and available.
- Enter HTTPS Port
-
Enter the HTTPS port number for secure access to the staAdapter managed server. Typically this port number is 7026.
Port numbers must be unique and available.
STA UI
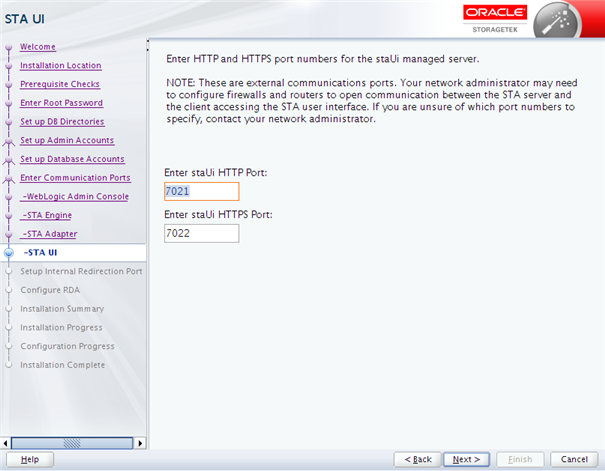
Description of the illustration ''portsstaui.png''
You specify the staUi managed server port number when you log into the STA application user interface.
Note:
These are external communication ports. Your network administrator may need to configure firewalls and routers to open communication between the STA server and the client accessing the WebLogic Administration console.Note:
Make a secure record of these port numbers. Once STA has been installed, the port numbers can only be changed using the STA Port Change Utility. See the STA Administration Guide for details.To protect your site security, these numbers are purposely not preconfigured nor hard-coded.
Screen Fields
- Enter HTTP Port
-
Enter the HTTP port number for unsecure access to the staUi managed server. Typically this port number is 7021.
Port numbers must be unique and available.
- Enter HTTPS Port
-
Enter the HTTP port number for secure access to the staUi managed server. Typically this port number is 7022.
Port numbers must be unique and available.
Set Up Internal Redirection Port
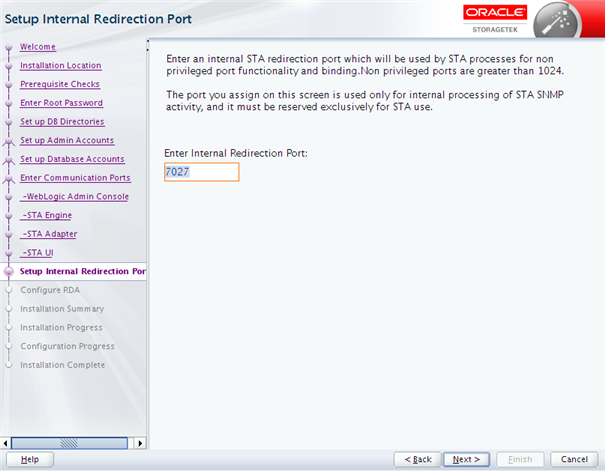
Description of the illustration ''redirectport.png''
This screen allows you to assign the internal port to which STA redirects non-privileged port functionality and binding. SNMP traps received on port 162, the standard external SNMP trap reception port, are redirected to this port for internal processing of SNMP activity. This port must be reserved exclusively for STA use.
Diagnostic Agent
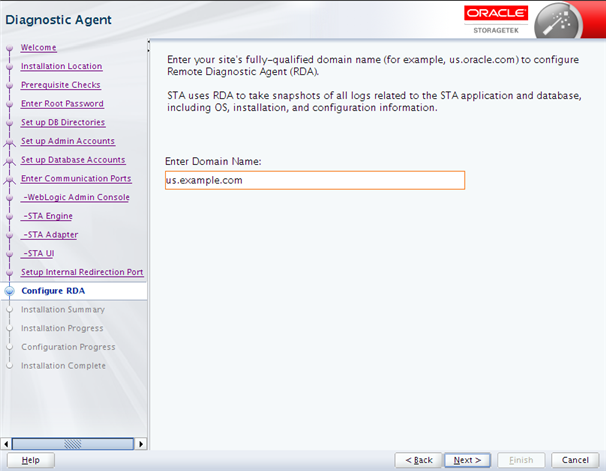
Description of the illustration ''rda.png''
The STA installer uses your site's fully qualified domain name to configure Oracle's Remote Diagnostic Agent (RDA).
STA uses RDA to take snapshots of all logs related to the STA application and database, including operating system, installation, and configuration information. See the STA User's Guide for additional information.
Installation Summary
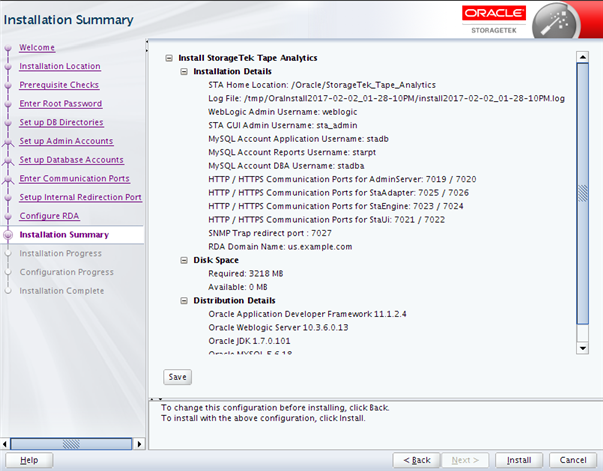
Description of the illustration ''instsummary.png''
The screen displays the following details about the installation. You can save this information to a text file for your records.
-
Installation Details—Information you have entered on the installer screens.
-
Disk Space—Required and available disk space, in MB.
-
Distribution Details—Names and version numbers of the software packages that will be installed.
Continue as follows:
-
To change any of the Installation Details, click Back to return to the applicable screen, or select the screen link in the navigation pane to go directly to the screen.
-
To save the displayed details in a text file, click Save.
-
To install using the displayed values, click Install.
-
To cancel the installation, click Cancel.
Screen-specific Buttons
- Save
-
Click to save the displayed information to a text file with the name STA_Installation_Profile_timestamp.txt In the Open dialog box, specify the directory where you want the file to be saved.
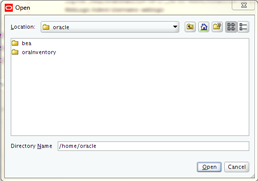
Description of the illustration ''instprogrsave.png''
- Install
-
Click to begin the installation. Once you click this button, you cannot pause or cancel the installation.
Installation Progress
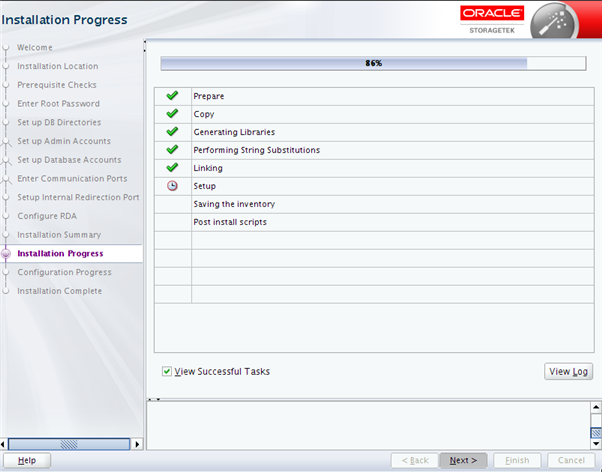
Description of the illustration ''instprogress.png''
The STA installation begins and the screen displays the status of each task.
Caution:
Do not close this window or otherwise interrupt the installation while it is in progress, as this may leave incomplete installation components on the server.If a task fails, the installation stops and you must exit the installer by clicking Cancel. The installer will roll back the installation and return the server to its original state.
Before you exit, you can view additional detail in the Message pane to help you troubleshoot issues and determine what action to take. You can also view the installation log for additional information.
Screen-specific Buttons
- View Successful Tasks
-
Select the check box to include Success outcomes in the display; this is the default.
Clear the check box to display only Failure outcomes. This allows you to filter out successful tasks, so you can focus on the ones requiring attention.
- View Log
-
Click to display the installation log in a separate window. Figure A-5 is an example. Click Close to dismiss the log window.
Figure A-5 Sample Installation Progress Log Display
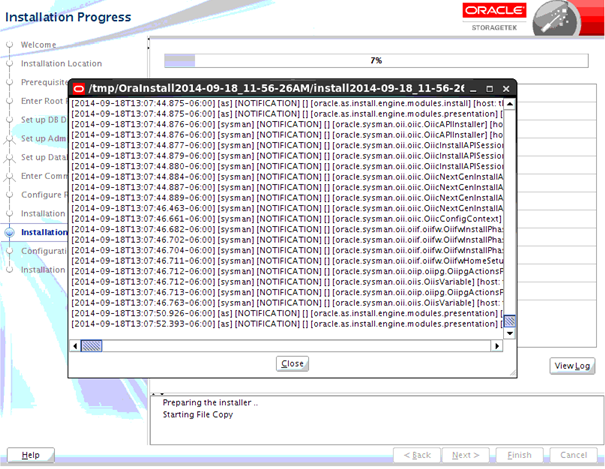
Description of ''Figure A-5 Sample Installation Progress Log Display''
You can also view the log from the Linux command line. While the installer is running, logs are kept in a subdirectory within /tmp. See "STA Installation, Upgrade, and Deinstallation Logs" for details.
Configuration Progress
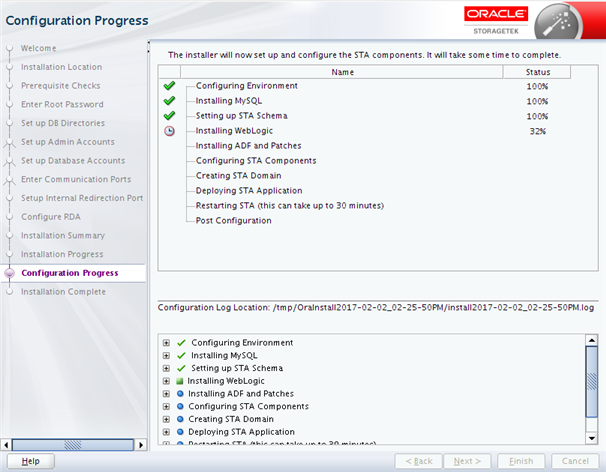
Description of the illustration ''confprogress.png''
The STA configuration and deployment begins, and the screen displays the status of each task.
Caution:
Do not close this window or otherwise interrupt the configuration while it is in progress, as this may leave incomplete installation components on the server.During this process, the WebLogic server, STA managed servers, and the STA application are configured and started. This may take 30 to 60 minutes to complete.
You can display expanded detail for any completed or in-progress task. In the Message pane, click the Expand (+) icon next to the task for which you want to display detail. Click the Collapse (–) icon to hide the detail again. Figure A-6 is an example showing expanded detail for successful and unsuccessful tasks.
If a task fails, the STA installer quits, rolls back the installation, and returns the server to its original state. You can view the installation log to troubleshoot the issue. See "STA Installation, Upgrade, and Deinstallation Logs" for details.
Figure A-6 Sample Configuration Progress Detail
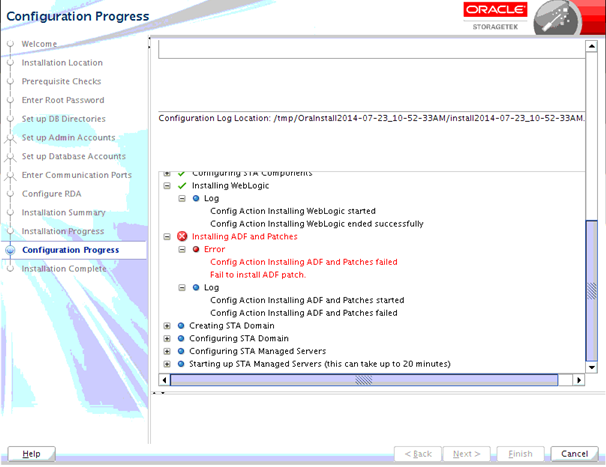
Description of ''Figure A-6 Sample Configuration Progress Detail''
Installation Complete
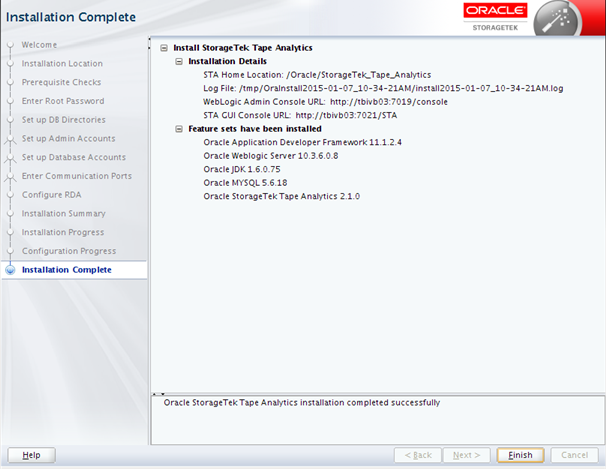
Description of the illustration ''instcomplete.png''
The screen displays the following details about the completed installation:
-
Installation Details—Locations of the installed STA application and installer log file, and connection details for the WebLogic and STA application user interfaces.
-
Feature sets have been installed—Names and version numbers of the software packages that have been installed.
You may want to save a screen shot of this information for your records. Click Finish to exit the installer.
STA Graphical Upgrade Screens
Note:
This section applies only if you are upgrading from STA 2.1.x or STA 2.2.x, to STA 2.3.x. These screens appear for automatic upgrades only. See "Understanding and Performing Automatic Upgrades" for details and a summary of the automatic upgrade process.For any other upgrade path, you must perform a manual post-installation upgrade, and these screens do not appear.
This section provides detailed reference for each screen of the STA graphical upgrade installer.
Note:
When you launch the STA graphical upgrade, the Oracle Universal Installer displays messages in the terminal window as it performs some basic environment checks. Requirements for running the STA graphical upgrade may exceed these minimal checks.Welcome
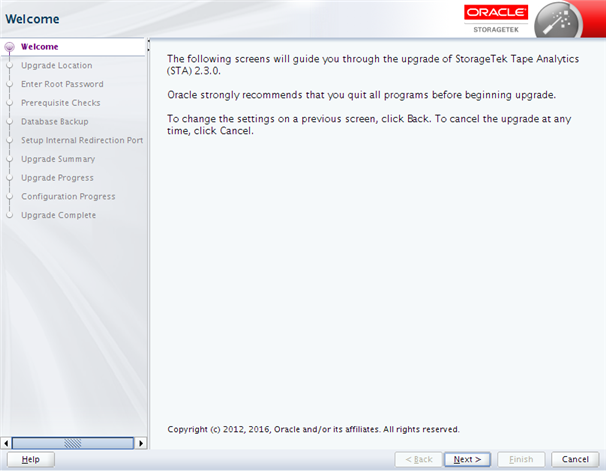
Description of the illustration ''upgwelcome.png''
This screen appears if an earlier version of STA has been installed in the STA Home location defined in the Oracle central inventory pointer file. The upgrade installer can be used only for upgrades from STA 2.1.x or STA 2.2.x, to STA 2.3.x.
This screen provides some general information for running the STA upgrade. Read the text, then click Next to begin the upgrade.
Note:
System changes are not implemented until you have completed all the STA upgrade input screens and clicked Install in "Installation Summary". Anytime before then, you can return to a previous screen and modify your entries.See "General Screen Layout" for details about the STA upgrade installer screens.
Upgrade Location
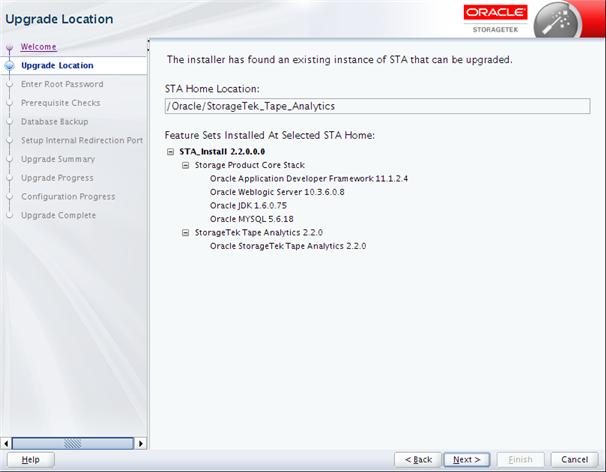
Description of the illustration ''upglocation.png''
The screen displays the location and version details for the current version of STA. The upgrade installer will upgrade this version of STA and your database to the new version.
Enter Root Password
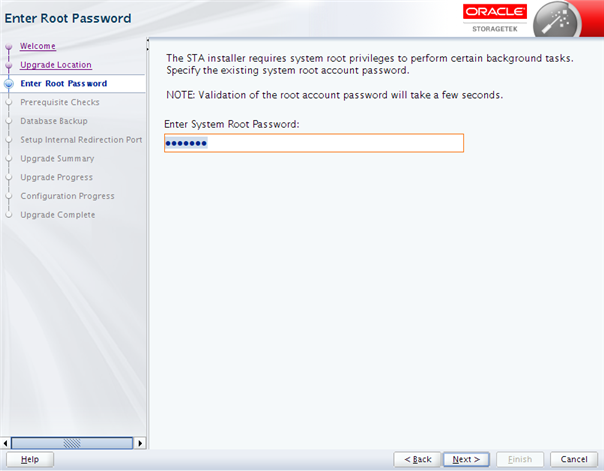
Description of the illustration ''upgrootpwd.png''
The STA upgrade installer requires system root access to perform some parts of the upgrade.
Prerequisite Checks
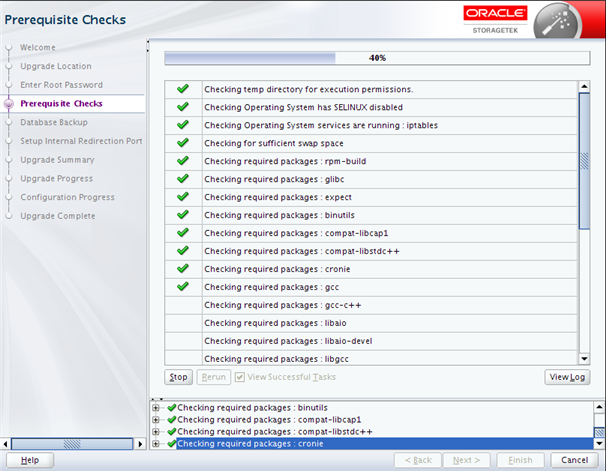
Description of the illustration ''upgprereqcks.png''
The upgrade installer performs a series of tasks to verify that the server environment meets all required and recommended prerequisites. This process may take several minutes, and some processes may take longer than others.
The possible outcomes of each verification task are as follows:
-
Success
—The prerequisite passed successfully. -
Warning
—The recommended prerequisite did not pass. -
Failure
—The required prerequisite did not pass.
You cannot continue the upgrade if there are any Failure outcomes. Additionally, it is recommended that you resolve all Warning outcomes before continuing. You can keep the upgrade installer up at this screen while you resolve any issues, and then return and click Rerun to run the verification process again.
Depending on the nature of a prerequisite, you may need to stop a service, change user privileges, or install a yum package to resolve issues. You can use either of the following methods to display expanded detail to help you troubleshoot issues and determine what action to take:
-
Select the task in the main window. The task is highlighted in the Message pane with expanded detail.
-
In the Message pane, click the Expand (+) icon next to the task for which you want to display detail. Click the Collapse (–) icon to hide the detail again.
Screen-specific Buttons
- Stop
-
Click to stop the verification process at the current task. You may want to do this so you can display detail for a selected task that has already completed.
- Rerun
-
Click to run the verification process again from the beginning. This allows you to resolve any Failure or Warning outcomes without exiting and restarting the STA upgrade installer.
- View Successful Tasks
-
Select the check box to include Success outcomes in the display; this is the default.
Clear the check box to display only Failure or Warning outcomes. This allows you to filter out successful tasks, so you can focus on the ones requiring attention.
- View Log
-
Click to display the prerequisite verification log in a separate window. See Figure A-4 in the Installation section for an example. Click Close to dismiss the log window.
You can also view the log from the Linux command line. While the upgrade installer is running, logs are kept in a subdirectory within /tmp. See "STA Installation, Upgrade, and Deinstallation Logs" for details.
Database Backup
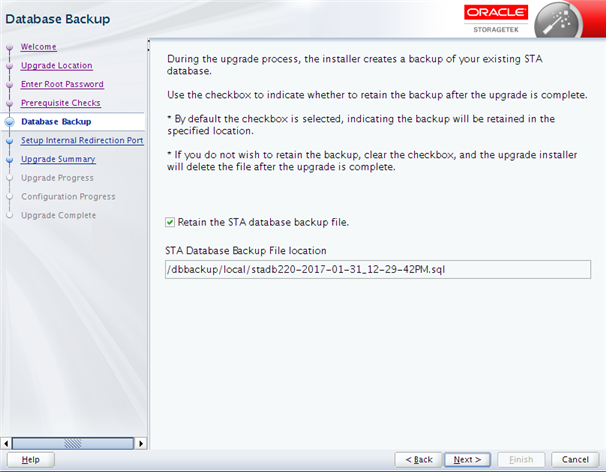
Description of the illustration ''upgdbbackup.png''
The STA upgrade installer automatically makes a full backup (dump file) of your current STA database and schema. If for some reason the upgrade cannot complete successfully, the upgrade installer restores your current version of STA and database from the backup.
This screen allows you to indicate whether you want to keep the database dump file after the upgrade completes. If you elect to keep the file, the screen displays the full path and file name. Oracle recommends that you keep the dump file at least until you are satisfied your data has been upgraded and the new STA version is running successfully.
Screen Fields
- Retain the STA database backup file
-
Select the check box if you want to keep the database backup after the upgrade completes successfully. This is the default.
Clear the check box if you do not want to keep the backup; it will be deleted once the upgrade completes successfully.
- STA Database Backup File location
-
Display only. This field appears only if you select the Retain the STA database backup file check box.
Full path of the database dump file that will be created by the STA upgrade installer. The path and file name are as follows:
dbbackup_location/local/stadb_210_timestamp.sql
Where:
-
dbbackup_location is the default backup location defined when the current version of STA was installed.
-
timestamp is the current date and time.
You should verify that dbbackup_location has sufficient space for the backup.
-
Set Up Internal Redirection Port
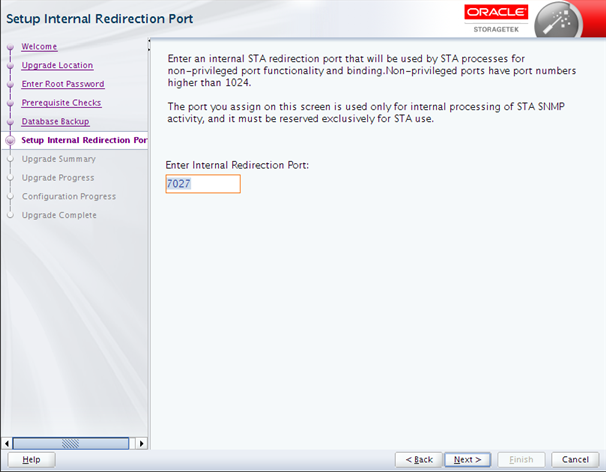
Description of the illustration ''upgredirectport.png''
This screen appears for upgrades from STA 2.1.x or STA 2.2.x to STA 2.3.x. It allows you to assign the redirection port for SNMP traps, which is introduced in STA 2.3.0.
This is an internal port to which STA redirects non-privileged port functionality and binding. SNMP traps received on port 162, the standard external SNMP trap reception port, are redirected to this port for internal processing of SNMP activity. This port must be reserved exclusively for STA use.
Upgrade Summary
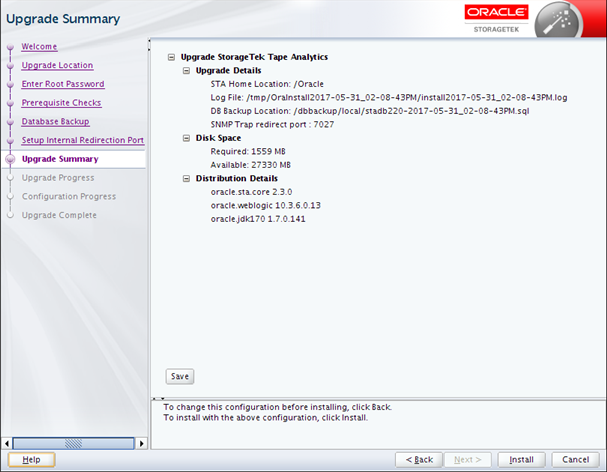
Description of the illustration ''upgsummary.png''
The screen displays the following details about the upgrade. You can save this information to a text file for your records.
-
Upgrade Details—Locations of STA Home, upgrade installer log file, and database backup file.
-
Disk Space—Required and available disk space, in MB.
Continue as follows:
-
To change any of the Upgrade Details, click Back to return to the applicable screen, or select the screen link in the navigation pane to go directly to the screen.
-
To save the displayed details in a text file, click Save.
-
To upgrade using the displayed values, click Install.
-
To cancel the upgrade, click Cancel.
Screen-specific Buttons
- Save
-
Click to save the displayed information to a text file with the name STA_Installation_Profile_timestamp.txt In the Open dialog box, specify the directory where you want the file to be saved.
Description of the illustration ''instprogrsave.png''
- Install
-
Click to begin the upgrade. Once you click this button, you cannot pause or cancel the upgrade.
Upgrade Progress
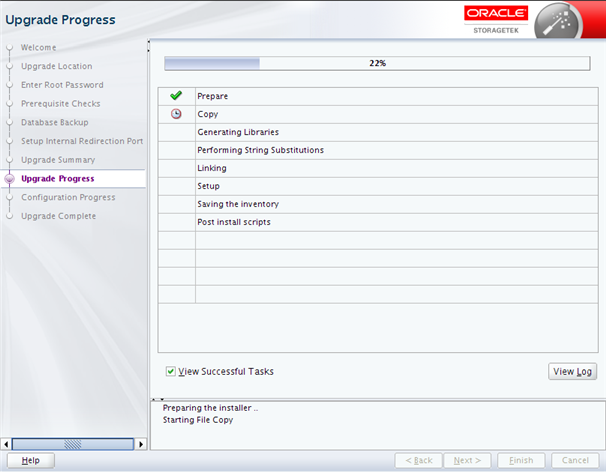
Description of the illustration ''upgprogress.png''
The STA upgrade begins, and the screen displays the status of each task.
Caution:
Do not close this window or otherwise interrupt the upgrade while it is in progress, as this may leave incomplete upgrade components on the server.If a task fails, the upgrade stops, and you must exit the upgrade installer by clicking Cancel. The upgrade installer rolls back any changes and returns the STA server, application, and database to their original states before the upgrade. See "Troubleshooting a Failed Upgrade" for details.
Screen-specific Buttons
- View Successful Tasks
-
Select the check box to include Success outcomes in the display; this is the default.
Clear the check box to display only Failure outcomes. This allows you to filter out successful tasks, so you can focus on the ones requiring attention.
- View Log
-
Click to display the upgrade log in a separate window. See Figure A-5 for an example. Click Close to dismiss the log window.
You can also view the log from the Linux command line. While the upgrade installer is running, logs are kept in a subdirectory within /tmp. See "STA Installation, Upgrade, and Deinstallation Logs" for details.
Configuration Progress

Description of the illustration ''upgconfprogress.png''
The STA upgrade and deployment begins, and the screen displays the status of each task. The upgrade performs the following tasks:
-
Saves a backup of the current STA database.
-
Upgrades the database to use the new STA schema and migrates your data.
-
Installs the new STA application, including any applicable software, such as WebLogic Server and MySQL.
-
Configures the WebLogic server, STA managed servers, and the STA application for the new 3version.
-
Restarts the WebLogic server, STA managed servers, and the STA application.
The entire process may take from one to several hours to complete, and some processes may take longer than others.
Caution:
Do not close this window or otherwise interrupt the configuration while it is in progress, as this may leave incomplete upgrade components on the server.You can display expanded detail for any completed or in-progress task. In the Message pane33, click the Expand (+) icon next to the task for which you want to display detail. Click the Collapse (–) icon to hide the detail again. See Figure A-6 for an example showing expanded detail for successful and unsuccessful tasks.
If a task fails, the STA upgrade installer quits and rolls back any changes it has made. See "Troubleshooting a Failed Upgrade" for details.
Upgrade Complete
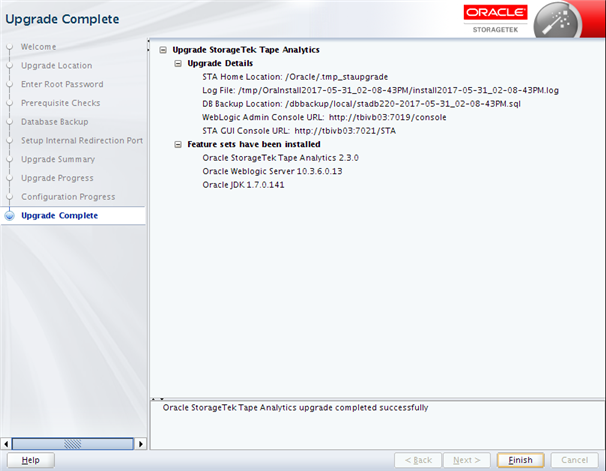
Description of the illustration ''upgcomplete.png''
The screen displays the following details about the completed upgrade:
-
Upgrade Details—Locations of the installed STA application and upgrade installer log file, and connection details for the WebLogic and STA application user interfaces.
-
Feature sets have been installed—Names and version numbers of the software packages that have been installed.
You may wish to save a screen shot of this information for your records. Click Finish to exit the upgrade installer.
STA Graphical Deinstaller Screens
This section provides detailed reference for each screen of the STA graphical deinstaller.
Welcome
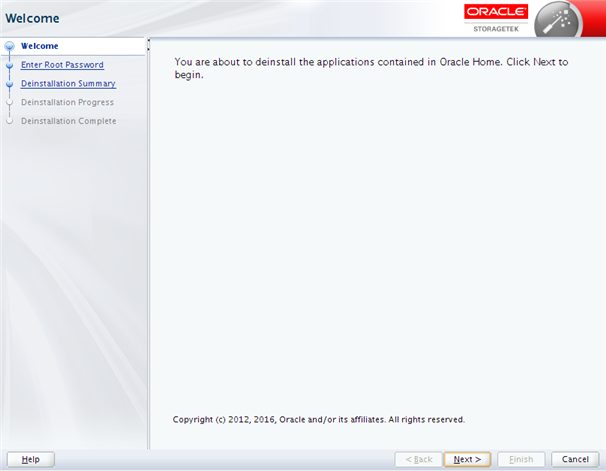
Description of the illustration ''deinstwelcome.png''
The screen confirms that you are about to deinstall the STA application and all associated software, including WebLogic Server and MySQL. Read the text and click Next to proceed.
Enter Root Password
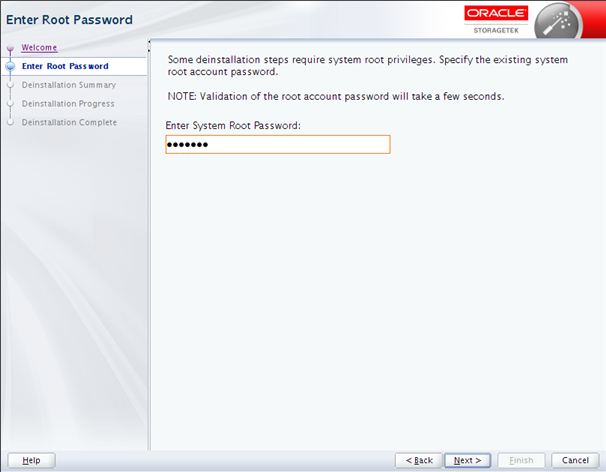
Description of the illustration ''deinstrootpwd.png''
The STA deinstaller requires system root access to perform some deinstallation tasks.
Deinstallation Summary
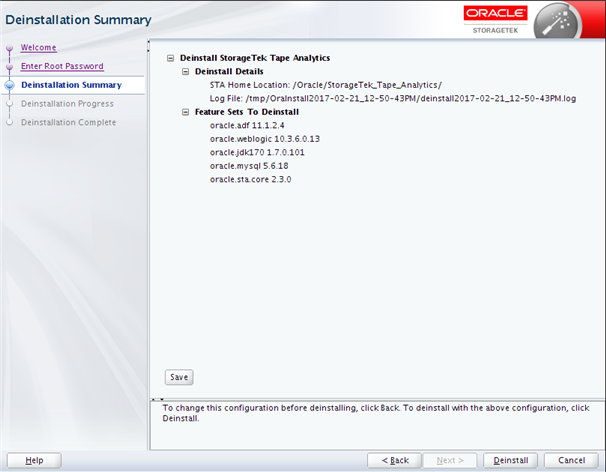
Description of the illustration ''deinstsummary.png''
The screen displays the following details about the software that will be deinstalled:
-
Deinstall Details—Locations of the STA application software and the deinstallation log.
-
Feature Sets to Deinstall—Names and version numbers of the software packages that will be deinstalled.
Verify this information, and then continue as follows:
-
Click Cancel to cancel and exit the deinstaller.
-
Click Deinstall to proceed with the deinstallation.
Deinstallation Progress
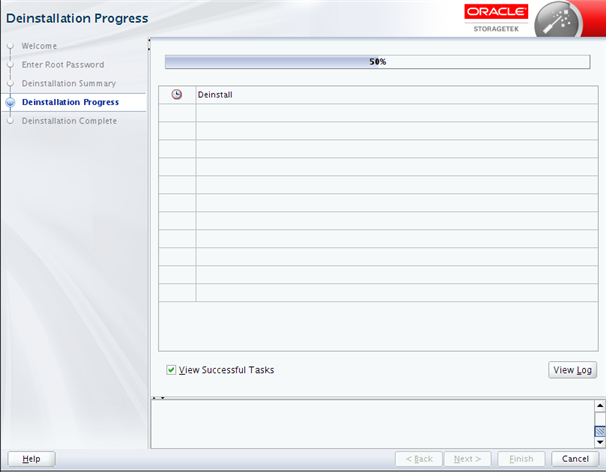
Description of the illustration ''deinstprogress.png''
The STA deinstallation begins, and the screen displays the status of each task.
Caution:
Do not close this window or otherwise interrupt the deinstallation while it is in progress, as this may leave incomplete STA components on the server.Note:
If either of the database locations are mount points on the STA server, the following message is displayed, notifying you that the mount point has been retained. Click OK to dismiss the message.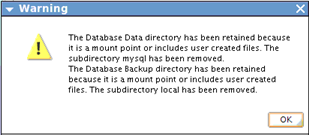
When the deinstallation completes, the message "Deinstallation Successful" appears in the Message pane. Click Next or Finish to proceed to the final screen.
If a task fails, the STA deinstaller quits, rolls back the deinstallation, and returns the server to its original state. You can view the deinstallation log to troubleshoot the issue. See "STA Installation, Upgrade, and Deinstallation Logs" for details.
Screen-specific Buttons
- View Successful Tasks
-
Select the check box to include Success outcomes in the display; this is the default.
Clear the check box to display only Failure outcomes. This allows you to filter out successful tasks, so you can focus on the ones requiring attention.
- View Log
-
Click to display the deinstallation log in a separate window. Figure A-7 is an example. Click Close to dismiss the log window.
Figure A-7 Sample Deinstallation Progress Log Display
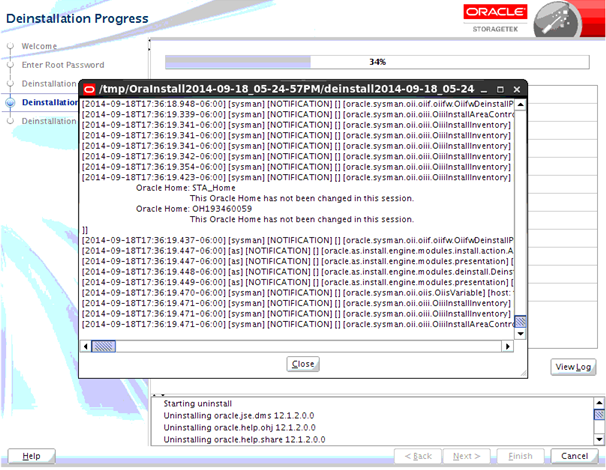
Description of ''Figure A-7 Sample Deinstallation Progress Log Display''
You can also view the log from the Linux command line. While the deinstaller is running, logs are kept in a subdirectory within /tmp. See "STA Installation, Upgrade, and Deinstallation Logs" for details.
Deinstallation Complete

Description of the illustration ''deinstcomplete.png''
The screen displays the details about the software packages that have been deinstalled.