3 Installing STA
This chapter assumes you are performing a new installation of STA on this server. Only one instance of STA can be installed on the server.
-
If you are upgrading STA from a previous version, see Chapter 7, "Upgrading to STA 2.3.x". Oracle recommends you install or upgrade to the latest version of STA.
-
If you need to reinstall STA or repair a current installation, see Chapter 8, "Deinstalling and Restoring STA."
Note:
Oracle provides support only if STA is installed on a dedicated server (called the STA server).This chapter includes the following topics:
Appendix C includes worksheets you can use to organize your installation activities and record your settings.
Users, Groups, and Locations Used by the STA Installer
This section describes key concepts and terms used in the STA installation process.
- Oracle group
-
A Linux group used for installing and upgrading Oracle products on the STA server. Oracle recommends creating a separate group dedicated for this purpose.
To perform STA installation and administration, you must log in as a user that is a member of this group. You cannot install STA as the Linux root user nor any other user with superuser privileges.
The instructions and examples in this guide use the name oinstall for this group; substitute the name you have chosen if it is different.
- Oracle user
-
The Linux user used to install Oracle products on the STA server and run STA utilities and the STA application. This can be any user that is a member of the Oracle group.
The instructions and examples in this guide use the name oracle for this user; substitute the name you have chosen if it is different.
- Oracle central inventory location
-
The directory used for tracking information about Oracle products installed on the STA server. STA installer and deinstaller logs are kept in the logs subdirectory within this location.
The Oracle user must own this directory and have full permissions to it. To ensure other users in the Oracle group have proper access so they can install Oracle products, you should not use the Oracle user's home directory. Additionally, there should not be any system links created in this directory, as these can interfere with an STA installation or upgrade.
This location should be separate from the other directories described in this section. The instructions and examples in this guide use /opt/oracle/oraInventory for this location; substitute the directory you have chosen if it is different.
Note:
Oracle recommends registering this location after STA installation is complete so all Oracle installers use the same central inventory location on this server. See "Register the Oracle Central Inventory Location" for details. - Oracle storage home location
-
The directory where STA and associated Oracle software are installed. STA is automatically installed in the StorageTek_Tape_Analytics subdirectory within this location; see "STA home".
This directory must be owned by the Oracle group, not root, and the Oracle user must have full permissions to it. If this directory does not exist, the STA installer will automatically create it if the Oracle user has full permissions to the parent directory.
Note:
If an earlier version of STA was installed on this server, this directory may already exist. If so, you should verify the correct ownership and permissions.This location should be separate from the other directories described in this section. The instructions and examples in this guide use /Oracle for this location; substitute the directory you have chosen if it is different.
- STA home
-
The directory where all STA software is installed. This directory is assigned the name StorageTek_Tape_Analytics, and the STA installer automatically creates it within the "Oracle storage home location".
The instructions and examples in this guide use /Oracle/StorageTek_Tape_Analytics for this location.
- STA installer location
-
The directory where you download the STA installer.
This location should be separate from the other directories described in this section. The instructions and examples in this guide use /Installers for this location; substitute the directory you have chosen if it is different.
- STA installer working location
-
By default, the STA and WebLogic installer files are unpacked to the STA_home/tmp directory, which requires a minimum 11 GB of space. You can have the STA installer files unpacked to a different working location by running the STA installer with the following option: –J–Djava.io.tmpdir=working_directory
working_directory must be an absolute path. For example:
$ ./sta_installer_linux64.bin –J–Djava.io.tmpdir=/Oracle/tmpSee "STA Silent-mode Installer, Upgrade, and Deinstaller" for details about using this option.
- STA logs location
-
Location of the STA and MySQL logs. The contents tend to grow and are managed through log rotation. The default location is /var/log/tbi, but you can change this location at any time after STA installation; see "Relocate the STA Logs Directory (optional)" for instructions.
See "Review STA File System Layout" for space requirements.
Username and Password Requirements
Username requirements are as follows:
-
Must be 1–16 characters in length
-
All usernames must be unique
Password requirements are as follows:
-
Must be 8–32 characters in length
-
Must include at least one uppercase letter and one number
-
Must not include spaces or tabs
-
Must not include any of the following special characters:
% & ' ( ) < > ? { } * \ ' " ; , + = # !
Accounts Configured During STA Installation
This section describes the accounts and port numbers created and configured by the STA installer.
System mysql Account
As part of the MySQL installation, the STA installer creates a system (Linux) account with the username ""mysql". This is the root account for the MySQL server and is used internally by STA processes to access and update the MySQL database.
Caution:
Do not delete or change the name or parameters of this account, as this may affect the ability of STA to access the database.User Accounts for Managing STA
The following required accounts are created during STA installation. These accounts are specific to STA, and they are not Linux usernames. The STA installer configures these accounts according to the specifications you provide during installation.
Note:
You can change the passwords for these accounts at any time using the STA Password Change Utility. See the STA Administration Guide for details.WebLogic Accounts
The following WebLogic accounts are used to log in to the WebLogic administration console or the STA application.
- WebLogic Administration
-
Use to log in to the WebLogic administration console to make changes to the WebLogic environment—for example, to connect WebLogic to an LDAP or RACF server.
- STA Administrator
-
Use to log in to the STA application with full access privileges.
After the STA installation has been completed, you can use the STA application to create additional user accounts with assignable roles; see the STA User's Guide for details.
STA Database Accounts
The following STA database accounts are MySQL accounts used by STA to access and manage the STA database.
- STA Database Root User
-
Owns the MySQL database and is used to create the root database installation. The predefined username is root, and it cannot be changed.
Caution:
The password for this account is not retrievable. - STA Database Application User
-
A user-defined MySQL username (for example, stadb) that STA uses to connect to the database. It is required to create, update, delete, and read privileges on data tables.
- STA Database Reports User
-
A user-defined MySQL username (for example, starpt) that non-STA and third-party applications may use to connect to the database. It has read-only access to certain database tables.
- STA Database Administrator User
-
A user-defined MySQL username (for example, stadba) that STA administration and monitoring utilities use to connect to the database, primarily to configure and run scheduled backups. It has all DBA privileges except the "grant option" on all database tables.
Ports Configured During STA Installation
STA uses the following ports to retrieve and receive data. These are dedicated ports, and they must remain available to STA. The STA installer configures these port numbers according to the specifications you provide during installation, and it will verify that the ports are not already in use on the network.
Unconfigurable External Ports
The ports described in Table 3-1 are external ports used for communication between the STA server and other network entities. The port values are fixed and cannot be changed during STA installation.
Firewall/router configuration: Must be reachable between the STA server and the backup server (for SSH), and between the STA server and the monitored libraries (for SNMP and SNMPTRAP).
Table 3-1 Unconfigurable External Ports
| Port | Protocol | Description/Purpose |
|---|---|---|
|
22 |
SSH |
Secure Shell. STA database backup; library log-in. |
|
161 |
SNMP |
Simple Network Management Protocol (SNMP). For transmittal of SNMP requests. |
|
162 |
SNMPTRAP |
For reception of SNMP notifications (traps). Traps are forwarded to configurable non-privileged internal port (default is 7027). See "Configurable Internal Ports". |
Configurable Ports
Note:
See your network administrator for assistance with port number assignments. Although it is permissible to have two different processes assigned to the same port number if they use different protocols (UDP and TCP, for example), this practice is not recommended.You initially define these port numbers during STA installation, and the STA installer automatically verifies that the ports are not already in use on the network. After STA installation, you can change the port numbers using the STA Port Change Utility. See the STA Administration Guide for details.
Configurable External Ports
The ports described in Table 3-2 are external ports used for communication between the STA server and other network entities. These ports are the configurable equivalent of standard ports 80 and 8080 (HTTP) and 443 (HTTPS), and they must be unique from other HTTP and HTTPS ports on the network. Contact your network administrator for assistance in choosing their values.
Firewall/router configuration: Must be reachable between the STA server and the client running the STA GUI.
Table 3-2 Configurable External Ports
| Default Port | Protocol | Description/Purpose |
|---|---|---|
|
7019 |
HTTP |
Access to the WebLogic Administration console, unsecure |
|
7020 |
HTTPS |
Access to the WebLogic Administration console, secure |
|
7021 |
HTTP |
staUi managed server. Access to the STA GUI, unsecure. |
|
7022 |
HTTPS |
staUi managed server. Access to the STA GUI, secure. |
Configurable Internal Ports
The ports described in Table 3-3 are used for internal STA communications. These port values must be unique.
Firewall/router configuration: Not applicable
Table 3-3 Configurable Internal Ports
| Default Port | Protocol | Description/Purpose |
|---|---|---|
|
7023 |
HTTP |
staEngine managed server. Basic STA internals, unsecure. |
|
7024 |
HTTPS |
staEngine managed server. Basic STA internals, secure. |
|
7025 |
HTTP |
staAdapter managed server. SNMP communication, unsecure. |
|
7026 |
HTTPS |
staAdapter managed server. SNMP communication, secure. |
|
7027 |
SNMPTRAP |
Internal non-privileged port for SNMP traps forwarded from external privileged port 162. |
Internal Port Forwarding for SNMP Traps
STA receives SNMP traps from the monitored libraries on UDP port 162 (see "Unconfigurable External Ports" for details). This is a privileged port which can only be monitored by a user with system root privileges.
Starting with STA 2.3.0, the STA application is run as the Oracle user instead of system root (see "User Accounts for Managing STA" for details). Because the Oracle user does not have sufficient authorization to monitor port 162, you must configure a non-privileged internal redirection port which it can monitor for SNMP traps. You can assign any available non-privileged port; the default is 7027.
The STA 2.3.0 installer prompts for the redirection port number during all installations and automatic upgrades. The installer then modifies the system iptables to redirect all SNMP traps from port 162 to the non-privileged port you have specified.
To support port forwarding, the iptables service must be running on the STA server. See "Enable the Linux Firewall" for instructions.
Ports for Communications With StorageTek SDP (optional)
STA 2.3.0 and above supports optional automatic creation of service log bundles and forwarding of the bundles to StorageTek Service Delivery Platform (SDP). See the following documents for details about these optional features:
-
STA User's Guide for information on configuring and using these features in STA.
-
StorageTek Service Delivery Platform User's Guide for information on configuring and using these features on the SDP host.
Table 3-4 summarizes the ports on the STA server that are used for communications with the SDP host.
Table 3-4 Ports for Communications With StorageTek SDP
| Port | Protocol | Description/Purpose |
|---|---|---|
|
7023 (default) |
HTTP |
Inbound communications from the SDP host to STA. Messages from SDP come in on the unsecure port assigned to the staEngine managed server (see "Configurable Internal Ports"). |
|
7024 (default) |
HTTPS |
Inbound communications from the SDP host to STA. Messages from SDP come in on the secure port assigned to the staEngine managed server (see "Configurable Internal Ports"). |
|
15000 (default) |
Java RMI |
Outbound communications from STA to the SDP host. This port number is assigned when the SDP host is configured in STA. See the STA User's Guide for instructions. The same port number must be configured on the SDP host to receive messages from STA. See the StorageTek Service Delivery Platform User's Guide for instructions. |
STA Installation, Upgrade, and Deinstallation Logs
You can use the STA installation, upgrade, and deinstallation logs to help troubleshoot issues. Most log file names include a timestamp to help identify the installation or deinstallation instance. The timestamp is the date and time when the installation or deinstallation began.
In particular, the following logs provide valuable information if an installation, upgrade, or deinstallation fails. See "/STA_logs/install" for details about their location.
-
installtimestamp.log
-
sta_installtimestamp.log
-
upgradetimestamp.log
-
sta_upgradetimestamp.log
-
deinstalltimestamp.log
-
sta_deinstalltimestamp.log
Log File Locations
The locations of STA installation, upgrade, and deinstallation logs vary depending on the status of the operation. Logs are found in the following directories. See "Review STA File System Layout" for details about these directories.
- /tmp/OraInstalltimestamp
-
This directory includes logs for in-progress installations, upgrades, and deinstallations. The logs are moved from this directory upon successful completion of the operation. Following is a sample listing of logs you might see in this directory during an operation.
install2016-09-24_04-14-04PM.log
installProfile2016-09-24_04-14-04PM.log
launcher2016-09-24_04-14-04PM.log
- /STA_home/inventory/logs
-
Where STA_home is the STA home location defined and created during STA installation (for example, /Oracle/StorageTek_Tape_Analytics).
This directory includes logs for installations, upgrades, and deinstallations that have completed successfully. Some logs, such as error or patch logs, are included only as applicable.
Following is a sample listing of logs you might see in this directory.
2016-08-05_01-55-59PM.log
install2016-08-05_01-55-59PM.log
install2016-08-05_01-55-59PM.out
installActions2016-08-05_01-55-59PM.log
OPatch2016-08-05_01-57-13-PM.log
OPatch2016-08-05_01-59-36-PM.log
oraInstall2016-08-05_01-55-59PM.err
oraInstall2016-08-05_01-55-59PM.out
- /STA_logs/install
-
By default, STA_logs is located at /var/log/tbi. You can optionally relocate this directory to a location of your choice any time after STA installation. See "Relocate the STA Logs Directory (optional)" for instructions.
This directory includes logs for installations, upgrades, and deinstallations that have completed successfully or failed. It includes logs related to the installation of the WebLogic server and MySQL database, as well as logs for installation and configuration of the STA application.
Following is a sample listing of logs you might see in this directory.
adf_install2016-08-05_01-55-51PM.log
dbinstall.log
dbinstall.mysqld.err
dbinstall.stadb-slow.log
install2016-08-05_01-42-09PM.log
patch_adf.log
sta_install2016-08-05_01-54-04PM.log
weblogic_install2016-08-05_01-55-34PM.log
STA Installer Modes
You can install STA using either of the following modes:
- Graphical mode
-
This is the recommended installation mode. This mode provides a graphical user interface for installing STA, and it requires an X11 display. See "STA Graphical Installer, Upgrade, and Deinstaller Screen Reference" for details.
- Silent mode
-
This mode allows you to bypass the graphical user interface and supply the installation options in an XML properties file called the response file. See "STA Silent-mode Installer, Upgrade, and Deinstaller" for details.
This mode is useful for unattended installations and for installing STA on multiple machines. By using a response file, you can supply a single set of parameters and automate the installation. You can run the silent-mode installer either from a script or from the Linux command line.
STA Installation Tasks
To install STA, perform all the following tasks in the order listed.
Identify or Create Information Required for the Installation
Use this procedure to identify and, if necessary, create users and locations to run the STA installer. You can use Table C-2, "Installation Users and Locations Worksheet" to record this information. See "Users, Groups, and Locations Used by the STA Installer" for details about these items.
-
Open a terminal session on the STA server and log in as the system root user.
-
Determine whether there is an Oracle central inventory pointer file, /etc/oraInst.loc, on the STA server. The file is present if the Oracle central inventory has been registered previously; see "Oracle central inventory location" for details.
-
If the file exists, record its contents. For example:
# cat /etc/oraInst.loc
inventory_loc=/opt/oracle/oraInventory
inst_group=oinstall
The inventory_loc entry identifies the Oracle central inventory location, and the inst_group entry identifies the Oracle group.
-
If the file is not present, proceed to Step 3 to create the necessary users and locations. For example:
# cat /etc/oraInst.loc
cat: /etc/oraInst.loc: No such file or directory
-
-
If there was no Oracle central inventory pointer file in Step 2, create the Oracle group. See "Oracle group" for details. For example:
# groupadd oinstall -
Obtain the username and password of the Oracle user, or create a new one if necessary. This user must belong to the Oracle group. See "Oracle user" for details. For example:
# useradd -g oinstall -d /home/oracle oracle
# passwd oracle
Changing password for user oracle.
New password:
Retype new password:
passwd: all authentication tokens updated successfully.
-
If there was no Oracle central inventory pointer file in Step 2, create the Oracle central inventory location. This directory must be owned by the Oracle user. See "Oracle central inventory location" for details. For example:
# mkdir /opt/oracle/oraInventory
# chown oracle /opt/oracle/oraInventory
# chgrp oinstall /opt/oracle/oraInventory
# ls -la /opt/oracle/oraInventory
total 8
drwxr-xr-x 2 oracle oinstall 4096 Feb 11 10:49 .
drwxr-xr-x 3 root   root     4096 Feb 11 10:49 ..
-
Locate the Oracle storage home location, or create the directory if it does not exist. This directory must have at least 11 GB of free space and it must be owned by the Oracle user. See "Oracle storage home location" for details. For example:
# mkdir /Oracle
# chown oracle /Oracle
# ls -la /Oracle
total 8
drwxr-xr-x 2 oracle oinstall 4096 Feb 11 10:49 .
drwxr-xr-x 3 root   root     4096 Feb 11 10:49 ..
-
Locate the STA installer location, or create the directory if it does not exist. See "STA installer location" for details. For example:
# mkdir /Installers -
Obtain the password for the system root user. The STA installer requires root access to perform certain tasks and will prompt for the password.
-
Choose usernames for the WebLogic Administrator, STA Administrator, and MySQL accounts that will be created during the installation. See "User Accounts for Managing STA" for details.
-
Choose port numbers for the configurable internal and external ports required for STA operations. Ensure that the external ports are open on the required networks. See "Ports Configured During STA Installation" for details.
-
Obtain your site's domain name for configuring Oracle's Remote Diagnostics Agent (RDA). See the STA User's Guide for details.
Verify Installation Prerequisites
Use this procedure to verify prerequisites before running the STA installer. This procedure is optional, but if any of these prerequisites are not met, the STA installation will fail. See the STA Requirements Guidefor a complete list of installation requirements.
All these steps are performed on the STA server. Contact your Linux administrator if you need assistance.
Note:
STA installation assumes 64-bit Linux has been installed with the Linux RPM packages specified in Chapter 2, "Installing Linux". If a required package is not installed, the STA installation will display an error message and not allow you to continue until the package is installed. See the following documents for details:-
The STA Requirements Guide for supported Linux versions.
-
"Install Required Linux Packages" for a list of required packages
Caution:
Before choosing to permanently remove or replace existing software, back up files as needed.-
Open a terminal session on the STA server and log in as the Oracle user. See "Oracle user" for details.
-
Verify that STA is not installed on the server. For example:
$ ls /etc/init.d/sta*
ls: cannot access /etc/init.d/sta*: No such file or directory$ ls /usr/bin/STA
ls: cannot access /usr/bin/STA: No such file or directory
$
If STA is already installed, you must deinstall it and then install the new version of STA and perform a manual post-installation upgrade. See "Upgrading to STA 2.3.x" for details.
-
Verify that MySQL is not installed on the STA server. For example:
$ ls /etc/init.d/mysql*
ls: cannot access /etc/init.d/mysql*: No such file or directory$ ls /usr/bin/mysql*
ls: cannot access /usr/bin/mysql*: No such file or directory
$
If MySQL is already installed, you must deinstall it before you can install STA.
-
Verify that the /tmp directory has at least 4 GB of free space.
$ df -H /tmp Filesystem Size Used Avail Use% Mounted on /dev/mapper/vg_tbivb03-lv_root 53G 35G 16G 70% / -
Verify that the Oracle storage home location has at least 11 GB of free space. This is the default STA and WebLogic installer working location. See "Oracle storage home location" for details about this directory.
For example:
$ df -H /Oracle
Filesystem             Size   Used  Avail Use% Mounted on /dev/mapper/vg_tbivb03-STA_OracleVol
                        34G   3.8G    29G  12% /Oracle
Note:
You can optionally specify a different working directory when you start the STA installer. See "STA installer working location" for details. -
Verify SELinux is disabled. If you have followed the instructions in "Post-Installation Tasks", SELinux should already be disabled; see "Disable SELinux" for details.
$ sestatus SELinux status: disabled -
Verify the iptables firewall service is running. If you have followed the instructions in "Post-Installation Tasks", iptables should already be running; see "Enable the Linux Firewall" for details.
Note:
Depending on your site configuration, this step may require system root privileges.# sudo service iptables status [sudo] password for oracle: Table: filter Chain INPUT (policy ACCEPT) num target prot opt source destination 1 ACCEPT tcp -- 0.0.0.0/0 0.0.0.0/0 tcp dpt:80 Chain FORWARD (policy ACCEPT) num target prot opt source destination ... Chain POSTROUTING (policy ACCEPT) num target prot opt source destination $ -
Stop and deconfigure SNMP services.
To avoid network port collisions and other issues, the STA server must not be running other SNMP services. The STA installer will quit in either of the following situations:
-
The snmpd and snmptrapd daemon services are running,
-
UDP ports 161 (SNMP) and 162 (SNMPTRAP) are not available.
Perform the following steps as required.
-
Display the current status of the SNMP snmpd and snmptrapd services.
$ service snmpd status
snmpd is stopped
$ service snmptrapd status
snmptrapd is stopped
-
If necessary, stop the SNMP services immediately.
$ service snmpd stop
$ service snmptrapd stop
Note:
If you receive a "FAILED" error with either of these commands, the services may already be stopped. -
Type the following to disable the SNMP services in the Linux services configuration file so they do not start automatically when Linux reboots:
Note:
Depending on your site configuration, this step may require system root privileges.$ sudo chkconfig snmpd off [sudo] password for oracle: $ sudo chkconfig --list snmpd snmpd 0:off 1:off 2:off 3:off 4:off 5:off 6:off $ sudo chkconfig snmptrapd off $ sudo chkconfig --list snmptrapd snmptrapd 0:off 1:off 2:off 3:off 4:off 5:off 6:off
-
-
Review and verify the applicable mode-specific requirements, as follows:
-
For the STA graphical installer, see "Graphical-mode Display Requirements".
-
For the STA silent-mode installer, see "Silent Mode Requirements".
-
Download STA
The STA installer download includes the following files. version is the STA installation version number.
-
sta_install_version_linux64.bin—Required for all installations.
-
sta_install_version_linux64-2.zip—Required for all installations.
-
silentInstallUtility_version.jar—Response file build utility. Required only if you will be using the STA silent-mode installer or deinstaller. See Appendix B, "STA Silent-mode Installer, Upgrade, and Deinstaller" for details
-
In a browser window, access the Oracle Software Delivery Cloud website at the following URL:
-
Click Sign In.
Description of the illustration ''edeliv_signin.png''
If you do not already have an Oracle account, select the New User? Register Here link.
-
Enter the user ID and password provided by Oracle Support.
-
On the Export Restrictions screen, click Accept.
Description of the illustration ''edeliv_expaccept.png''
-
Perform the following steps on the Selected Products screen:
-
In the Product menu, type StorageTek Tape, and then select StorageTek Tape Analytics.
-
In the Select Platform menu, select the Linux x86-64 check box and then click Select.
-
Click Continue.
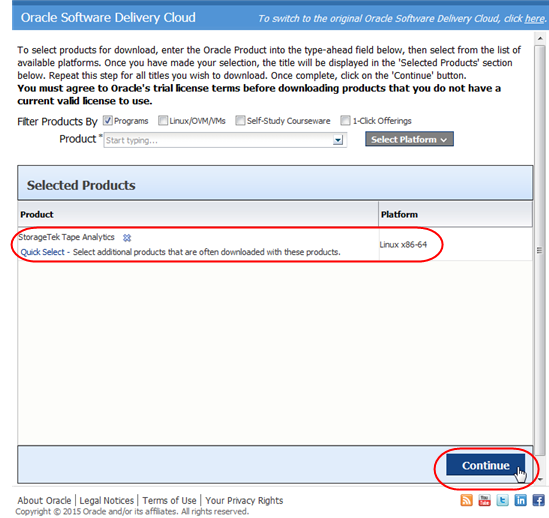
Description of the illustration ''edeliv_products.png''
-
-
On the Oracle Standard Terms and Restrictions screen, read the terms, select the I have reviewed and accept the terms... check box, and then click Continue.
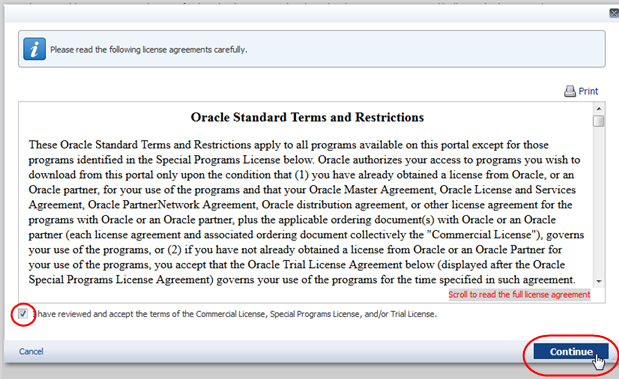
Description of the illustration ''edeliv_terms.png''
-
The File Download screen appears, listing the files you have selected. To download all files at once, click Download All. To download one file at a time, select the active link with the file name. Save the files to a location containing at least 4 GB of free space.
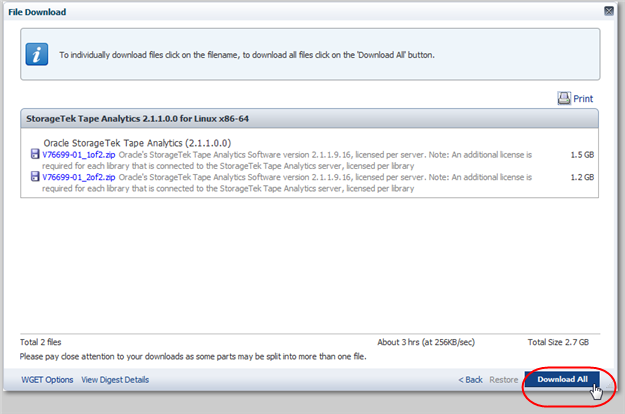
Description of the illustration ''edeliv_filedown.png''
-
If this is the first time you have used the Oracle Software Delivery Cloud, the Download Manager dialog box appears. If you have already installed the download manager, you can skip this step.
Select the Download the installer link to download the Akamai NetSession Interface download manager. Once installed, the download manager displays the progress of the file downloads in a separate window.
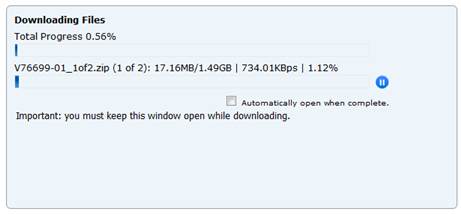
Description of the illustration ''edeliv_downlprogress.png''
-
Once the download is complete, use an unzip tool or command to extract the zip files to the STA installer location you have selected in "Identify or Create Information Required for the Installation" (for example /Installers). For example:
$ unzip V76699-01_1of2.zip -d /Installers
Archive:  V76699-01_1of2.zip
  inflating: /Installers/V76699-01_1of2.zip
$ unzip V76699-01_2of2.zip -d /Installers
Archive:  V76699-01_2of2.zip
  inflating: /Installers/V76699-01_2of2.zip
Note:
Unzip only the top-level zip files you have downloaded from the Oracle Software Delivery Cloud (for example, V76699-01of2.zip). Do not unzip any compressed files that are contained within these files (for example, sta_install_2.1.1.9.16_linux64-2.zip). -
Ensure that the Oracle user has all of the following permissions:
-
Ownership of the installation files
-
Execute permissions to the sta_install_version_linux64.bin file
-
Read access to the sta_install_version_linux64-2.zip file and silentInstallUtility_version.jar files
By default, the files are owned by the user you were logged in as when you downloaded the files from the Oracle Software Delivery Cloud. For example:
$ cd /Installers
$ ls -la
-rw-r--r--   1 oracle oinstall       5964 Oct 23 16:14 silentInstallUtility_2.1.0.64.124.jar
-rw-r--r--   1 oracle oinstall 1275158996 Oct 23 13:35 sta_install_2.1.0.64.124_linux64-2.zip
-rwxr--r--   1 oracle oinstall 1599220560 Oct 23 13:01 sta_install_2.1.0.64.124_linux64.bin
-
-
Review the STA Release Notes, which are included in the installer download package.
Install STA
Use this procedure to run the STA installer. You can install STA using either the graphical or silent mode. See "STA Installer Modes" for details.
-
Open a terminal session on the STA server and log in as the Oracle user. See "Oracle user" for details.
-
Oracle recommends that you make as much space as possible available in the system temporary directory (/tmp). Use the following command to remove all files and directories owned by the Oracle user, which may be left over from previous STA installations or installation preparation activities.
$ rm -rf /tmp -
Change to the STA installer location; see "STA installer location" for details. For example:
$ cd /Installers -
Launch the STA installer with one of the following commands:
-
To use the STA graphical installer:
$ ./sta_install_version_linux64.bin
Where version is the version of the STA installer you downloaded. For example:
$ ./sta_install_2.3.0.25.32_linux64.binThis mode requires an X11 display. See Appendix A, "STA Graphical Installer, Upgrade, and Deinstaller Screen Reference" for instructions.
-
To use the STA silent installer:
$ ../sta_install_version_linux64.bin –silent –responseFile response_file
Where:
-
version is the version of the STA installer you downloaded.
-
response_file is the absolute path of the previously created response file.
For example:
$ ./sta_install_2.3.0.25.32_linux64.bin –silent –responseFile /Installers/SilentInstall.rspBefore using this mode, you must also download the silentInstallUtility_version.jar file and create a response file specifying the installation options. See Appendix B, "STA Silent-mode Installer, Upgrade, and Deinstaller" for instructions.
-
-
Verify Successful Installation
Use this procedure to verify that STA is running.
-
Use the following steps to ensure that the STA bin directory is included in the PATH variable for the Oracle user.
-
Open a terminal session on the STA server and log in as the Oracle user.
-
Use a text editor to open the Oracle user profile. For example:
$ vi /home/oracle/.bash_profile -
Add the STA bin directory to the PATH definition. For example, add the following line to the file:
PATH=$PATH:Oracle_storage_home/StorageTek_Tape_Analytics/common/binWhere Oracle_storage_home is the Oracle storage home location specified during STA installation.
-
Save and exit the file.
-
Log out and log back in as the Oracle user.
-
Confirm that the PATH variable has been updated correctly.
$ echo $PATH
/usr/lib64/qt-3.3/bin:/usr/local/bin:/bin:/usr/bin:/usr/local/sbin:/usr/sbin:/sbin:/home/oracle/bin:/Oracle/StorageTek_Tape_Analytics/common/bin
-
-
Use the STA command to verify that all STA services are running and active. Example 3-1 is a sample successful status display. See the STA Administration Guide for details.
Example 3-1 STA Successful Status Display
$ STA status all mysql is running staservd service is running staweblogic service is runningstaengine service is running .... and the deployed application for staengine is in an ACTIVE state staadapter service is running .... and the deployed application for staadapter is in an ACTIVE state staui service is running .... and the deployed application for staui is in an ACTIVE state -
Proceed as follows:
-
If the STA services are running and active, you can begin configuring the libraries and STA. See Chapter 5, "Configuring SNMP on the Libraries"and Chapter 6, "Configuring Library Connections in STA" for instructions.
-
If there are any issues with the STA services, you can review the installation and STA logs for more information. See "STA Installation, Upgrade, and Deinstallation Logs" for their locations.
-
Relocate the STA Logs Directory (optional)
Use this procedure only if you want to relocate the STA and MySQL logs to a location other than the default, which is /var/log/tbi. After you complete this procedure, new logs will be written to the location you designate. You can perform this procedure anytime after STA has been installed. See "Review STA File System Layout" for the location requirements.
Note:
This procedure requires system root permissions.-
Open a terminal session on the STA server and log in as the system root user.
-
Stop all STA services.
# STA stop all Stopping the staui service...... Successfully stopped the staui service Stopping the staadapter service...... Successfully stopped the staadapter service Stopping the staengine service...... Successfully stopped the staengine service Stopping the staweblogic service...... Successfully stopped the staweblogic service Stopping the staservd Service... Successfully stopped staservd service Stopping the mysql service..... Successfully stopped mysql service # -
Create the new STA logs directory you want to use for STA and MySQL logs. For example:
# mkdir -p /LOGS_DIR/log/
# ls -ld /LOGS_DIR/log
drwxr-xr-x 2 root root 4096 Jan 20 14:17 /LOGS_DIR/log
-
Change access permissions to the directory so STA and MySQL can write to it. For example:
# chmod 777 /LOGS_DIR/log
# ls -ld /LOGS_DIR/log
drwxrwxrwx 2 root root 4096 Jan 20 14:17 /LOGS_DIR/log
-
Move the current /var/log/tbi directory to the STA logs directory you have just created.
# mv /var/log/tbi /LOGS_DIR/log
# ls -la /LOGS_DIR/log/tbi
total 20
drwxrwxrwx 2 mysql mysql 4096 Jan  7 10:45 backups
drwxrwxrwx 3 mysql mysql 4096 Jan  7 10:45 db
drwxrwxrwx 2 mysql mysql 4096 Jan  7 11:30 install
-rwxrwxrwx 1 root  root  1191 Jan 20 13:04 monitor_staserver.log
drwxrwxrwx 2 root  root  4096 Jan  7 11:03 uidumps
-
Create a symbolic link from your new STA logs directory to the default location. For example:
# ln -s /LOGS_DIR/log/tbi /var/log/tbi
# ls -l /var/log/tbi
lrwxrwxrwx 1 root   root      15 Jan 20 14:22 /var/log/tbi -> /LOGS_DIR/log/tbi
-
Restart STA.
# STA start all
Starting mysql Service..
mysql service was successfully started
Starting staservd Service.
staservd service was successfully started
Starting staweblogic service......
staweblogic service was successfully started
Starting staengine Service.........
staengine service was successfully started
Starting staadapter Service..........
staadapter service was successfully started
Starting staui Service..........
staui service was successfully started
#
Register the Oracle Central Inventory Location
Use this procedure after STA installation has completed to register the Oracle central inventory location on the STA server. You only need to use this procedure once on this server.
This procedure creates an Oracle central inventory pointer file, /etc/oraInst.loc, which allows the Oracle central inventory location and Oracle group to be known to all Oracle installers used on the server.
-
Open a terminal session on the STA server and log in as the Oracle user.
-
Change to the Oracle central inventory directory. You specify this directory the first time an Oracle product is installed on the STA server. For example:
$ cd /opt/oracle/oraInventory -
Run the registration script, located in that directory.
$ ./createCentralInventory.sh
Setting the inventory to /opt/oracle/oraInventory
Setting the group name to oinstall
Creating the Oracle inventory pointer file (/etc/oraInst.loc)
Changing permissions of /opt/oracle/oraInventory to 770.
Changing groupname of /opt/oracle/oraInventory to oinstall.
The execution of the script is complete
$
The Oracle central inventory location and the Oracle group and are now identified in the Oracle central inventory pointer file, /etc/oraInst.loc.
Display the Oracle Central Inventory Location
Use this procedure to display the location of the Oracle central inventory after STA has been installed. Oracle recommends that you register this location (see "Register the Oracle Central Inventory Location" for instructions). Registration creates an Oracle central inventory pointer file, /etc/oraInst.loc. If the location has not been registered or the pointer file has been deleted, you can use this procedure to display the location.
-
Open a terminal session on the STA server and log in as the Oracle user.
-
Display the location, as follows.
-
If the Oracle central inventory has been registered, you can display the contents of the /etc/oraInst.loc pointer file. For example:
$ cat /etc/oraInst.loc
inventory_loc=/opt/oracle/oraInventory
inst_group=oinstall
$
The location is defined by the inventory_loc parameter, and the Oracle group is defined by the inst_group parameter.
-
If the Oracle central inventory has not been registered or the pointer file has been deleted, you can search for the Oracle central inventory, which has the directory name oraInventory. For example:
$ find / -name oraInventory
/opt/oracle/oraInventory
-
STA Patch Utilities
There are two patch utilities available to update 2.3.0 components.
-
STA 2.3.0 Patch 2019 (
sta230_patch2019.zip) -
STA 2.3.0 P2 02-06-2020 (
sta230_P2_02062020.zip)
You should install these patches to update 2.3.0 for the latest security fixes.
Contact Oracle support for the patch. Follow the installation instructions provided with the utility.