Change the State of an Alert
Change the state of alerts according to the alerts workflow process implemented at your site.
See Alerts Workflow for an example workflow.
-
In the left navigation, expand Tape System Activity, then select Alerts Overview.
-
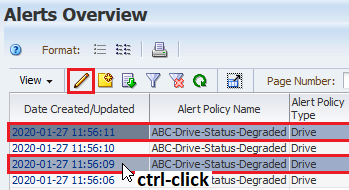
Select the alerts you want to modify (shift- or ctrl-click to select multiple). Click Change Alert State
 .
.
-
From the drop-down, select the state you want to assign, and then click OK.
-
If you changed the selected alerts to "Dismissed," and the Alerts Overview screen is set to hide dismissed alerts, the alerts are removed from the display.
See Show or Hide Dismissed Alerts for details on displaying dismissed alerts.
Alerts Workflow
You can set alerts on the Overview screen to several predefined states. The progression of an alert through various states is called a workflow.
Change the alert state depending on the current action being taken for the alert. You can implement the alerts workflow in whatever manner best suites your site, but a suggested progression of alert states is:
-
New – STA assigns this state to all alerts when they are created.
-
Acknowledged – The alert has been noted.
-
In Progress – The alert has been assigned to a responsible party and is being evaluated.
-
Dismissed – The responsible party has completed all activity on the alert. By default, all dismissed alerts are hidden on the Alerts Overview screen, but you can optionally display them.
See Show or Hide Dismissed Alerts for details.
See Change the State of an Alert for details on using alert states to implement a manual workflow.