Go to primary content
Oracle® Communications EAGLE Database Administration - System Management User's Guide
Release 46.6
E93319 Revision 1
Go To Table Of Contents
Contents

Previous
Previous
Next
Next

Removable USB Drive

Purpose:
This section is referenced in this manual by many procedures requiring the use of the removable USB thumb disk in the E5-MASP card. The procedures found in this section are recommended procedures for handling the removable USB drive in the E5-MASP card.
Requirements:
None

Procedure - Remove USB Drive

  1. Verify that the removable USB drive is locked in position and in use.

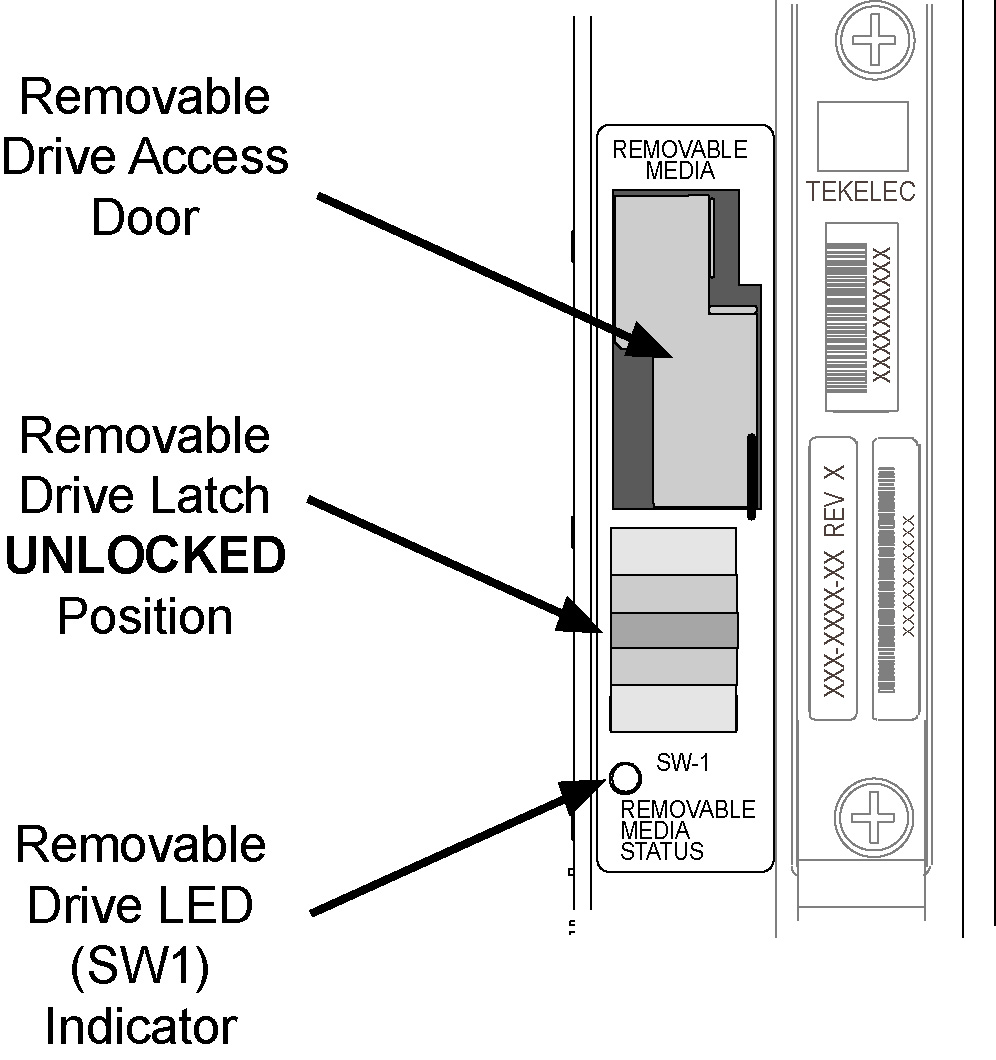
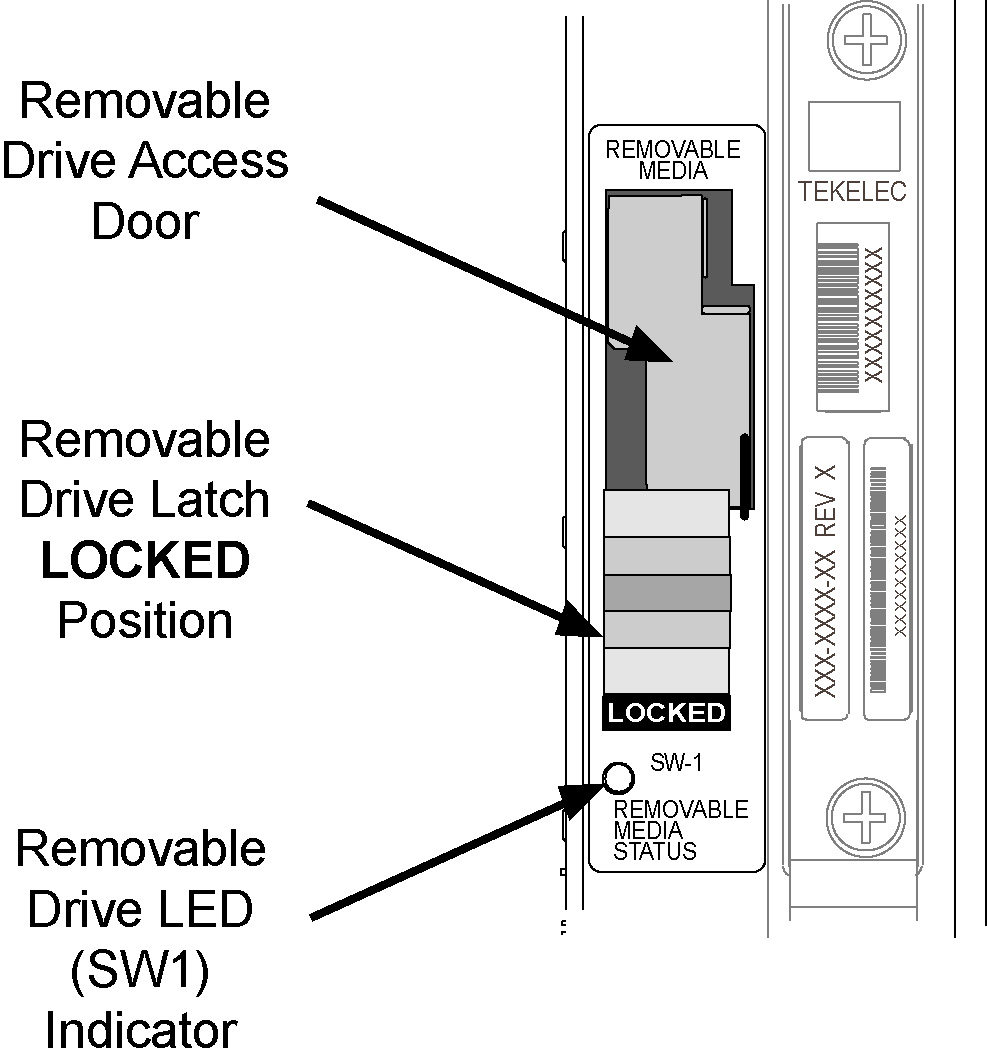
    The removable drive latch (SW1) is in the LOCKED position and the Removable Media Status LED on the E5-MASP is Off. Refer to Figure 2-1.

    Figure 2-1 Removable USB Drive LOCKED

  2. Move SW1 from the LOCKED to the unlocked position and wait for the LED to indicate a steady blue state. See Figure 2-2.

    When SW1 is transitioned from locked to unlocked, the LED will flash blue to indicate the drive is unlocked and in process of shutting down.

    Caution:

    Removal of the drive prior to the LED indicating steady blue could result in drive corruption.

    Figure 2-2 Removable USB Drive UNLOCKED

  3. When the LED indicates a steady blue state, the removable USB drive can be safely removed. The LED is off when the USB drive is fully ejected from the drive media.
    The USB drive can now be removed from the drive media.
  4. Lift the access door up, swing it past the detent position so that the door remains open on its own.
  5. Grasp the pull tab of the slide and pull the slide out slowly until it stops (it travels about a half inch).

    Caution:

    The full travel of the slide is less than an inch, do not try to pull the assembly to expose the full length of the thumb drive as this is beyond the slide’s designed travel.
  6. The USB drive is disengaged and can be taken from the inject eject assembly.
  7. Insert a USB drive into the inject-eject assembly.
  8. Grasp the pull tab of the slide and push the slide in slowly until you feel the USB drive is seated in its slot (it travels about a half inch).
  9. Close the access door.
  10. Move SW1 from the unlocked to the LOCKED position.

    When SW1 is transitioned from unlocked to locked, the LED will flash blue to indicate the drive is locked and in process of coming online.

  11. When the LED turns Off, the removable USB drive is ready for use.