212/279 212/279

Viewing, Exporting, and Removing Personal Data

To respond to anyone’s request to view their stored personal data, you can export this information (using comma-separated values (CSV) file format) and forward it to them. You are limited to viewing, exporting, or removing personal data one record at a time.

You can respond to all formal requests to remove personal data from your system by using the anonymize feature. When you anonymize someone, it deletes their personal data from the system. Once anonymized, a person needs to be re-entered into SimVen to become active on the system again.

Personal data purging is not performed on any profile record that has open transactions, purchase orders, or are assigned to a current or upcoming event

All of the tasks listed here are logged in either the Actions or Operations logs.

  1. On the toolbar, click Security, and then click Privacy Data Maintenance.
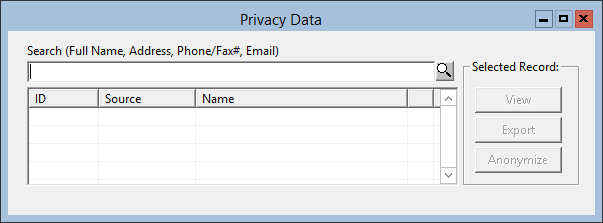
  2. In the Search field, enter the Full name (both the first name and last name), address, or phone number for the person, and then click the search icon. A list of matching personal data records appears.

    Figure 1-166 Privacy Data Search Window

    This figure shows the Privacy Data Search Window from where you can search, view, export, and anonymize records.
  3. To view additional details, choose a record by selecting the checkbox adjacent to the record, and then click the View button.
  4. To export personal data:
    1. Search for and choose a record by selecting the checkbox adjacent to the record, and then click the Export button.

      The personal data for the subject’s record is exported to a .csv file. The exported file includes all personal data associated with a specific vendor, company, contract partner, group, or hawker.

    2. After the data export has completed, use Microsoft Windows Explorer to navigate to the <Drive letter>:\SimVen\Conc\Export folder to access the export file.
  5. To remove private data from a record:
    1. Search for and choose a record by selecting the checkbox adjacent to the record, and then click the Anonymize button.
    2. An anonymization confirmation message appears. Click Yes to continue, or No to cancel the task.