21/279 21/279 21/279

Setting Up Vendors

You must first obtain consent from each vendor prior to storing their personal data in the system.

Figure 1-12 Setting Up Vendors
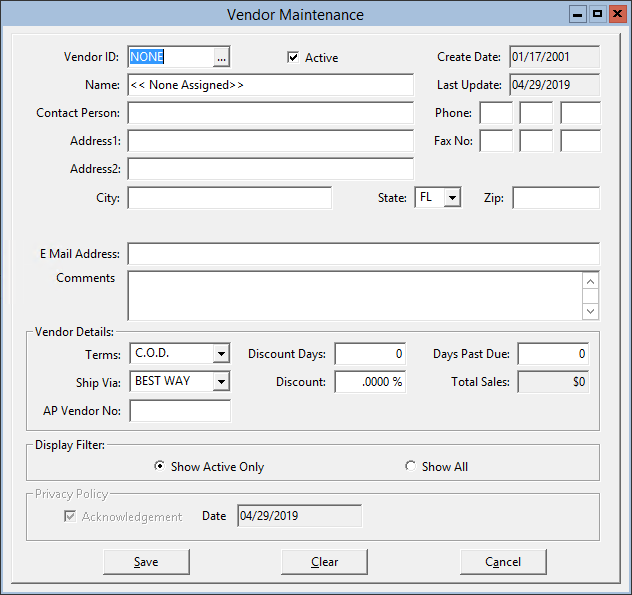
This figure displays the Vendor Maintenance window.
  1. On the toolbar, click Setup, and then click Vendors.
  2. Enter the Vendor ID, Name, and (optional) contact details, and then select the vendor’s State from the drop-down list.

    You can enter up to eight characters for the Vendor ID which can be numeric, alphabetic, or alphanumeric characters.

    1. Enter the vendor’s (optional) zip code in the Zip field.
    2. Enter the vendor’s (optional) email address in the E Mail Address field.
    3. Enter any additional information (optional) in the Comments field.
  3. Select the net billing Terms, select the shipment method from the Ship Via drop-down list, and then enter the AP Vendor No (optional), Discount Days (optional), Discount amount (optional), and Days Past Due (optional).
  4. In the Privacy Policy section, select Acknowledgement to opt in or provide your consent to the processing of personal data (when processed through the API). After you check this option, the Acknowledgement Date field automatically updates using the current date.

    If the vendor is not the person who is entering the personal data, the application end-user can do so on behalf of the vendor.

  5. Click Save, and then click Yes.