Setting Up Hawkers
You must first obtain consent from each hawker prior to storing their personal data in the system.
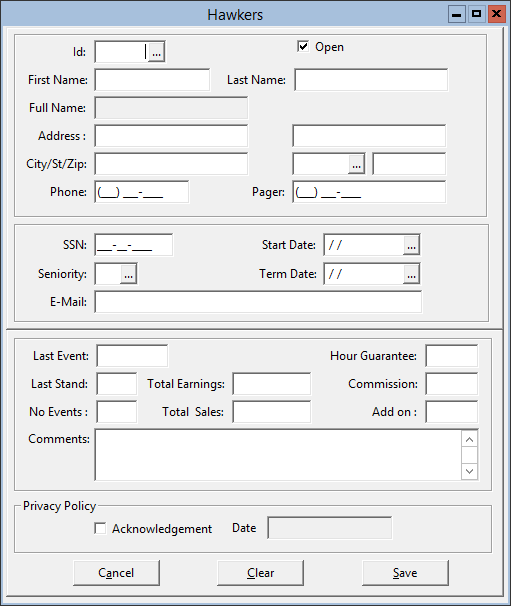
Figure 2-1 Hawkers Setup

- On the toolbar, click Vending, and then click Hawkers.
- Enter a Hawker ID. It is recommended to use the last four digits of the Hawker’s Social Security Number as their Hawker ID. Hawker ID’s can be one to six numeric characters in length.
- Enter a First Name and a Last Name.
- (Optional) You can enter an Address, Phone Number, and E-mail Address; however, they are not required.
- Enter a Seniority Level, or click the ellipsis (...) button and select the seniority level from the drop-down list.
- (Optional) You can select a Start Date and Term Date; however, they are not required.
- Assign an Hours Guarantee if one is offered.
- Enter a Commission if no Seniority Level is assigned.
- Enter an Add on Commission, if one is offered.
- Click Save.
- In the Privacy Policy section, select Acknowledgement to opt in or provide your consent to the processing of personal data. After you check this option, the Acknowledgement Date field automatically updates using the current date.
- Click Save.
Parent topic: Vending and Vending Room