7/36
Configuring an Audit Journal
To configure and assign an Audit journal to a workstation:
- In the POS Configurator, click the Devices tab, and then click Devices.
- Insert a record and enter the name of the new Audit journal from the General tab.
- Select Disk File for a journal entry that is written as a text file to the RES 3700 application server from the Device Type drop-down list. If you want to output an Audit journal to a printer, select Roll Printer from the Device Type drop-down list.
- Select the appropriate Network Node for your Audit journal from the drop-down list.
- Click the Printer Definition tab.
- If you choose the Disk File device type, enter the relative path in the Print To Disk Filename field. The relative path tells the system where you want the journal text file to be written to on the RES 3700 application server. For example:
..\journals\Auditjnl1.txt. - If you choose to output your Audit journal to a printer, select the Printer Interface Type that you are using from the drop-down list.
- Select the corresponding printer type from thePrinter Type drop-down list (based on your Printer Interface Type setting), and then click Save.
- Repeat all of the previous steps to configure a Backup Audit journal for your newly added Audit journal.
To assign an Audit journal and a Backup Audit journal to a workstation:
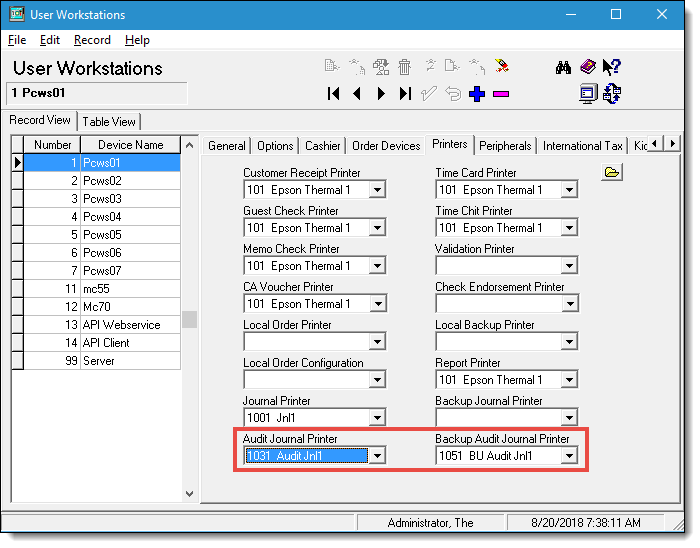
- In the POS Configurator, click the Devices tab, click User Workstations, and then click the Printers tab.
Figure 1-1 POS Configurator User Workstations Module

- Select the workstation record that you want to assign an Audit and Backup journal.
- Select the Audit journal from the Audit Journal Printer field that you want to write or print all transactions for this workstation.
- Select the Backup Audit journal from the Backup Audit Journal Printer field that you want to backup the primary Audit journal for this workstation and Save.
Parent topic: Audit Journal