GUI Tool Functions
The Web GUI provides some tools that apply to the entire GUI and other tools that apply to specific functions on a tab. For example, "Customizing the Page Display" applies to all pages and "Add widget" applies only to the Home page. Some tools are activated by icons and some are activated by links. The display of icons and links depends on whether the system displays Expert mode or Basic mode.
Shortcut Keys for the Web GUI
Home Page
- Add a Widget—Ctrl+Shift+a
- Refresh—Ctrl+Shift+r
Configuration Page
- Discard—Ctrl+Shift+d
- Save—Ctrl+Shift+s
- Search—Ctrl+Shift+e
Web GUI Tabs — Display and Operation
The Web GUI displays tabs that you click to display information and where you can perform tasks.
Home Tab
The Home tab displays the Web GUI Dashboard, which displays SIP statistics in configurable widgets. The Home Tab displays and operates in the same way for both Basic Mode and Expert Mode. On the Home tab, you can:- Add a widget
- Specify the widget sampling parameters
- Reset the display to the default
- Refresh the data displaying in the widgets
Configuration Tab
In Basic Mode the Configuration tab displays a workspace where you drag and drop icons to configure the border controller in the network. The toolbar on the Configuration Tab contains the following buttons that display task controls:- Settings. Configure system settings.
- Network. Configure the Host Route and Network Interface.
- Security. Configure a Certificate Record, the SDES profile, and the TLS profile.
- Management. Configure Accounting, SNMP Community, Trap Receiver, and Web Server.
- Other. Configure Media Profile, Translation Rules, SIP Features, SIP Manipulations, and SPL.
- Save. Save and activate the configuration.
- Discard. Delete unsaved configuration changes.
- Wizards. Set boot parameters, Set initial configuration, Set time zone, and Upgrade software.
- Switch to Expert. Change from Basic mode to Expert mode.
- Search. Search for objects and attributes.
- Media Manager
- Security
- Session Router
- System
Monitor and Trace Tab
The Monitor and Trace tab displays data that the system collects about:- Sessions
- Registrations
- Subscriptions
- Notable Events
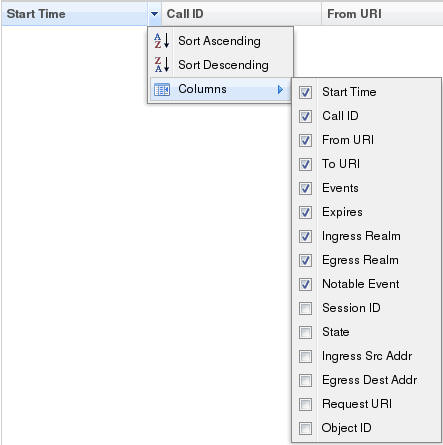
The page displays a toolbar that you can configure to display particular data for each of the data collection types. For example, you can choose the sort order and column headings. The Monitor and Trace Tab displays and operates in the same way for both Basic Mode and Expert Mode.
- Search. Configure a search filter.
- Show all. Override the display filter and show all data.
- Ladder diagram. Displays data in a ladder diagram.
- Export session details. Save the detailed data to an external location.
- Export summary. Save a summary of the data to an external location.
Widgets Tab
The Widgets tab is a portal to statistics about the system. The Widgets Tab displays and operates in the same way for both Basic Mode and Expert Mode.- Displays a list of objects that provide Configuration, SIP, and System statistical data. Depending on the object selected, you can view the data in list, table, pie chart, bar graph, and line graph form.
- Displays a list of Favorite widgets.
System Tab
The System Tab displays and operates in the same way for both Basic Mode and Expert Mode. The System tab displays the following management controls:- File management. Displays a list of file types and a set of controls to Refresh, Upload, Download, Backup, Restore, and Delete files.
- Force HA Switchover. Manually place the system in the standby state.
- Reboot. Manually reboot the system at any time.
- Support information. Generate a file that displays troubleshooting information that you can save and send to Oracle Customer Support.
- Upgrade Software. Verify the health of the system software, for example, synchronization health, configuration version, and disk usage. Configure the upload method, browse to the software file to upload, and opt to automatically reboot the system after the upgrade.
Search
From the Web GUI, you can search for a system object with the Search button located on the toolbar and you can search by the attributes of a system object with the Search field located on the page for a system object.
On the toolbar, click the Search button and the system displays the system objects in a drop down list. You can select an object from the list or type the object name in the text box. The system displays the search results in a list, where the object name is a link. Click the link to navigate to the object page.
On a system object page, enter an attribute or value for the object in the Search field and click Search. The system displays the results on the system object page.
Note:
The system does not support searching or sorting on lists and sub-objects from the Search field on a system object page.- For example, the realm-config system object page displays a list of Network Interfaces. You cannot search for one of the network interfaces on the list.
- For example, the realm-config system object displays the sub-objects "In realm", In network", and "Same ip" under the "Mm" object. You cannot search for the sub-objects.
Help
The logged on user button on the Web GUI displays the following information:
- Screen Help. Short descriptions of elements on the page.
- Help Topics. Online Help system containing topics about the tasks that you can perform on the Web GUI.
- About. Oracle notices and disclaimers, Oracle terms and restrictions, and third-party notices.


