
|
|
|
Email/Fax Destination
If you are e-mailing the report, the file is attached to an email message (e.g., as a PDF or HTML file.) If you are faxing the report, the file is rendered in the selected format and the image is faxed. When faxing or e-mailing a report, you can select the recipient from existing profiles or create a new recipient.
Once the report has been selected, the Fax / Email check box is selected, and the OK button is selected, then this screen appears to select the recipients to receive the report via fax or e-mail:
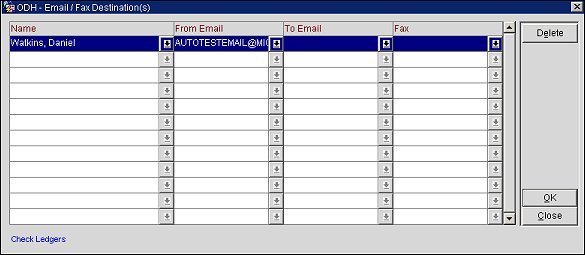
Also, the Email/Fax Destination screen is displayed when the Email List/Attach check box is selected and the Email button is chosen on the Batch AR Statements, AR Statements, Batch Owner Statements and Owner Account Statements (when the OPV_<version number> OPERA Vacation Ownership license is active) and Folio Options screen to e-mail folios. When multiple statements have been selected to be emailed, the Email/Fax Destination screen is displayed for each of the selected accounts, displaying the account name you are sending the statement for in the lower left hand corner of the screen in blue. Every e-mail address specified will receive a separate e-mail as this is not a CC or BCC e-mail.
Name. Simply select the down arrow or press the F9 quick key to display the Profile Search screen when in PMS or the Account/Contacts Search screen when in S&C.
From Email. The e-mail address of the user, department, or other entity that sent the e-mail. To determine which e-mail address populates in this field, the system will use the following sources and priorities:
Note: After a confirmation has been e-mailed, if the confirmation needs to be re-sent and the e-mail address that was used in the 'From Email' field has since been deleted from the system, you must select a new e-mail address from the 'From Email' field list of values.
Note: Reports emailed via OPERA Reports Scheduler will use the "From" email address configured for the General delivery method (see Delivery Method Maintenance for details).
To Email. If not auto populated from the guest's profile, enter the email address to where the report is to be sent or enter the email information on the Delivery Information prompt (see Folio Options for details). When multiple email addresses are configured for the selected profile, a single select list of values display when selecting the down arrow next to the field, or selecting F9, to choose the correct email address. But if no email address is configured and the user selects F9, then a message prompt is displayed notifying the user that no codes have been configured for the email. To send to multiple email addresses, click in the next line below and select another profile or simply just enter an email address in the To Email column.
Fax. If not auto populated from the guest's profile, enter the target fax number in the Fax Number field. When multiple fax numbers are configured for the selected profile, a single select list of values display when selecting the down arrow next to the field, or selecting F9, to choose the correct fax number. But if no fax number is configured and the user selects F9, then a message prompt is displayed notifying the user that no codes have been configured for the fax number.
Attach. Available when the General>File Attachments application function is set to Y and a value has been defined for the General>Email Attachment Directory Name application setting, select to add a file attachment to be sent to the selected email addresses. When attachments exist, the number of attachments that are sent is displayed in the lower corner of the screen in blue letters, for example Attachments: 2. The attached files are sent to all of the email addresses or fax numbers that have been specified. See Attaching Files below for details.
Delete. Deletes the highlighted recipient from the destination list.
Note: If both the Email and Fax fields are auto populated for the profile but the user only wants to send the report via email, the user would simply need to click in the Fax field and press the Delete button on the keyboard. If the Delete button is clicked, then the whole recipient, email, and fax information is deleted from the destination list.
OK. Select to add the recipients to the destination list and continue on to the Report filter screen for the selected report. The selected report or account is displayed in the lower left corner of the screen in blue letters.
Note: Any files that are attached here will not be attached to the guest's profile or reservation, only used as an email attachment.
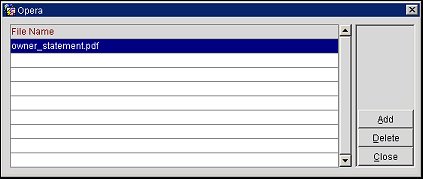
To add a file or files to the email, click on the Add button to display the File Upload screen. If files need to be removed, highlight the file and select the Delete button.
Select the down arrow to search your local and network directories. After choosing the file you are brought back to the File Upload screen. The Select File field is populated with the directory and file name you wish to attach. Select the Upload button to add the file to the email.
See Also