
|
|
|
Searching for an Activity
This feature is available when the OPS <version number> OPERA Sales & Catering license is active or when the OPF<version number>Sales Force Administration license is active.
The Activity Search screen can be accessed in a number of ways. For example, from the main menu, select Customer Management > Activities, or select the Activities button from the Business Block Search screen, or select the Activities button from an account or contact Profile screen.
As a sales manager or catering manager it may be hard to remember all the details of your appointments; however, there is usually one detail that you remember whether it be a date, time, or contact name that can be used to search for that activity.
Note: OPERA will save certain values by user when this screen is closed and default those values the next time that user opens the Diary. These values are: Property and Completed LOVs.
Property. This feature is available if the OPP MHT2 or OPS MHT2 license is active. Select the down arrow to choose the property to search for the activity. The default is your login property.
Type. Select the down arrow to choose types of activities and view all the activities of that type.
Priority. Select the down arrow to choose the priority levels of the activities for which you are searching.
Account. Select the ellipsis button to display the Account Search screen where you can search for the account profile to find related activities.
Note: When accessing the Activity Search screen from the Business Block screen or from the Business Block Search screen, the Account and Contact information will not be passed to the Activity Search screen (allowing for all the activities linked to the business block to be displayed). However, if you create a new activity (select the New button) from this screen, the Account and Contact information will be passed to the Activities screen. In addition, if an account or contact is manually selected in the Activity Search screen, that information would be passed to the new Activity.
Contact. Select the ellipsis button to display the Contact Search screen where you can search for the contact profile to find all attached activities.
Class. Select the down arrow to choose the activity class: Appointment, Call, Correspondence, To Do, or Meeting.
From Date. To search for activities scheduled to start on a particular date (or any date thereafter), enter the start date or use the calendar tool to choose the date. The default for this field is controlled by the application setting ACTIVITY > NUMBER DAYS TO KEEP TO DO ON CALENDAR. For example, if the business date is June 25, 2008, and the value in the application setting = 2, then the To Date defaults as Business Date + 1 (June 26, 2008) and the From date will now default as To date minus the value in the application setting June 24, 2008).
To Date. Enter a date or use the calendar field to search for activities having a start date up to or before the date you specify. The default for this field is business date +1.
Note: When the ACTIVITY > USE TIME ZONES FOR ACTIVITIES application parameter is set to Y, date and time information related to activities is converted to the logged-in user's time zone; if no time zone is specified for the logged-in user, the logged-in property time zone is assumed; if the logged-in property does not have a time zone assigned, the database time zone is assumed. See Activity Time Zones for details.
Owner. Select the ellipsis button to choose the sales managers whose activities you want to find. The logged in user is selected by default.
Purpose. Enter all or part of the purpose of the activity. This is a free typing field. Use it for a partial or full field search.
Completed. Select the down arrow to choose Yes, No or Both. Use to search for completed, incomplete, or both kinds of activities.
When searching for activities by selecting the Activities button from any of the business block screens (Business Block Search screen, Business Block screen, Quick Business Block Search screen, Quick Business Block screen, and SFA Business Block screen), the name of the business block where the search was initiated is defaulted into the Block Name field and is shown in bold on the Activity Search screen for the initial search. When searching for activities by selecting the Activities button from the Account screen or Contact screen, the Account and/or Contact search options will be displayed in bold for the initial search. If you later change the Block Name, Account and/or Contact search options and click on Search (or tab out of the changed search option field), the changed search option will appear in regular (non-bold) type. This behavior can help you recognize when you have changed any of the default initial search options when accessing the Activity Search screen from block screens or from the Contact or Account screens.
For example, the Account and Contact fields look like this for the initial search from an Account screen.

If you change the account name, the Account field is no longer bold. (The contact name, which was unchanged, remains in bold type.)

Note: Campaign Names will not appear in bold on the Activity Search screen, even if the Activity Search screen was opened from a specific campaign.
Block Name. Select the ellipsis button to display the Business Block Search screen where you can search for the business block to find all associated activities.
Campaign. Use this filed to search for activities based on a specific Campaign.
Potential. This feature is available if the GENERAL > POTENTIAL application function is set to Y. Select the ellipsis button to display the Potential Search screen where you can search for the potential to find all associated activities.
Filter. Available if the GENERAL > FILTER SEARCH application function is set to Y. Select the down arrow to choose a filter to be applied to this search. Filters can be used to return only those records that meet certain predefined conditions. Select the ellipsis button to access the Filter Maintenance screen.
When creating and using filters, the following rules apply:
Result. In SFA when the application parameter ACTIVITY > ACTIVITY RESULTS is set to Y, this field is available to base activity searches based on an activity result.
The results of your search display in the grid in newest to oldest order. To display the Activities screen which provides complete information about the activity, double-click the activity (or highlight the activity and select the Edit button).
X. The first column in the grid (X Column) provides the means to select and identify activities for processing. Mark the activity and select one of the available buttons (Complete, Delete, Move, Sync, or Unsync) to process accordingly. If more than one activity is selected, all activities will be processed in batch. (It is not possible to hide this column when editing the Activity Search Grid.)
Note: The Complete button is unavailable for Notification Class activities.
Owner. Initials of the sales manager responsible for this activity.
Start Date. Start date for this activity.
Time. Start time for this activity.
Note: When the ACTIVITY > USE TIME ZONES FOR ACTIVITIES application parameter is set to Y, date and time information related to activities is converted to the logged-in user's time zone; if no time zone is specified for the logged-in user, the logged-in property time zone is assumed; if the logged-in property does not have a time zone assigned, the database time zone is assumed. See Activity Time Zones for details.
C. An X in this column indicates that the activity has been completed.
M. An X in this column identifies this activity as a Master (source) activity.
A. An X in this column indicates that the activity has attachments associated with it. Highlight the activity and select the Attachments indicator lamp to display a list of attachments for this activity.
Note: When an Attachment is added to a 'Master' activity (an activity from which other attendees were invited), that attachment will be visible on all the linked activities. Attachments added to the linked activities, will NOT be visible on the 'Master' nor on the other linked activities.
Property. (This feature is available if the OPP MHOT Multi-property add-on license is active.) Property with which the activity is associated.
Class. Activity class.
Type. Activity type.
Account. Name of the Account associated with this activity.
Contact. Name of the contact for this activity.
Phone No. Contact's phone number.
Email. The primary email address for the contact associated with this activity. The email address can be copied from the grid (Ctrl+C), if desired.
Purpose. Description of the purpose of the activity.
Priority. Select an Activity priority for this activity.
Note: An activity's priority code can be assigned a color schematic for visual identification. See Priorities, for more details.
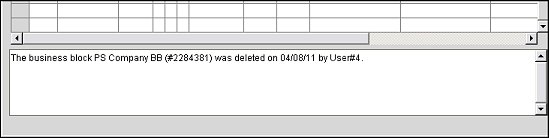
Below the Search Results Grid is an editable text area where you can add any notes you want to keep regarding an activity. For an Auto Trace that is generated based on record deletion, this area will be automatically populated with a message containing the record type that was deleted (Account, Contact, or Business Block), the name/description of the record, the record ID number, the date deleted, and the user that deleted the record.
For example, a Business Block (with a record deletion Auto Trace attached) was deleted, which triggered an Activity for that record, and automatically populated the Notes section for that Activity:
See Trace Code Definitions When Delete - Record for more information on generating an Auto Trace based on record deletion.
A right-click on the column headers in the search results grid allows you to change the sort order of the search results and make other modifications to the grid. Options include:
Add this Item to Order By. Use this option to add the selected column to the sort order. For example, if the default order by is start date and user wants to order by start date and then status, right click on status and select this option.
Add this item in order by, descending. Use this option to add the selected column to the sort order, in descending order. The same as above except that the sort on status will be in reverse sequence order.
Order by this item in descending order. Use this option to start the sort order using the selected column.
Remove this item from Order By. Use this option to remove the selected column from the sort order.
Don't Order By Any Column. Use this option to display results without a sort order.
Show Existing Order By. Select this option for a text display of the current sort order.
Column. To increase or decrease the width of a selected column in the Search result grid, select the Column option and select Increase Width or Decrease Width. You can also select and drag the right border of the column header to the desired width. The changes only remain in place in the Search grid when the Search screen is open. If you want permanent changes to the column adjustment:
- Select Save Grid in the right-click Order by menu.
- Or, select Modify Grid. The Grid Definition screen appears where you can set the desired width in the Preview Grid and select Save.
Save Grid. Select this option to enable the Modify Grid option to change the display of the columns in this grid.
Modify Grid. Opens the Grid Definition screen which allows you to add or remove columns from the grid, edit column headers, change the column width or the column order and color code the grid. If the Modify Grid option is grayed out, you must first select Save Grid.
When more than one activity is selected, the only enabled buttons are: Search, Advanced, Close, Sync, Move, Complete, and Delete.
Note: The Complete button is unavailable for Notification Class activities.
Sync/Unsync. Available when OPERA S&C Outlook Integration is configured. Select Sync to synchronize the selected OPERA S&C activity with Outlook. Use Unsync to remove the synchronization between the selected OPERA S&C activity and Outlook. See Using OPERA Outlook Integration for more details.
Email. Open the Email Activities screen. The Purpose of the activity will be auto-filled on the Subject line of the email.
Note: The OPERA user wanting to open this screen must have an email address associated with their Employee profile.
Copy. Copy the selected activity into the same or another profile.
Move. This option calls the Quick Profile screen which allows you to Move (cut and paste) the selected activity to another Account and/or Contact.
Complete. Mark the highlighted activity as Completed. On the Activity screen, the Completed check box is selected and the current date and time are automatically inserted into the completed fields. You can add any notes you want to keep regarding this activity in the text entry area beneath the grid. Once an activity is marked as Completed, the Complete button is unavailable for that activity.
Note: The Complete button is unavailable for Notification Class activities. |
Note: If a survey is attached to the activity type and the survey has not been completed at the time the activity is marked Completed, the Survey Responses form opens so that the survey can be completed.
In SFA, if the ACTIVITY > ACTIVITY RESULTS application parameter is set to Y, the Activity screen will open when the activity is marked as Completed. The Completed check box is selected and the current date and time are automatically inserted into the completed fields on the Activity screen.
Extract. Create a mail merge based on the selected activities. The Extract button takes you to the Template screen where you can choose a template (or create a new one) for the mail merge. When you select an Activity for an extract, you have access to the associated Accounts, Contacts, and Business Blocks information. See Data Extraction for details.
Options. Go to the Activities Options menu.
Delete. Select this button to delete selected activities. You will be prompted to confirm that you do indeed want to delete the selected activity.
If an activity is a multiple assigned activity, meaning that it has more than one profile associated with it (e.g., and Account and a Contact, or two Contacts, or two Accounts, etc.), the delete function brings up an additional confirmation prompt that asks "This is a multiple assigned activity. Do you wish to continue?" with Yes, Yes to All, No, No to All, and Cancel options.
If more than one multiple assigned activity is selected to be deleted, the Yes (or No) confirmation prompt begins its confirmation in row order, top selected row first, regardless of which row is highlighted or the order in which they were selected. If you select Yes to All after choosing at least one No, it will delete all but the activity for which you answered No. If you select No to All after choosing at least one Yes, it will delete only the activity for which you answered Yes.
New. Select this button to create a new activity on the Activities screen.
Edit. Select this button to display more detailed information about the highlighted activity. The Activities screen displays.
This feature is available if the GENERAL > SURVEY application function is set to Y. The Survey lamp in the lower part of the Activities Search screen indicates that a survey is attached to the activity you have highlighted (See Indicator Lamps for details). Click on the lamp (or select the Survey button from the Activities Options menu) to display the Survey Response screen. You can use this screen to provide responses to the survey questions if the survey has not already been answered. If responses have already been provided, you can review the answers given but you cannot change them.
If a survey is attached to the activity type and the survey has not been completed, the Survey Responses form will open when the activity is marked Completed.
See Surveys for details.
See Also