| Oracle® Retail Xstore Office Cloud Service 18.1 User Guide Release 18.1 F18648-05 |
|

 Previous |
 Next |
| Oracle® Retail Xstore Office Cloud Service 18.1 User Guide Release 18.1 F18648-05 |
|
Previous |
Next |
The goal of the Profile Management component of Configuration Manager is to define Store Personalities for your organization. The Store Personalities allow you to easily maintain portions of your configuration paths using a GUI format in Oracle Retail Xstore Office Cloud Service. Behind the scenes, these Store Personalities are translated into the various configuration paths specified in configPath.properties. For more information on Personality Maintenance and configuration paths, see Appendix B, "Appendix: Personality Maintenance and Config Paths."
|
Note: The Configurator component of Configuration Manager is used to create, maintain, and deploy Oracle Retail Xstore Point-of-Service configuration changes selectively, or globally across the entire organization. Refer to Chapter 5, "Configurator" for more information about making configuration changes and deploying the information to your stores. |
Profile Management includes functions for creating and maintaining profile groups and elements for stores and registers, creating and maintaining the personalities that determine the prioritized profile elements for configuration overrides, and creating and maintaining the store landscapes used for machine (register) configurations. After setting up this information, you can assign Store Personalities to your stores.
First, create Profile Groups and their associated Elements. Follow the steps outlined in Profile Maintenance to set up and maintain the Profile Groups.
Next, after creating the Profile Group and Element combinations, set up your Personalities and Landscapes.
A Personality is a grouping of at least one or many Profile Group and Element combinations in an ordered list that work together to define a store. For example, using the Profile Groups and Elements you set up previously (step 1 above), you can identify a personality as being Canadian, Banner, Outlet, in addition to another personality defined as US, Banner, Flagship, Retail, and so on.
A Landscape is a collection of prioritized profile groups and elements for register-specific configuration overrides. When assigned to a store, the landscape determines the configurations that are applicable to individual register numbers or ranges of register numbers (for example, "22-Managers Terminal", "44-Lead Register", and so on).
Follow the steps outlined in Personality Maintenance and Landscape Maintenance to create Personalities and Landscapes.
Finally, set up each Store Personality by assigning the Personalities and Landscapes you created (step 2 above) to your stores. Follow the steps outlined in Store Personality Maintenance to create Store Personalities.
This section describes the profile maintenance functionality.
The profiles you set up here will be available as configuration scope overrides for Personality and Landscape group types in the Configurator component, providing the ability to deploy configurations that will override the global layer for specific locations as defined by the Store Personality. Refer to Chapter 5, "Configurator" for more information about the Configurator component.
Profile Groups are used to associate configuration overrides with specific Profile Elements.
A Profile Group is simply a collection of configuration elements by type; for example Location, Register Type, Store Type, and so on.
A Profile Element is the child property associated with the Profile Group; for example, Location= Ohio, California, Iowa, and so on.
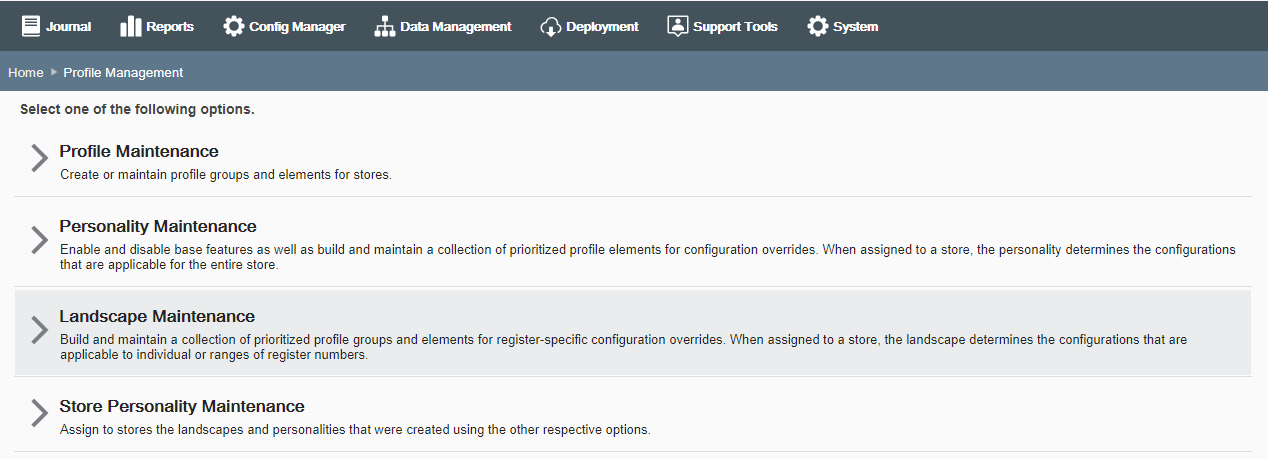
From the Oracle Retail Xstore Office Cloud Service menu, select Configuration Manager, then Profile Management, or click the Profile Management link in the Configuration Manager panel.
From the Profile Management page (Figure 4-1), select Profile Maintenance.
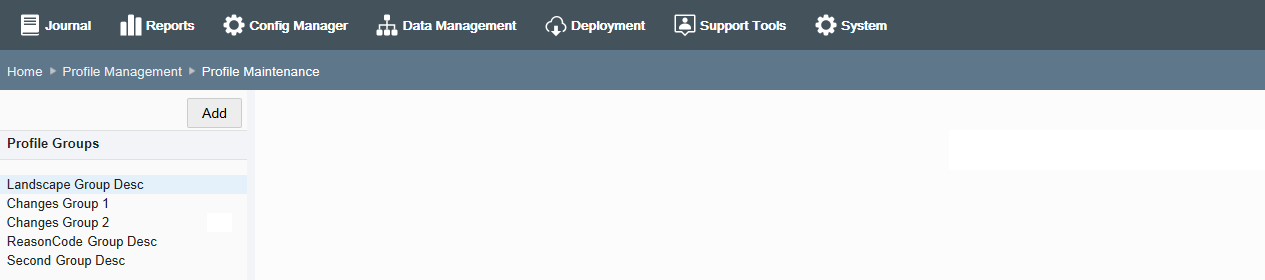
The Profile Maintenance page displays. Click Add to create a new Profile Group.
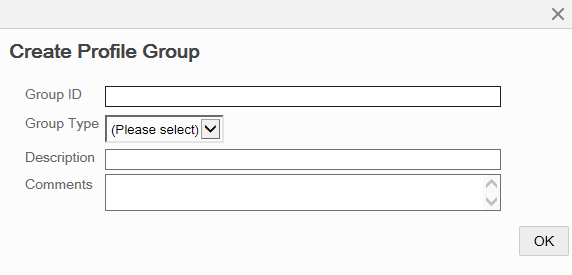
At the Create Profile Group window, enter the information required to create a new Profile Group:
Group ID - The profile group identifier. Spaces are not allowed here.
Group Type - The type of profile group: Personality or Landscape
The Group Type selected here determines where the Profile Group will be available for selection when setting up Personalities and Landscapes. Landscape profile groups will only be available for Menu Configuration and System Configuration overrides.
Description - The profile group description.
Comments - [OPTIONAL] A comment associated with the Profile Group.
Click OK.
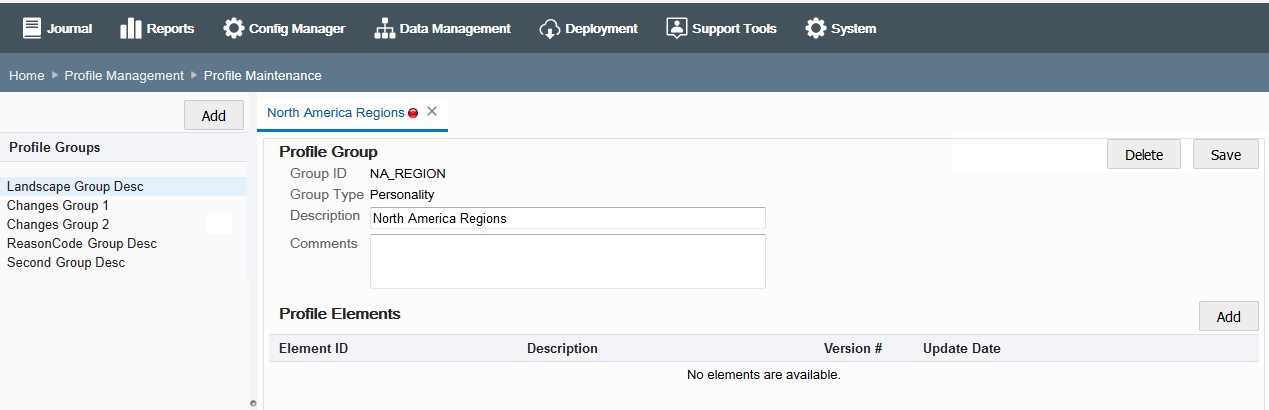
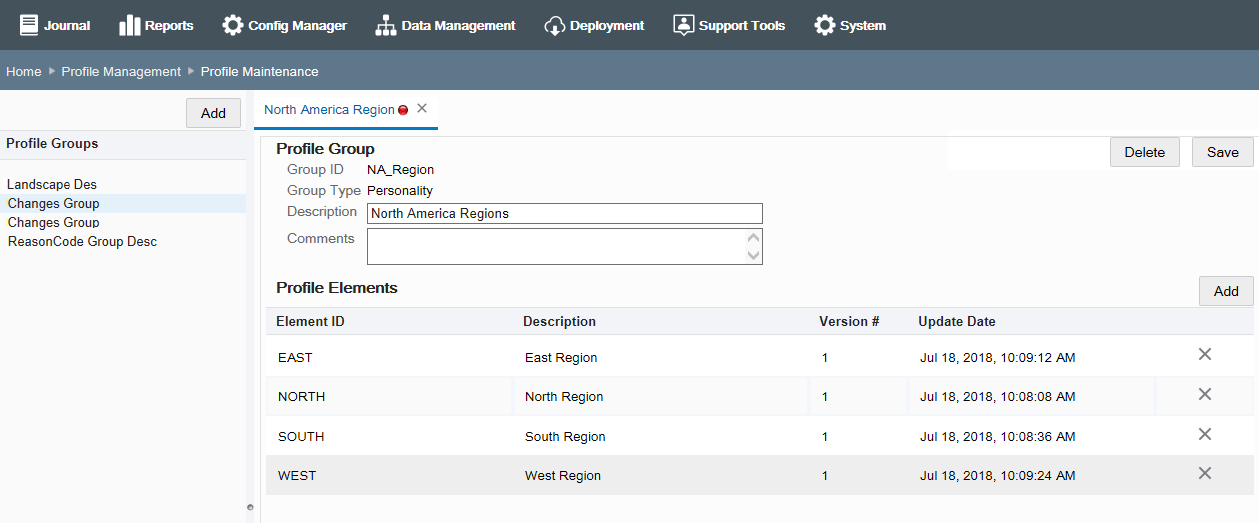
The Profile Maintenance window displays the new Profile Group information you added.
The red icon ![]() in the tab header indicates this Profile Group has not been saved.
in the tab header indicates this Profile Group has not been saved.
To close the tab, click the close icon. You will be prompted if there are un-saved changes.
To delete this Profile Group, click Delete. You will be prompted to confirm the deletion.
If a Profile Group (and its Elements) is being used by a Personality or Landscape, it cannot be deleted.
Click Save to save the Profile Group to the Profile Group list, or continue with step 8 below before saving.
Click Add in the Profile Elements section of the window to add elements to this Profile Group.
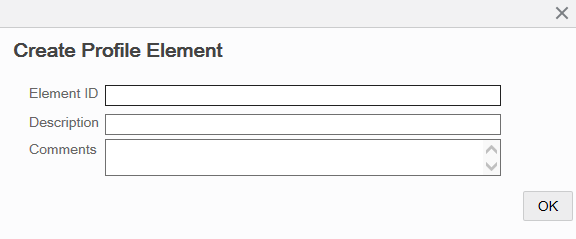
At the Create Profile Element window, enter the information required to create a new Profile Element for the Profile Group:
Element ID - The element identifier. (Note: Spaces are not allowed here.)
Description - The element description.
Comments - [OPTIONAL] A comment associated with the Profile Element.
Click OK.
Repeat steps 8 through 10 to add additional Elements to the Profile Group.
When all Elements have been associated with the Profile Group, click Save.
The Profile Group created here will now be available in the Overrides feature in the Personality Maintenance and Landscape Maintenance sections of Profile Maintenance where applicable for the group type. (See Figure 4-1)
Delete Options:
If you need to delete the Profile Group and all the associated Elements, click the Delete button.
If you need to delete an Element, click the Delete icon.
You will be prompted to confirm your selection.
If a Profile Group (and its Elements) is being used by a Personality or Landscape, it cannot be deleted.
The version number is shown on the Profile Maintenance page for the Profile Group and Element. This value will be increased by one each time the Profile Group/ Element is deployed, or scheduled for deployment, with a new set of configurations.
The version number is not increased until the configuration is deployed (or scheduled for deployment). Editing an existing profile element does not increment the version number.
Rollback is not available at this time.
Audit logging includes who, when, and in which version the change was made.
See also Chapter 5, "Configurator".
Use Personality Maintenance to group one or many Profile Group and Element combinations that will be used to define a store.
From the Oracle Retail Xstore Office Cloud Service menu, select Config Manager - Profile Management, or click the Profile Management link in the Configuration Manager panel.
From the Profile Management page (Figure 4-1), select Personality Maintenance.
At the Personality Maintenance page, add a new Personality or edit an existing one:
|
Note: To quickly find a Personality, enter text in the Description field. The list will be filtered to show the Personalities with the text in their descriptions. |
If adding a new Personality:
Click Add New.
At the Edit Personality page, use the wizard to complete the information on each tab, then click Next. See Personality Setup Options for a list of Personality options.
Skip to step 4 to review your selections.
If editing an existing Personality:
Select the Personality in the list.
At the Personality Detail window, click Edit.
Complete the fields as required, then click Next. See Personality Setup Options for a list of Personality options.
Continue with step 4 to review your selections.
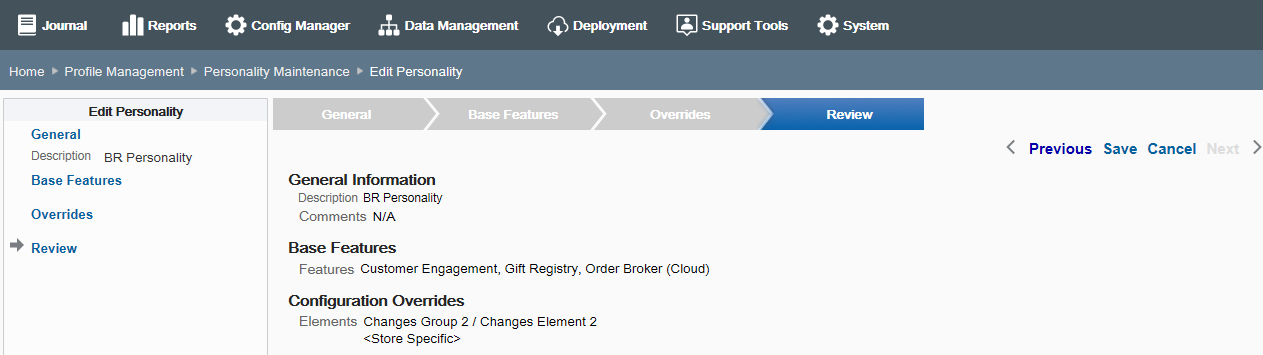
Review the Personality options you selected:
To save the Personality, click Save. The Personality is added to the list on the Personality Maintenance page.
To edit the Personality:
Click Previous to go back one page, or select a configuration option in the Edit Personality section in the left panel of the window.
After making your changes, click Save. The new Personality is added to the list on the Personality Maintenance page.
To discard the Personality, click Cancel. When prompted, click Yes to confirm you want to cancel Personality setup.
After completing Personality setup, Oracle Retail Xstore Office Cloud Service returns to the Personality Maintenance page.
To delete a Personality that has been created or updated, click the Delete icon associated with the Personality on the Personality Maintenance page.
When prompted, click Yes to confirm the deletion.
If a Personality has been assigned to a Store, it cannot be deleted.
This section describes the personality setup options.
Define the basic information for the Personality, then click Next.
Description - Enter the Personality identifier.
Comments - [OPTIONAL] Enter additional identifying information for the Personality.
Select the Oracle Retail Xstore Point-of-Service features that are active for this Personality, then click Next.
About the Profile Group and Element combinations:
The Profile Groups and Elements available here are created in Profile Maintenance. See Profile Maintenance for more information.
Only the Profile Groups with the type "Personality" are available in the drop-down list. (Profile Groups with the type "Landscape" are not available in Personality Maintenance.)
A <Store Specific> override entry is available by default in the drop-down list.
Select and prioritize the Profile Group and Element combinations:
Select the Profile Group for this Personality.
Select the Profile Element for this Personality.
Click Add Element.
Repeat steps a through c as needed to add all the Profile Group and Element combinations to this Personality.
If needed, select a Profile Group and Element combination row and use the up/ down arrows to change the priority. Elements at the top of the list have higher priority.
If needed, click the icon to remove the Profile Group and Element combination from the Personality.
Click Next.
Use Landscape Maintenance to create and edit the register layout portion of configuration paths.
From the Oracle Retail Xstore Office Cloud Service menu, select Config Manager - Profile Management, or click the Profile Management link in the Configuration Manager panel.
From the Profile Management page (Figure 4-1), select Landscape Maintenance.
At the Landscape Maintenance page, add a new Landscape or edit an existing one.
If adding a new Landscape, continue with Adding a New Landscape below.
If editing an existing Landscape, skip to Editing an Existing Landscape.
At the Landscape Maintenance page, click Add New.
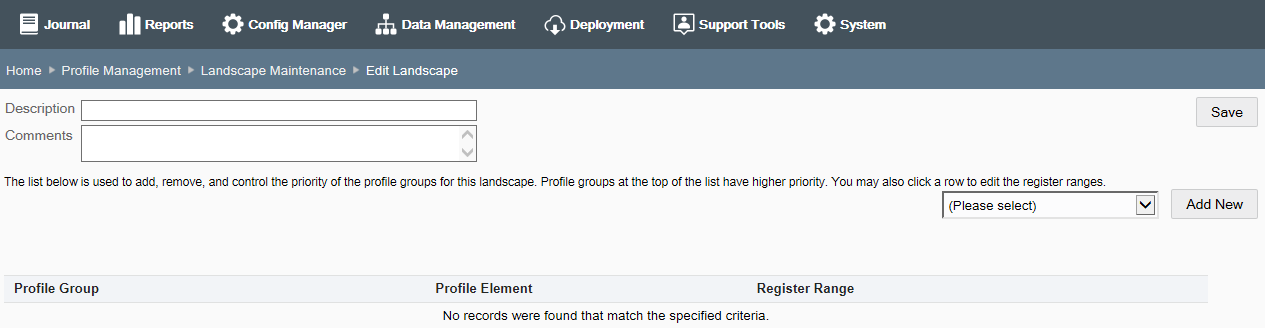
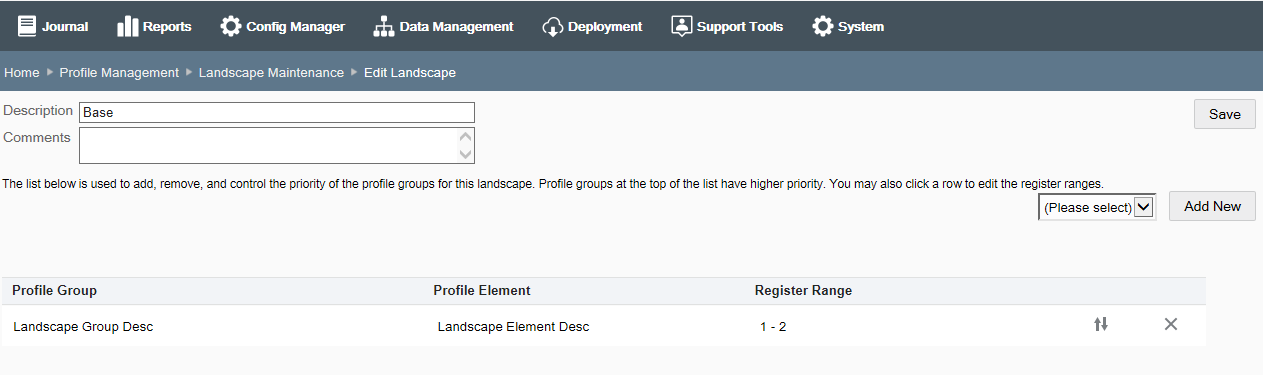
At the Edit Landscape page, complete the following information:
Description - Enter a short description for the new Landscape.
Comments - [OPTIONAL] Enter additional information about the new Landscape.
Select a Profile Group from the drop-down list, then click Add New to add the Profile Group to the Landscape.
|
Note: The Profile Groups and Elements available here are created in Profile Maintenance. See Profile Maintenance for more information. Only the Profile Groups with the type Landscape are available in the drop-down list. Profile Groups with the type Personality are not available in Landscape Maintenance. |
At the Profile Group page, click Add New to add a Profile Element to the Profile Group.
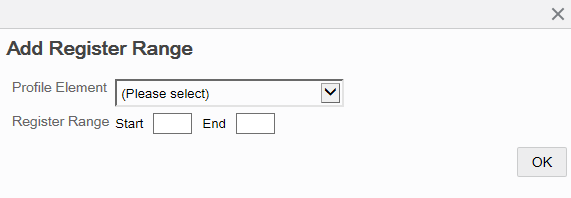
At the Add Register Range window, complete the fields, then click OK.
Profile Element - Select a Profile Element from the drop-down list.
Register Range - Enter a starting and ending register range. If there is only one register, enter the register number in both fields.
Repeat steps 4 and 5 as needed to add all the Profile Elements and Register Ranges for the Profile Group.
Click Done to return to the Edit Landscape page.
You have the following options at the Edit Landscape page before saving the Landscape:
To add additional Profile Groups and Elements to the Landscape, repeat steps 3 through 7.
To edit the register ranges, select the row to open the Add Register Range window and make changes as needed.
To change the priority, click the Selector Control icon ![]() to select the row and activate the up and down arrows on the right side of the page.
to select the row and activate the up and down arrows on the right side of the page.
With the row selected, use the up/down arrows to move the row up or down in the list. Profile Groups at the top of the list have higher priority.
To delete a register range, select the row and click the Delete icon.
When Landscape setup is complete, click Save to return to the Landscape Maintenance page.
At the Landscape Maintenance page, select the Landscape in the list.
To delete a Landscape, click the Delete icon.
When prompted, click Yes to confirm the deletion.
If a Landscape has been assigned to a Store, it cannot be deleted.
At the Edit Landscape page, edit the Landscape as needed:
To change the Description or Comment, enter the information in the appropriate field.
To add a new profile group perform step 3 on page 8 through step 7 on page 10.
To edit the register ranges, select the row to open the Add Register Range window and make changes as needed.
To change the priority, click the Selector Control icon ![]() to select the row and activate the up and down arrows.
to select the row and activate the up and down arrows.
With the row selected, use the arrows to move the row up or down in the list. Profile Groups at the top of the list have higher priority.
Click Save when the edits are complete to return to the Landscape Maintenance page.
Store Personalities are used to create the configuration paths specified in configPath.properties.
Store Personality Maintenance is where you assign the Personalities (created in Personality Maintenance) and Landscapes (created in Landscape Maintenance) to stores.
From the Oracle Retail Xstore Office Cloud Service menu, select Config Manager - Profile Management, or click the Profile Management link in the Configuration Manager panel.
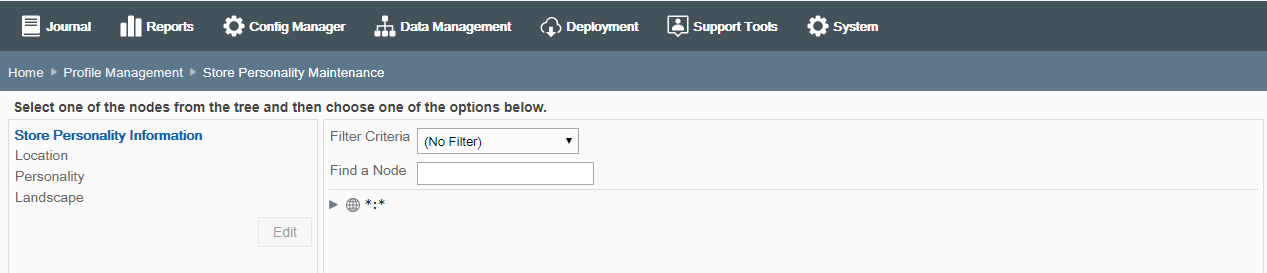
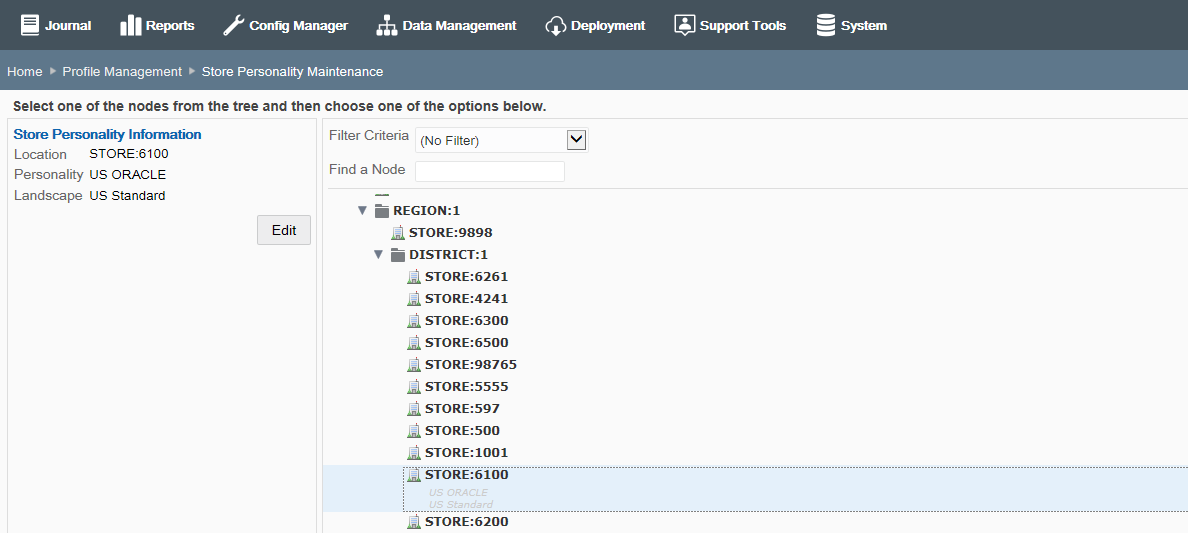
From the Profile Management page (Figure 4-1), select Store Personality Maintenance.
[OPTIONAL] At the Store Personality Maintenance page, use the Filter Criteria and Find a Node search options to quickly find a store:
To quickly find a store you can:
Select an option from the Filter Criteria drop-down list to filter the nodes displayed in the org hierarchy tree based on assigned personalities and landscapes. The following filter options are available:
No Filter (default): Select this option to remove any filters.
No Store Personality - Select this option to display only the stores that do not have store personalities assigned to them.
Personalities or Landscapes: All the personalities created on the Personalities Maintenance page are listed under the heading Personalities, and all the landscapes created on the Landscapes Maintenance page are listed under the heading Landscapes. Select a personality or landscape to display only the stores that have the selected personality or landscape assigned to them.
<OR>
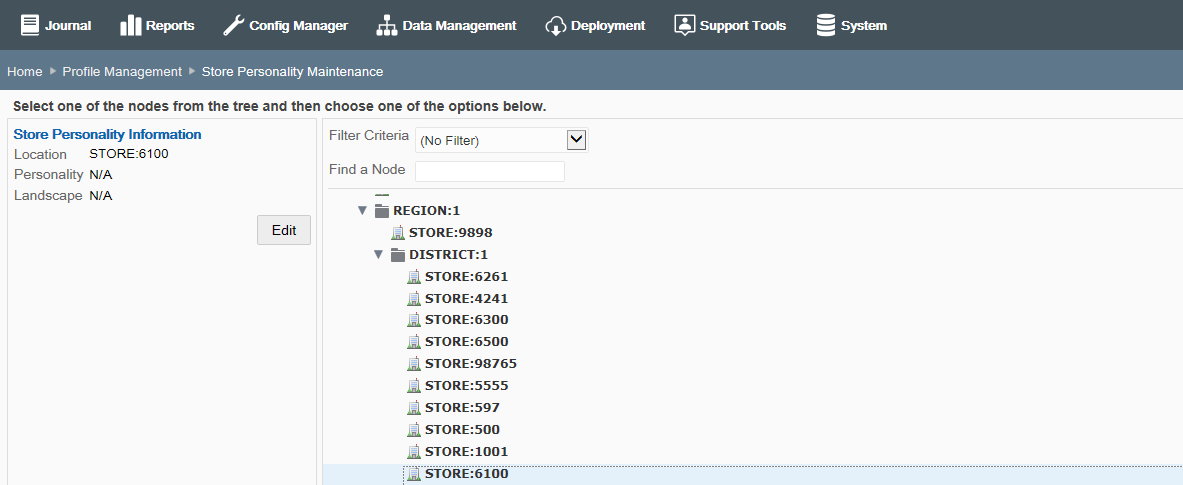
In the Find a Node field, begin typing the node description to search for a specific node in the org hierarchy tree.
From the hierarchy tree, select a node to assign a Personality/Landscape pair.
|
Note: If you select a non-store node (for example District), all stores contained in that node will be affected by any change made to the personality and landscape. This will remove and replace any personality/landscapes that were previously assigned to stores within that node. |
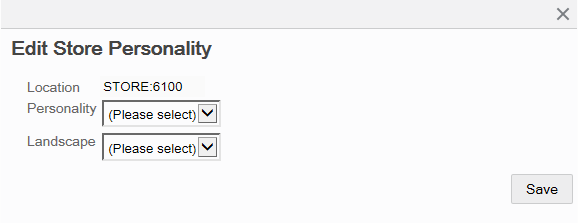
Click Edit to modify the personality/landscape assignments for the selected store.
At the Edit Store Personality window, select a Personality and a Landscape from the drop-down lists. Both a Personality and a Landscape are required.
Click Save to assign the selected Personality and Landscape to the store.
See also Appendix B, "Appendix: Personality Maintenance and Config Paths".