Defining Element Names
|
Page Name |
Definition Name |
Usage |
|---|---|---|
|
GP_PIN |
Name an element and define its basic parameters. |
|
|
GP_PIN_CUSTOM_SEC |
Add user-defined fields to an element definition. |
|
|
GP_PIN_SEC |
Enter or review detailed comments for an element. The comments that you enter are for informational purposes only and do not affect payroll processing. |
|
|
GP_FORECAST_SEC |
Select forecasting options for an element. |
Although each element type has a unique purpose, all element types share a common set of attributes that are defined and stored on the first page of each element component. The object name of this page is always GP_PIN and it appears as the first page for all element definitions. In this topic, this page is called the <Element> Name page, although it is often labeled to identify the element type that is being created—for example, Earnings Name. Once you define an element name, you can enter additional information that is specific to the element type.
When you create an element name, the system assigns the element a PIN code and a PIN number. The PIN code and the element name must be unique. As you create new elements, the system checks to see whether this unique set of identifiers already exists. You can rename an element name, but the PIN code is a constant.
PIN numbers:
Enable the system to track the element and its name wherever it's used, regardless of its name.
You can change an element name without affecting the system.
Point to the data and the element name on the <Element> Name page.
Are significant only within a database and can be different for the same element names across databases.
Act as keys to the GP_PIN table and the value that is stored in other tables to represent an element.
Are assigned sequentially.
Are used only for batch-processing.
Elements can have many effective-dated rows. The definition as of date that you assign to an element on the <Element> Name page tells the system which effective-dated definition to retrieve for the element during processing.
You can select one of these dates: Calendar Period Begin Date, Calendar Period End Date, Payment Date, Process Begin Date, and Process End Date.
Note: You can override the process begin date and process end date for a payee and calendar group by using the Payee Calendar Groups page.
Example 1
Assume that an element has the following effective-dated rows (definitions) and values:
January 1, 1990 = 100
January 1, 2000 = 125
January 31, 2000 = 150
February 1, 2000 = 175
The January and February calendars have the following dates:
|
Calendar Date |
January Calendar |
February Calendar |
|---|---|---|
|
Begin Date |
January 1, 2000 |
February 1, 2000 |
|
End Date |
January 31, 2000 |
February 28, 2000 |
|
Payment Date |
February 1, 2000 |
March 1, 2000 |
When you process the January calendar, the system retrieves the definition of the element based on the element's definition as of date:
|
Definition As Of Date |
Effective-Dated Row Used |
Value |
|---|---|---|
|
Calendar Begin Date |
January 1, 2000 |
125 |
|
Calendar End Date |
January 31, 2000 |
150 |
|
Payment Date |
February 1, 2000 |
175 |
Example 2
Process Begin Date and Process End Date can be especially useful for issuing advance payments. They refer to the begin date and end date of the calendar period in which the element is actually processed.
For example, suppose that in January you want to issue an advance payment to a payee who will be on vacation in February. To make the advance payment, you process the February calendar in January; however, you want the system to use the definition of the element as of January—the actual processing period.
This table shows which definition of the element the system retrieves, based on your choice of definition as of date:
|
Definition As Of Date |
Effective-Dated Row Used |
Value |
|---|---|---|
|
Process Begin Date |
January 1, 2000 |
125 |
|
Process End Date |
January 31, 2000 |
150 |
|
Calendar Begin Date |
February 1, 2000 |
175 |
|
Calendar End Date |
February 28, 2000 |
175 |
Use the <Element> Name page (GP_PIN) to name an element and define its basic parameters.
Navigation
Image: <Element> Name page
This example illustrates the fields and controls on the <Element> Name page.
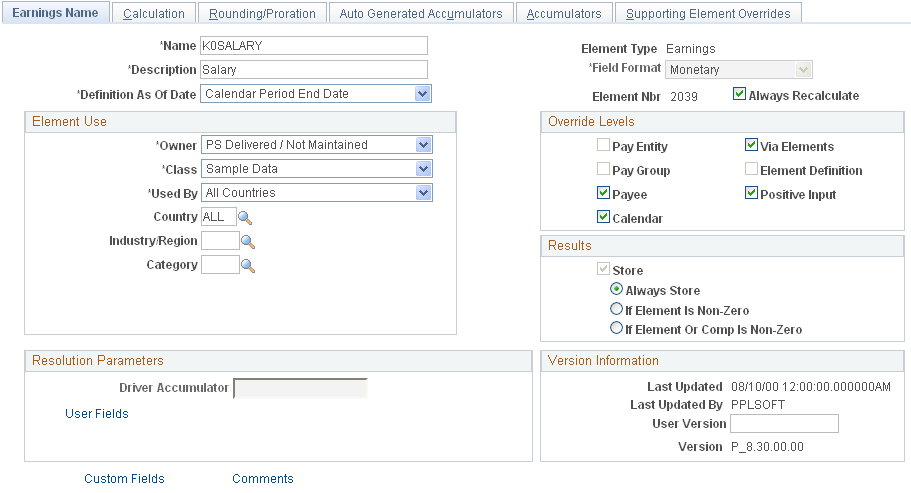
Note: The preceding example is a generic representation of the page that you use to create all element types. After you create an element on the Earnings - <Element> Name page, you continue the process of defining each element in its appropriate component, as described elsewhere in this product documentation.
|
Field or Control |
Definition |
|---|---|
| Field Format |
Defines the format for the resolved value. Available values are based on the element type and can include Date, Decimal, Character, Monetary, or Pointer (for calculating generic formulas for a variable). For some element types, such as earnings and deductions, you cannot change the displayed field format. Note: The difference between Decimal and Monetary is that Monetary is currency-controlled and requires the entry of a currency code. |
| Definition As Of Date |
Select the date on which the system is to retrieve the element definition during a process run. Options are: Calendar Period Begin Date: The begin date of the calendar period to which the element is linked. Calendar Period End Date: End date of the calendar period to which the element is linked. Payment Date: Payment date of the calendar period to which the element is linked. Process Begin Date: Begin date of the calendar period in which the element is processed. Process End Date: End date of the calendar period in which the element is processed. Selections are limited for some elements. For example, Calendar Period End Date is the only valid option for section and process list elements. Retroactivity is also a consideration for this field. During recalculation, the system always respects this day and uses the appropriate date based on individual recalculation period calendars. |
| Element Nbr (element number) |
The PIN number. |
| Always Recalculate |
Applies only to the period of time that is being resolved and is selected by default. If selected, the system recalculates the element every time that it encounters it in the calculation process. If this check box is deselected, the system uses the previous resolved value of the element. deselect the check box when:
Select this check box if you think that the previous value is incorrect and needs to be updated—for example, in formulas that need to be applied within a loop, an array, or a count. Note: If this check box is deselected, and the Recalculate check box on the Section - Definition page is selected, the system resolves the element each time that it encounters it when that section is processed. If the same element is encountered in a different section where the check box is deselected, the element is resolved only once. When the PIN Manager encounters an element, it runs an eligibility check. If it determines that the element must be resolved, it looks at the recalculation logic. You can indicate an element's recalculation at the process list level, the section level, and the element level. If you indicate recalculation at any of these levels, the element is recalculated. For example, if the Always Recalculate check box is selected, the system recalculates the element. If the Always Recalculate check box is deselected, the system looks at the table of resolved elements for a match between the same element and the same calculation dates. If there is a match, the system uses that value; otherwise, the system resolves the element. |
See Understanding the Process of Selecting Definition As Of Dates.
Element Use
In this group box, you define several security-related options.
|
Field or Control |
Definition |
|---|---|
| Owner |
Identifies who controls and maintains the definition of the element. Values are: Customer Maintained: Identifies the elements that you created. All fields are available for entry. PS Delivered/Maintained: The element is delivered and maintained by PeopleSoft. To edit any fields, you can take control of the element by selecting the Customer Control Indicator check box. This changes the owner to PS Delivered/Customer Modified. If PeopleSoft later releases an updated version of the element, you can accept the updated definition or retain your changes. Either way, element ownership does not change. If you change the name, description, override levels, class, industry, or category for an earning, deduction, or absence element, the system makes the same changes to all related components and auto generated accumulators and changes the owner for those items. Important! Taking control of an element is irreversible. PS Delivered/Not Maintained: The element is delivered, but not maintained by PeopleSoft (for example, sample data or statutory data). You can update any editable fields. PS Delivered/Customer Modified: Indicates that you have taken control of a PeopleSoft-delivered or maintained element. PS Delivered/Maintained/Secure: The element is delivered and maintained by PeopleSoft. You can edit the name, description, override levels, results, custom fields, and comments (and for system elements, Use as Chartfield and prompt view). Any changes that you make can be overwritten by future PeopleSoft updates. |
| Class |
Indicates the type of rule for the element. Values are: Customary: Sample rules that are created by PeopleSoft. They are not statutory requirements, but are commonly followed rules. An example of when a customary rule is used is with tariffs. Customary rules are often used in a production environment. Not Classified. Sample Data: Rules that are created by PeopleSoft for sample data purposes. They are not used in a production environment. Statutory: Rules that are created by PeopleSoft for calculating rules that are required by law. System Data: Rules that are created by PeopleSoft. They are either system elements or system data that are delivered with the application—for example, common constants and dates. The Class field works with the Owner field to determine the level of support and security. Note: Not all statutory rules are set to PS Delivered/Maintained. For some statutory rules, the owner is set to PS Delivered/Not Maintained. Typically these rules are statutory, but might need to be modified for each organization—for example, an accumulator for taxable gross. All organizations need to comply with reporting taxable gross; however, you need to add the specific earning in your organization that contribute to taxable gross. |
| Used By |
Select whether the element is used by All Countries or a Specific Country. This field is also used in User Rules Profile security to determine which elements a user can access. |
| Country |
If you selected Specific Country in the Used By field, the Country field appears. Select the country for which the security-related options apply. Note: Element usage security is a way to limit the number of elements that you see on a prompt so that you see only the element information that's useful to you. |
| Industry/Region |
To classify your element further, select an industry code or region code. You define industry codes on the Industry/Region Types page. If an element is created for a specific industry, select an industry code here. Typical industry codes include Banking, Insurance, and Metallurgy. |
| Category |
To classify your element further, select a category code. Category codes are defined on the Category Types page. |
| Customer Control Indicator |
Appears only if you have authority to take control of the element according to the user profile rules. See the Owner field. |
Override Levels
In this group box, you enable security-related override levels for the selected element. That is, you define when users can override the element's value, or, in some cases, exclude the element from processing. For example, if you select Pay Calendar, you can use the Calendar - Excluded Elements page to tell the system not to process this element for any payee associated with a particular calendar. If you select Pay Calendar for a bracket, date, duration, formula, or variable element, you can use the Calendar - Overrides page to have the system use an override value for the element when the system processes a particular calendar.
|
Field or Control |
Definition |
|---|---|
| Pay Entity, Pay Group, Payee, Calendar, Via Elements, Element Definition and Positive Input |
Select each type of override that you want to enable. Options vary by element type. |
Results
In this group box, you specify when to store the resolved value of the element in the result tables. The options vary by element type.
Select these options with caution to avoid creating large tables that are difficult to manage. Consider storing only the values that you need for reporting and auditing purposes or for executing historical rules, retroactivity, or other calculations where you need to refer to the prior value of an element.
|
Field or Control |
Definition |
|---|---|
| Store |
Select to store the resolved value of the element in the result table during processing. For certain element types, you can specify the conditions under which the value is stored by selecting an option below the check box. When Store is deselected, the resolved value is never stored. |
| Always |
This option (the default) appears only for earning and deduction elements. Select it to store the calculated result of the element, even when the value is 0. |
| If Element Is Non-Zero |
Appears only for earning and deduction elements. Select it to store the resolved value of the element when it is not 0. |
| If Element or Comp (component) is Non-Zero (if element or component is nonzero) |
Appears only for earning and deduction elements. Select the option if you want to store the resolved value of the element if it or one of its components (percent, base, rate, or unit) is nonzero. With this option, the element or component values are always stored if the arrears balance, the amount being paid back, the amount not taken, the adjustment value, or the retroactive adjustment value is nonzero. |
| Store if Zero |
Appears for all element types except earnings and deductions. You cannot select this check box without first selecting Store. The Store if Zero check box is a way to further define what is sent to the results tables. Select Store if Zero to store a resolved value even when the value is 0. If you select Store but not Store if Zero, the element is written to the result tables only if the resolved value is not equal to zero, blank, or null. If you select both check boxes, the resolved value is written to the result tables, even if it is zero, blank, or null. If you select neither check box, the system never stores the resolved value. |
Resolution Parameters
The fields in this group box apply only for earning and deduction elements.
See Earnings Name Page.
Version Information
|
Field or Control |
Definition |
|---|---|
| User Version |
You can enter up to 14 alphanumeric characters in this field to identify changes you make to the element definition. When you save the definition, the system adds a prefix of INT_ to indicate that this is a user-defined value. You can use the Global Payroll utilities to stamp and package elements by version. The value that you enter here appears in the Version field of the pages that you update. For example, if you change the calculation rule for an earning element, then update the User Version field on the Element Name page, the version that you enter appears on the Element Name page and the Earnings - Calculation page. |
| Version |
Displays the version of the element. The prefix P_ identifies versions released by PeopleSoft. The prefix C_ identifies versions created by customers. The system clears this version from the page when any of the following conditions occur:
|
Additional Elements
|
Field or Control |
Definition |
|---|---|
| Custom Fields |
Click this link to access the <Element> Name - Custom Fields page. |
| Comments |
Click this link to access the <Element> Name - Comments page. |
| Forecasting |
This link appears for absence take and absence entitlement elements only. Click this link to access the <Element> Name - Forecasting page. |
Use the Custom Fields for <Element Name> page (GP_PIN_CUSTOM_SEC) to add user-defined fields to an element definition.
Navigation
Click the Custom Fields link on the <Element> Name page.
Image: Custom Fields for <Element Name> page
This example illustrates the fields and controls on the Custom Fields for <Element Name> page
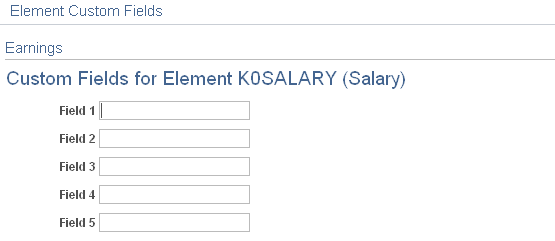
Use the fields on this page in any way that you want. For example, you can use the fields to classify elements or to indicate a sorting order for reports. The data that you enter is stored by system elements.
Use the Comments for <Element Name> page (GP_PIN_SEC) to enter or review detailed comments for an element.
The comments that you enter are for informational purposes only and do not affect payroll processing.
Navigation
Click the Comments link on the Earnings Name page.
Image: Comments for <Element Name> page
This example illustrates the fields and controls on the Comments for <Element Name> page.
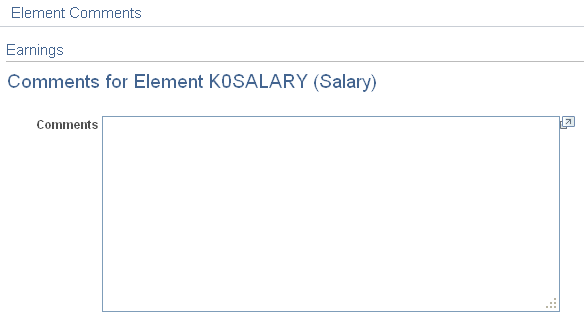
For each system-computed system element that is delivered by PeopleSoft, you can view detailed comments including a general description, when the system element is available, and where it is used. This is useful information when you want to learn about what a specific system element does.
For elements that you define, you can use the Comments page to view or enter your own notes or details about an element.
Use the Forecasting for <Element Name> page (GP_FORECAST_SEC) to select forecasting options for an element.
Navigation
Click the Forecasting link on the <Element> Name page. This link is available for absence take and absence entitlement elements only.
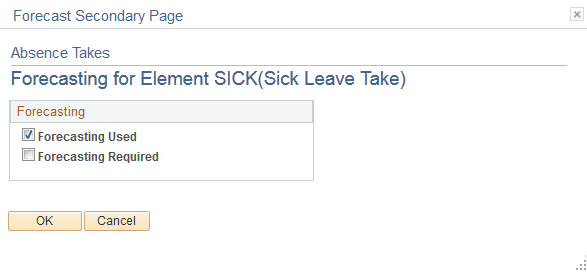
Image: Forecasting for <Element Name> page
This example illustrates the fields and controls on the Forecasting for <Element Name> page.
|
Field or Control |
Definition |
|---|---|
| Forecasting Used |
Select to enable the absence forecasting or balance inquiry feature for this element. |
| Forecasting Required |
This field appears for absence take elements only. Select to have the system generate a warning if a user tries to save absence entries on the Absence Event Entry page without first running the Forecasting process. |