(BRA) Providing Additional Information for Brazilian Employees
These topics discuss providing additional information for Brazilian employees.
|
Page Name |
Definition Name |
Usage |
|---|---|---|
|
PERSONAL_INFO_BRA |
Enter additional information about a person for Brazil. |
|
|
ADDL_INFO_BRA |
Enter additional worker information. |
|
|
PERS_NID_HI_BRA |
Enter the effective dated national ID. This information is used in SEFIP reporting. |
|
|
CONTRCT_DTA_BRA |
Specify the first and second contract periods for the employee who has an active contract. |
Use the Personal Information BRA page (PERSONAL_INFO_BRA) to enter additional information about a person for Brazil.
Navigation
Image: Personal Information BRA page
This example illustrates the fields and controls on the Personal Information BRA page.
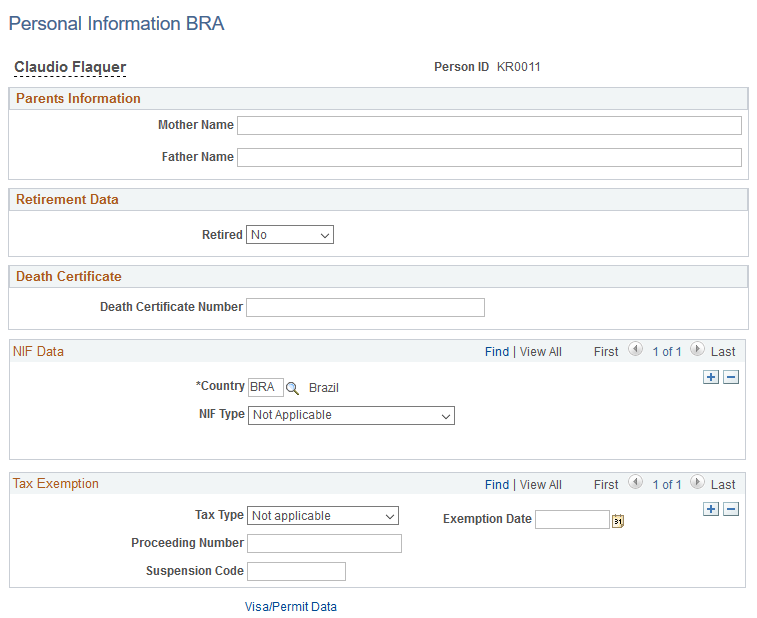
Use this page to enter additional personal information, such as parental information, retirement data, death certificate number, NIF (foreign tax identification) data, and tax exemption information. Information entered in this section is used in eSocial reporting.
Retirement Data
|
Field or Control |
Definition |
|---|---|
| Retired and Date |
Select Yes if the
employee is retired, otherwise select No.
If the employee is retired, specify the retirement date. These fields are not used in eSocial reporting. |
Death Certificate
|
Field or Control |
Definition |
|---|---|
| Death Certificate Number |
Enter the death certificate number, if the employee is deceased. |
NIF Data
|
Field or Control |
Definition |
|---|---|
| NIF Type |
Select the NIF (foreign taxpayer identification number) type. Values are: Beneficiary W/ NIF. If selected, enter the NIF number. Country Does Not Require Exempt Beneficiary Not Applicable |
Tax Exemption
|
Field or Control |
Definition |
|---|---|
| Tax Type |
Select the tax type. Values are: FGTS INSS IRRF Not applicable (default value) Union Contribution |
| Exemption Date, Proceeding Number and Suspension Code |
Specify the tax exemption date, judicial proceeding
number and suspension code of the selected tax type. These fields
are required if a tax type is specified on the Tax Type field.
|
Use the Additional Information BRA page (ADDL_INFO_BRA) to enter additional worker information.
Navigation
Image: Additional Information BRA page (1 of 2)
This example illustrates the fields and controls on the Additional Information BRA page (1 of 2). You can find definitions for the fields and controls later on this page.
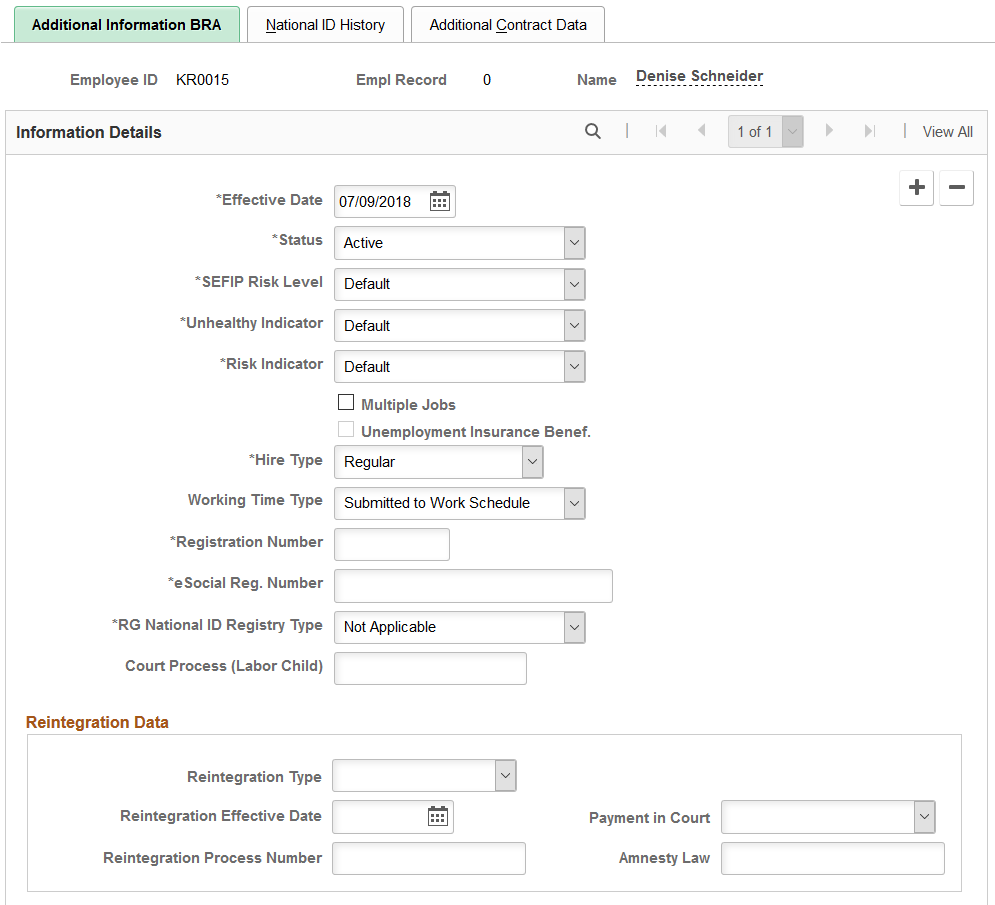
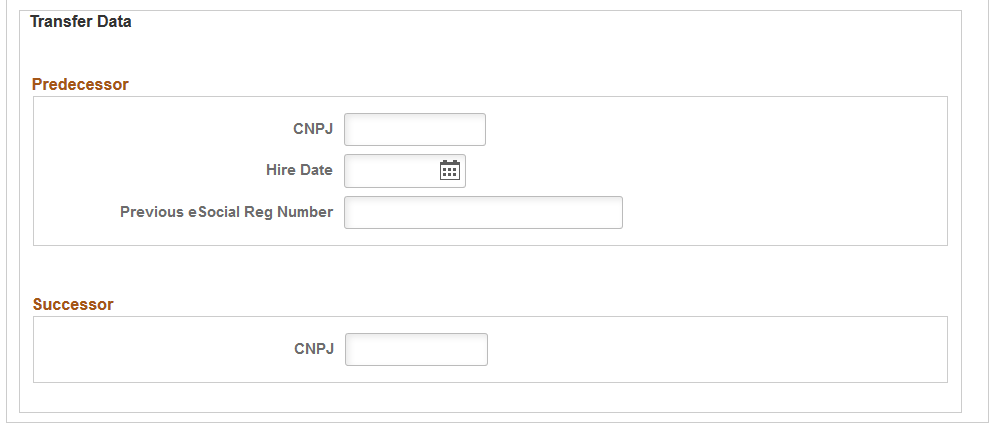
Image: Additional Information BRA page (2 of 2)
This example illustrates the fields and controls on the Additional Information BRA page (2 of 2). You can find definitions for the fields and controls later on this page.
Note: If you have Global Payroll for Brazil installed, you can override the values on this page using the Payee Parameters page.
|
Field or Control |
Definition |
|---|---|
| SEFIP Risk Level |
Select the appropriate risk level for the employee's activities. The system uses this information to generate the SEFIP report and to determine the employee's retirement deduction. |
| Unhealthy Indicator |
Select the appropriate health risk level for the employee's activities. The system uses this indicator to calculate an earning that compensates for this health risk factor. Values are: Default Maximum Grade Middle Grade Minimum Grade Not Applicable |
| Risk Indicator |
Select the appropriate hazard level for the employee's activities. The system uses this indicator to calculate an earning that compensates for this hazardous factor. Values are Applicable, Default, and Not Applicable. |
| Multiple Jobs |
Select to specify whether this person has one or more jobs outside of this company. |
| Unemployment Insurance Benef. (unemployment insurance benefits) |
Select to specify that this person (new employee) receives unemployment benefits. This field is editable if the effective date corresponds to a Hire or Rehire action in this person’s job data. If the newly hired or rehired employee receives unemployment
benefits, the company needs to send the CAGED information to the Ministry
of Labor and Employment on the same day that the employee begins to
work. If the employee does not receive unemployment benefits, the
company has until the 7th day of the next month to send out the information,
along with other terminated and transferred employment information
that occur in the current month.
|
| Hire Type |
This field appears if the employee’s job data action
is HIRE and that effective dates of that job data and this additional information
record are the same.
Values are: Regular Resulting Tax Action Resulting/Court Decisions |
| Working Time Type |
Select the applicable working time. Values are:
External Activity Functions Specific Not Applicable Submitted to Work Schedule (default) Telecommuting This information is used in eSocial reporting. |
| Registration Number |
Enter the employee's registration number. This number acts as an alternate employee ID. When an employee is hired, transferred, or rehired through the Job Data component, the system updates this field with the next registration number listed on the Additional Info - Brazil Page of the establishment that is associated with the employee. If an employee was terminated and later rehired with the same establishment, the same registration number is used. |
| eSocial Reg. Number |
Displays or enter the employee’s 30-digit register
number in eSocial.
The value in this field is different depending on the eSocial numbering method that is selected for the associated company on the (BRA) Company Details BRA Page. If the method is DRT Number, the field value should be the same as the registration number on this page. If the method is Specific to eSocial, the field values should be the sum of the eSocial Last Reg Number field value (on the (BRA) Company Details BRA Page) plus 1. Note: This number must be present for all employees in companies before they perform initial data loading to the eSocial reporting environment. A new eSocial register number is assigned when the employee is transferred to another company. |
| RG National ID Registry Type |
Select the applicable RG national ID registry type for the employee. |
| Court Process (Labor Child) |
Enter the judicial process number if the employee
is a child labor.
|
Reintegration Data
|
Field or Control |
Definition |
|---|---|
| Reintegration Type |
Select the reintegration type. Reintegration refers to the rehiring of an employee by court decision, which ensures that all the rights of the previous contract stay intact. Values are: Amnesty Judicial Decision Others |
| Reintegration Effective Date |
Enter the effective date of the reintegration. |
| Payment in Court |
Select Yes if court payment was involved. |
| Reintegration Process Number |
Enter the associated judicial proceeding number, if the selected reintegration type is Judicial Decision. |
| Amnesty Law |
If the reintegration type is Amnesty, select the applicable amnesty law. |
Transfer Data
Predecessor
Complete this section if the employee moved from an employer (the predecessor) that does not use PeopleSoft for eSocial reporting to the current employment that does. The information specified here will be reported to the government through the S-2200 event.
|
Field or Control |
Definition |
|---|---|
| CNPJ |
Enter the CNPJ number of the predecessor of the individual’s employment transfer. An establishment’s CNPJ is a 14-digit long number that is displayed in this format: 99999999999999. |
| Hire Date |
Enter the employee’s hire date with the predecessor. |
| Previous eSocial Reg Number |
Enter the employee’s 30-digit register number in eSocial with the predecessor. |
Successor
|
Field or Control |
Definition |
|---|---|
| CNPJ |
Enter the CNPJ number of the successor of the individual’s employment transfer. Specify this value if the employee left the current employment to work for an employer (the successor) that does not use PeopleSoft for eSocial reporting. The information will be reported to the government through the S-2299 event. An establishment’s CNPJ is a 14-digit long number that is displayed in this format: 99999999999999. |
Use the National ID History page (PERS_NID_HI_BRA) to enter the effective dated national ID.
This information is used in SEFIP reporting.
Navigation
Image: National ID History page
This example illustrates the fields and controls on the National ID History page. You can find definitions for the fields and controls later on this page.
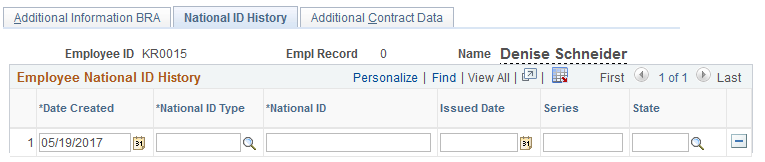
Enter a Brazilian employee's PIS and CTPS (work card) national IDs and supporting data on the Biographical Details and Regional pages of personal data. When one of these national IDs is updated in personal data, a new history record, containing the national ID as well as the additional related data found on Regional page, are entered on the National ID History page. These values can be modified or deleted on this page.
|
Field or Control |
Definition |
|---|---|
| Date Created |
Displays the date the national ID was entered in the system. This date is used in SEFIP reporting. |
| National ID Type |
The national ID comes from the Biographical Details page of personal data. The national ID history only allows the CTPS (work card) and PIS values. |
| National ID |
Displays the historical national ID number. |
| Issued Date |
Specifies the date this ID was issued. This information comes from the Regional page of personal data. Data entered in the CTPS group box of the Regional page displays for the CTPS (work card) national ID type. The issue date for the PIS national ID type comes from the date entered in the Inscription Date field on the Regional page of personal data. |
| Series |
Enter the work card number. This value comes from the Regional page of personal data in the CTPS group box. |
| State |
Enter the political subdivision of the CTPS issuing agency. This value comes from the Regional page of personal data in the CTPS group box. This information is required if a CTPS number is provided. |
Use the Additional Contract Data page (CONTRCT_DTA_BRA) to specify the first and second contract periods for the employee who has an active contract.
Navigation
Image: Additional Contract Data page
This example illustrates the fields and controls on the Additional Contract Data page. You can find definitions for the fields and controls later on this page.
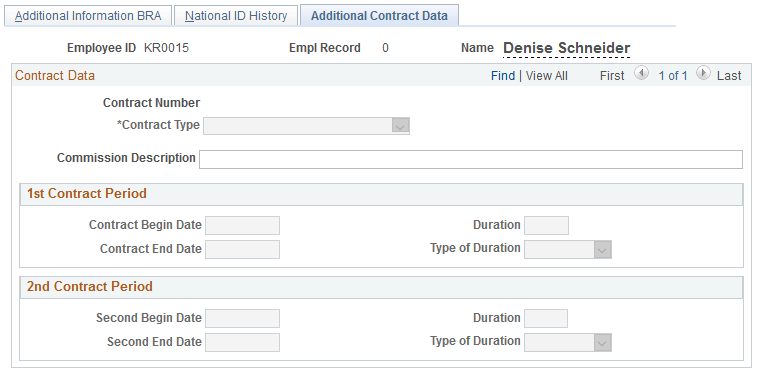
After you specify the contract dates and save the page, the system updates the expected contract end date on the Contract Status/Content Page with the contract end date listed here (the farthest of the two). The expected contract end date is used in processing payroll rules and reports.
d
Contract Data
|
Field or Control |
Definition |
|---|---|
| Contract Number |
Displays the number of the contract, if available, that is populated from the Job Information Page. |
| Contract Type |
Select the legal contract type for the contract. If the value is populated by the system, the value is determined based on the contract information that is defined on the Job Information Page and the contract type setup that is defined on the Legal Contract Type Page or the By Employee Classification Page. Values are: Indeterminate: if selected, you can enter any value as the contract end date or duration. Determinate: if selected, the contract end date you entered must be within the two-year period starting from the contract begin date. Only the 1st contract period is available for edits. Indeterminate w/probation dt. (indeterminate with probation date): if selected, you can assign both periods a total of 90 days combined. |
| Commission Description |
(Optional) Enter the sales commission description.
|
| Clause of Advanced Termination |
This field appears if the selected contract type is either Indeterminate w/probation dt. or Determinate. |
1st Contract Period
Specify the first contract period by either entering the contract begin and end dates, or entering the contract begin date and the duration of the contract (for example, 2 months, 30 days, and so on). If the latter method is used, the system calculates and populates the contract end date in this section automatically.
Note: When either the contract begin date or the duration is updated, the contract end date is recalculated accordingly.
An error is displayed if the begin date entered is greater than the end date.
2nd Contract Period
The system populates the second begin date value by adding 1 day to the current contract end date. When the duration is specified, the system calculates and populates the second end date automatically.
Note: If the contract end date is recalculated due to a change in the contract begin date or duration, and the newly adjusted second begin date value is not equal to the current second begin date, the system populates the newly adjusted second begin date and clears the second end date and duration values in this section.
An error is displayed if the begin date entered is greater than the end date, or if the contract end date is removed manually when the second begin date value is present.