Creating Positions Using Fluid
To create positions, use the Manage Position (POSITION_DATA_FL) component in fluid.
This topic gives an overview of the Manage Position pages in fluid and lists the pages that administrators can access from a single location in the PeopleSoft Fluid User Interface to perform Position Management-related transactions.
For general information about fluid pages in PeopleSoft HCM, see Understanding PeopleSoft Fluid User Interface Home Pages.
|
Page Name |
Definition Name |
Usage |
|---|---|---|
|
HC_HR_POSITION_DETAIL_FL (this is the cref for the tile) |
Create and manage positions using the fluid pages. |
|
|
HC_HR_POSITION_DETAIL_FL |
Search for a position by position number, description, or status. You can also create a position. View a chart of the position search results by business unit. |
|
|
POSITION_DETAIL_FL |
Add, clone, view, edit, or delete an effective dated row for a position. |
|
|
POSITION_CLONE_SBF |
Clone a position. |
|
|
POSITION_ADD_SCF |
Enter the effective date and reason for a new effective dated row. |
|
|
The Activity Guide Composer Framework for the Manage Position Component (common elements on pages used to create or manage positions using fluid) |
N/A |
In fluid Position Management, the application appears within the context of a PeopleTools Activity Guide. The activity guide shows a list of position data pages in the left panel and the page that corresponds to the current selected page step in the right panel. The activity guide also provides navigation buttons in the page banner for navigating through the page steps. |
|
POSITION_DATA_1_FL |
Enter a description and job details about the position. |
|
|
POSITION_DATA_5_FL |
Enter information that is specific to the position you're creating, such as the work phone number and the mail drop ID. |
|
|
POSITION_DATA_6_FL |
Review the position's current budget and incumbents. |
|
|
POSITION_SUMM_FL |
Review a summary of the changes to this position, add or view attachments, and submit your position data for approvals. |
|
|
POS_SUB_CNF_FL |
Confirm that your position updates have been submitted. |
|
|
POSITION_VIEW_FL |
View a complete summary of the position details by effective date. |
Administrators use the Manage Position tile to create and manage positions using the fluid pages.
Navigation
From the Workforce Administrator Home Page in fluid, click the Position Management Tile to access the Position Management Dashboard.
The Manage Position tile is delivers as part of the Position Management dashboard by default, but the location can change if you change the delivered home pages or if administrators personalize their home pages.
Image: Manage Position Tile
This example illustrates the Manage Position tile.
Click the Manage Position tile to access the Manage/Create Position fluid component and pages. The system will display the Manage/Create Position search page that enables you to add a new position, or you can use search criteria in the left collapsible panel to locate a specific existing position:
Important! You must complete the prerequisites task In order to access the fluid Manage Position pages. For more information on the required preliminary tasks, see Prerequisites to Using Fluid Position Management.
Use the Manage/Create Position search page to search for a position by position number, description, or status. You can also create a position. View a chart of the position search results by business unit.
Navigation
From the Position Management Dashboard click the Manage Position Tile.
Image: Manage/Create Position Search Page
This example illustrates the fields and controls on the Manage/Create Position search page.
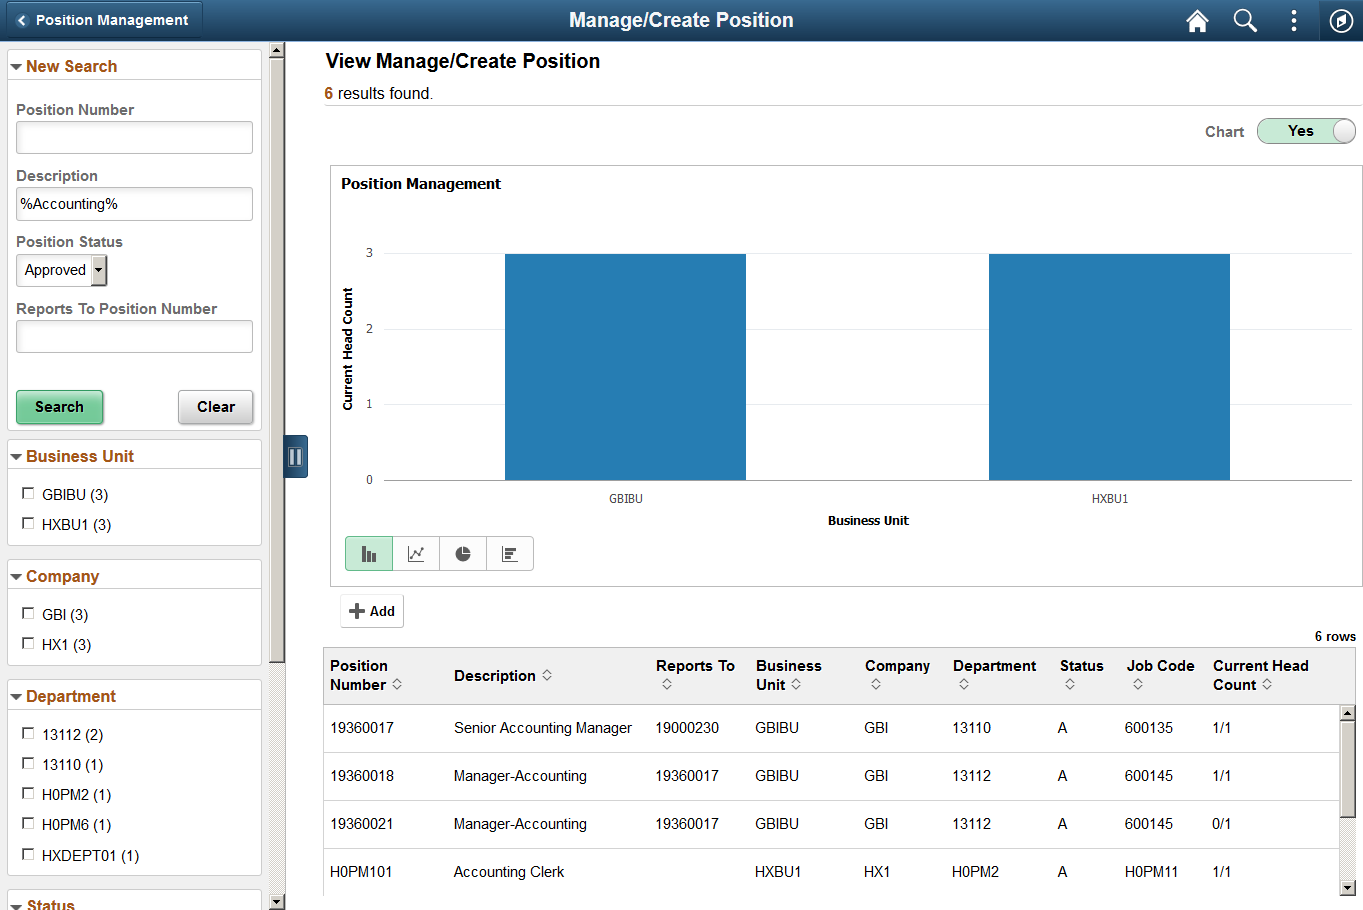
Left Search/Facet Panel
Use this section to enter criteria and narrow your search results.
|
Field or Control |
Definition |
|---|---|
| New Search |
This section appears by default when you first access the page. You can use the following search criteria in the left collapsible panel to locate a specific existing position:
Enter the search criteria and click Search. To perform a partial word search, use the % wild card. After you enter the initial search criteria, the main panel will display the results, and the left panel will display addition facets that correspond to the positions listed in the search results. Select facets to further narrow your search. |
| Facets |
This section displays information based off of the search results. Select different facets to further filter your results. |
View Manage/Create Position Panel
Use this section to view information about the positions from your search results.
|
Field or Control |
Definition |
|---|---|
| Chart toggle switch |
The Chart toggle switch defaults to No. Swipe to Yes to have the Manage/Create Position search page display a chart of the search results by business unit. |
 (chart option types) (chart option types) |
These chart option icons are available when the Chart toggle switch is set to Yes. Click to display data in the chart type represented by the icon type. Available chart types include vertical bar (default value), line, pie and horizontal bar. |
 (Add button) (Add button) |
Click this button to open the Create Position page to enter a position number and effective date for a new position. |
Search results appear in the main panel of the page. Select a row to access the Position Details Page and select a row to view, edit, delete, clone, or you can add a new effective dated row.
Use the Position Details page (POSITION_DETAIL_FL) to add, clone, view, edit, or delete an effective dated row for a position.
Navigation
Select the Manage Position Tile, from the Manage/Create Position (Search) Page search results select a position.
Image: Position Details Page
This example illustrates the fields and controls on the Position Details page.
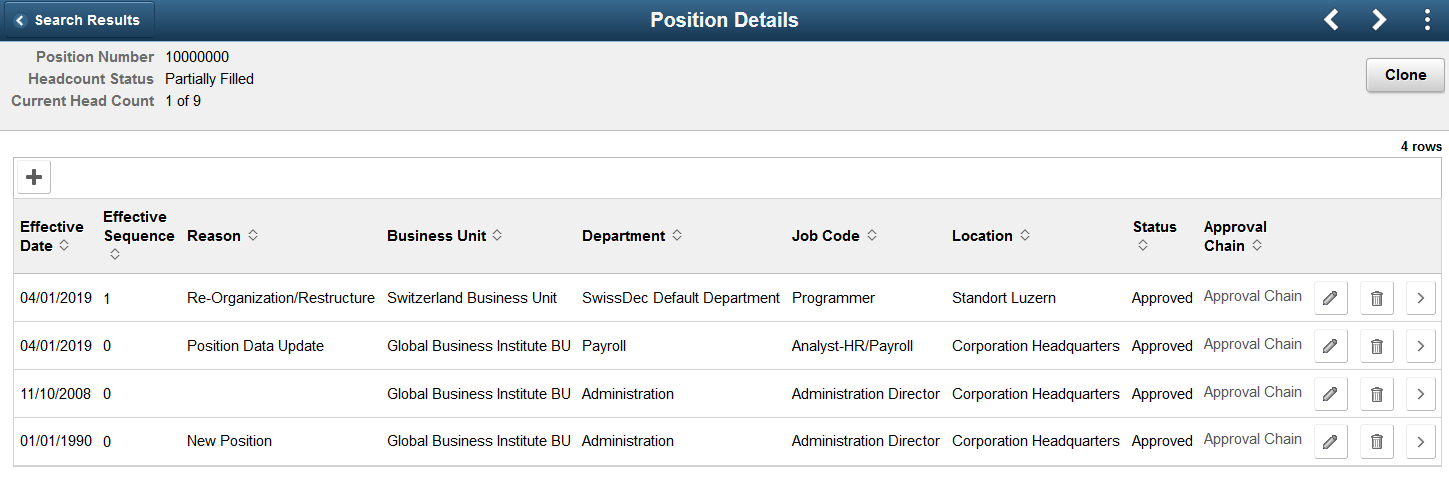
The header displays the unique number assigned to the position as well as the headcount status information. When you add or clone a position, you can specify the position number when creating a new position or you can enable the system to assign the next number for you (when you save) by accepting the default value 00000000.
Note: To avoid maintaining two different sets of position numbers, it is best practice to either always assign numbers manually or always enable the system to do it; do not do both.
|
Field or Control |
Definition |
|---|---|
 Clone button Clone button |
Click to clone the properties of this position. The system will open the Clone Page where you will enter a new position number and effective date. |
 Insert Row button Insert Row button |
Click this button to open the Request Details page and identify the effective date and reason for a new effective dated row. When you enter an effective date that is equal to the previous effective dated row, the system will increase the Effective Sequence field value by one. |
The grid lists all the effective dated rows for this position. When there is more than one row for a date, the system uses the effective sequence to distinguish the rows.
|
Field or Control |
Definition |
|---|---|
| Approval Chain |
This link is available when you have approval workflow set up and the position has been sent for approval. Select this link to view the approval status and approver details of a proposed position. |
 Edit button Edit button |
Click this button for an effective dated row to access the Manage Position - Position Data Page and view or update this position. |
 Delete button Delete button |
Click to remove this effective dated row. |
 View Detail button View Detail button |
Click the View Details button to access the View Position Page in a new browser window and view a summary of this position. |
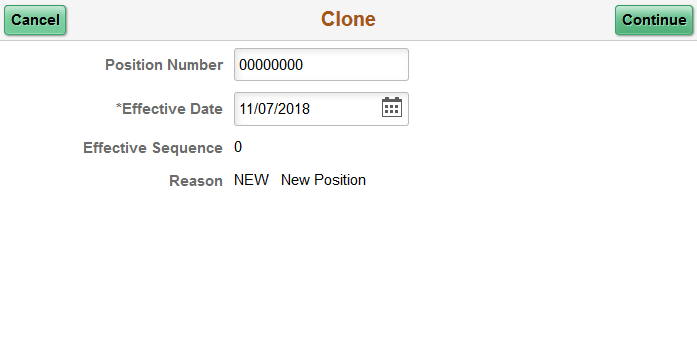
Use the Clone page (POSITION_CLONE_SBF) to clone a position.
Navigation
Click the Clone button from the Position Details Page.
Image: Clone Page
This example illustrates the fields and controls on the Clone page.
|
Field or Control |
Definition |
|---|---|
| Position Number |
Specify the position number when creating a new position, or you can enable the system to assign the next number for you (when you save) by accepting the default value 00000000. Note: To avoid maintaining two different sets of position numbers, it is best practice to either always assign numbers manually or always enable the system to do it; do not do both. |
| Reason |
For new positions, the field default value is NEW. . |
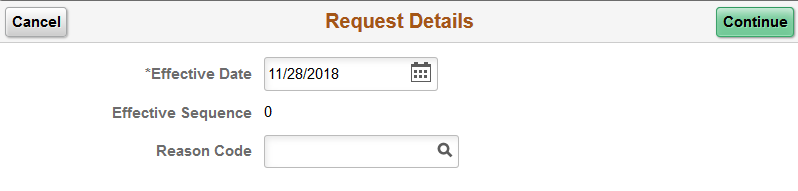
Use the Request Details page (POSITION_ADD_SCF) to enter the effective date and reason for a new effective dated row.
Navigation
Click the Insert Row (+) button from the Position Details Page.
Image: Request Details Page
This example illustrates the fields and controls on the Request Details page.
|
Field or Control |
Definition |
|---|---|
| Reason Code |
Enter the reason for the change of the position. For new effective dated rows, you will select from the list of available options. |
In fluid, the Manage Position component pages appear within the context of the Activity Guide Composer. The PeopleSoft HCM application delivers the Manage Positions (POS_DAT) template for this component.
The activity guide shows a list of position data pages (steps) in the left panel and the page that corresponds to the current selected page step in the right panel. The activity guide also provides navigation buttons in the page banner for navigating through the page steps.
To understand or set up templates using the Activity Guide Composer, see the Understanding the Activity Guide Composer documentation.
Image: Page Layout for the Manage Position Pages
This example illustrates the layout for the Manage Position pages.

Note: Throughout this topic, the page illustrations show sections of the position management process without the context of the left panel activity guide step list. Even though the framework is not illustrated, remember that all steps appear within that framework.
Page Banner
The top of PeopleSoft pages is called the page banner. In other PeopleSoft applications, the banner displays several standard icon buttons.
You will see the standard set of banner icon buttons.
|
Field or Control |
Definition |
|---|---|
 Exit button Exit button |
Click this button to exit the position and return to the search page without saving your data. |
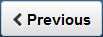 Previous button Previous button |
Click this button to navigate to the previous page. Navigating to another page does not save your data. The button is not visible on the first step in the request. |
 Next button Next button |
Click this button to navigate to the next page. Navigating to another page does not save your data. The Review and Submit page does not display the Next button. Instead it displays a Submit button. |
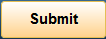 Submit button Submit button |
This button appears on the Manage Position - Review and Submit Page only. Note: Your position data will not be saved to the system until you click the Submit button. When approvals are required for updating or creating positions, the request will be sent to the approving managers, where they will use the Pending Approvals - Create Position Page or Pending Approvals - Manage Position Page to take action on a position request. |
Position Header
A gray area under the main page banner displays contextual information that is specific to the position, including the position number and headcount information.
Left Panel Navigation
The page framework includes a left panel that lists the numbered page tabs in the position creation or maintenance process. Each step displays a status, which is either Not Started or Visited. Users can navigate to steps by clicking the page tab or using the navigation buttons in the banner,
Pages
The main panel displays the page for the current step in the transaction.
Note: For the transaction page topics that follow, the page illustrations show the individual position management pages without the context of the activity guide step list, although the system will display .
|
Field or Control |
Definition |
|---|---|
| <Title Text> |
Displays a page title that includes the step name. For substeps, the page title includes both the step and substep name, separated by a hyphen. For example, Payroll - Tax Withholding indicates that the step title is Payroll and the substep title is Tax Withholding. |
Supplementary Panel for the Manage Position Pages
If you use PeopleTools 8.57 or later, the position creation pages include a supplementary panel that provides access to related information and simplified analytics.
For more information about simplified analytics, see product documentation for PeopleTools: Pivot Grid, “Working with Simplified Analytics.”
These videos demonstrate simplified analytics:
Navigation
Click the Supplementary Panel tab on any of the Manage Position pages.
Image: Supplementary Panel for the Manage Position Pages
This example illustrates the supplementary panel options for the Manage Position pages.

|
Field or Control |
Definition |
|---|---|
 (Supplementary Panel tab) (Supplementary Panel tab) |
Click this tab to open the Related Information panel and view related information. |
 [Personalize RC (Related Content) icon] [Personalize RC (Related Content) icon] |
This icon appears at the top of the Related Information panel. Click to open the Personalize page. This page lists the available related content so you can choose whether the Related Information panel shows or hides each item. |
 (Display <Related Content
Item> in Modal Window icon) (Display <Related Content
Item> in Modal Window icon) |
This icon appears at the top of each individual related content item in the Related Information panel. Click to expand the item to open a modal dialog with a larger interactive version of the content. |
| Related Information |
For Manage Position, this pane includes a View Position link. Click this link to open the View Position Page and reference historical records and incumbent information about the position you are updating. |
For information on how to use the Related Information panel (also known as the Unified Related Content Analytics pane), see PeopleTools: Pivot Grid, “Working with Simplified Analytics,” Accessing Simplified Analytics.
Use the Manage Position - Position Data page (POSITION_DATA_1_FL) to enter a description and job details about the position.
Navigation
To access the Manage Position pages start at the Position Management Dashboard, select the Manage Position Tile, then:
Click the Add button from the Manage/Create Position search page.
Enter search criteria on the Manage/Create Position search page and select a position. This will take you to the Position Details Page where you can:
Click the Clone button to enter the new position number and effective date.
Click the Insert Row (+) button to add a new effective dated row.
Click the Edit (pencil) button for a row to view and update existing information.
After accessing the Manage Position component (by navigating as specified in either of the previous bullets), click the Previous button or select the Position Data tab from the left panel navigation steps.
Image: Manage Position - Position Data Page (1 of 3)
This example illustrates the fields and controls on the Manage Position - Position Data page (1 of 3).
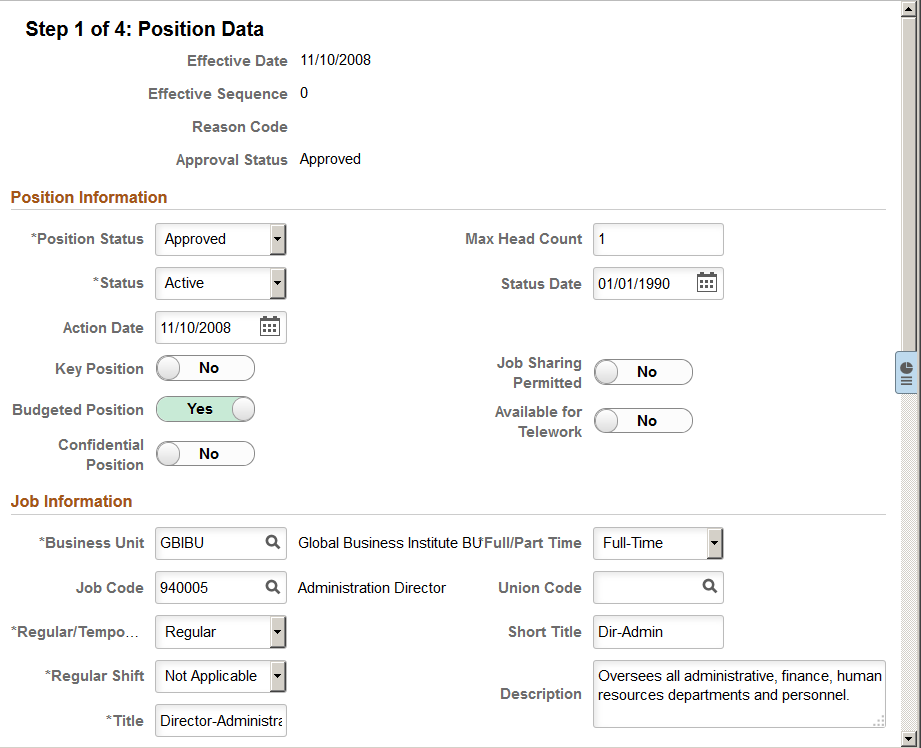
Image: Manage Position - Position Data Page (2 of 3)
This example illustrates the fields and controls on the Manage Position - Position Data page (2 of 3).
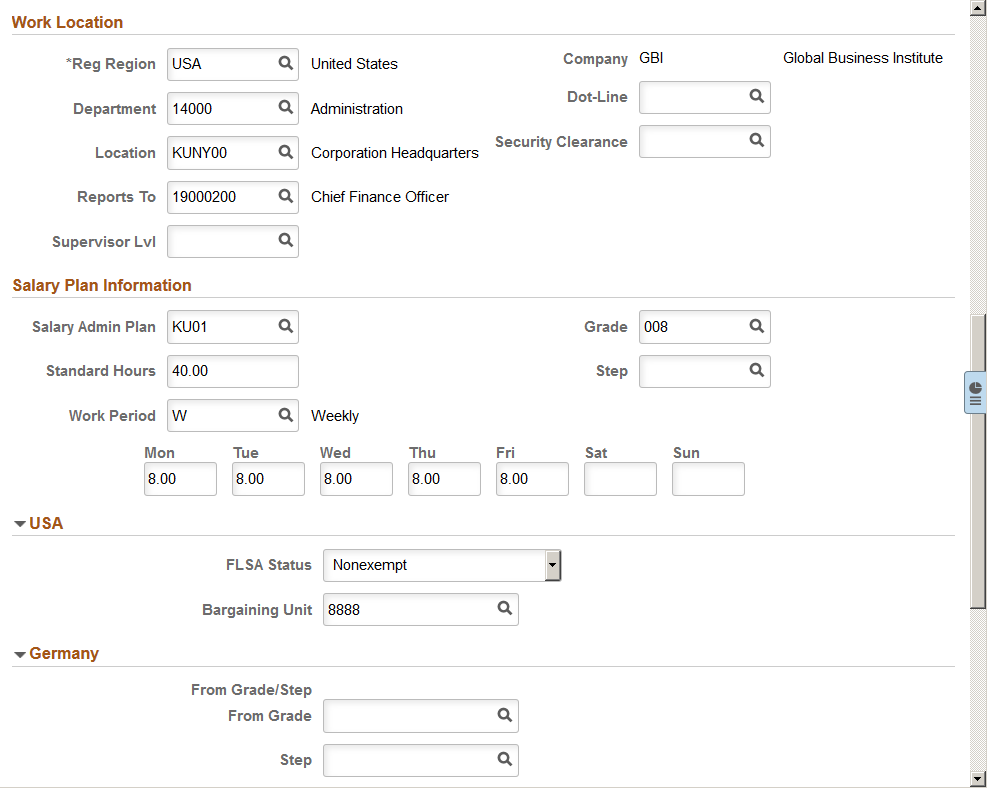
Image: Manage Position - Position Data Page (3 of 3)
This example illustrates the fields and controls on the Manage Position - Position Data page (3 of 3).

Position Information
|
Field or Control |
Definition |
|---|---|
| Position Status |
Indicate when the position is Approved, Frozen, or Proposed. |
| Max Head Count (maximum head count) |
Enter the maximum head count allowed for this position. The default value is 1 because positions normally have a one-to-one relationship with employees (a position usually has one person assigned to it). However, if this position permits job sharing or can be assigned to more than one person, change the head count to the appropriate number. |
| Status Date |
Indicate the date for the position status. |
| Key Position |
Swipe this field to Yes if it is a key position. Key positions are used when creating succession plans for your organization. For more information on succession plans, see Setting Up Succession Planning. |
| Budgeted Position |
This field is set to Yes by default. If this position's status is Proposed or Frozen, swipe this field to No. Otherwise, leave it set to Yes for reporting purposes, so that the system knows that this is an approved position. |
| Confidential Position |
Swipe to Yes if this position is confidential. |
| Job Sharing Permitted |
Swipe to Yes if job sharing is permitted for this position. If job sharing is permitted, indicate the position's maximum head count (the maximum number of people who can share the position) in the Max Head Count field near the top of this page. |
| Available for Telework |
Swipe to Yes if this position allows workers to work remotely. |
Job Information
|
Field or Control |
Definition |
|---|---|
| Business Unit |
Enter the business unit for the position. |
| Job Code |
Select the job code that is associated with this position. The job title associated with this job code is defaulted into the (position) title field when a job code is selected. (E&G) In Education and Government systems, you can select only job codes where the Used by Position Management check box is selected on the Evaluation Criteria Page in the Job Code Table component. |
| Regular/Temporary |
The system enters a default value of Regular for a new position. If the position is temporary, select Temporary from the available options. Note: (USF) Federal users: If the position is Temporary, enter a date in the Not To Exceed Date field on the Request Data - Data Control Page page. |
| Regular Shift |
If your organization assign shifts to positions, select a regular shift code. |
| Title |
This field displays a title for the selected position. This field is defaulted from the title associated with the job code. You can override this default value by typing in a new title. Note: If you have Update Incumbents selected on the Manage Position - Budget Incumbents Page, modifications to the position title will be reflected on each incumbents job data as a change in the employee's job title. This job title can be seen on the Job Information page of the Job Data component. |
| Full/Part Time (full-time or part-time) |
The system enters a default value of Full-Time for a new position. If the position is part-time, select Part-Time from the available options. |
| Short Title |
Enter a short title of the position. When you select a job code on the Job Information page, this field displays the short title associated with that job code. You can override the default value. |
| Union Code |
Enter the union code for the position. |
| Description |
Enter a detailed position description, if required, for this position. |
Work Location
|
Field or Control |
Definition |
|---|---|
| Reg Region (regulatory region) |
Enter a regulatory region for the position. |
| Department |
Select the department that this position is associated with from the list of available options. |
| Location |
Select the location that this position is associated with from the list of available options. |
| Reports To |
To establish reporting relationships, select the position number that this position reports to from the list of available options. If this is the top position record, enter the position's number here. For example, in the CEO's position record, enter the CEO's position number in this field. |
| Supervisor Lvl (supervisor level) |
Select the supervisor level, if applicable, associated with the position from the list of available options. |
| Company |
When you select a department this field displays the associated company and is unavailable for entry. If the department that you select has no associated company, select one from the list of available options. |
| Dot-Line (dotted-line) |
If there is a dotted line reporting relationship to another position, select that position number from the list of available options. |
| Security Clearance |
Select a value for a type of security clearance that can be held by a person. |
Salary Plan Information
|
Field or Control |
Definition |
|---|---|
| Salary Admin Plan (salary administration plan) |
Select the salary plan associated with the position from the list of available options. The value that you select appears on the Job Data component when you assign a new employee to a position. |
| Standard Hours |
Enter the standard hours worked in the associated Work Period for this position. For example, if the Work Period is Weekly, the Standard Hours might be 40.00. |
| Work Period |
Select the work period associated with this position. The work period is the smallest unit of time that employers use to communicate working hours to their employees. If you select a W (Weekly) work period, enter the hours worked per day in the fields provided. |
| Grade |
Select the grade associated with the position from the list of available options. |
| Step |
Select the step associated with the position from the list of available options. |
(USA) United States
|
Field or Control |
Definition |
|---|---|
| FLSA Status (Fair Labor Standards Act status) |
Determine the appropriate coverage under the Fair Labor Standards Act, and select either Administrative, Computer Employee, Executive, Highly Compensated Employees, Management, No FLSA Required, Nonexempt, Nonexempt Alt Overtime, Outside Salesperson, or Professional. |
| Bargaining Unit |
Enter the bargaining unit associated with this position. |
(DEU) Germany
|
Field or Control |
Definition |
|---|---|
| From Grade/Step, From Grade, and Step or To Grade/Step, To Grade, and Step |
Enter the salary grade and step from which the salary range begins and which the salary range ends for this position. |
(DEU) German Public Sector
|
Field or Control |
Definition |
|---|---|
| Service Class Group |
Enter a service class group. Valid values are:
MD – Midrange Service (Mittlerer Dienst) |
| Allowance |
Indicate whether this position is eligible for additional allowance. |
Note: For customers using Position Management, a change to the Service Class Group field or a change to the Allowance selection will not automatically be updated to Job. The Update Incumbent functionality only covers a few select fields.
(AUS) Australia
|
Field or Control |
Definition |
|---|---|
| Package Template ID |
Select a salary package template ID. |
| Package Rule ID |
Select a salary package rule ID. |
(CAN) Canada
|
Field or Control |
Definition |
|---|---|
| Employment/Labour Std Status (employment and labour standards status) |
Choose whether this position is Exempt or Non-Exempt according to the provincial Employment Standards Act or Labour Standards Act. The default value is Non-Exempt until you select a job code, at which point the default value comes from the job code table. The value that you select becomes the default value for the Employment/Labour Std Status field on worker job records that are associated with this position. |
(USF) US Federal
These fields are available when you work in a federalized (U.S. Federal) database:
|
Field or Control |
Definition |
|---|---|
| Occupational Series |
Enter the occupational series that is associated with this position. |
| Parenthetical Title |
Enter the parenthetical designation of the position. Select from Data Transcribing, Office Automation, Stenography, or Typing. |
| Organization Posn Title Code |
Enter an official title for this position. These values are defined on the Official Position Titles Page. |
| Position Occupied |
Identify the type of appointment which can occupy the position. Values are Competitive, Excepted, SES (senior executive service) Career Reserved, and SES General. This is a CPDF reported field. |
| Override NFC Indicator |
Select this check box to override the value in the NFC Update Indicator field. |
| NFC Update Indicator |
Displays the status of the transaction in relation to NFC, as maintained by the user or system. Options in this field include:
|
| NFC Function Code |
Identifies the task to be performed by NFC on a master record. Options in this field include Add, Change, Delete/Restore, Inactivate, and Reactivate. |
| Work Schedule |
Select the work schedule for this position. |
| Fund Source |
Select from Appropriated Funds, External Funds, Non-Appropriated Funds, or Other Funds. |
| Position Location |
Indicate if this position is located at Headquarters or in the Field. |
| Personnel Office ID |
Select the identification number for the personnel office of your agency. |
| Sub Agency |
Select the sub-agency to which this position belongs. |
| Cyber Security Speciality |
Enter a cyber security specialty code that should be associated with this position. Select the specialty area where the work of the position or incumbent is predominantly done. These codes are maintained on the Cyber Security Specialty USF Page. Note: Cyber Security Codes for Position is stored in a new child record POS_FED_CYB_CD. Data in POSITION_DATA. GVT_CYBER_SEC_CD is marked obsolete and should not be used. Add button and Priority fields are visible only for row with Effective Date on or after December 1st, 2016. |
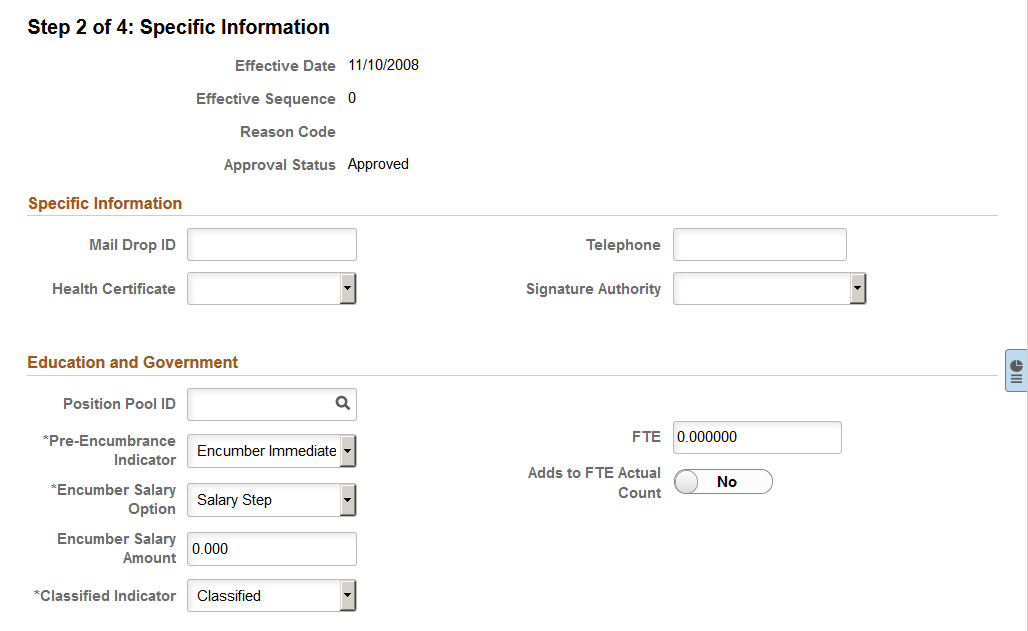
Use the Manage Position - Specific Information page (POSITION_DATA_5_FL) to enter information that is specific to the position you're creating, such as the work phone number and the mail drop ID.
Navigation
To access the Manage Position pages start at the Position Management Dashboard, select the Manage Position Tile, then:
Click the Add button from the Manage/Create Position search page.
Enter search criteria on the Manage/Create Position search page and select a position. This will take you to the Position Details Page where you can:
Click the Clone button to enter the new position number and effective date.
Click the Insert Row (+) button to add a new effective dated row.
Click the Edit (pencil) button for a row to view and update existing information.
After accessing the Manage Position component (by navigating as specified in either of the previous bullets), click the Previous or Next button or select the Specific Information tab from the left panel navigation steps.
Image: Manage Position - Specific Information Page
This example illustrates the fields and controls on the Manage Position - Specific Information page.
|
Field or Control |
Definition |
|---|---|
| Mail Drop ID and Telephone |
Enter the mail drop ID and work phone number assigned to this position, if applicable. |
| Health Certificate |
Select the health certificate required for this position from the list of available options, if applicable. |
| Signature Authority |
Select the signature authority assigned to this position from the list of available options, if applicable. |
(E&G) Education and Government
|
Field or Control |
Definition |
|---|---|
| Position Pool ID |
If appropriate, select a position pool ID from the list of available options. This code maps to the position pool with which this position should be budgeted in Commitment Accounting. Position pools enable you to group related positions together for budgeting purposes. For instance, you could group all positions related to your PeopleSoft HCM implementation project in a single position pool and then assign a budget to that pool. |
| Pre-Encumbrance Indicator |
Indicate if you want the position to encumber immediately. Values include: Encumber Immediately, Encumber on Requisition, or No Encumbrance. |
| Encumber Salary Option |
If you encumber salaries using Manage Commitment Accounting, select an encumber salary option. The system uses the option that you select here to determine salary when it encumbers the salaries of vacant positions. |
| Encumber Salary Amount |
If you select User Specified Amount as the Encumber Salary Option, enter the salary amount to encumber. |
| Classified Indicator |
Associate the position with an FTE (full time equivalents classification) that you established on the Department Budget FTE page. When you hire a worker into a position in the Workforce Administration menu, the system displays the FTE data tied to the position in the Job Data pages for the worker. |
| FTE (full time equivalents) |
Enter the FTE value for this position to be used for defining an FTE budget in Manage Commitment Accounting. |
| Adds to FTE Actual Count |
Swipe to Yes to include this position when processing FTE edits for budgeting purposes. Swipe to No if you don't want to include this position when processing FTE edits. |
Use the Manage Position - Budget Incumbents page (POSITION_DATA_6_FL) to review the position's current budget and incumbents.
Navigation
To access the Manage Position pages start at the Position Management Dashboard, select the Manage Position Tile, then:
Click the Add button from the Manage/Create Position search page.
Enter search criteria on the Manage/Create Position search page and select a position. This will take you to the Position Details Page where you can:
Click the Clone button to enter the new position number and effective date.
Click the Insert Row (+) button to add a new effective dated row.
Click the Edit (pencil) button for a row to view and update existing information.
After accessing the Manage Position component (by navigating as specified in either of the previous bullets), click the Previous or Next button or select the Budget Incumbents tab from the left panel navigation steps.
Image: Manage Position - Budget Incumbents Page
This example illustrates the fields and controls on the Manage Position - Budget Incumbents page.
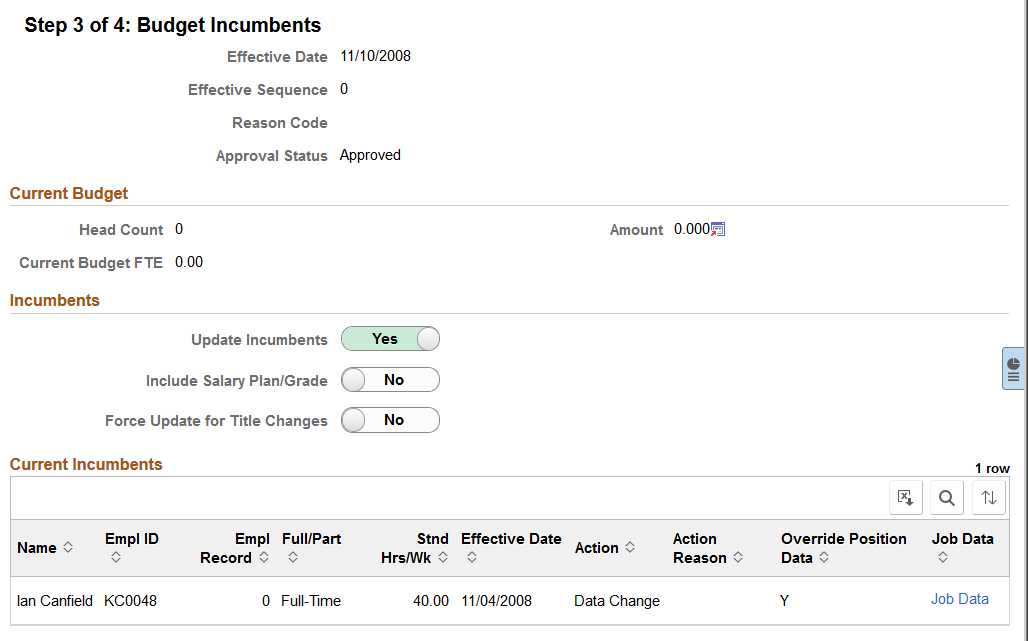
Current Budget
The Current Budget group box displays the position'sHead Count,Current Budgeted FTE, and Amount.
Incumbents
|
Field or Control |
Definition |
|---|---|
| Update Incumbents |
Swipe to Yes to have the system automatically update incumbent job data on the Job Data component. The default setting for new positions is No. A warning appears if Yes is selected when you save a new position. Note: If you use Guided Self-Service to update position data, be sure that the Update Incumbents check box is set to Yes. This configuration is necessary so that the position data updates made through Guided Self-Service flow through to incumbent job records. It is safe to ignore the warning that appears if the Update Incumbents check box is selected when you save a new position. For more information, see Understanding Updates to Position Data in the Guided Self-Service documentation. If the employee record is using position data and Update Incumbents is set to Yes, then you can also check Include Salary Plan/Grade, which makes the Salary Plan, Grade, and Step fields controlled by the position and cannot be modified in Job Data. If Update Incumbents is set to No, then the Include Salary Plan/Grade field is unavailable. Note: (USF) Federal users don't currently use this field. |
| Include Salary Plan/Grade |
Swipe to Yes to include the salary plan and grade in the incumbents update. When set to Yes, then salary plan and grade are included in the incumbent update. When you set Include Salary Plan/Grade, to No then the salary plan and grade are not included in the incumbent update. Note: If the position data military Rank field is populated, then the Include Salary Plan/Grade field is unavailable for data entry. |
| Force Update for Title Change |
Swipe to Yes to make position title changes trigger the update incumbent process. If Yes is selected when you create a new position data row with a reason of TTL (Title Change) and a change to the data in the Title field, then the system creates a corresponding row in the incumbents’ Job Data records. The new job data row has the action code Position Change and the Action Reason Title Change. Note that the job title is not actually stored on the job record. The job title that appears next to the Position Number field on the Work Location page is pulled from the position data record based on the effective date of the job data row. So if Force Update for Title Change is set to No and no new job data row is created, the title shown on the job data row is based on the previous effective date, which is why the old title continues to appear. |
Current Incumbents
After you assign an employee to the position, this group box displays the incumbent's employee information and a Job Data link.
|
Field or Control |
Definition |
|---|---|
| Job Data |
Select this link to open a new browser window and access the Job Data component for this employee. From there you can review or made changes to the employee’s job data. |
Use the Manage Position - Review and Submit page (POSITION_SUMM_FL) to review a summary of the changes to this position, add or view attachments, and submit your position data for approvals.
Navigation
To access the Manage Position pages start at the Position Management Dashboard, select the Manage Position Tile, then:
Click the Add button from the Manage/Create Position search page.
Enter search criteria on the Manage/Create Position search page and select a position. This will take you to the Position Details Page where you can:
Click the Clone button to enter the new position number and effective date.
Click the Insert Row (+) button to add a new effective dated row.
Click the Edit (pencil) button for a row to view and update existing information.
After accessing the Manage Position component (by navigating as specified in either of the previous bullets), click the Next button or select the Review and Submit tab from the left panel navigation steps.
Image: Manage Position - Review and Submit Page
This example illustrates the fields and controls on the Manage Position - Review and Submit page.

|
Field or Control |
Definition |
|---|---|
| Submit button |
The Submit button appears on this page only. Click this button to save your position. If approvals are required for updating or creating positions, the request will be sent to the approving managers, where they will use the Pending Approvals - Create Position Page or Pending Approvals - Manage Position Page to take action on a position request. Note: You position data will not be save until you click the Submit button. If you exit out of the Manage Position pages without submitting your changes, your data will be discarded. When a position has been successfully submitted, the system will display the Position Confirmation Page. |
Summary Of Changes
Use this section to review changes you have made to a position. The page will display the proposed value side-by-side with the old value for the changed fields.
Attachments
Use this section to manage attachments by uploading, deleting, or updating attachments using fluid. Attachments are not accessible from the classic pages. When a user submits position for approval, all attachments on this page will be sent with the request.
|
Field or Control |
Definition |
|---|---|
 Add
Attachment button Add
Attachment button |
Click this button to access the File Attachment page and upload files. |
| Attachments and Description |
Select the link to download and view the attachment. Enter a description, or the field will use the attachment file name as the description upon saving the page, which you can overwrite. |
 (Delete) button (Delete) button |
Click this button to remove an attachment from this position.. |
Managers use fluid Approvals to view position requests using the Pending Approvals - Create Position Page or Pending Approvals - Manage Position Page..
The following video provides an overview and demonstration of the Fluid Attachment framework:
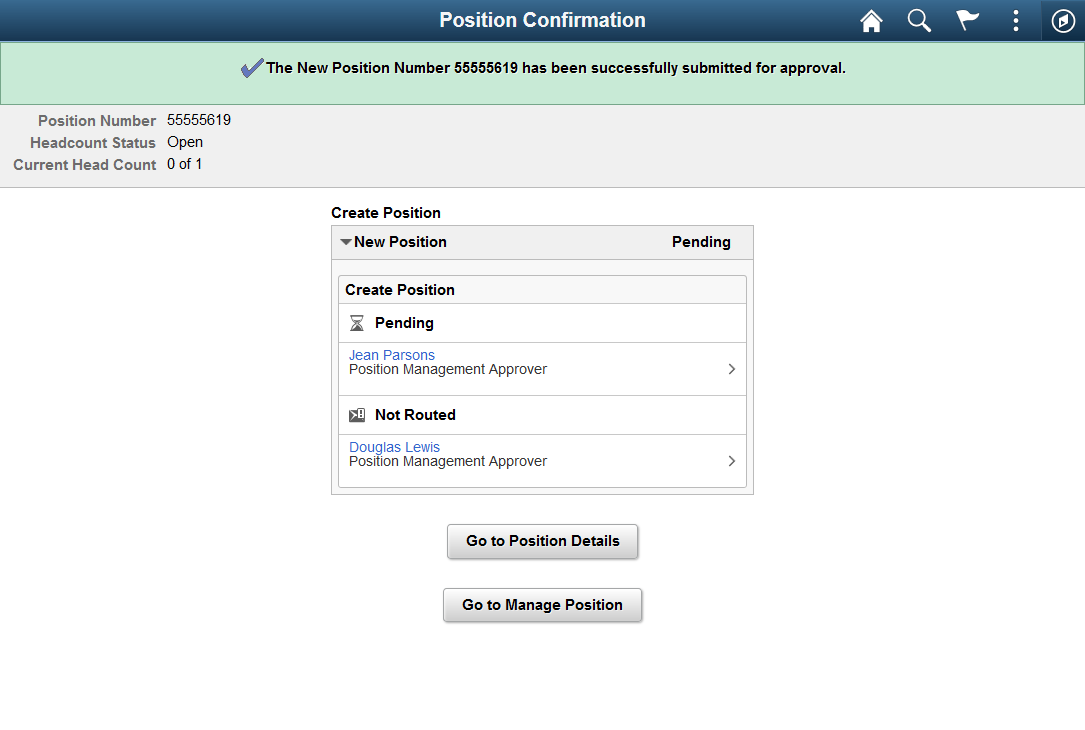
Use the Position Confirmation page (POS_SUB_CNF_FL) to confirm that your position updates have been submitted.
Navigation
Click the Submit button on the Manage Position - Review and Submit Page.
Image: Position Confirmation Page
This example illustrates the fields and controls on the Position Confirmation page.
|
Field or Control |
Definition |
|---|---|
| Go to Position Details button |
Click this button to go to the Position Details Page for this position. |
| Go to Manage Position button |
Click this button to return to the Manage/Create Position (Search) Page and create another position or look up an existing position. |
Use the View Position page (POSITION_VIEW_FL) to view a complete summary of the position details by effective date.
Navigation
Select the View Details button from the Position Details Page
Select the View Position link from the right-hand collapsible supplementary panel.
Select the View Position Details from the Pending Approvals - Create Position Page or Pending Approvals - Manage Position Page
Image: View Position Page (1 of 2)
This example illustrates the fields and controls on the View Position page (1 of 2).
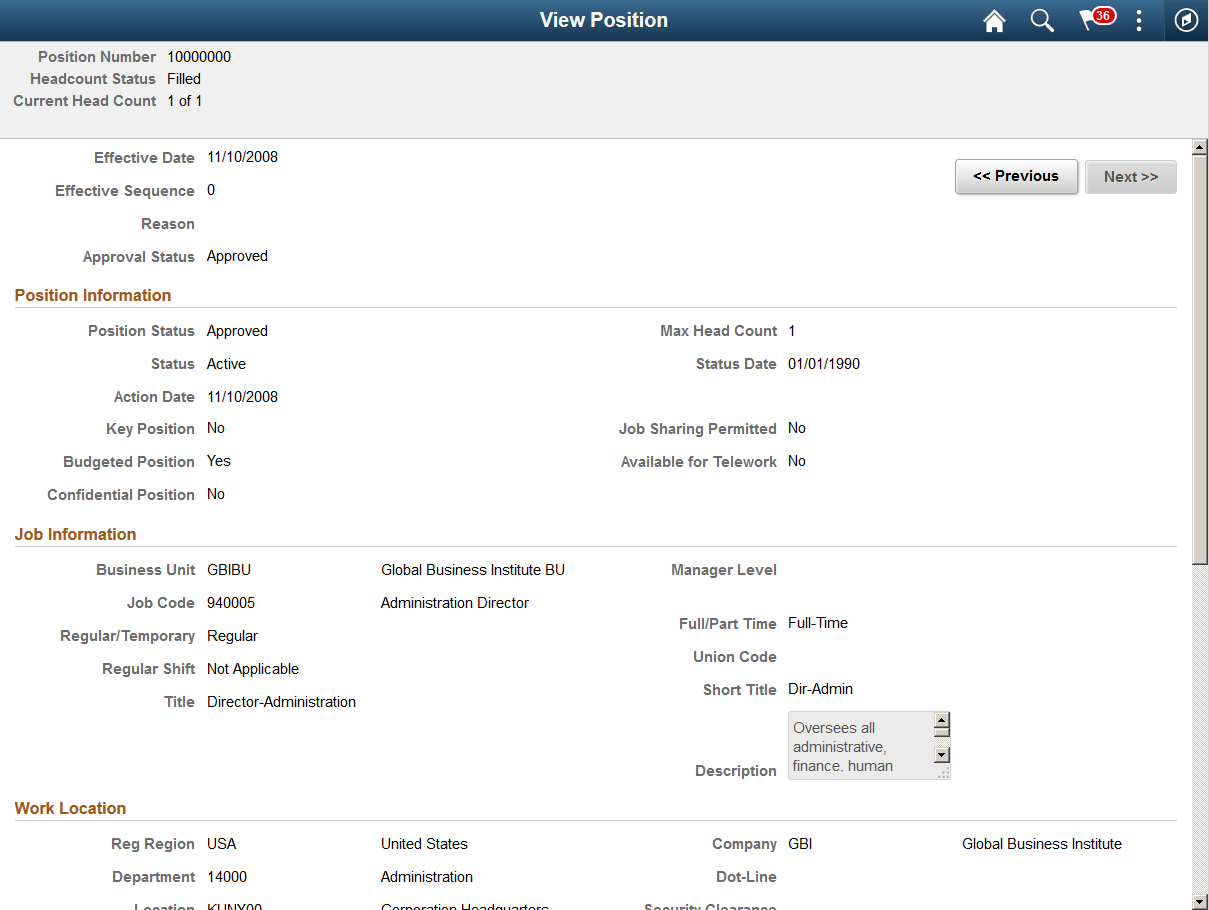
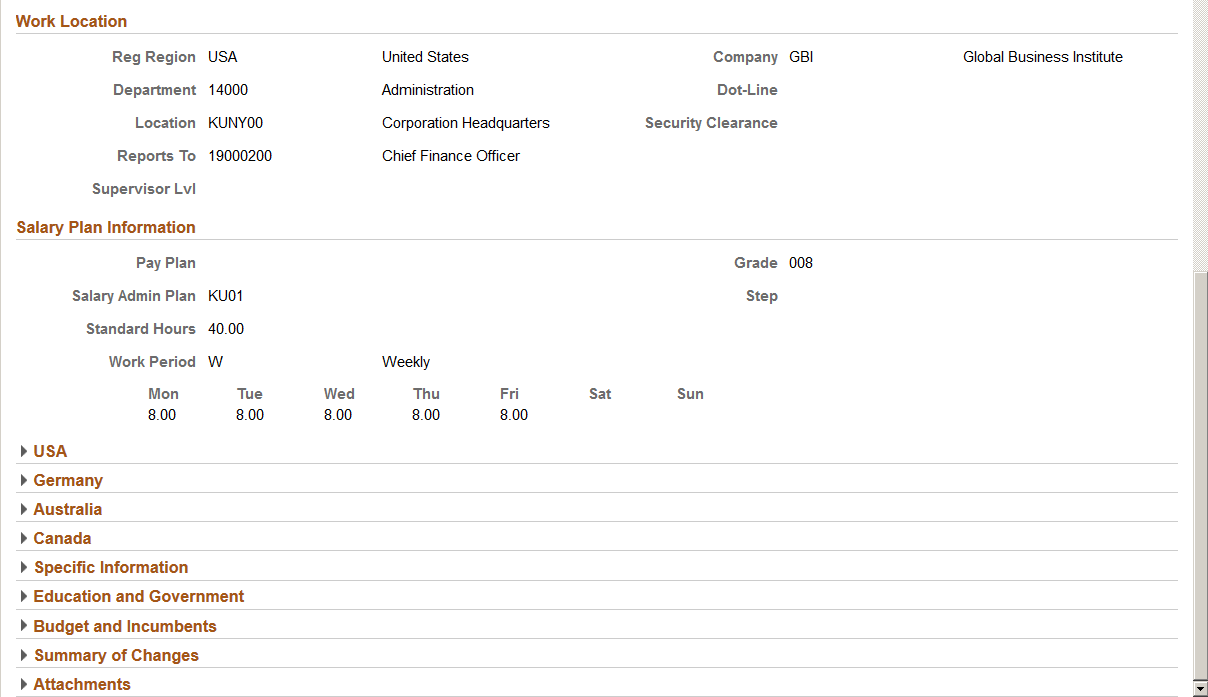
Image: View Position Page (2 of 2)
This example illustrates the fields and controls on the View Position page (2 of 2).
|
Field or Control |
Definition |
|---|---|
| << Previous and Next >> buttons |
Click these buttons to scroll through all the effective dated rows for this position. |