Configuring Banquet Guest Check Buttons and Prompts
To configure the Begin Banquet Guest Check for point-of-sale (POS) workstation touchscreens:
-
Access the EMC and select the Enterprise, Property, Revenue Center, or Zone, click the Configuration tab, and then select Page Design.
-
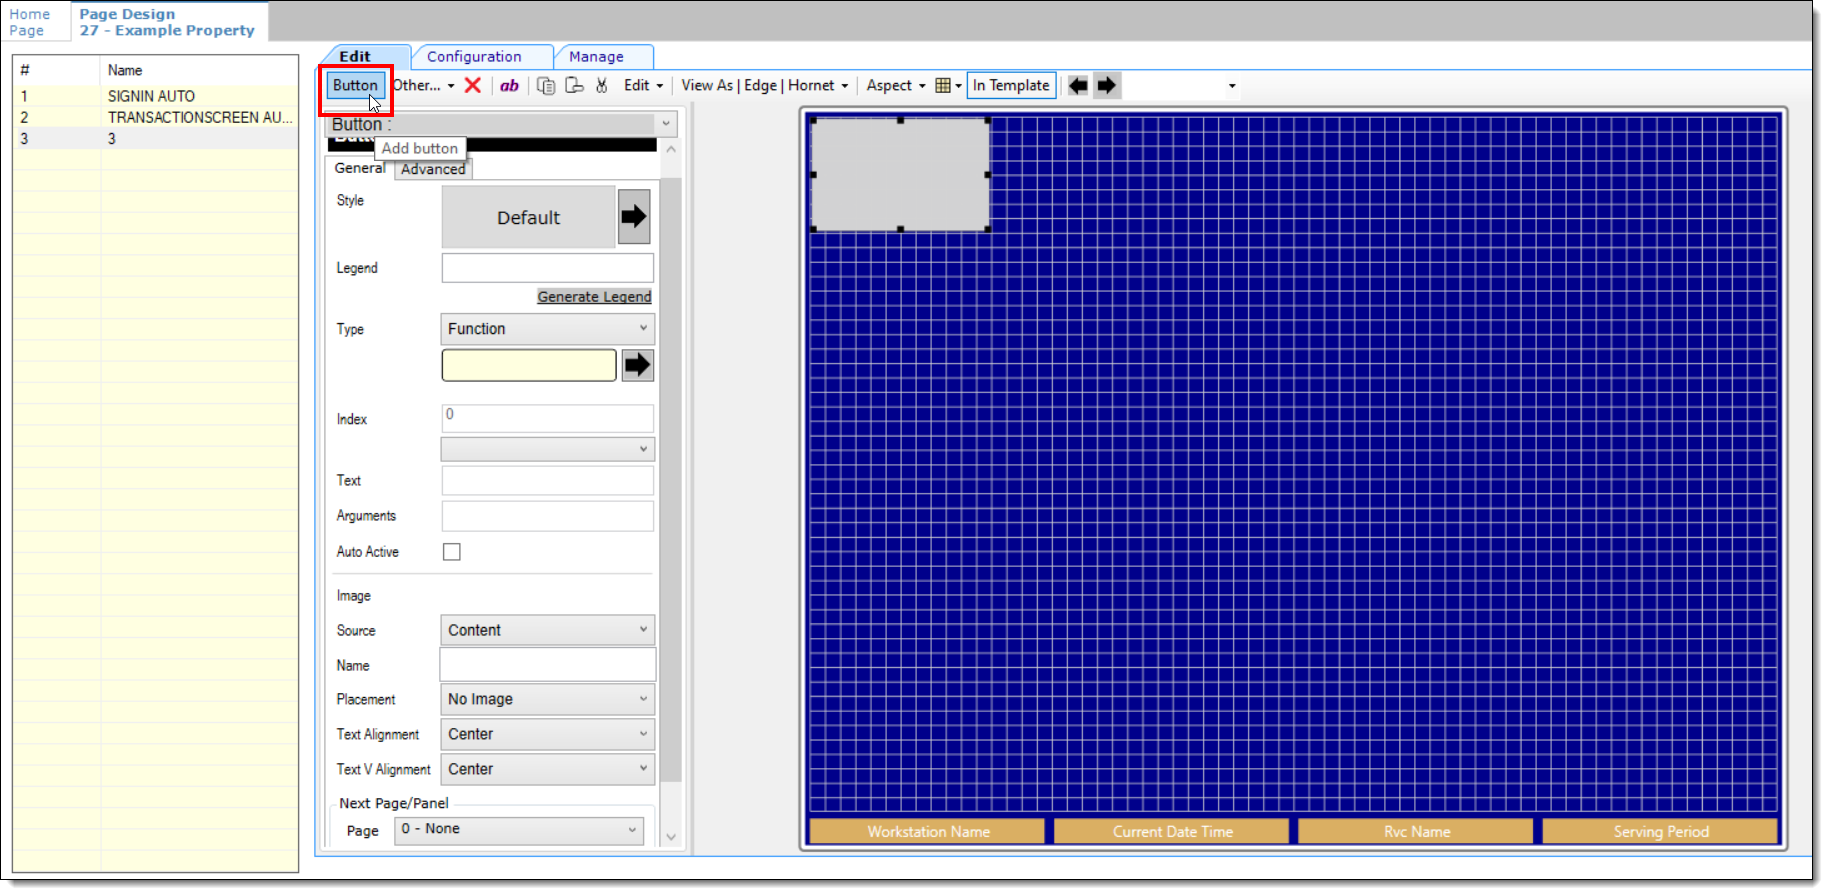
You can configure an existing touchscreen or add a new one. Add a new button.
Figure 41-2 Page Design – Add Button
-
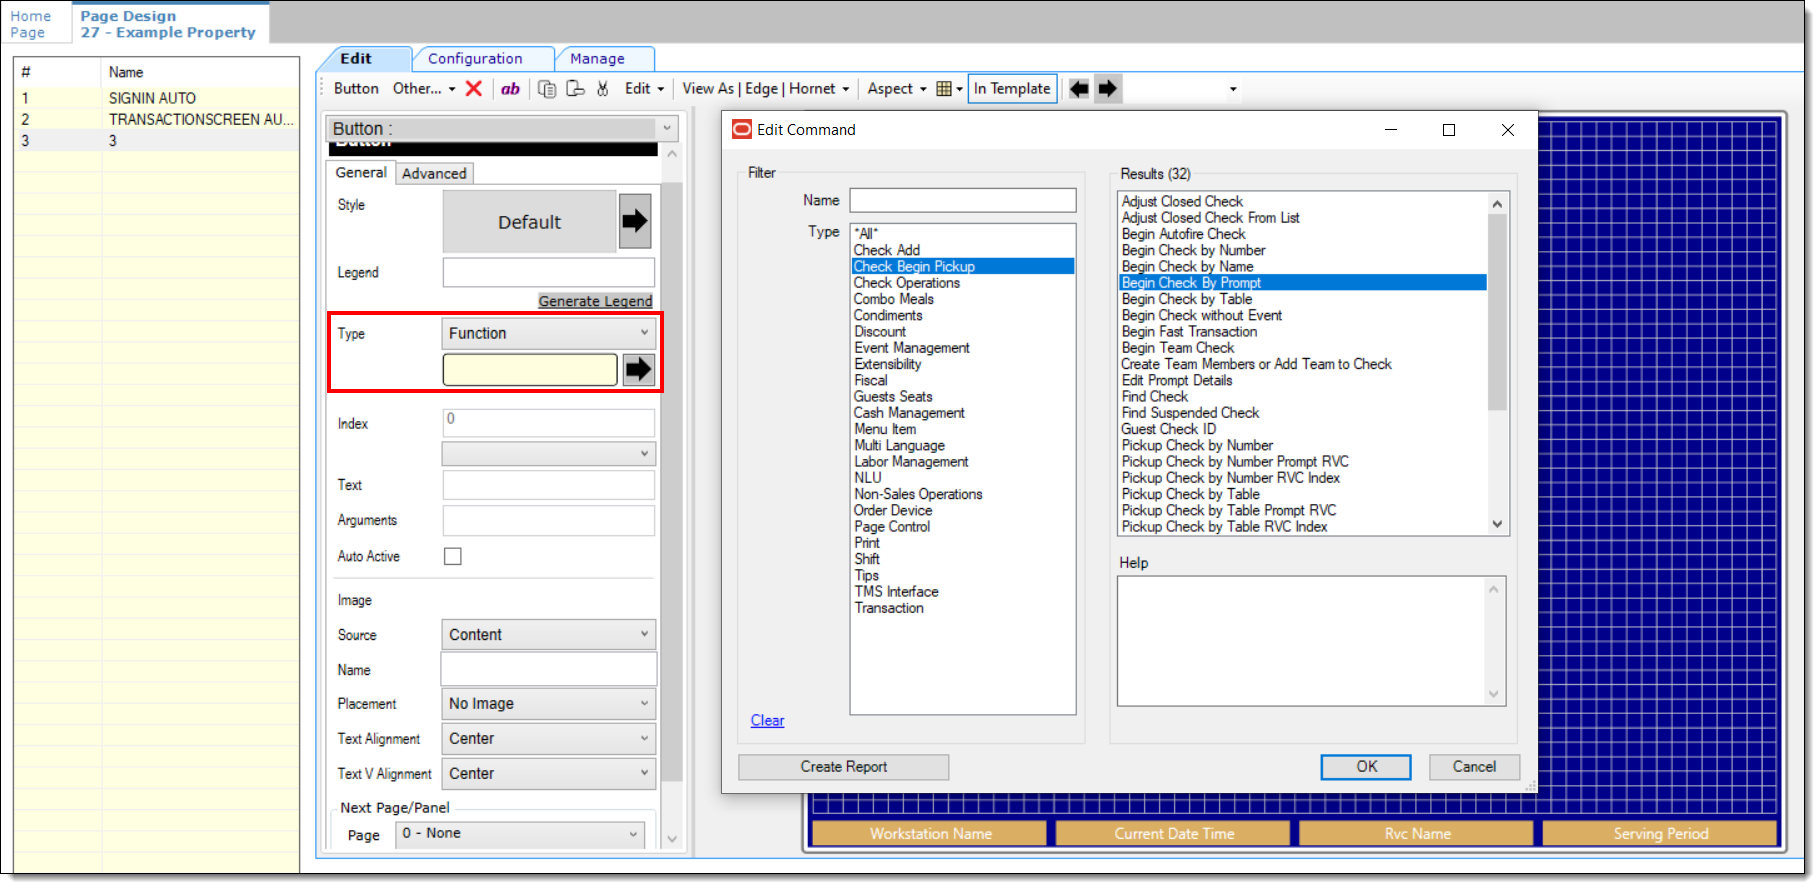
From the Type drop-down list, select Function, select the Begin Check By Prompt function, and then click OK.
Figure 41-3 Page Design – Begin Check By Prompt Function
-
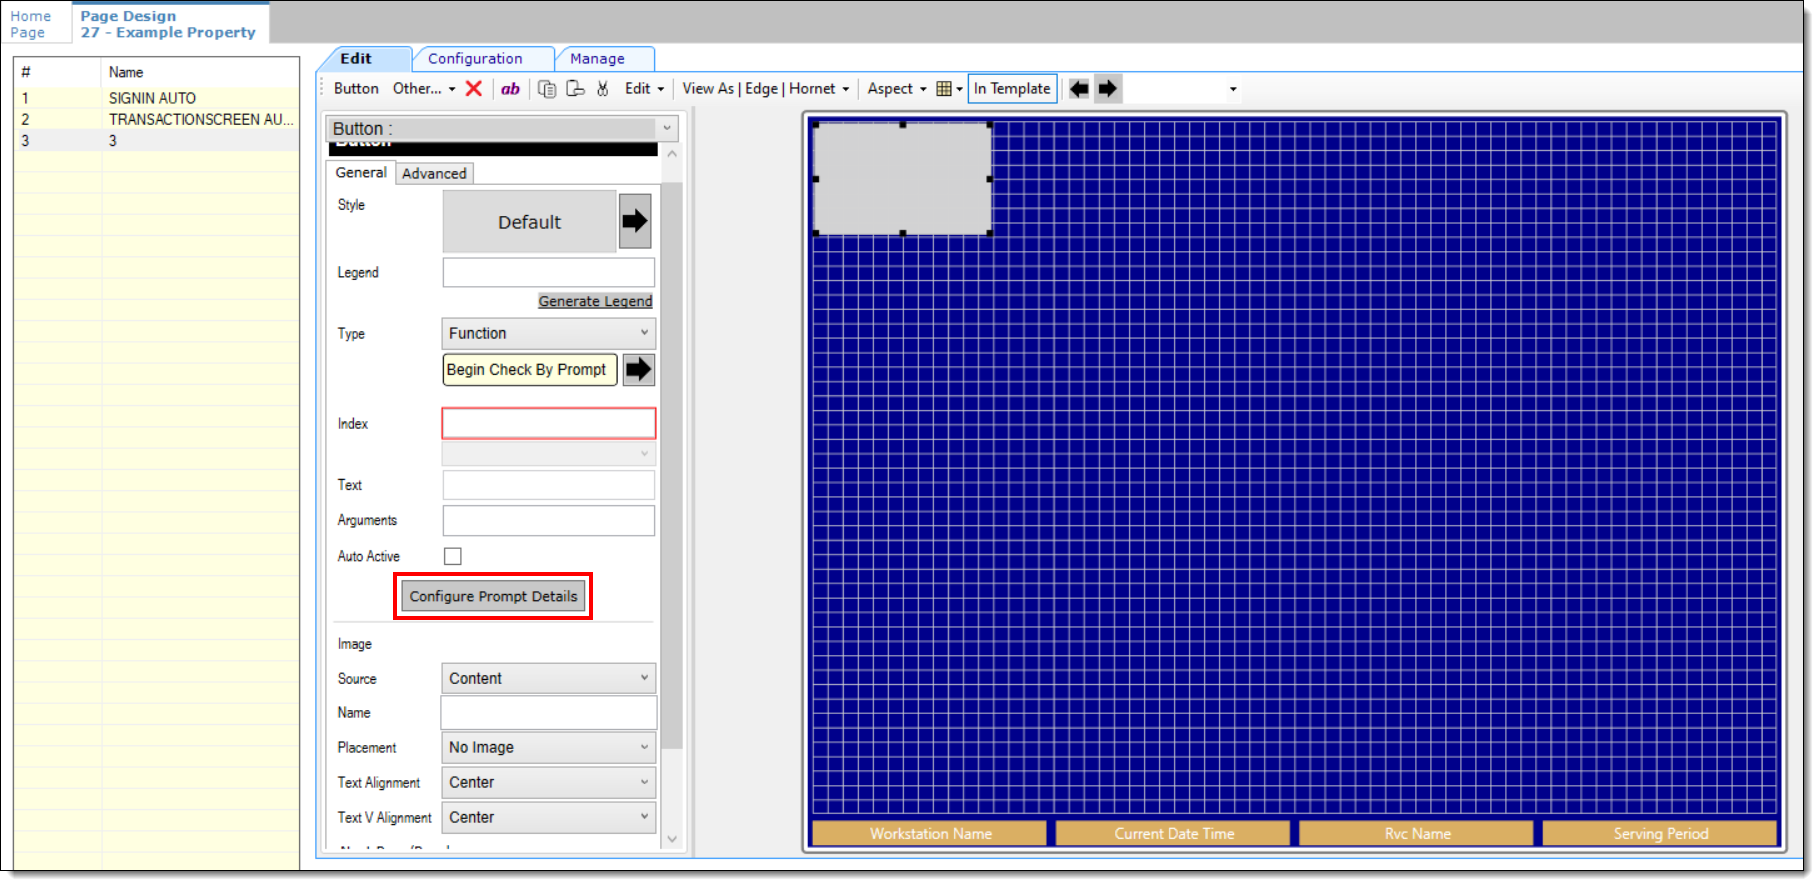
Click the Configure Prompt Details button.
Figure 41-4 Page Design – Configure Prompt Details
Option 1 – Clicking the ‘No’ Button
-
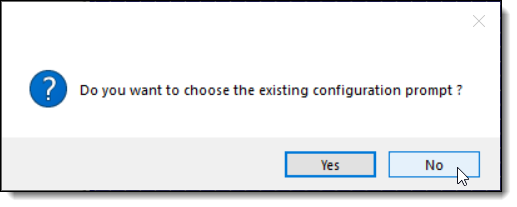
Click No when prompted.
Figure 41-5 Configure Prompt Details ‘No’ Response
-
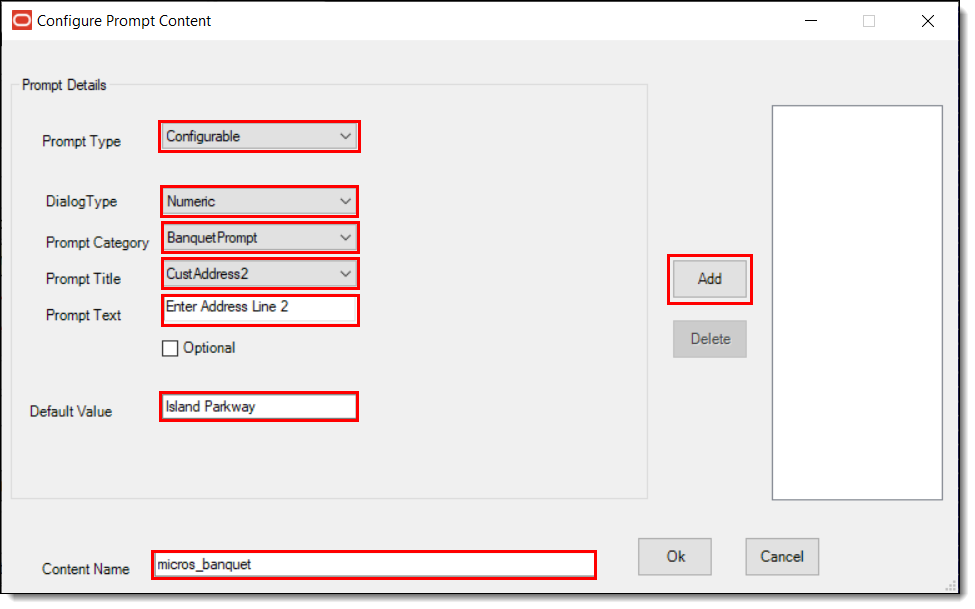
From the Prompt Details section, configure the following:
-
From the Prompt Type field, select Configurable.
-
From the Dialog Type field, select a type from the drop-down list.
-
From the Prompt Category field, select BanquetPrompt.
-
From the Prompt Title field, select a title category from the drop-down list.
-
From the Prompt Text field, enter the appropriate text based on the Prompt Title setting.
-
From the Content Name field, enter a name for your banquet content.
-
Click the Add button, and then click Ok.
Figure 41-6 Configure Prompt Content Window - Prompt Details
-
Option 2 – Clicking the ‘Yes’ Button
-
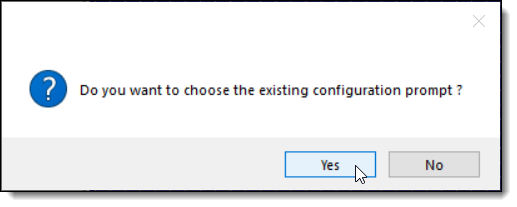
A prompt asks you to choose the existing configuration prompt to set, or select the prompt content.
Figure 41-7 Configure Prompt Details ‘Yes’ Response
-
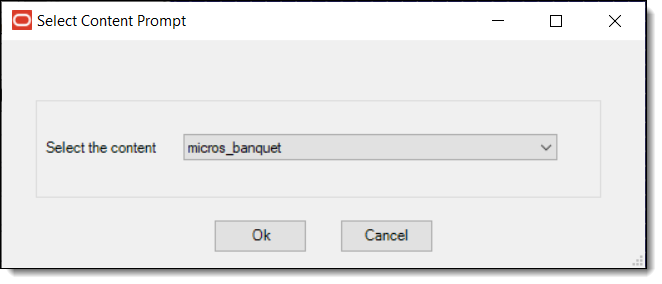
Selecting Yes displays a list of all the existing configuration file names in the Content table.
Figure 41-8 Select Existing Content Prompt
-
As mentioned previously, selecting No allows you to set the prompts and save details in the Content table. Specify the name of the content.
-
-
As shown in Figure 5 above, configure the Prompt Type, Dialog Type, Prompt Category, Prompt Title, Prompt Text, Default Value, and then enter a Content Name. Click Add and Ok.
Note:
The Optional check-box allows the prompt to bypass the next screen and allows the user to click OK.
-
There are a number of options when configuring prompt content. Prompt Types can be Configurable or Non-Configurable. Dialog Types include AlphaNumeric, Numeric, List, and by Date. Users must select from the following list of configurable prompt items that can be used for a Banquet Check:
-
name="lblOrganization" >Organization
-
name="lblAcct" >Acct
-
name="lblCustName" >Name
-
name="lblCustAddress1" >Address Line 1
-
name="lblCustAddress2" >Address Line 2
-
name="lblCustCity" >City
-
name="lblState" >State
-
name="lblZip" >Zip
-
name="lblDate" >Date
-
name="lblTime" >Time
-
name="lblEvent" >Event
-
name="lblSalesperson" >Sales Person
-
name="lblMaitred" >Maitre D'
-
name="lblGuarantee" >Guarantee
-
Configurable Prompt Type
The example below illustrates a Configurable Prompt Type. When this type is configured, users are prompted to enter the requested information at the POS workstation — in this case, a selection of function rooms.
Figure 41-9 Configure Prompt Content Window - Configurable Type

Non-Configurable Prompt Type
Non-Configurable prompts are not sent to users when beginning a Banquet Check. Regardless of the assigned Dialog Type (e.g., Alphanumeric, Numeric, List , or Date), users are not prompted to enter information.
Figure 41-10 Configure Prompt Content Window - Non-Configurable Type
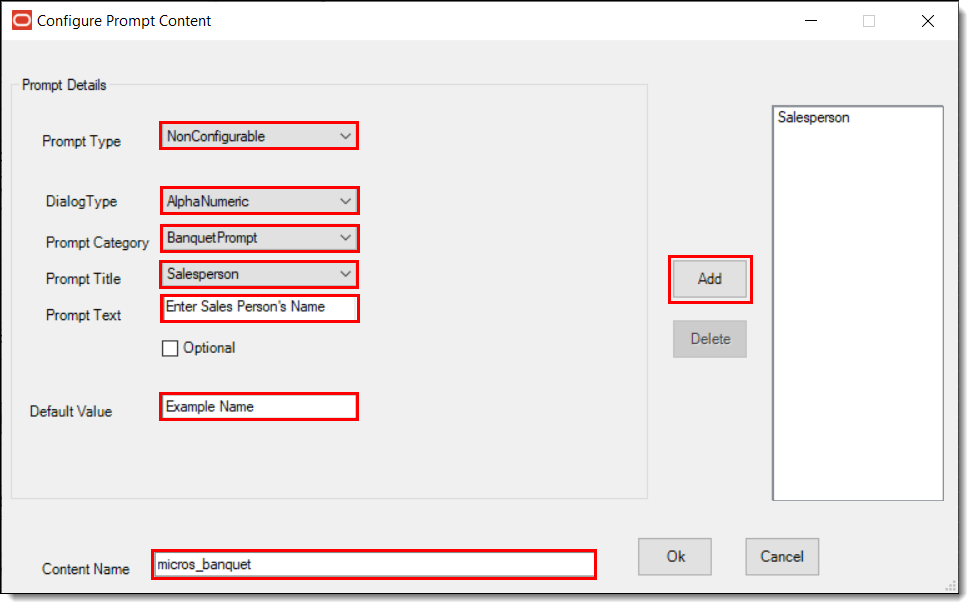
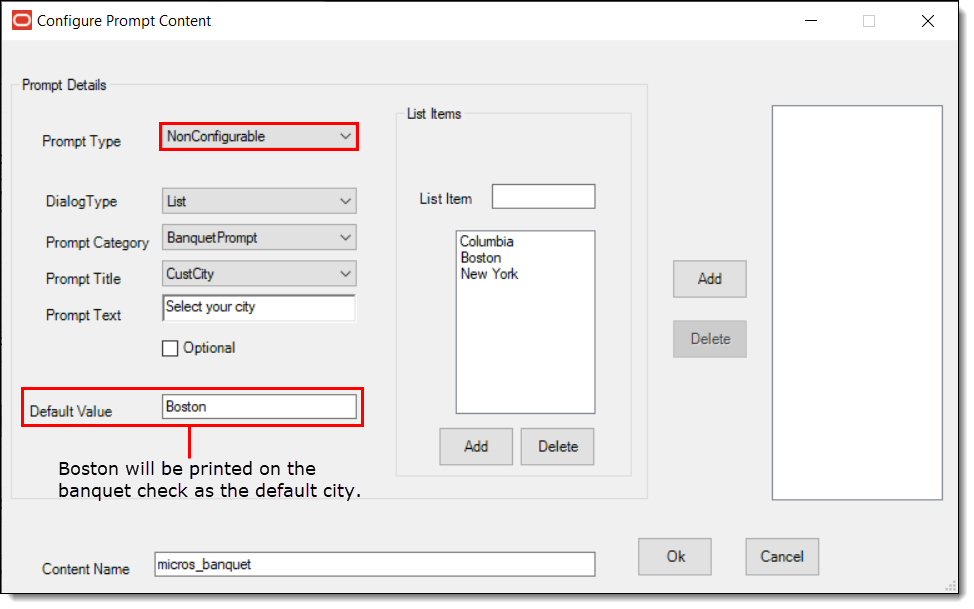
When configuring a Non-Configurable prompt, and a Default Value is entered, the value is printed on the Banquet Check by default, without any prompts being sent to the user. The following example illustrates a List Dialog Type to provide a list of items — in this case, a selection of cities.
Figure 41-11 Non-Configurable Type - List Dialog Type
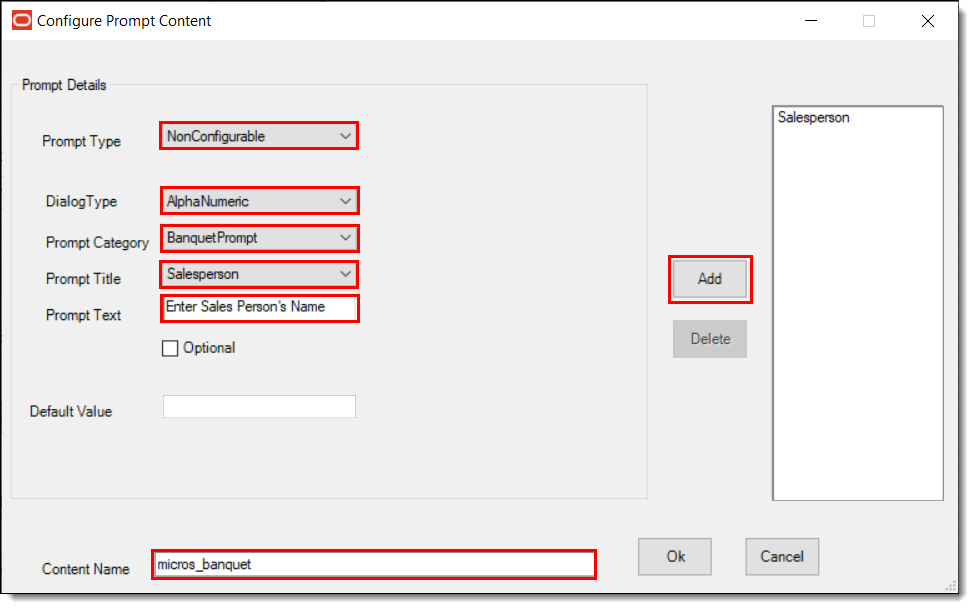
When configuring a Non-Configurable prompt and the user does not enter a Default Value (leaves the setting blank), nothing is printed on the Banquet Check.
Figure 41-12 Non-Configurable Type - Blank Default Value Setting
Users may configure Non-Configurable prompts when certain data does not change and remains static in a Banquet Check. For example, if the organization holding the banquet is always the same, then it can be defined as a Non-Configurable prompt.
-
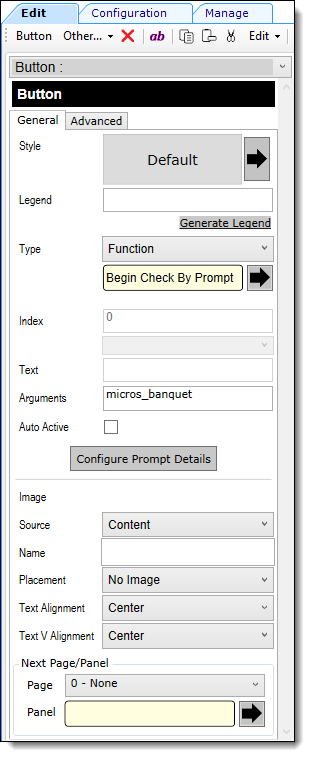
The details and content name added or selected is added as Arguments in the button properties panel.
Figure 41-13 Page Design - Button Properties Panel
-
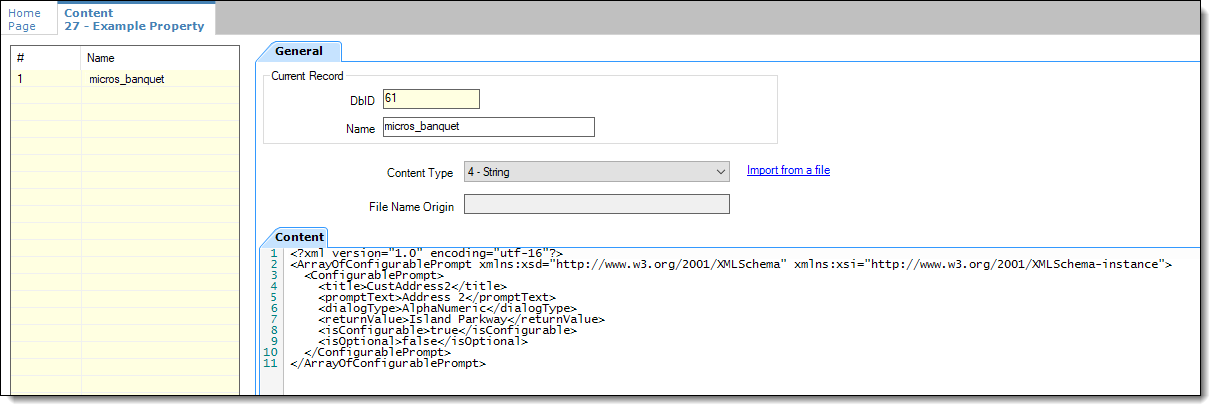
The configuration data for Banquet Check prompts is saved in the Content module as a String in the Content Type field, and is shown using XML format below.
Figure 41-14 Property Level Content Module
Configuring a Banquet Check Add/Transfer by Number
The following steps illustrate how to transfer one Banquet Check to another.
-
Access the EMC, select a Revenue Center, click the Configuration tab, and then click Page Design.
-
Choose the touchscreen page to be edited and add a new button.
-
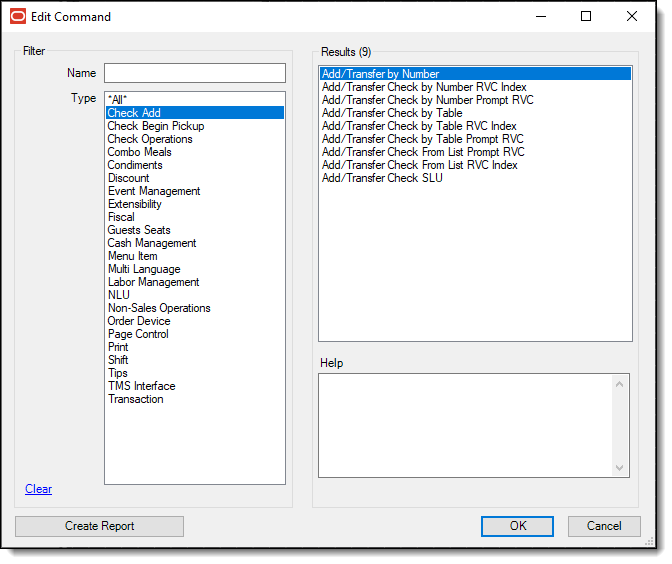
Select Function as the Type, select Add/Transfer by Number, click OK, and then Save.
Figure 41-15 Page Design – Add/Transfer by Number Function
-
Access and sign onto a point-of-sale (POS) workstation.
-
Begin a Banquet Check and ring up menu items. Note the check number and service total.
-
Begin a second Banquet Check and ring menu items. Note the check number and service total.
-
Pickup the first Banquet Check from the workstation Pick Up check list.
-
Press the Add/Transfer by Number button.
-
Enter the second Banquet Check number mentioned in step 6. The first check’s prompt data overwrites the second check’s prompt data when the checks are merged.
-
Press OK from the ‘Add Check’ screen. The second Banquet Check is transferred to the first one.
Configuring a Banquet Split Check
The following steps illustrate how to split a Banquet Check.
-
Access the EMC, select a Revenue Center, click the Configuration tab, and then click Page Design.
-
Choose the touchscreen page to be edited and add a new button.
-
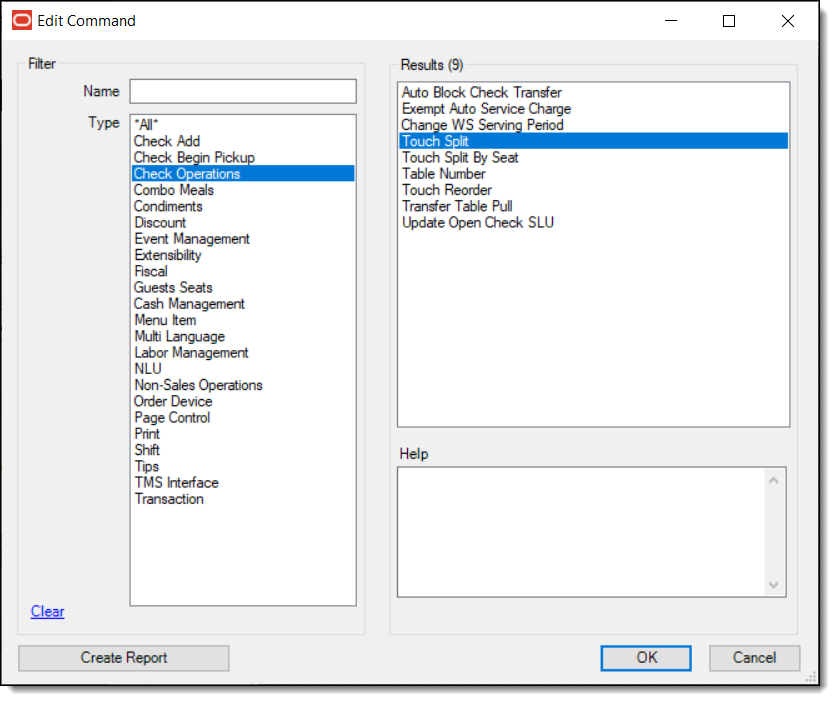
Select Function as the Type, select Touch Split, click OK, and then Save.
Figure 41-16 Page Design – Touch Split Function
-
Access and sign onto a point-of-sale (POS) workstation.
-
Begin a Banquet Check, ring up some menu items, and then service total.
-
Pickup the first Banquet Check from the workstation Pick Up check list, and then press the Touch Split button.
-
Add a check, move some menu items from one check to another, and then press Save.
-
Press Yes in response to the ‘Exit and save changes?’ prompt.
-
Press Yes in response to the ‘Print split checks?’ prompt. The Banquet Check is split and the individual checks can be viewed in the open checks list. The first check’s prompt data is copied to the second check when the checks are split.
Configuring RVC Table Names as Room Names
-
Access the EMC, select a Property, click the Configuration tab, click Employee Classes, and then select the Operator Options tab.
-
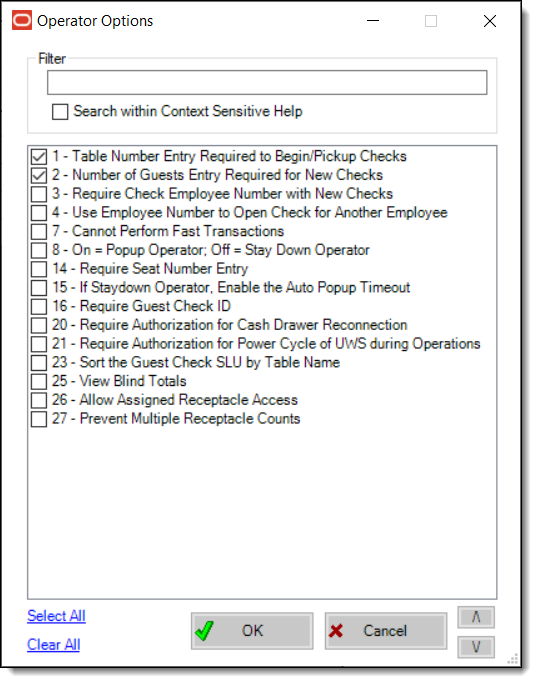
Enable the 1- Table Number Entry Required to Begin/Pickup Checks and 2- Number of Guest Entry Required for New Checks options, click OK, and then Save.
Figure 41-17 Employee Classes - Operator Options
-
Access the EMC, select a Revenue Center, click the Setup tab, and then select the Tables module (under the RVC Configuration header).
-
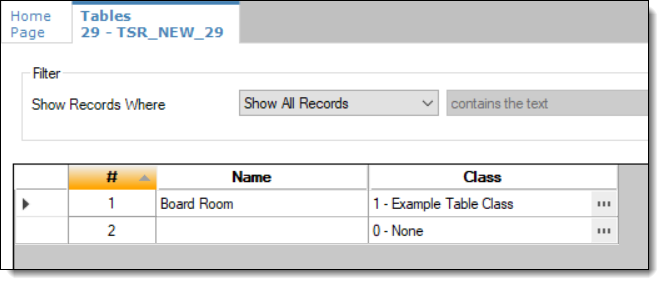
Insert or click an available record, enter a room name, for example, Board Room, assign a Dining Table Class in the Class field, and then Save.
Figure 41-18 Revenue Center Configuration - Tables Module
