Purpose: You can perform the following actions on the Order Line Details page.
Order Line Actions:
• Review, Change, or Delete Personalization Details
• Sort Order Line Activity Records
• Sort Item Availability Records
• Filter Gift Card Detail Records
• Update an Order Line Message
• Delete an Order Line Message
Order Actions:
• Review and Enter Order Messages
• Review and Enter Customer Messages
• Review Refunds and Returns for the Order
• Review Invoices for the Order
• Review Recently Viewed Invoice Details
• Review Recently Viewed Order Line Details
For more information:
• Order Line Details for an overview of the Order Line Details page.
• Fields on Order Line Details for a description of the fields on the Order Line Details page.
Review, Change, or Delete Personalization Details
In the Item Information Panel, select the Personalization (Special Handling) link for an item to advance to the Personalization Information window.
Note: The Personalization field displays only if it is selected for display in the Work with Contact Center (WWCC) menu option.
Sort Order Line Activity Records
You can sort on any column in the Order Line Activity Table by clicking on the column name. An arrow pointing up displays next to the field when the values for the field display in ascending sequence; an arrow pointing down displays next to the field when the values for the field display in descending sequence.
Order line activity records first displays in this table in descending activity date, ascending activity type sequence.
Sort Item Availability Records
You can sort on any column in the Item Availability Table by clicking on the column name. An arrow pointing up displays next to the field when the values for the field display in ascending sequence; an arrow pointing down displays next to the field when the values for the field display in descending sequence.
Item Warehouse records first display in this table in descending quantity available sequence.
You can sort on any column in the Gift Card Details Table by clicking on the column name. An arrow pointing up displays next to the field when the values for the field display in ascending sequence; an arrow pointing down displays next to the field when the values for the field display in descending sequence.
Gift cards first display in this table in ascending gift card number sequence.
Filter Gift Card Detail Records
The Order Line Details page displays the first 15 gift card detail for the order line.
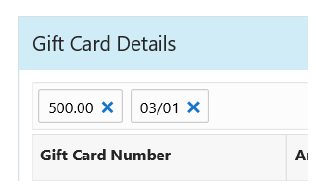
The page provides an entry field below the Gift Card Details panel with the message Type to filter. You can further refine the gift card details displayed in the Gift Card Details Table by entering one or more search terms found in any of the fields displayed in that table.
Example: Enter 500. The displayed gift card details include only those that include 500 in the amount or the last 4 positions of the gift card number. Next, enter a date of 1/28. Displayed results are now further restricted to gift card details that include both search criteria.
Matching records need to contain the search term, but do not need to start with the search term. For example, both 123.45 and 23.45 are matches for a search term of 23.
Filtering is across all results: The filtering is not restricted to the gift card details displayed on the first page of results. For example, if the gift card detail matching your entry is on the second page of results, this detail is displayed.
Additional information on filtering:
• Only fields displayed at the Gift Card Details Table are available for filtering.
• To filter based on issued date or email sent date, include the date delimiters. For example, enter 8/27 rather than 827 to filter for a message entered on August 27.
Removing a search term: Optionally, click the X next to a search term to remove it from the filter criteria.
Click Add Order Line Message above the Order Line Messages Table to open the Add Order Line Message window.
If you have authority under the Modify Existing Messages (A30) secured feature, you can edit a message in the Order Line Messages Table:
• Optionally, click in the Message (Order Line Message) to edit the message text.
• Optionally, click in the Print Location (Order Line Message Print Location) to change the print location.
• When you are done, select the check mark in the Actions column to save your changes.
You cannot apply a different Order Line Message Template to an existing order line message.
If you have authority under the Modify Existing Messages (A30) secured feature, you can delete a message in the Order Line Messages Table by clicking the X in the Actions column.
You can sort on any column in the Order Line Messages Table by clicking on the column name. An arrow pointing up displays next to the field when the values for the field display in ascending sequence; an arrow pointing down displays next to the field when the values for the field display in descending sequence.
Order line messages first display in this table in descending message date sequence.
The Order Line Details page displays the first 15 order line messages for the order line.
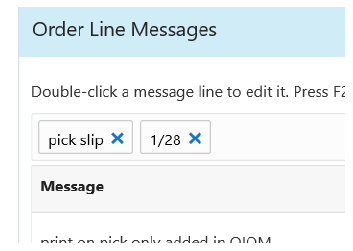
The page provides an entry field below the Order Line Messages panel with the message Type to filter. You can further refine the order line messages displayed in the Order Line Messages Table by entering one or more search terms found in any of the fields displayed in that table.
Example: Enter pick slip. The displayed order line messages include only those that are flagged to print on the pick slip, or that include the words “pick slip” in the message. Next, enter a date of 1/28. Displayed results are now further restricted to order line messages that are both flagged to print on the pick slip and were entered on January 28.
Matching records need to contain the search term, but do not need to start with the search term. For example, both 123.45 and 23.45 are matches for a search term of 23.
Filtering is across all results: The filtering is not restricted to the messages displayed on the first page of results. For example, if the only order line message matching your entry is on the second page of results, this message is displayed.
Additional information on filtering:
• Only fields displayed at the Order Line Messages Table are available for filtering.
• Filtering is not case-sensitive. For example, you can enter pick or PICK to display messages flagged to print on the pick slip.
• To filter based on entered date, include the date delimiters. For example, enter 8/27 rather than 827 to filter for a message entered on August 27.
Removing a search term: Optionally, click the X next to a search term to remove it from the filter criteria.
You can sort on any column in the Item/SKU Comments Panel by clicking on the column name. An arrow pointing up displays next to the field when the values for the field display in ascending sequence; an arrow pointing down displays next to the field when the values for the field display in descending sequence.
Item/SKU comments first display in this table in descending comment sequence.
The Order Line Details page displays the first 15 item/SKU comments for the item on the order line. Only item/SKU comments that are flagged to display in a window are shown.
The page provides an entry field below the Item/SKU Comments panel with the message Type to filter. You can further refine the item/SKU comments displayed in the Item/SKU Comments Panel by entering one or more search terms found in the Comment field.
Filtering is across all results: The filtering is not restricted to the item/SKU comments displayed on the first page of results. For example, if the only item/SKU comment matching your entry is on the second page of results, this comment is displayed.
Removing a search term: Optionally, click the X next to a search term to remove it from the filter criteria.

In the page title banner, select the Add Order Message option or press CTRL + ALT + m to advance to the Add Message window.
In the page title banner, select the New Search option to return to the Order Search (Search for Orders or Customers) page. The system clears all of the fields on this page so that you can enter new search criteria and perform a new search.
In the left-hand navigation pane, select the Order Summary option to advance to the Order Summary page for the current order.
In the left-hand navigation pane, select the Order Activity option to advance to the Order Activity page for the current order.
Review and Enter Order Messages
In the left-hand navigation pane, select the Order Messages option to advance to the Order Messages page.
Review and Enter Customer Messages
In the left-hand navigation pane, select the Customer Messages option to advance to the Customer Messages page.
Review Refunds and Returns for the Order
In the left-hand navigation pane, select the Returns/Refunds option to advance to Returns/Refunds page.
In the left-hand navigation pane, select the Invoices option to advance to the Invoices page.
Review Recently Viewed Invoice Details
Once you advance to the Invoices page for an order, the link to the Invoices page displays in the left-hand navigation pane for the order under the title Recently Viewed Invoices as Invoice #, where # is the invoice number. Select the Invoice # option for the invoice you wish to review to advance to the Invoice Detail page.
The Recently Viewed Invoices title displays up to the last ten recently viewed invoices in reverse chronological order, with the most recently viewed invoice at the top of the list.
Review Recently Viewed Order Line Details
Once you advance to the Order Line Details page for an order line on an order, the link to the Order Line Details page displays in the left-hand navigation pane for the order under the title Recently Viewed Order Lines as Ship-To # | Line #, where Ship-To # is the order ship-to associated with the order line and Line # is the order line number. Select the Ship-To # | Line # option for the order line you wish to review to advance to the Order Line Details page.
The Recently Viewed Order Lines title displays up to the last ten recently viewed order lines in reverse chronological order, with the most recently viewed order line at the top of the list.
In the page title banner, select Unlock Order or press CTRL + ALT + u to process any remaining order updates and unlock the order so that it available for maintenance by another user.
Note: This option displays only if you have locked the order in the current session; it does not display if another user has locked the order.
For more information: See Maintaining an Order for more information about locking and unlocking an order.
________________________________
Copyright © 2020, Oracle and/or its affiliates. All rights reserved.
Legal Notices