5 PAYPOINT
The following sections describe the setup, usage of Online Credit Card Transfer for PAYPOINT Handling.
Prerequisite, Supported Systems, and Compatibility
This section describes the minimum requirements to operate the Paypoint credit card device.
-
OHC Ship Transf.exe
-
OHC Tools.exe
-
Wrapper.dll
-
SPMS Parameters
-
CRUFLFC.dll version
-
PaypointAPI.dlli9
-
Interop.PAYPOINTAPILib.dll
-
Paypoint.dll
Compatilbility
SPMS version 20.1 or later. For customer operating on version below 20.1, database upgrade to the recommended or latest version is required.
SPMS Parameters Paypoint
Table 5-1 PAR_GROUP General
| PAR Name | PAR Value | Description |
|---|---|---|
|
Enable Signature Capture for Credit Card |
0 or 1 |
0 - Disables Signature Capture for Credit Card 1 - Enables Signature Capture for Credit Card |
|
Allow payment for Declined Authorization |
0 or 1 or 2 |
0 - Does not allow payment if authorization is declined but allow when offline 1 - Allows payment if authorization is declined or offline. 2 - Does not allow payment if authorization is decline or offline |
|
Allow posting for declined authorization |
0 or 1 |
0 - Does not allow posting if credit card authorization is declined 1 - Allows posting |
|
Online Initial Auth Amount |
<Amount> |
Specifies initial authorization amount for all card types when the card is swiped at the terminal with online mode |
|
CC Type Not Supported |
<Blank> |
Does not include supported credit card |
|
Auto Incremental Auth Amount |
<Amount> |
Minimum Incremental Amount |
|
Specify Decline Error to Allow Payment |
('FEIL VED KOMMUNIKASJON','TIMEOUT') |
This parameter is work with ‘'Allow Payment for Declined Authorization’. If payment does not allow due authorization is offline or decline, but with decline error specified in parameter, the program will still allow payment to be performed. |
Table 5-2 PAR_GROUP Interfaces
| PAR Name | PAR Value | Description |
|---|---|---|
|
Specify Decline Error for Resend |
('FEIL VED KOMMUNIKASJON','TERM. ER OPPTATT','MISTET FORBINDELSE','TIDSAVBRUDD') |
This parameter allows the identified transaction to be resent. If the Paypoint returns a response with an error message, OHC Ship Transfer will update the CCT_STATUS = 0, CCT_QSTATUS = 8 and remove the CCT_NONAPPROVALTEXT for resent purpose. |
|
Enable Auto Incremental Auth |
0 or 1 |
This is used for OCC. When enabled, the system checks for each debit posting amount if it is within the last approved auth amount. If not, an auth is sent with the amount specified in the parameter Auto Incremental Amount. 0 - Disable the automatic incremental authorization 1 - Enable the automatic incremental authorization |
|
CC Auth/Settlement Folder |
Folder path |
Repository location for authorization/settlement files generated by OHC Credit Card Interface Note: To avoid adverse impact on your system, please abstain from using the following folder path:
|
Table 5-3 PAR Group Not Specified
| PAR Name | PAR Value | Description |
|---|---|---|
|
CC Transfer Format |
PAYPOINT |
Online Credit Card Format |
|
CCard Interface Name |
<Workstation IP/Name> |
Workstation IP address/name which used to run OHC Ship Transfer |
System Configuration Paypoint
This section describes the various system codes setup within the Administration module.
Department Setup
A debit/credit department code of a credit card type is required for charge/posting and this is setup up in Administration module, Financial Setup, Department setup.
-
Login to Administration module and select Financial Setup, Department setup from the drop-down list.
-
Click New to create a Sub-Department code.
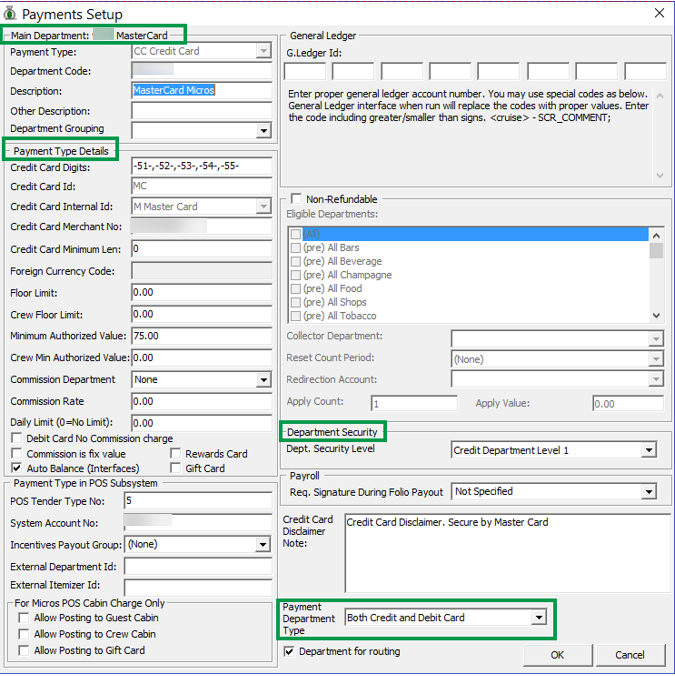
Figure 5-1 Department Code Setup
-
At the Main Department section, enter the credit/debit card information such as Payment type, department code and description.
-
Enter the two digits of the first set of the credit card number of the Credit Card type.
-
Enter the Credit Card ID. For example, MC for MasterCard, VI for Visa, and others.
-
Select the corresponding Credit Card Internal ID from the drop-down list.
-
Enter the Credit Card Merchant Number provided by the Service Provider.
-
Select the Commission Department from the drop-down list and update the commission rate in percentage.
-
Check the Debit Card No Commission charge if the commission is not applicable to debit card.
-
-
At the Department Security access, select the relevant security level from the drop-down list.
-
Select the relevant Payment Type under Payment Department Type, either Both Credit and Debit card, Credit card or Debit card. This field determines whether the payment type is a Credit Card or Debit Card.
-
Click OK to save.
Setting up Receipt
To generate a receipt upon payment, it requires a report template to be set up. A Standard Credit Card receipt template is available in Administration module, System Setup, Report setup, _Receipts group.
Please contact Oracle Hospitality Cruise Support if you would like to configure a customized receipt format.
OHC Transfer Setup
The OHC Ship Transfer Interface is an interface that sends credit card payments from SPMS to Paypoint Payment Gateway for credit card payments to be authorized using interface program OHC Ship Transf.exe
-
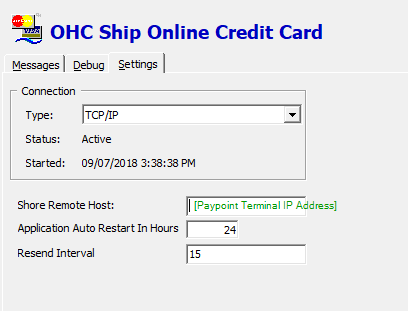
Start OHC Ship Transf.exe and navigate to the Settings tab.
-
Enter the Shore Remote Host IP address. The shore remote host is the Paypoint Terminal IP address.
Figure 5-2 OHC Ship Transfer — Setting Screen
-
The connection is shown in Message tab per below figure.
Figure 5-3 OHC Ship Transfer — Message Screen

Paypoint Workflow
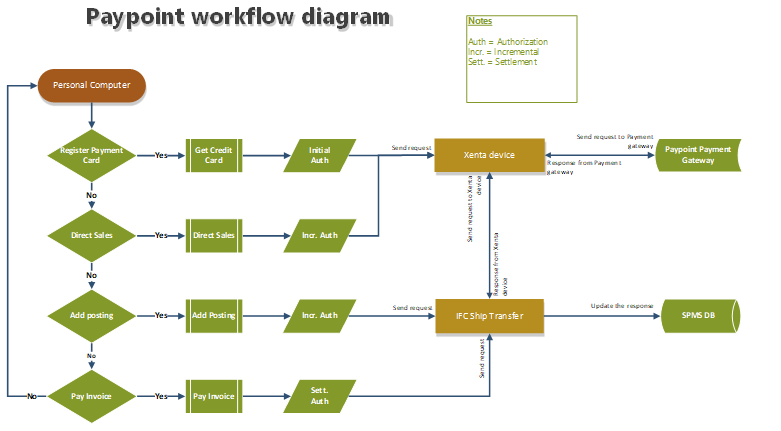
The SPMS application communicates with Paypoint device through a TCP/IP protocol and the device handles the communication with the host through its own network card. The IP address is stored in the Paypoint device itself.
Send Initial Authorization
Authorization requests performed at Management module, Get Credit Card or Advance Quick Check-in module, Get Credit Card/Direct Salesare sent to the Paypoint device before passing them to the Paypoint Payment Gateway.
Send Incremental/Settlement Authorization
An Incremental/Settlement request performed at Management module, Add Posting / Pay invoice function is sent to OHC Ship Transfer module before being passed to Paypoint payment gateway.
Figure 5-4 Paypoint Credit Card Handling Workflow
PAYPOINT Handling
-
Navigate to Options, Hardware tab from the menu bar.
-
Enter the device IP address into the Pin Entry Device Initialization field and click Save PED IP.
Figure 5-5 Hardware Options — Pin Entry Device IP

-
After the Save PED IP button is clicked, a Test Communication between the Management module and the device shall commence.
Figure 5-6 Management — Test Communication — In Progress
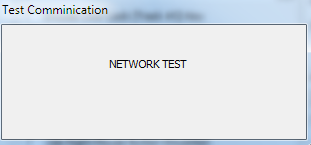
Figure 5-7 Management — Get Credit Card
-
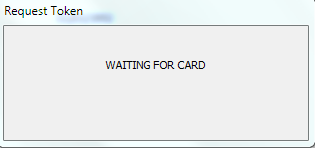
When you click the Get Credit Card button at Guest Handling, the program communicates with the device and prompts to insert/swipe a credit card.
Setting up Device in Advance Quick Check-In Module
-
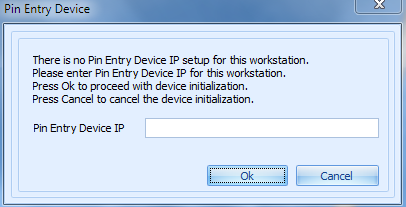
At the start up the AQCI module and if the module has never been connected/configured with a card device, the Pin Entry Device screen without an IP address prompts ‘Enter the device’s IP address’ and click OK.
Figure 5-8 Advance QCI — Pin Entry Device
-
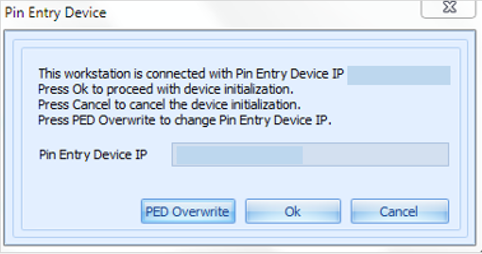
If AQCI has been connected to the card device before, the previous IP address is stored in Pin Entry Device. Click the PED Overwrite button to change the IP address if the device’s IP is different.
Figure 5-9 Advance QCI — Pin Entry Device — with IP address
-
The AQCI program will run the Test Communication between AQCI and the card device when the OK button is clicked and you will receive a notification when the testing is OK
. -
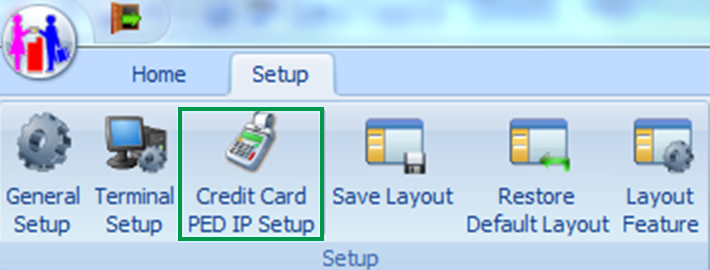
To change or re-test the connection, navigate to the Setup tab, click the Credit Card PED IP setup at the ribbon bar and the Pin Entry Device IP screen shall prompt. Click the PED Overwrite button and enter the new IP address.
Figure 5-10 Advance QCI — Credit Card PED IP Setup
Viewing Authorization Amount in Management Module
-
Login to Management module and navigate to Guest Handling screen.
-
At the Search Panel, browse the guest account.
-
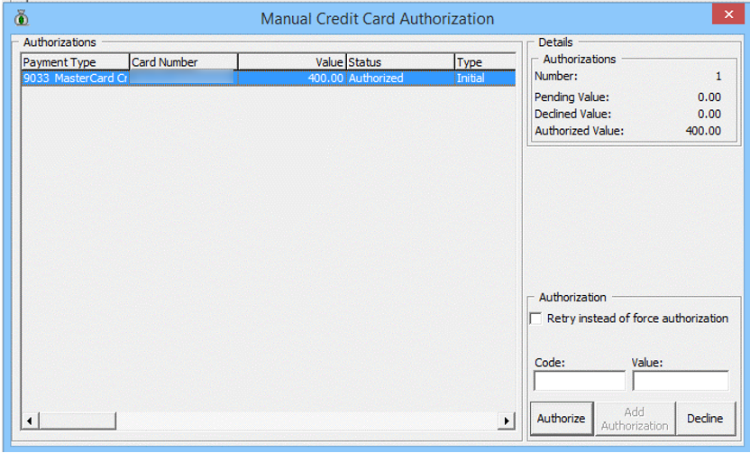
Navigate to the Credit Card tab of the guest account. The registered card status should be in Inactive mode.
Figure 5-11 Management Credit Card
-
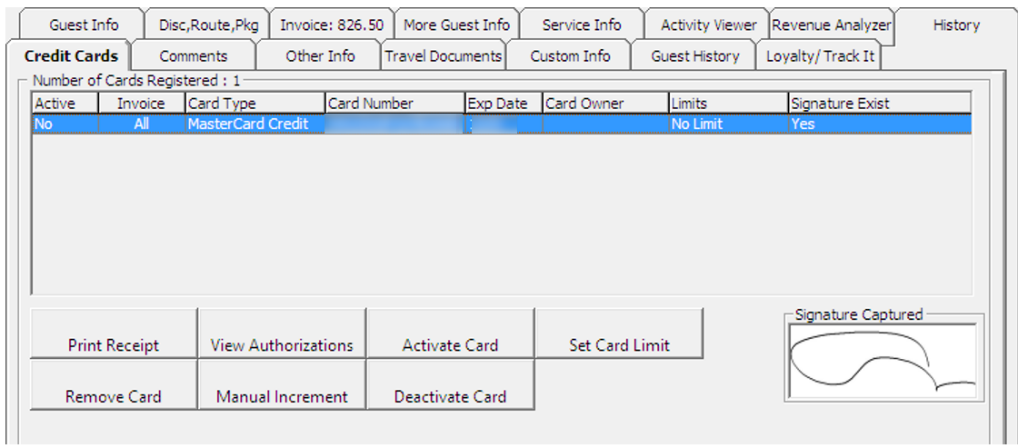
To display the initial authorization, select the credit card and click View Authorization.
-
The Authorized Value shown in View Authorization is the last authorization amount, excluding the amount from Direct Sales.
Figure 5-12 Management View Authorization
-
To view the earlier settlement of the credit card, navigate to the Invoice tab.
-
If the card is a debit card, the amount is credited onto the invoice automatically.
Figure 5-13 Management Authorization Display on Invoice — Debit Card Details

OHC Ship Transfer (Sample Response Message)
Below are the samples response message in OHC Ship Transfer.
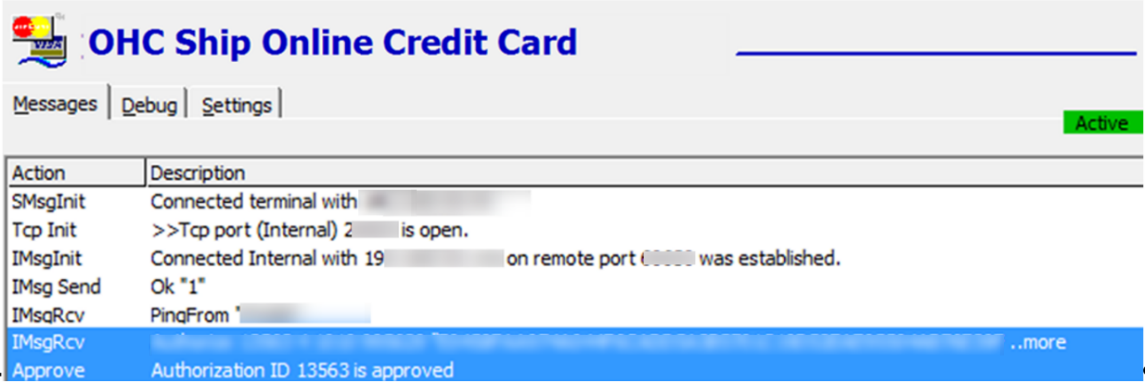
Send Authorization
Figure 5-14 OHC Ship Transfer — Send Request Message — Send Authorization
Send Settlement
Figure 5-15 OHC Ship Transfer — Send Request Message — Send Settlement

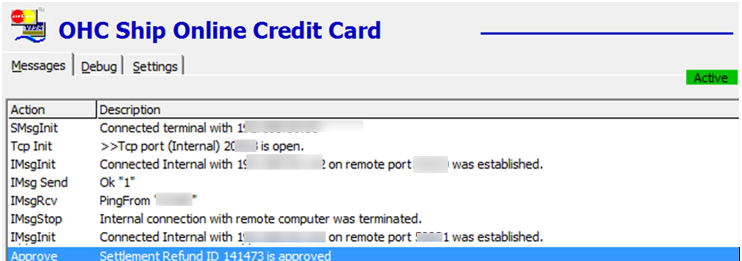
Send Refund
Figure 5-16 OHC Ship Transfer — Send Request Message — Send Refund
Troubleshooting PAYPOINT
This section describes the troubleshooting steps that will assist you in resolving the known errors with PAYPOINT Credit Card Handling.
GeneralTable 5-4 General Known Issue and Solution
| Known Issue | Solution |
|---|---|
|
To trace the Paypoint error log |
The log file is saved in Oracle Hospitality Cruise folder .\DIR\DIR\Paypoint.log or Paypointtrans.log |
Management Module
Table 5-5 Management Module
| Known Issue | Solution |
|---|---|
|
Error ‘No contact with term’ |
Restart the program or device. This is due to no connection between the program and the device. |
|
Error ‘No contact with card issuer’ |
Try another credit card. This card may be blocked by Paypoint payment gateway. |
|
Error ‘Error in sending pre-authorization’ |
Restart the program and reset the network connection. |
|
Error ‘Invalid Service for this card’ |
This is due to the credit card type not defined in parameter ‘CCard Not Supported’ |
Transaction Status
Table 5-6 Transaction Status Detail
| Status | Description/Transaction Type |
|---|---|
|
Initial Authorization |
|
|
CCA_OPERATION |
1 |
|
CCA_MTYPE |
0 = Online initial auth, 1 = Offline initial auth |
|
CCA_STATUS |
0 = outstanding/pending, 1 = approved, 2 = declined |
|
CCA_QSTATUS |
0 = pending, 8 = completed |
|
Incremental Authorization |
|
|
CCA_OPERATION |
2 |
|
CCA_MTYPE |
4 = Online incremental auth, 5 =offline incremental auth If CCA_MTYPE = 5 When parameter Allow Posting For Declined Authorization is set to 0, the incremental authorization is created during system cruise change. When parameter Allow Payment For Declined Authorization is set to 0 or 2, then the incremental authorization is created during pay invoice/quick billing. |
|
Settlement |
|
|
CCT_STATUS |
0 = outstanding, 1 = approved, 2 = declined |
|
CCT_QSTATUS |
0 = pending, 2 = “Process” button pressed at Management module, Credit Card Batch Settlement, 8 = Completed |
|
Direct Payment |
|
|
CCA_MTYPE |
6 |
|
CCA_STATUS |
1=approved, 2=declined |
Ship Transfer Interface Module
Table 5-7 Ship Transfer Interface Module Known Issue and Solution
| Known Issue | Solution |
|---|---|
|
Error ‘Duplicate reject trans’ |
Turn off the checking on XENTA device from Menu, Administer, Change Params, General Use, Duplicate. |
|
Error ‘Automation Error. The Specification module could not be found’ |
The PAYPOINTAPI.dll is missing or corrupted. Replace the new PAYPOINTAPI.dll into Oracle Hospitality Cruise folder. |
|
Error ‘paypoint.dll open failed’ |
The remote shore host does not match the Paypoint terminal IP address. |
|
Do not pick up the settlement transaction to process |
|
|
Do not pick up the authorization transaction |
2015-05-07 05:12:34.373 ERROR Illegal additional transaction data 2015-05-07 05:14:34.511 DEBUG TransData (type 49): 300000;4;ñøôñ÷à ï÷éøîà;A000000025010402;526542;;;;;; 2015-05-07 05:14:34.511 DEBUG TransData (type 50): 1164347
|