2 Configuring DGS ResOnline
This section describes the configuration of DGS ResOnline Interface.
Setting Up the Parameter
-
Login to DGS ResOnline and navigate to Settings tab.
-
Select the sub-tab and select the relative option check boxes.
-
Click Apply to save.
-
Restart the application for the changes to take effect.
Setting Up Alert Email List
The Alert e-mail List notifies users listed in the alert list of the changes made to the reservation. This requires set ups in Administration module.
Setting Up Email Server
-
Login to Administration module and select System Setup, Database Parameter from the drop-down menu.
-
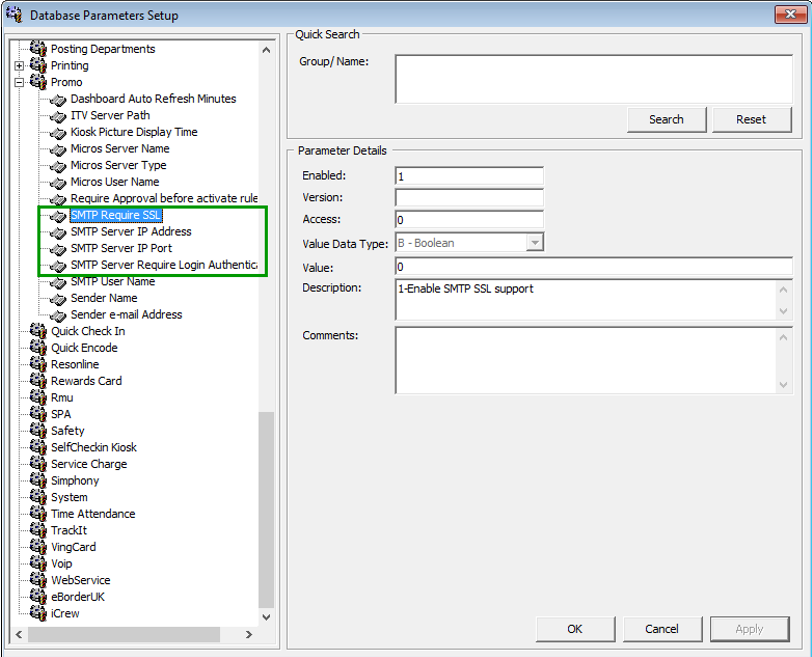
In the Database Parameters Setup window, available Parameters are grouped by the function groups. Click the plus‘+’ key to expand the group and select, or use the Quick Search section to look up. Enter the parameter name ‘Promo’ in Group/Name field and then click Search.
Figure 2-1 Email Server Parameters

-
Enter the information in the following parameters and click Apply at each of the parameter.
-
SMTP Server IP Address: Enter the email server IP address.
-
SMTP Server IP Port: Enter the email server port. Default port value is 25.
-
SMTP Server Require Login Authentication: Set the Value to 1 if it requires login authentication.
-
SMTP User Name: Enter a valid email user account for login
-
SMTP User Password: Enter the password for the email user account
-
-
Exit the program when the update is completed.
Inserting Email Alert Report Template Script
-
Open the Command Prompt with Run as Administrator
-
At the command line, type SQLPLUS and then press the Enter key.
-
Enter the SQL System user name and password.
-
At the SQL command-line, enter the following command @”<file location + file name”. For example
@”C:\temp\ResOnline Email Alert.sql”. -
Press the Enter key to execute the script, and close the SQL command and the Command Prompt.
Uploading Email Alert Report Template
-
Login to Administration module and select System Setup, Report Setup from the drop-down menu.
-
At the Current Reports List, ResOnline group, right-click, and select Add Report.
-
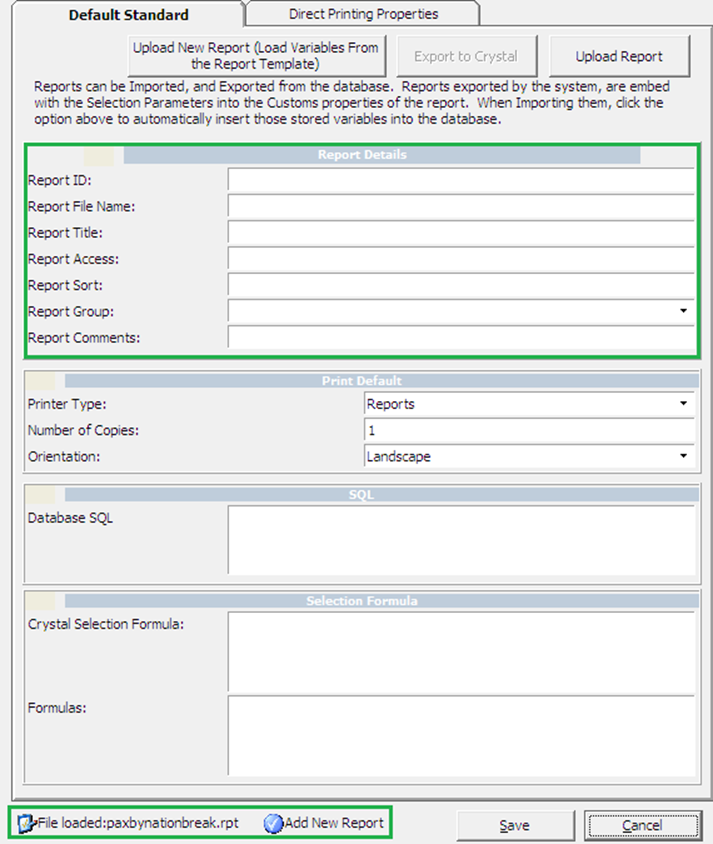
Navigate to select Upload New Report (Load Variables From the Report Template) or Upload Report and then search for the .RPT file on your local drive, if you are uploading a report template.
-
In the Report Details section, enter the following:
-
Report ID: Unique ID of customized report.
-
Report File Name: Crystal Report file name, for example, testreport.rpt.
-
Report Title: Report name to show in Current Report List.
-
Report Access: User Access allowed to view/print the report.
-
Report Sort: Sort order of the report within the assigned report group.
-
Report Group: Group this report belongs to. Select from the drop down menu.
-
Report Comments: Additional comments/information pertaining to this report.
Figure 2-2 Report Setup Details

-
-
At the Print Default section, select the printer type and print orientation from the drop-down list, and then enter the number of copies to print.
-
Click Save to add the report to the list, and OK at the Save New Report prompt. The newly loaded report template is shown.
Setting Up Email Alert List
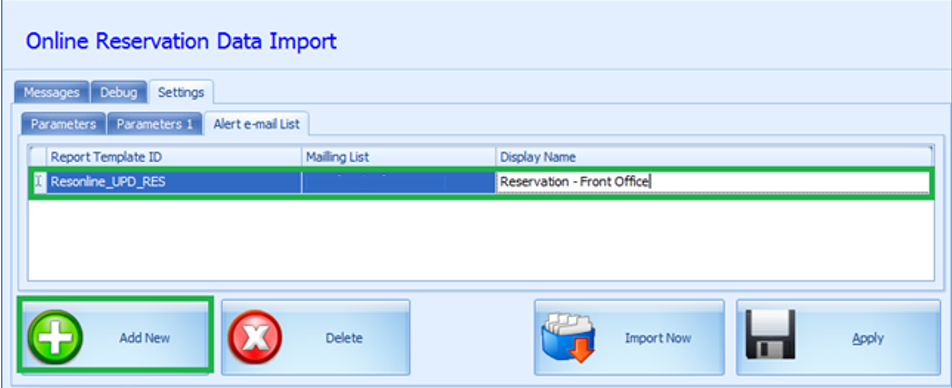
Figure 2-3 Email Alert Report Linking

-
Login to DGS ResOnline and go to Settings, Alert e-Mail List tab.
-
Click the Add New button to insert a report entry.
-
Insert the Report ID from report setup into Report Template ID and add the Mailing List and Display Name in the grid. Use a semicolon “;” to separate multiple email address, if any.
-
Click the Apply button to save the changes.
-
Repeat the steps above to add more report alerts for other department. The Alert E-Mail Template settings are save to
AlertEMail.xmlin Public Documents folderC:\Users\Public\Documents\Oracle Hospitality Cruise. -
The Alert e-Mail sent is based on the parameter stored in OHCSettings.par
[#Res Online Data Import.Parameter.LastSendRspID=xxxxxx#]that references to the ID of last sent alert. -
Copy the OHCSettings.par from the Oracle Hospitality Cruise folder of the ResOnline Interface PC to the new PC that you intend to run DGS ResOnline application. If the
[#Res Online Data Import.Parameter.LastSendRspID=xxxxxx#]on the next PC is reset or starts from zero, the application then resend all previously sent alert.
Setting Up Email Alert Mapping Field
Besides configuring the e-Mail server and adding the user email accounts to the alert list, you are also required to define the trigger fields for alerts in ResOnline Viewer. See ResOnline Viewer User Guide- Configuring a View with Field Mappings section for details.
Setting Up Pre-Posting Quantity to Unit Price
- Login to Administration module and select System Setup, Database Parameter from the drop-down menu.
- In the Database Parameters Setup window, available Parameters are grouped by function group. Click the plus (+) key to expand the group and select, or enter the parameter name ‘General’ in Group/Name field and then click theSearch button.
- Select the Default Prepaid System Account and insert the credit department code in the value field. The credit department code must start with an ‘S’. For example: S9185 for Prepaid account.
- Click the Apply button to save the changes.
Enabling ‘Log Changes into chglog’
If the change log parameter is checked in DGS ResOnline, you are require to define the change log trigger fields in OHC Tools.exe. See Tools User Guide to setup the mapping fields.