1 Front Desk Function
The Front Desk Menu comprises functions such as Cabin Overview, Posting Overview and Check-in/Check-out status, which provides you a high level monitoring and overview of the operations.
The product is pre-installed with a set of operational reports. You can create and add customize reports through the Administration module, System Setup, Reports Setup.
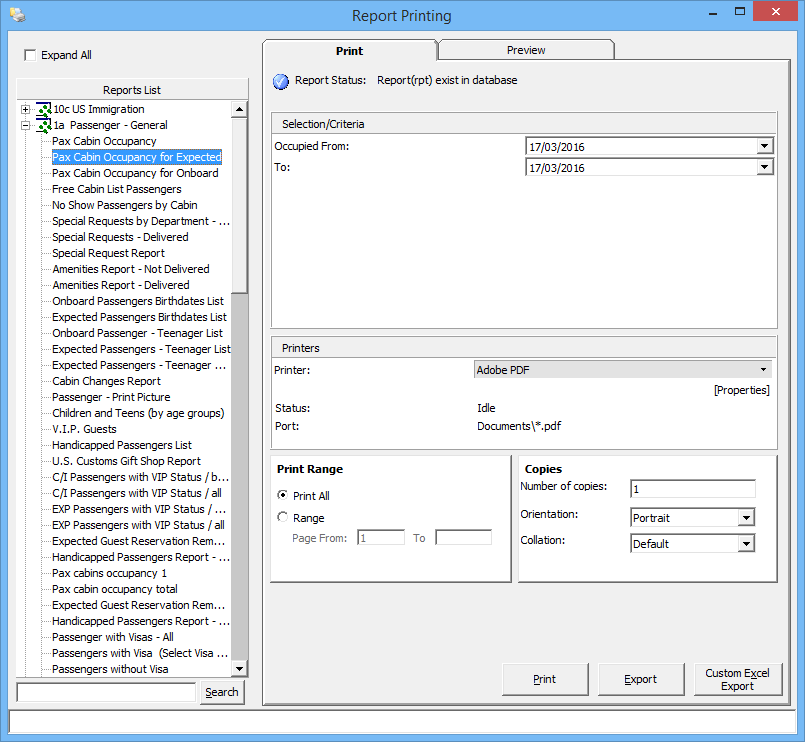
Figure 1-1 Reports List
Printing a Report
- From the Front Desk file menu, select Reports option.
- Expand the report folder in the Reports List section by clicking the (+) key.
- Select a report to print.
- Navigate to the Print tab and select the Selection/Criteria and relevant fields.
- Click Print or navigate to Preview tab to preview before printing.
- To export the report, repeat the above steps and click Export.
Batch Reporting
-
Select Reports Batch Printing from the Reports drop-down list.
-
In the Batch Reports Printing window, select the batch number to print.
-
In the Printer selection section, select the Printer and then click Run.
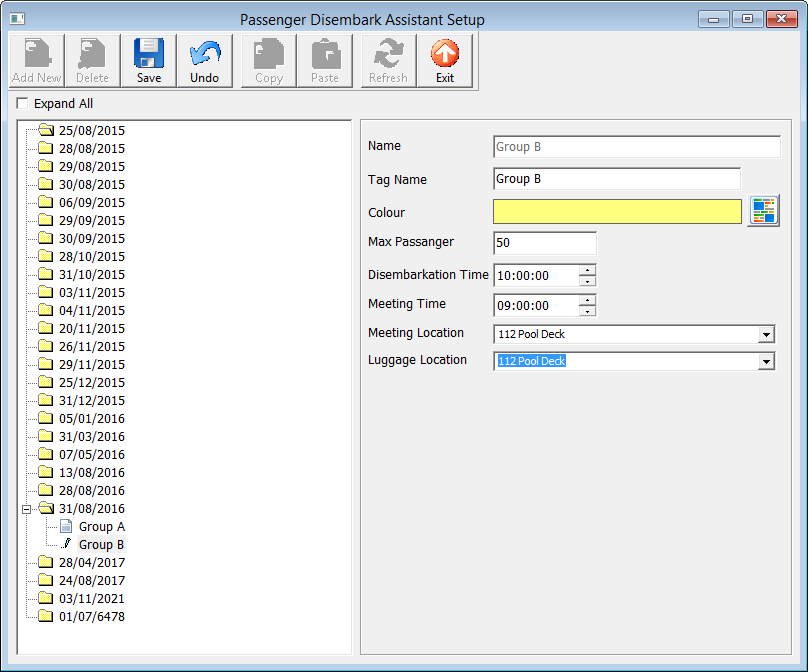
Passenger Disembark Assistant Setup
Figure 1-2 Passenger Disembark Assistant Setup
-
In the Passenger Disembark Assistant Setup form, click Add New.
- Enter all the required fields and click Save.
-
Click Exit to close the form.
Note:
You cannot delete the group if there is passenger assigned. You must first unassigned all the passenger from the group before proceeding.To remove a debarkation group, select the group from the list and click Delete.
Child Locator
The Child locator function enables you to monitor the location where a child is checked in to, based on their reservation status — Expcted, Check-In or Check-Out, and the guardian assigned to take care of the child.
Figure 1-3 Child Locator
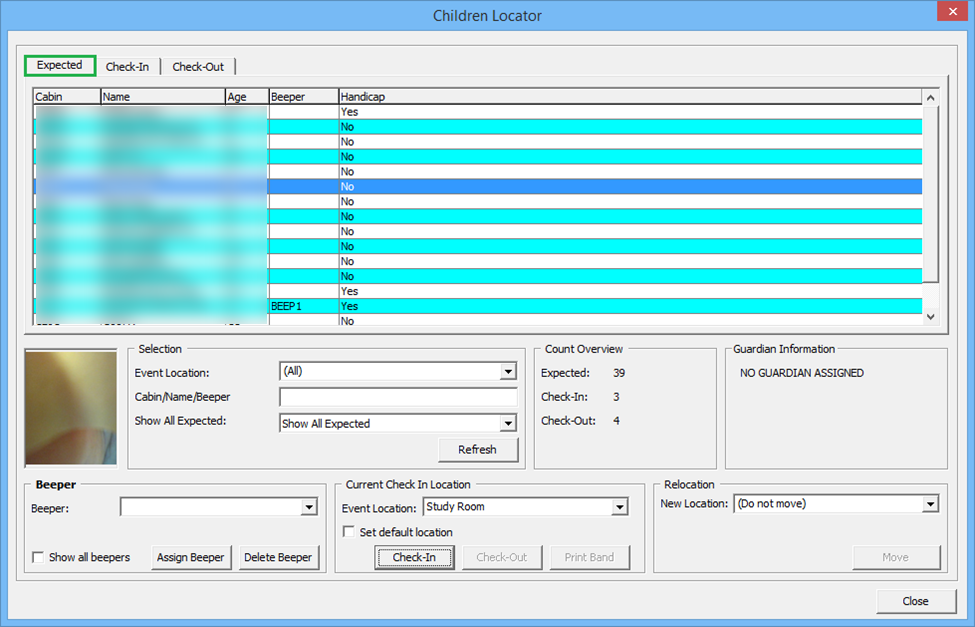
Checking In a Child
Checking Out a Child
- From the Child Locator window, navigate to the Check-In tab.
- At the Selection section, select one of the options, then click Refresh.
- Select the child name from the grid and then click Check-Out.
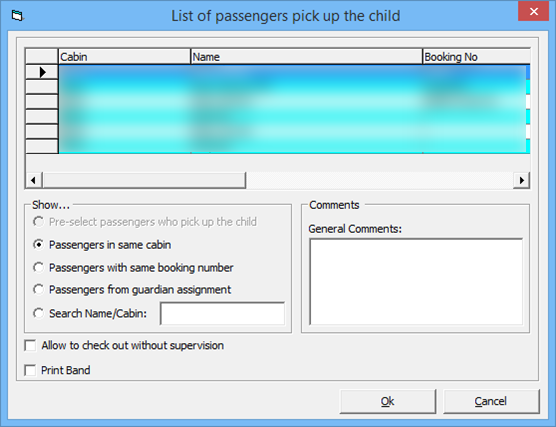
- At the Passenger to Pick Up Child window, verify the name and then click OK to confirm and updates the child information into the Check-Out tab.
Changing the Pick up Person
- At the Check-In tab of the Child Locator window, right-click on the child name and select Change Pick Up Person.
- In the Show section, select the one of the options, then select the passenger name from the grid and click OK. By default, the names shown are the Passengers in the same cabin.
Advance Board Card Printing
Figure 1-5 Advance Board Card Printing Window
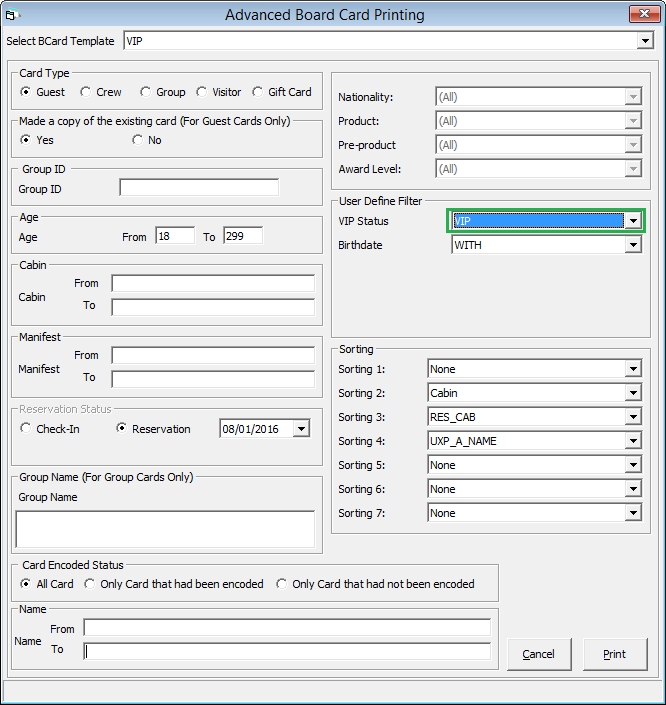
BoardCard Wizard
- From the Front Desk menu, select BoardCard Wizard option.
- In the BCard Printing Wizard prompt, read and follow the instructions before clicking Next.
- At the following wizard window,
- Select the type of board card to print and click Next.
- Choose an option to encode — using existing card number or newly generated a card number, then click Next.
- Choose an option to print — cards for guest already on-board or future reservations. For future reservations, select the Embarkation Date from the drop-down list and click Next.
- Check mark the Filter Age and enter the age From/To field, if any.
- Select one or more options using the drop-down list, such as Nationality, Product, Pre-Product and Award Level, if any.
- Enter the Names, Room numbers or Manifest from/to, if any, and then click Next.
- The number of cards matching the selection is shown. Check mark if the cards should be sorted by Product when printing.
- Check mark the preferred print sort order — either by room number, name, room number descending or person name descending.
- Click the Finish button to proceed.
- At the Batch Board Card Printing window, you will see the number of cards that are successfully printed or failed.
- Click Close to exit and return to the main menu.
Check In/Out Status
The Check In Status provides a real time status of expected check in for the day. it shows the number of reservations for the day, checked in and remaining check in at that time.
Similarly, the Check-Out Status shows the total of reservations checking out, checked-out and the number remaining.
Cruise Comment
-
From the Front Desk menu, select the Cruise Comment option.
-
Select the Cruise from the drop-down list.
-
Enter the comment in the blank field and then click OK to save.
Cabin Availability
Figure 1-6 Cabin Availability
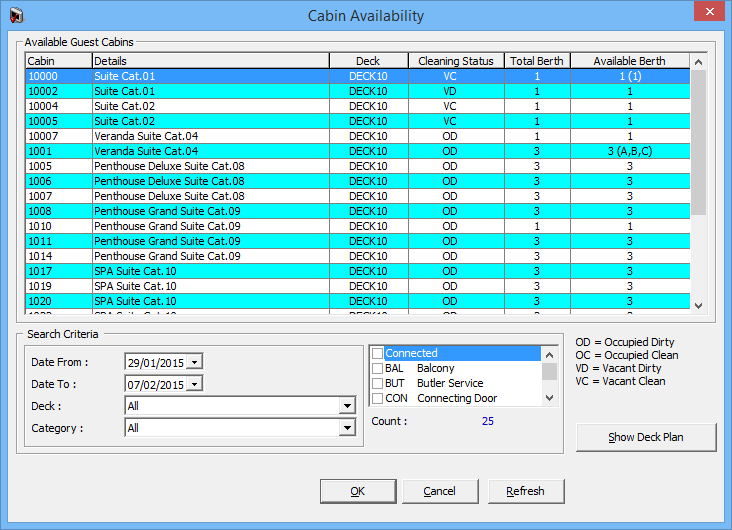
Searching for Available Cabin
- From the Front Desk menu, select Cabin Availability option.
- In the Selection Criteria, select the Date From/To, Deck and Category from the drop-down list.
- Select the Cabin Features using the check-box, if any.
- Click Refresh to refresh the view.
Viewing Availability Using Deck Plan
Figure 1-7 Deck Plan Viewer
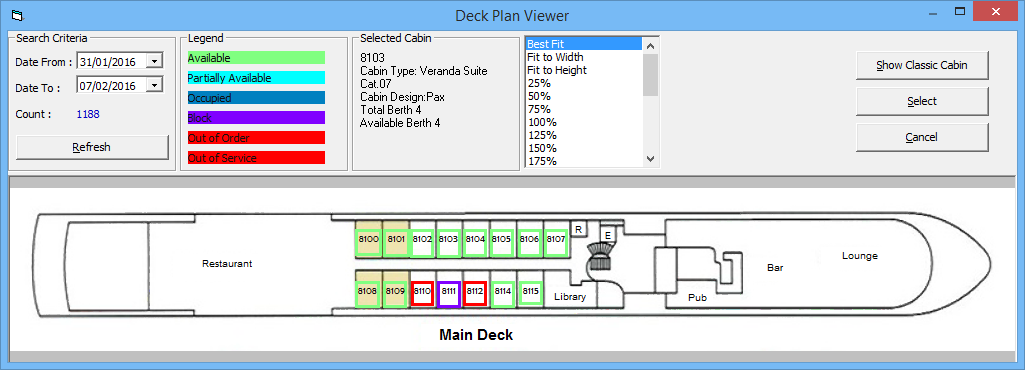
- From the Cabin Availability window, click Show Deck Plan.
- In the Selection Criteria, enter the Date From/To, then click Refresh.
- In the diagram, the status of the cabin is reflected according to the color chart, and information of the selected cabin is displayed in Selected Cabin section.
Cabin Overview
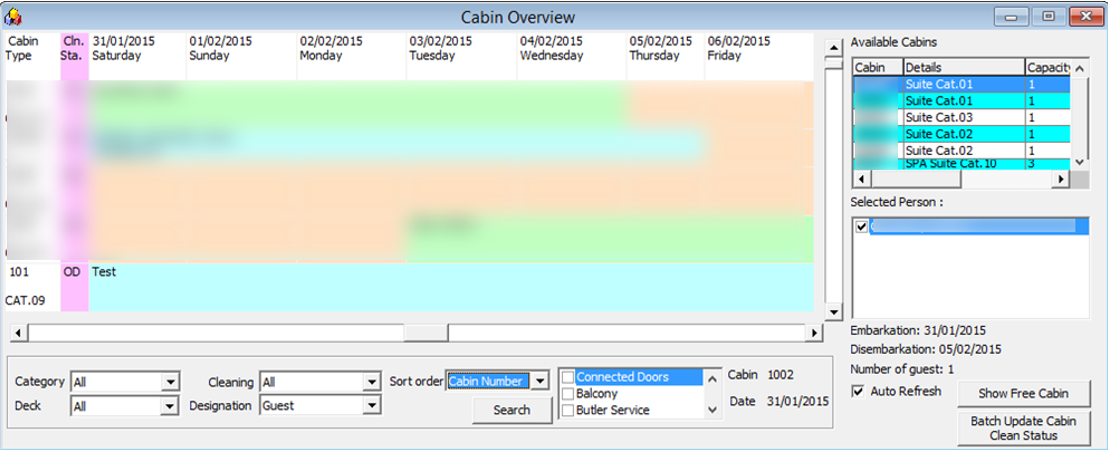
The Cabin Overview shows you a quick view of all cabin status by date, category, cabin clean status and occupant’s name. You can also update the cabin clean status by batch from here.
Figure 1-8 Cabin Overview
-
On the Overview window, the cabin number and category are shown, with its cabin cleaning status next to i
-
If the cabin is occupied or block for an expected guest, the name appears on the grid from the date booked until check-out.
-
To search for a specific category or cabin cleaning state, use the filter fields.
-
To show the Available Cabins of the window, select the guest name then click Show Free Cabin.
Batch Update of Cabin Clean Status
-
At the Cabin Overview window, click Batch Update Cabin Clean Status.
-
In the Batch Update Cabin Clean Status window, choose the categoryor deck, followed by cleaning status and then click Search.
-
Cabins matching the criteria are shown. Check mark the cabin number check-box to select or use the Select All option.
-
Choose the Clean Status from the drop-down list and click Update.
Cabin Status
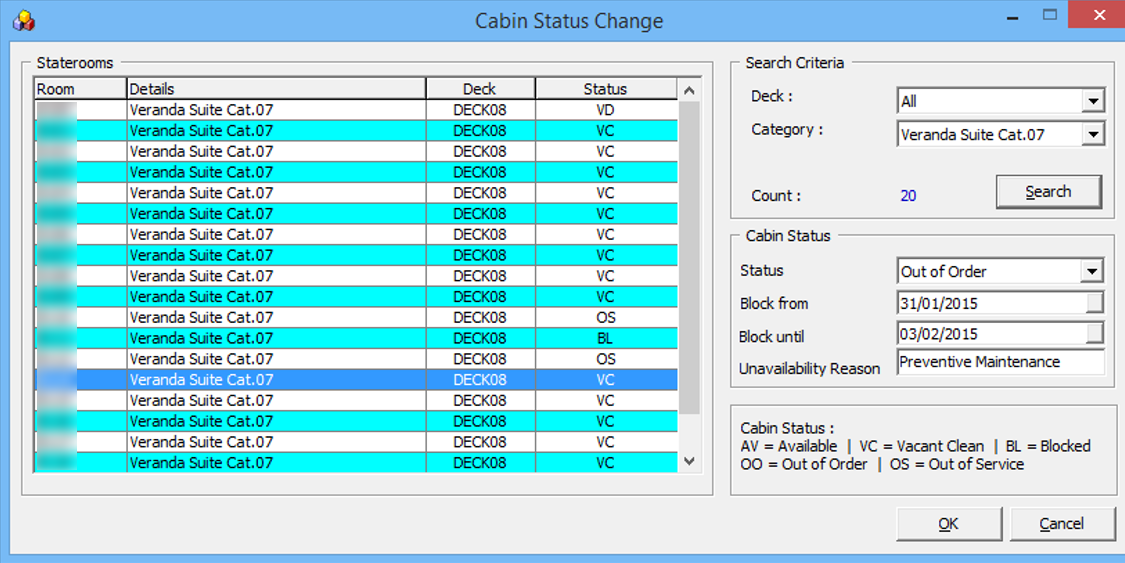
Figure 1-9 Cabin Status Change
-
From the Front Desk menu, select Cabin Status option.
-
In the Search Criteria, select the Deck and/or Category, then click Search.
-
Cabins matching the search criteria are shown on the window. Select the cabin, then navigate to Cabin Status.
-
Select the Status from the drop-down list, insert the Block From/Until date and the Unavailability Reason.
-
Click OK to proceed and update the status shown in the grid. Blcoked cabins are highlighted in light orange in the Cabin Overview window.
Postings Overview
Figure 1-10 Posting Overview Window

-
From the Front Desk menu, select Postings Overview option.
-
Select the Cruise Date.
-
Select the Department code to view.
-
Postings of the selected department code are shown.
-
Double-clicking the transaction opens the posting details window and display the bill image.
Amenities Overview
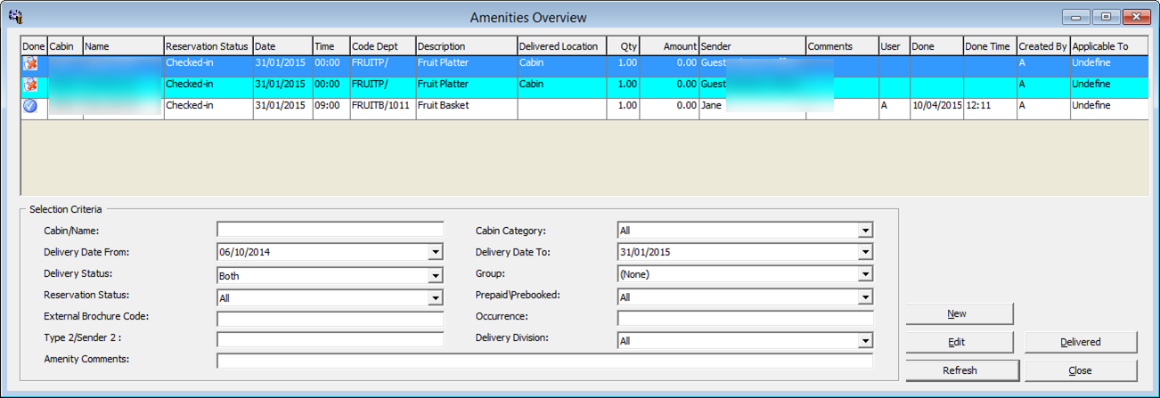
Figure 1-11 Amenities Overview
-
From the Front Desk menu, select Amenities Overview option.
-
In the Selection Criteria, choose from the available filters and then click Refresh.
-
Information matching the selected criteria are displayed at the window.
Adding/Editing/Delivering Amenities
See Cashier Function, Guest Handling, Service Info Tab for more information.
Itinerary Overview
Figure 1-12 Itinerary Overview
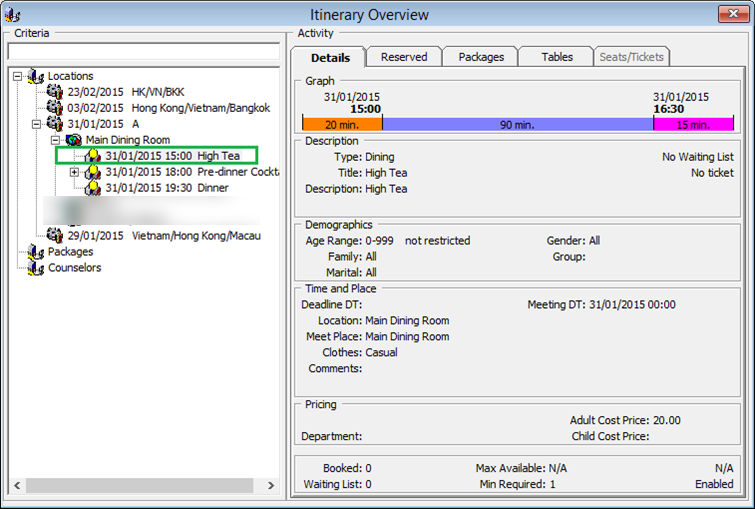
- From the Front Desk menu, select Itinerary Overview option.
- Expand the Locations or Packages container, then double-click on the Cruise Date to display available activities.
- Expand the Activities to view the details.
Flights Overview
Figure 1-13 Flight Overview Window
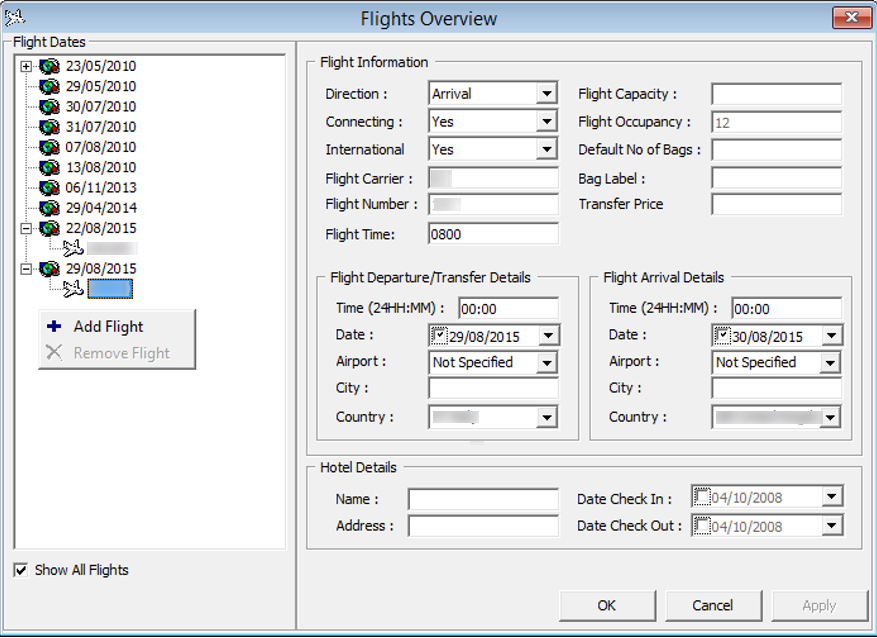
- From the Front Desk menu, select Flights Overview option.
- Expand the date of the Flights Overview window.
- To view the Flight Information, select the Flight Number below the date.
Adding/Removing Flight Information
- In the Flight Overview window, select the date
- Right-click and select Add Flight.
- Enter the Flight Information.
- Click OK to save.
- To remove the Flight Information, select and right-click the Flight Number, and then select Remove Flight.
Comments Overview
Figure 1-14 Comments Overview Window
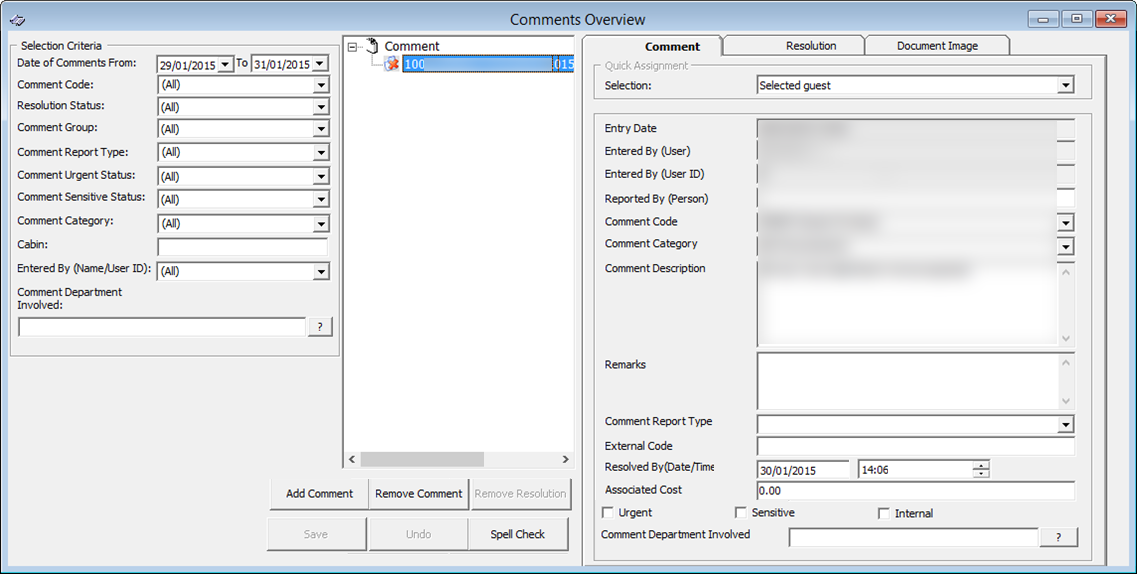
- From the Front Desk menu, select Comments Overview option.
- In the Selection Criteria, choose from the available filters for information to be display, and then click Refresh.
- Information matching the selection is shown in the Comment section.
- To view the comment, select the comment from the Comment section.
See Cashier Function, Guest Handling, Comments Tab for more information on how to add and remove comments.
Revenue Overview
Figure 1-15 Revenue Overview Window
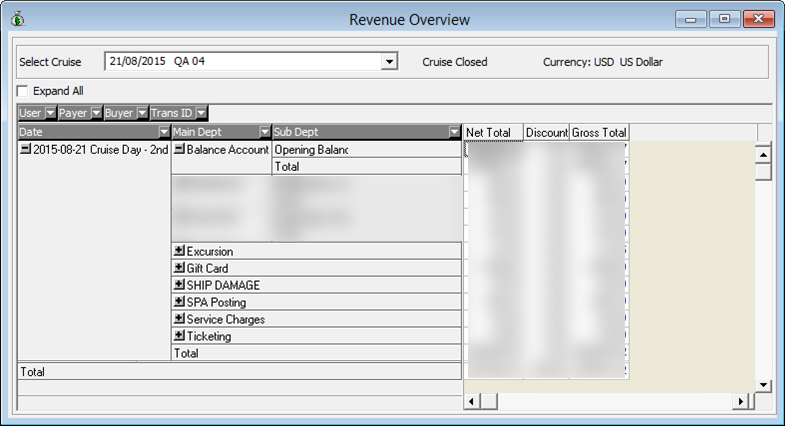
- From the Front Desk menu, select Revenue Overview option.
- Select the Cruise to view the revenue by the day.
- Click the ‘+/-’ to expand or collapse the information.
- To further drill down the information by User, Payer, Buyer or Transaction ID, select from the drop-down list.
- Check mark the box beside the code and click the check mark to refresh the information.
Figure 1-16 Check Mark Boxes

Add Work Order
Figure 1-17 Add New Work Order Form
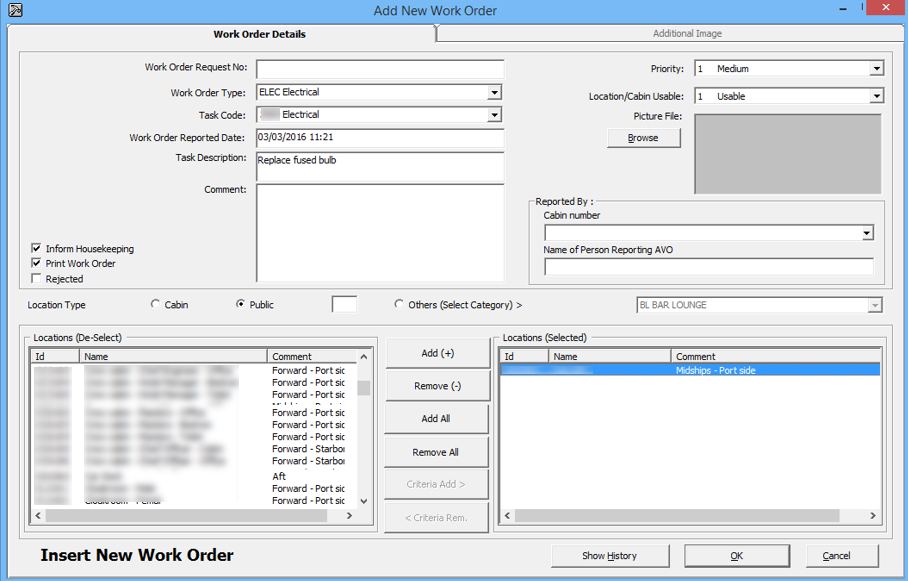
- From the Front Desk menu, select Add Work Orders.
- At the Add New Work Order form, Work Order Request No. field, enter the external document number, if any.
- Select from the drop-down list the Work Order Type, Task Code and enter the Task Description and Comment.
- Select the Priority and Location/Cabin Usable Status from the drop-down list and attach a picture file, if any. You can override the predefined Priority and Location Usable Status when adding or editing a work order.
- At the Reported By Section, select the Cabin number and enter the Name of Person Reporting AVO.
- Select the Location Type , either Cabin, Public or Others (Select Category)>, then navigate to Location section and select the exact location from the grid.
- Click Add to add the location to Location (Selected) section.
- To de-select the location from the Locations (Selected), highlight the item to remove and then click Remove(-) or Remove All.
- Click OK to save the work order.
Adding Work Orders by Batch
- Repeat step 1 to 6 of Adding Single Work Order.
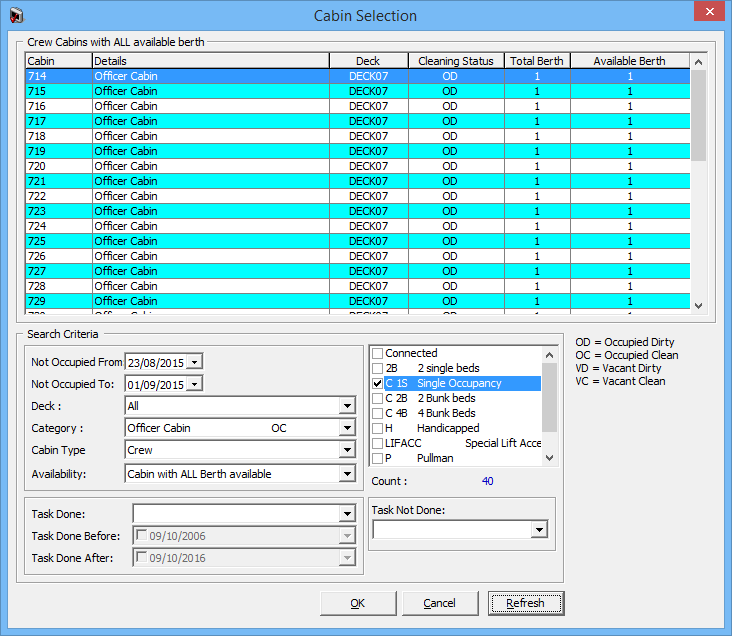
- Click Criteria Add>, to launch the Cabin Selection window.
- In the Cabin Selection window, navigate to Search Criteria section, select the criteria from the drop-down list and check the required filter, and then click Refresh to update the information in the grid.
Figure 1-18 Cabin Selection Criteria
