3 Mobile Check-In Setup
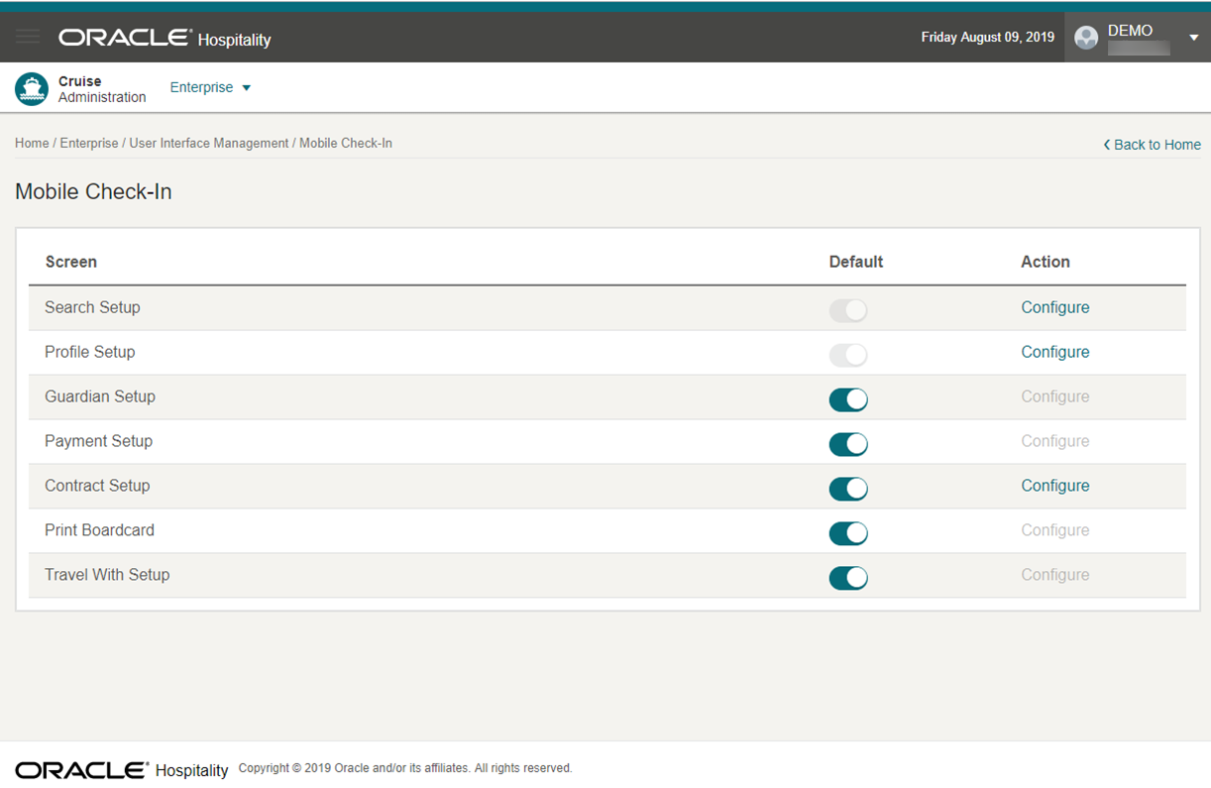
The Mobile Check-In setup enables you to configure the Check-In wizard. You can disable any of the page or features that you do not require, for example print board card. The presentation of the Check-In Wizard page follows the order of the setup and may vary depending on the default on/off.
Figure 3-1 Mobile Check In Setup

Search Setup
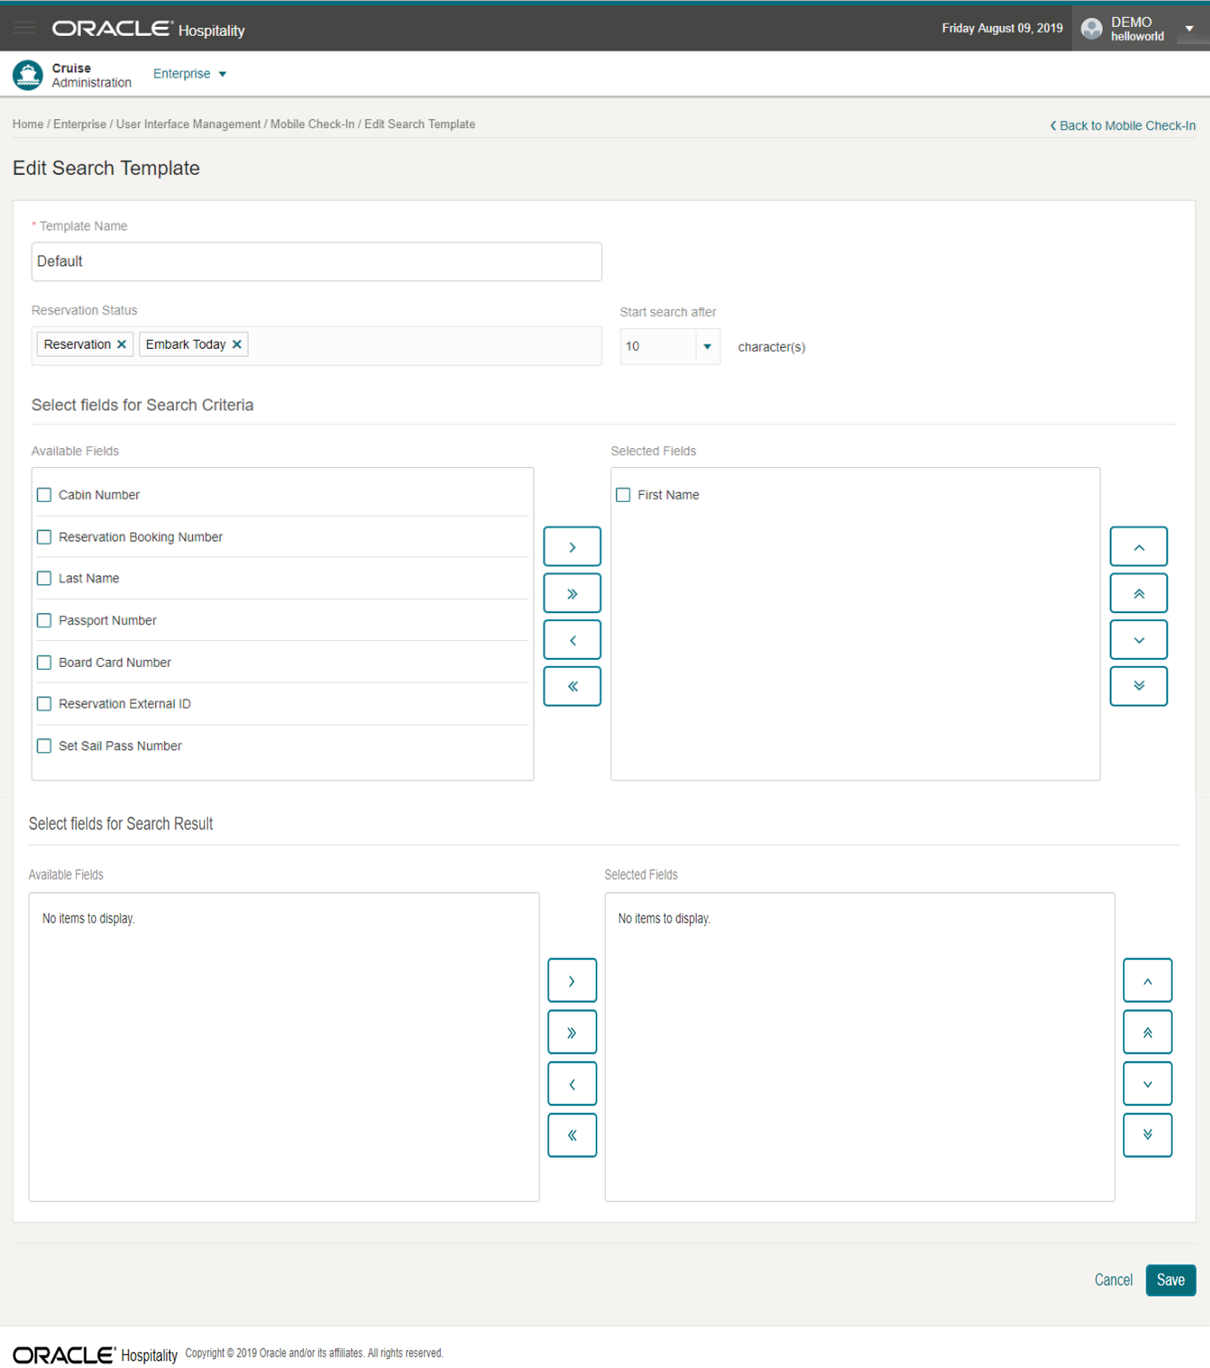
This feature allows you to customize the search criteria fields. The results can be viewed in Mobile Check-In.
Search Criteria
-
Search records according to the selected reservation status in the Search page and the Check-In Wizard page.
-
Auto search takes place after you enter a number of characters in the Check-In – Search field.
-
Search is based on Search Criteria - selected fields only.
Result
-
Return results based on the selected reservation status in the Search Criteria - selected fields.
-
Result table fields are displayed on the Search page and the Check-In Wizard page.
Figure 3-2 Edit Search Template Page

Saving the Search Template
Profile Setup
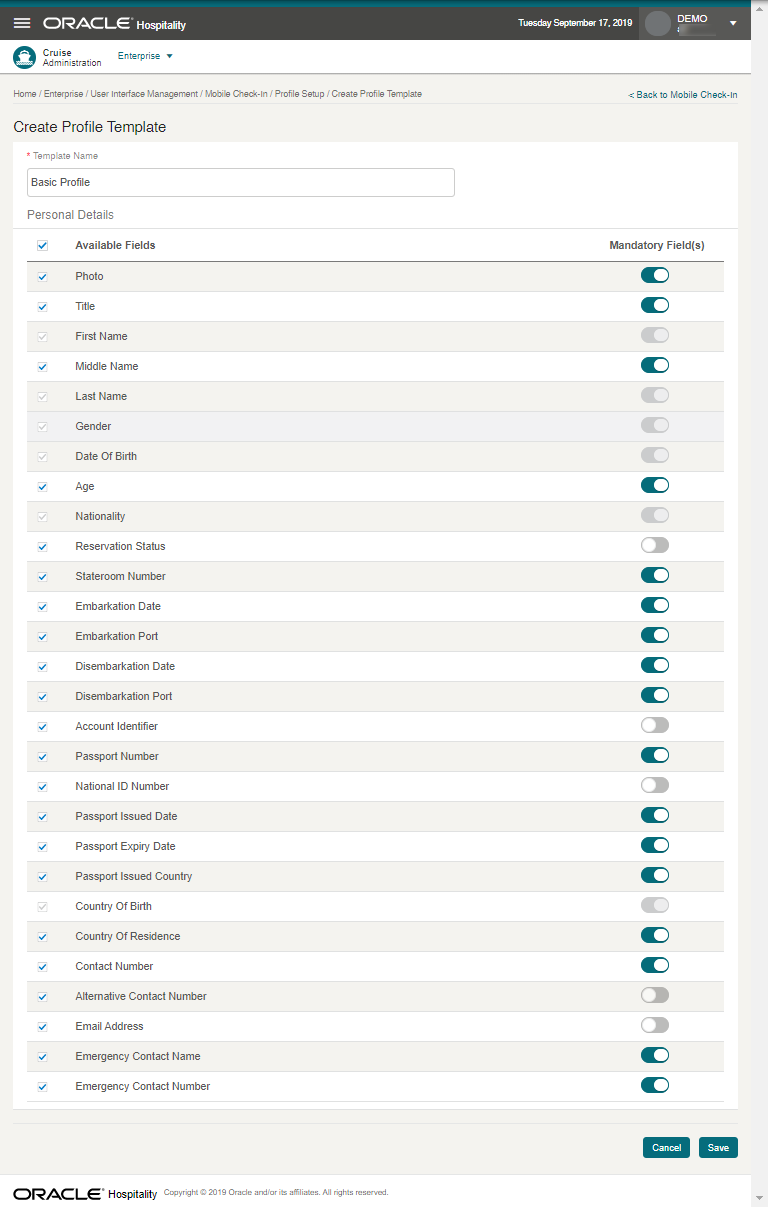
This feature enables you to select which fields to show or hide, with an indicators whether the field is mandatory in the Mobile, Check-in, Check-In Wizard, Profile page. The selected fields are shown on the first page of the Check-In Wizard.
Figure 3-3 Profile Setup Template

Saving a Profile Template
- From the Enterprise, User Interface Management, Mobile Check-In page, press the Configure button for Profile Setup
- At the Create Profile Template page, enter the Template Name.
- Check mark the Available Fields you want to show in the Mobile Check-In, Check-In Wizard, Profile page. To hide the fields, uncheck the check mark from the fields.
- Under the Mandatory Fields column, slide to make the field as a mandatory.
- Press Save.
Guardian Setup
The Guardian page is the second step of the Check-In wizard and is an optional set up. Turning on this feature allows the system to verify and show if the person is a minor (below 18 years of age) in Mobile Check-In, Check-In Wizard, Guardian page.
Payment Setup
The Payment page is an optional set up. Turning on this feature will show the card type information and allow you to add a payee in step three of the Check-In Wizard.
Contract Setup
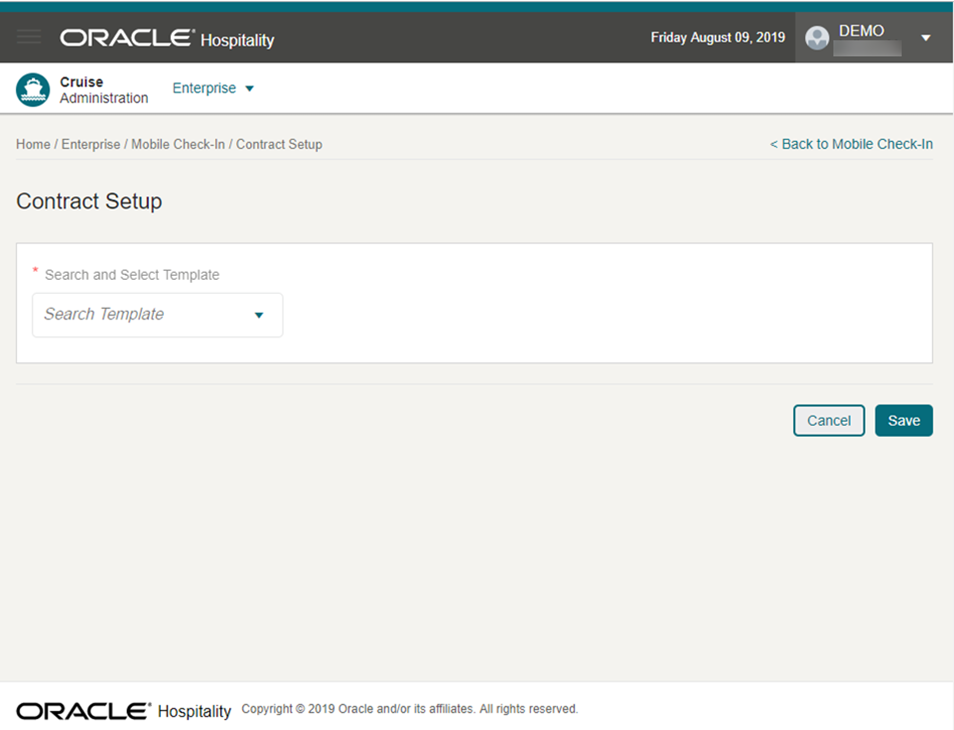
This feature lists the active contracts, enabling you to choose the contract to show at the Mobile Check-In, Check-In Wizard, Contract page. This setup is optional and will show in step 4 of the Check-In Wizard.
Figure 3-4 Contract Setup

To choose a contract, from the Enterprise, Mobile Check-In, Contract Setup page, select a template from the list of views, then press Save.