6 Immigration Gate Handling
The Immigration Gate Handling is use in some countries to facilitate the Immigration clearance at checkpoints according to Immigration Rules.
Setting up Immigration Gate
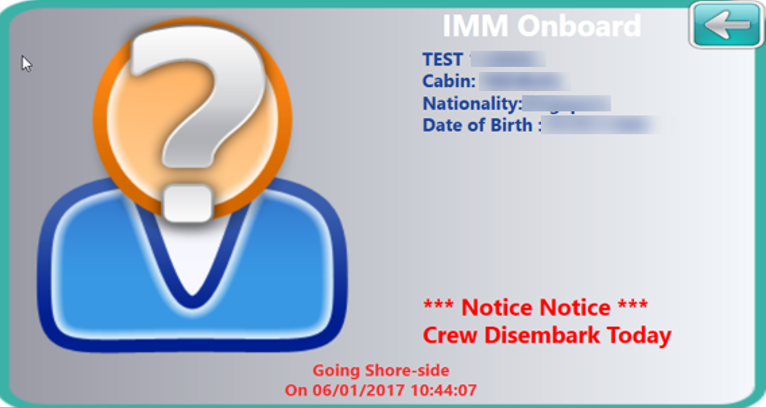
Figure 6-1 Immigration Onboard Status

When the WPF program is launched, the Security Officer need to determine the location of the checkpoint, gate type and the traffic direction. See section WPF Security for gate type.
The passenger and crew are required to either swipe, scan, or tab their board card on the card reader when passing through this gate, with IMM Onboard or Ashore indicated on the Account Information board.
Resetting the Immigration Gate Status
A status reset is performed at the end of each Immigration clearance check and the user assigned to perform this task must have the privilege #685 – Reset Immigration Counter assigned to him.
-
At the end of the Immigration clearance check, click the Reset Immigration button at the Toolbar of the application main window.
-
Once login, at the confirmation dialog box, click Yes to proceed or No to abort.
-
A prompt showing ‘Immigration reset done’ when the reset is successful.
Internal Gate Handling
The Internal Gate function is use to manage the crew training movements or assigned duties at restricted area or shore duty.
When the WPF program is launched, Security Offices need to determine the location of the gate, gate type and traffic direction. See section WPF Security for gate type.
Crew members passing through this gate must either swipe or scan their board card when entering or leaving the training session. The movement is shown on the Account Information board with INT Onboard or INT Ashore, depending of the type of movement.
Special Need Handling
A special needs passenger requiring assistance whilst on board is assigned with a accessibility code when a reservation is made. There are occasions that this information is not up-to-date and are added on ad-hoc basis at the Security Gate. In order to update the accessibility code on ad-hoc basis, the codes must be pre-configured in the Administration module and made available for use in WPF Security.
-
When a special need passenger swipes their board card on the MSR, click the Accessibility button at the Toolbar. This launches the Accessibility Status Assignment dialog box.
-
At the dialog box, select an special need code from the list by checking the Mark as Accessibility radio button and click Save.
-
To deselect, mark the special need code and click Mark as Accessibility before clicking Save.
Gangway Log
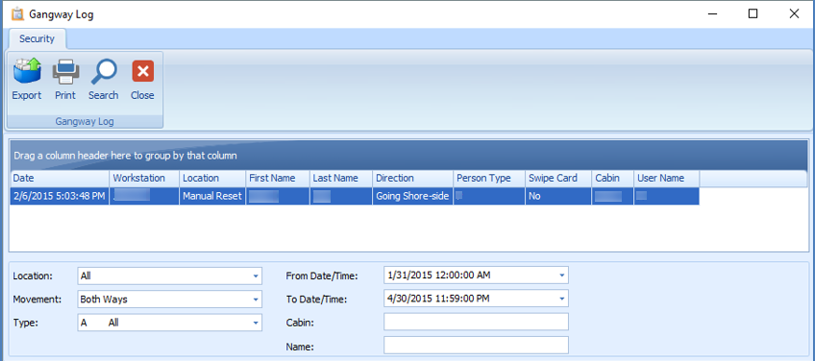
The system records all movements through the Security Gate by date, workstation, location, name, movement direction, account type, cabin number, and user name. These entries can be exported to a text file, report, or Microsoft Excel sheet.
Figure 6-2 Gangway Log

Table 6-1 Gangway Log Search Option
| Search Criteria | Description |
|---|---|
|
Location |
Gangway location setup in Administration, Gangway Locations. |
|
Movement |
List of direction of the movement |
|
Type |
Account Type: A – All P – Passenger C – Crew V – Visitor |
|
From Date |
Start date of the search |
|
To Date/Time |
End date of the search |
|
Cabin |
Cabin Number |
|
Name |
Name of the person you want to search |
-
At the WPF Security Toolbar, click the Gangway Log. This prompts for a re-login.
-
At the Gangway Log window, select the type of information to export/print using the drop-down list
-
Click Search at the ribbon bar to populate the information onto the grid.
-
You can sort information shown on the grid by the header name, by clicking the column name or right-click the header to bring up the customizable sort option.
-
Click Print to print the report or click Export to export the report template to other format.
-
Click Close to exit the Gangway Log window and return to WPF Security main window.