Using PeopleSoft Application Designer
This section provides an overview of the eight steps of application development and discusses how to work with the Application Designer interface.
Application development is a systematic process. Between the design and implementation of the application, you define and build application definitions, establish relationships, implement security, and test every aspect thoroughly. When developing in the PeopleSoft environment, it is helpful to look at the development phase as an eight step process:
Design the application.
Create field definitions.
Create record definitions.
Build application data tables.
Create page definitions.
Define components.
Register components.
Test the application.
Step One - Designing the Application
Create a development plan. The first phase of development in any environment is always planning. Designers might spend 80 percent of their time designing a sound plan before they work on the first step. In PeopleSoft applications, you will need to fully understand the other seven steps of development to design a good plan. When you finish the development plan, you should have a business requirements document that specifies the tables required and the relationships among them, a list of required definitions (fields, records, and so on) complete with detailed specifications and naming conventions, mock-ups of page layouts, and a navigational hierarchy that will give users access to the pages you create.
Step Two - Creating Field Definitions
Field definitions in PeopleSoft are slightly different from other environments. Designers define fields apart from any tables they may belong to and ensure that they can be reused in any number of separate database tables. The field definition is the basis for all the steps that follow.
Step Three - Creating Record Definitions
PeopleTools-based applications are table-based systems. When creating a record definition, you are actually defining two layers of information: the record level and the field level. At the record level, you define the structure of the database table, and the ultimate purpose of the record definition, and how the system will use the definition. At the field level, you define the characteristics of the fields and any online processing that you want to occur behind the scenes when a user enters data.
Step Four - Building Application Data Tables
After you define a record definition, you must create or build the underlying SQL tables that house the application data that users will enter online in the production environment. This build process is the centerpiece of the data administration features in PeopleSoft Application Designer. The build process takes all of the properties of a record definition and creates a database table from them. Unless you complete this step, no table will exist in the database to accept the application data.
Step Five - Creating Page Definitions
Pages are the user interface for the application. Pages present data to the users and enable them to enter data into the application data table created in the previous step. In this step, you add page controls to a page, associate the page controls with record fields, and configure appearance of the page. The system displays the page to users in a browser window as HTML.
Step Six - Defining Components
Component definitions represent complete business transactions in PeopleSoft applications and are central to navigation and security access. A component holds one or more pages that the user navigates between using tabs or links. In this step, you define the search record and search attributes, the processing mode, and the toolbar buttons that appear at the bottom of each page in the component.
Step Seven - Registering Components
The Registration Wizard makes registering a component easy. In this step, you attach the component to a menu, assign security access for users, and place navigational links in the registry. After you register a component, the user interface is complete and you can view the application in the browser.
Step Eight - Testing the Application
The final step of application development is to thoroughly test the application before delivering the finished product to users. You must test all aspects of the application by opening a transaction in your browser and entering test data into the application. As issues arise, you can cycle back through each of the previous steps to resolve the issues.
Open PeopleSoft Application Designer from the Start menu. Alternatively, if you have set up a shortcut on your desktop, you can open the application from there. At the PeopleSoft Signon dialog box, enter the Database Name or Application Server Name (depending on your connection type), User ID, and Password. PeopleTools opens automatically to PeopleSoft Application Designer.
Note: Specific PeopleSoft utilities require you to set an environment variable, PS_SERVER_CFG, to run properly. However, PeopleSoft Application Designer is not compatible if PS_SERVER_CFG is set. Before you start PeopleSoft Application Designer, you must ensure that PS_SERVER_CFG is not set. A convenient way to do this is to use a DOS batch file to unset PS_SERVER_CFG, launch PeopleSoft Application Designer, and then—after PeopleSoft Application Designer exits—reset PS_SERVER_CFG to its previous value.
In addition to launching PeopleSoft Application Designer from the Start menu, you can also do so using the command line syntax and the available parameters listed there.
PeopleSoft Application Designer offers a variety of command line parameters that you can use to control the database to which it connects. By using these parameters, you can automatically navigate to the part of the system that you need.
Use the values from the following tables to specify specific parameters.
Syntax
The following command line syntax applies to all actions identified in this topic:
PSIDE [-parameter value [-parameter value . . .]]
Use this command line syntax to start PeopleSoft Data Mover:
PSDMT [-parameter value [-parameter value . . .]]
You can include as many or as few parameters as you need.
Each parameter starts with a hyphen (-) or a forward slash (/). The value for each parameter follows the hyphen or slash, separated by zero or more spaces. In general, the value does not need to have quotation marks around it, even if it has internal spaces, because the system treats all text following the parameter as part of the value up to the next parameter or the end of the command line.
Note: You must enclose a value in quotation marks only when it includes a hyphen or forward slash or to include leading or trailing spaces. If the value itself includes a quotation mark character, then precede the double quotation mark with a backslash (\).
Available Parameters
The available parameters for pside.exe fall into two general categories:
Parameters that provide login information.
Parameters that set general options.
If the command line includes login parameters, it uses them only if no PeopleSoft applications are currently running. If a PeopleSoft application is already running, then the system starts a new instance by using the same login information as the active instance.
This table lists all of the available parameters:
|
Parameter |
Value |
Description |
|---|---|---|
|
-CT |
Database type |
Enter the type of database to which you are connecting. Valid values are ORACLE, MICROSFT, and DB2ODBC (note the spelling of MICROSFT). |
|
-CS |
Server name |
Enter the name of the database server for the database to which you are connecting. This setting is required for some database types. |
|
-CD |
Database name |
Enter the name of the database to which you are connecting as you would enter it into the PeopleSoft Signon dialog box. |
|
-CO |
User ID |
Enter the PeopleSoft user ID used for sign in. |
|
-CP |
Password |
Enter the password for the specified user ID. Passwords entered on the command line can be clear text or encrypted. |
|
-CI |
Connect ID |
Enter the ID that is used to connect to the database server. |
|
-CW |
Password |
Enter the password for the specified connect ID. Passwords entered on the command line can be clear text or encrypted. |
|
-SS |
NO |
Use to suppress the appearance of the PeopleSoft splash screen. Any other value will cause the splash screen to appear. |
|
-SN |
NO |
Use to suppress the sound that plays when you sign in to the PeopleSoft system. Any other value will allow the sound to play. |
|
-QUIET |
(none) |
Use to run in quiet mode so that no message boxes appear. |
|
-HIDE |
(none) |
Use to hide the PeopleSoft Application Designer interface. |
For more information on using the Application Designer command line parameters, see Understanding PeopleSoft Application Designer Command Line Parameters.
Example
This command line statement starts PeopleSoft Application Designer and signs the user in to the DEP7TST database:
PSIDE -CT MICROSFT -CS
SEPNTDB05 -CD DEP7TST -CO VP1 -CP password
This command line statement starts PeopleSoft Application Designer using an encrypted password.
pside.exe -CT ORACLE -CO
PTDMO -CP encrypted_password -CD QAHRTST
In this case, encrypted_password should be substituted with the actual encrypted password value.
For more information on encryption, see Using the PSCipher Utility.
This table describes the six main elements that comprise the PeopleSoft Application Designer user interface:
|
Element |
Description |
|---|---|
|
Title bar |
Displays the name of the database, the active project (optional), and the active definition (optional) in the following format: |
|
Menu |
Provides access to PeopleSoft Application Designer items and features. |
|
Toolbar |
Displays buttons that are useful in editing the active definition. |
|
Project workspace |
Provides a graphical representation of the components that are contained in a project. The project workspace has two folder tabs:
|
|
Definition workspace |
Displays individual definitions that you open. |
|
Output window |
Contains the output text from PeopleSoft Application Designer operations, such as Build (SQL Create and Alter), Find Definition References, Upgrade, Results, Validate, and PeopleCode Log. |
Note: You should maximize the PeopleSoft Application Designer window to make optimal use of the different workspaces.
Application Designer Menus
This topic reviews the general PeopleSoft Application Designer menus. Specific menus appear for each definition when it is open and active. Those menus are discussed in the topic about each definition.
Note: The menu items that appear on each menu often depend on the type of definition that is open in the definition workspace. Those menu items are described in the corresponding topics.
In addition to the standard Microsoft Windows File menu items, several PeopleTools-specific items appear in the File menu. This table lists the PeopleTools-related File menu items:
|
File Menu Items |
Usage |
|---|---|
|
Save Project |
Save the project. |
|
Save Project As |
Save the active project definition. This menu item enables you to change the name of the project when you save it. |
|
Print Project |
Print an Upgrade Project report for all the elements in the open project. |
|
Merge Projects |
Create a new project from selected definitions of two existing projects. |
|
Project Properties |
Edit properties for the open project. |
|
Definition Properties |
Provide general comments and change attributes for the active definition. You can change attributes for Use, Type, and Internet properties, depending on the definition type. |
|
View Report |
View a report of the definition in an open window in the workspace. |
|
Report from File, Print Preview |
View a print preview of a selected report file that is saved to a disk. |
|
Report from File, Print |
Print a selected report file from a disk. |
|
Report from File, View Report |
View a report from a selected report file that is saved to a disk. |
|
List of last opened definitions |
View and open one of the last few definitions you opened. You can configure the maximum number of definitions that appear in the list. |
In addition to the standard Microsoft Windows-based menu items, such as Cut and Paste, two PeopleTools-specific menu items appear in the Edit menu. This table describes their use:
|
Edit Menu Items |
Usage |
|---|---|
|
Find Definition References |
Search for all related definitions and references (fields, records, pages, PeopleCode, application packages, and so on) to the current open definition. The results appear on the Find Definition References tab of the Display window. |
|
Find In |
Search through all PeopleCode, SQL programs, HTML definitions, and Free form sub style sheets for a text string that you describe in a dialog box. You can also specify which type of PeopleCode and SQL programs to search. |
This table describes the use of View menu items:
|
View Menu Items |
Usage |
|---|---|
|
View Definition |
View a definition that is referenced in the active definition. For example, if you highlight a record field in a record definition, then selecting this option opens the selected field definition. |
|
View PeopleCode |
View PeopleCode characteristics of the active definition. |
|
Filtering |
Select a filter option for your view of upgrade:
|
|
Toolbar |
Show or hide the toolbar. |
|
Status Bar |
Show or hide the status bar. |
|
Project Workspace |
Show or hide the project workspace. |
|
Output Window |
Show or hide the output window. |
|
Property Window |
Show or hide the property window. |
This table describes the use of Insert menu items:
|
Insert Menu Items |
Usage |
|---|---|
|
Current Definition into Project |
Insert the active definition into the project. |
|
Definitions into Project |
Display a dialog box to insert definitions into the project. |
This table describes the use of Build menu items:
|
Build Menu Items |
Usage |
|---|---|
|
Current Definition |
Display a dialog box to build or alter the record definition that is currently active in the definition workspace. |
|
Project |
Display a dialog box to build (SQL Create and SQL Alter) all project records. |
|
Settings |
Display a dialog box in which you set parameters that apply to build operations. |
This table describes the use of Debug menu items:
|
Debug Menu Items |
Usage |
|---|---|
|
PeopleCode Debugger Mode |
Start the PeopleCode Debugger, which invokes a debugging session and causes a full Debug menu to appear. When in Debugger mode, a Local Variables pop-up window appears in the definition workspace. |
This table describes the use of Tools menu items:
|
Tools Menu Items |
Usage |
|---|---|
|
Validate Project |
Validate attributes of the active project. |
|
Validate Database for WSRP |
Validates all of the appropriate definitions within a database for WSRP compliance. |
|
Compile All PeopleCode |
Validate all of the PeopleCode in the current database. Displays the Compile All PeopleCode dialog box where you can choose to compile and save all PeopleCode and all Directive PeopleCode. See Compiling All PeopleCode Programs at Once andCompiling and Saving Directive PeopleCode. |
|
Compile Project PeopleCode |
Validate the PeopleCode in the current project. |
|
Diff / Merge Project PeopleCode |
Compare and merge two PeopleCode definitions during an upgrade. |
|
Diff / Merge External Text |
Compare and merge two versions of an external text file (such as a Data Mover script or a SQL script) during an upgrade. |
|
Compare and Report |
Compare two projects and report on the differences. |
|
Copy Project |
Copy the current project to a database or a file, or export a project from a file to your database. |
|
Data Administration |
Open dialog boxes that describe space allocation in the database. |
|
Change Control |
Open dialog boxes to view history or set system-wide change control options as the administrator. |
|
Upgrade |
Upgrade an application project. |
|
Translate |
Translate base and operator language databases. |
|
Miscellaneous Definitions |
Set custom field formats, toolbars, colors, styles, access profiles, and file type codes. Important! Styles are a deprecated feature. You must maintain styles by using style sheet definitions. |
|
Bulk Operations |
Insert, modify, or delete certain definition types across your entire database in one operation. |
|
Options |
Select commands specifying insertion commands, definition language preference, validating options, PeopleCode fonts, definition owner ID, and more. |
This table describes the use of Window menu items:
|
Window Menu Items |
Usage |
|---|---|
|
Cascade |
Cascade all of the definitions that are not minimized in the definition workspace into overlapping layers of definitions with the definition names visible. |
|
Tile |
Reorganize and resize all of the definitions that are not minimized in the definition workspace so that they are all visible and do not overlap. |
|
Arrange Icons |
Group all of the minimized definitions in the definition workspace. |
|
Close All |
Close all of the definitions in the definition workspace. |
This table describes the use of Help menu items:
|
Help Menu Items |
Usage |
|---|---|
|
Current Window |
Provide context-sensitive help that is related to the active window by opening the appropriate documentation in the appropriate location. |
|
PeopleBooks Library |
Go to the PeopleSoft Online Library (the online documentation for PeopleTools and your licensed PeopleSoft applications). |
|
About PeopleTools |
Display the PeopleTools release level, application release, user ID, database name, database type, and application server name. |
PeopleSoft Application Designer Toolbars
In addition to the standard Microsoft Windows toolbar button items, such as Cut, Paste, and Save, several items are PeopleTools-specific. The command name appears in parentheses following its description.
|
Field or Control |
Definition |
|---|---|
 |
Open the Definition Properties dialog box (). |
 |
Open the Build dialog box (). |
 |
Toggle the display of the project workspace (). |
Project Workspace
View projects and their associated definitions in the project workspace. A project organizes a collection of definitions in logical groups for easier development, adaptation, maintenance, and upgrade.
Image: Project workspace shown with a project open
This example illustrates the fields and controls on the Project workspace shown with a project open. You can find definitions for the fields and controls later on this page.
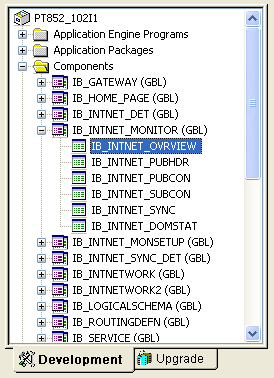
Work with a development project or an upgrade project by selecting either the Development tab or the Upgrade tab at the bottom of the project workspace.
The text on the Development and Upgrade tabs might not appear if your monitor is not large enough to display it.
Definition Workspace
Use the definition workspace to create and modify definitions. You can maximize, minimize, cascade, or tile them in the workspace.
Output Window
The output window displays status messages of various PeopleSoft Application Designer operations. The output is organized into different categories by using tabs at the bottom of the window.
The text that appears in the output window is context-sensitive, which enables you to select it and perform related operations. For example, if you have a field definition open, select to list the definitions that reference the active field definition. The list appears in the output window. Double-click any of the related definitions listed to open them.
The output window has several tabs that relate to numerous functions that you can perform with PeopleSoft Application Designer: This table describes the use of the tabs:
|
Tab |
Usage |
|---|---|
|
Build |
Create tables, indexes, views, triggers, and alter tables. If you select the Log to Output Window option in the Build settings, then errors, warnings, and informational messages appear here. You can control the level of detail that appears. |
|
Find Definition References |
View definitions that other references use or reference. Double-click a definition to open it. |
|
Upgrade |
View upgrade actions that are initiated from PeopleSoft Application Designer. |
|
Results |
View messages related to project operations, like opening a project or inserting definitions into a project. |
|
Validate |
Validate projects and components, and view the results. |
|
Find In |
View the Find In dialog box output. Double-click a definition to open it. You can limit the Find In search to a specific project rather than the entire database. |
|
PeopleCode Log |
View errors that you receive when you are in the debugger stepping through code. |
You can set preferences for various features in the Options dialog box. Select to access the Options dialog box. Seven tabs appear on the dialog box and each tab features configurable options for different areas of PeopleSoft Application Designer. Most of these options are described in further detail in other, more relevant areas of the product documentation. The following topics provides a general description of each tab and a link to further details about the options:
Project
Set various project options.
Validate
Set project validation options, enable the PeopleSoft Application Designer spell check feature, and enable WSRP validation.
See Validating Projects.
Editors
Set Word Wrap options for the various editors in PeopleSoft Application Designer.
General
Image: Options dialog box: General tab
This example illustrates the fields and controls on the Options dialog box: General tab. You can find definitions for the fields and controls later on this page.

|
Field or Control |
Definition |
|---|---|
| Undo/Redo Buffer Depth |
Enter the number of most recently performed actions for PeopleSoft Application Designer to store in memory. The default value is 10, which mean that you can undo up to 10 immediately previous actions, such as adding or deleting page fields from a page. |
| Maximum Most Recently Used Definition |
Enter the number of recently opened definitions to appear in a list at the bottom of the File menu in PeopleSoft Application Designer. The default value is 5. |
| Report Output Directory |
Enter the output destination of the reports that you run in PeopleSoft Application Designer. Reports include upgrade, build, and definition reference reports. |
| Enable Translatability Options |
Select to enable the following translatability options:
Note: Translation warnings only appear when your base language value in Configuration Manager is English. |
| Show Hidden Borders |
Select to enable the borders of hidden group boxes and frames to appear as dashed lines indicating the boundary of all hidden group box and frame page control types. |
| Enable Property Window |
Select to enable the property window for page controls. See Using the Property Window for more information. Note: You must close and restart Application Designer for this setting to take effect. |
Owner Id
Set the default owner ID for new definitions you create. Alternatively, leave the option blank, which is the default, to allow users to select the owner ID they want. The Owner ID helps identify which applications team last made a change to a definition.
Image
Set the preferred storage format for newly created image definitions.
Browser
Enter the base uniform resource indicator (URI) to be used by the browser to locate the application and the node name.
For convenience and efficiency, you can use these keyboard shortcuts in Application Designer for selected tasks. The action (or menu equivalent) depends on the currently selected definition.
|
Keyboard Shortcut |
Action (Menu Equivalent) |
|---|---|
|
Ctrl+N |
|
|
Ctrl+O |
|
|
Ctrl+S |
|
|
Alt+Enter |
|
|
Ctrl+P |
|
|
Ctrl+Z |
|
|
Ctrl+Y |
|
|
Ctrl+X |
|
|
Ctrl+C |
|
|
Ctrl+V |
|
|
Ctrl+Delete |
|
|
Ctrl+R |
|
|
Ctrl+Shift+F |
|
|
Ctrl+Enter |
|
|
Ctrl+D |
|
|
Ctrl+E |
|
|
Shift+E |
|
|
Alt+O |
|
|
Alt+1 |
|
|
Alt+2 |
|
|
F7 |
|
|
Ctrl+F7 |
|
|
Ctrl+Shift+R |
Find Definition References - Field... |
|
Ctrl+Alt+R |
Find Definition References - Record Field |
When you are working with results in the output window, such as after a Find Definition References or Find In request, you can use your keyboard to navigate the results.
|
Output Window Keyboard Shortcuts |
Description |
|---|---|
|
Up/Down Arrow |
Navigate up and down output window results. |
|
Enter |
Opens the definition associated with that output window result. |
When you are working with page definitions, you can use the tab key to move from control to control, and when within a grid, use the left and right arrow keys to navigate between columns in the grid.
When working with projects, you can use the up and down arrows to navigate the list of definitions in the project workspace, and you can use Ctrl+D to open the currently selected definition. You can select multiple definitions using the Ctrl key and open them simultaneously.