3 User Access Rights
User access to the system is managed in the User Security application. Accesses are granted at a group level, not at the individual level.
User Security
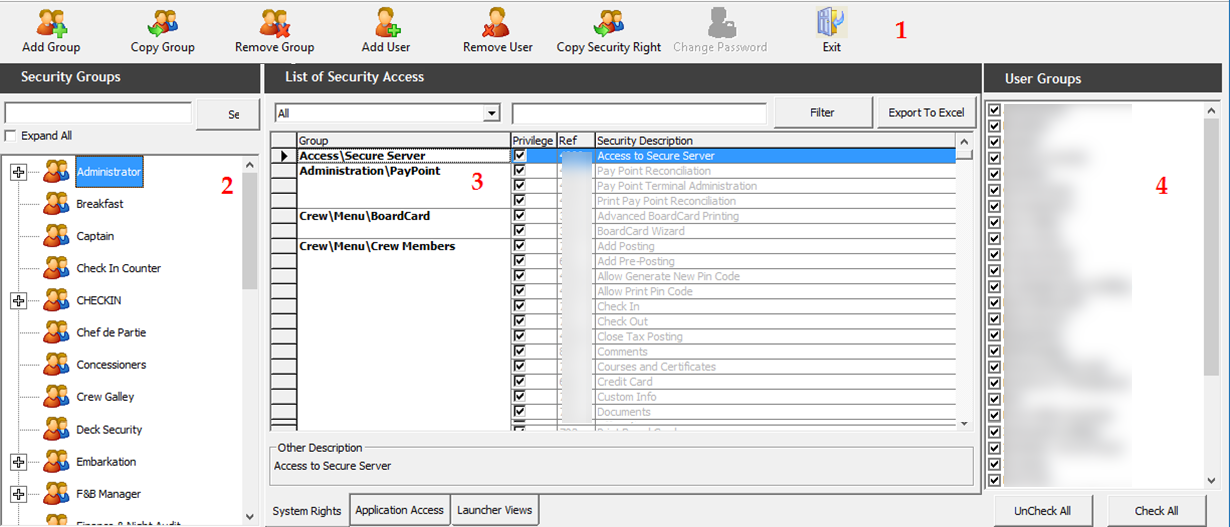
The User Security function comprises the following four main areas.
-
Menu bar
-
Security Group
-
Access Level by module
-
Group: Indicates the module the function is attached to.
-
Privilege: Indicator if the user rights are assigned.
-
Ref: System Security Access Rights Reference.
-
Security Description: Description of the security rights.
-
-
User Groups.
Figure 3-1 User Security
-
Run the Launch Panel application and navigate to the Utilities tab.
-
Double-click the User Security application.
Creating a User Group
-
From the User Security screen, click Add Group.
-
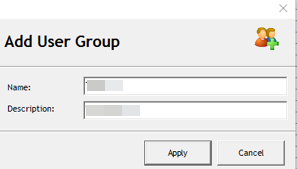
In the Add User Group window, enter the new User Group’s Name and Description. The name field is limited to six alphanumeric characters, and the description field is limited to 50 alphanumeric characters.
Figure 3-2 Add User Window
-
Click Apply to create the new user group. The newly created security group is located under the Security Groups and User Groups sections.
-
In the User Groups section, select the newly created group.
-
Navigate to the System Rights tab and select the respective privilege check boxes to assign. You can use the search bar to look up the privilege by keyword.
-
Navigate to the Application Access tab and check mark the application this User Group can access.
-
Navigate to the Launcher Views tab and check mark the view this User Group can access.
-
Click Exit to close the application.
Copying a Group
-
Select a Security Group from the Security Group list.
-
Click Copy Group.
-
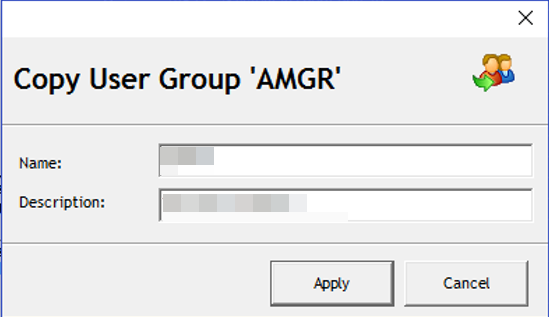
In the Copy User Group GroupName window, enter the new group name and description.
Figure 3-3 Copy User Group
-
Click Apply to copy and add the group in a security group and user group.
-
The System Rights of the group are identical to the Security group you copied from
Removing User Group
To remove a group, select the Security Group, click Remove Group, and select Yes when prompted.
Adding a User
Figure 3-4 User Security Add User Window
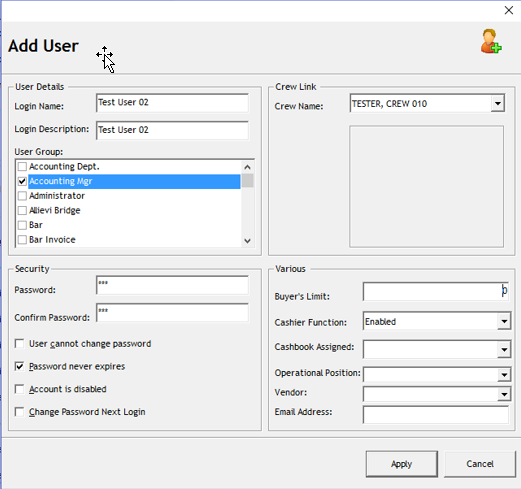
Table 3-1 Add User Window Field Definitions
| Field Name | Description |
|---|---|
|
Login Name |
Login ID for the SPMS application. |
|
Login Description |
User full name |
|
User Groups |
Group user is assigned to, multiple selections is allowed. |
|
Password |
User Password |
|
User cannot change password |
Select this to prohibit users from changing their password. |
|
Password never expires |
User password has no expiry date |
|
Account is Disabled |
Check this to lock the account and prevent the user from logging in. |
|
Change Password Next Login |
This prompts and enforces users to change their password at next login. |
|
Crew Name |
Linked user ID to a Crew profile. |
|
Buyer Limit |
The maximum amount user is allowed to spend on good purchases in the MMS module. |
|
Cashbook Assigned |
Cashbook account the user is assigned to. |
|
Operational Position |
Operational Position user is assigned to. |
|
Vendor |
Used by web services (iCrew) to retrieve the excursion. |
|
Email address |
Email address of the user. |
-
Select a Security Group from the Security Groups list.
-
Click Add User.
-
In the Add User window, enter the relevant information in each of the section.
-
Click Apply.
-
The newly added user is shown in the selected Security Group. To view the user account, expand the tree view.
Removing a User
-
Select the user from the Security Group and click Remove User.
-
At the Remove User prompt, reconfirm the user name and ID and, then click Yes to proceed or No to return to the previous menu.
-
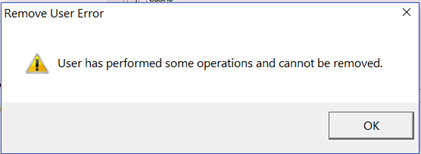
The system prevents you from removing a user that has performed transactions in the system and prompts an error when you click Yes to proceed.
Figure 3-5 Removing User Error Prompt
Copying User Security Right
The Copy Security Right allows you to copy a group user access rights to another.
-
Select a Security Group from the Security Groups list.
-
Click Copy Security Right from the menu bar.
-
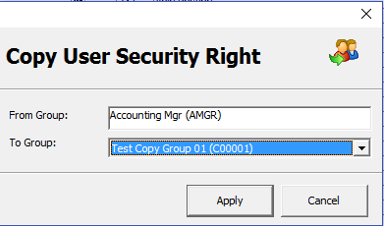
In the Copy User Security Right window, the selected group is defined in From Group column. Select the To Group from the drop-down list.
Figure 3-6 Copy User Security Right
-
Click Apply to proceed. The access rights you copied from are added to the group.
Changing Password
-
Select a user from the Security Group list.
-
Click Change Password from the menu bar.
-
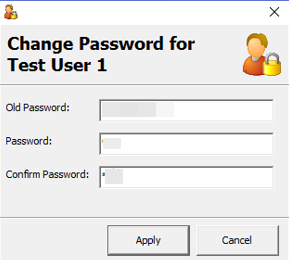
In the Change Password for [User Name] window, enter the new password and confirm the password.
Figure 3-7 Password Change Window
-
Click Apply to proceed. A message box prompts “Password has been changed” when the password is applied successfully.
-
Click OK to close the message box.
Searching for Access Rights
The User Security function has a built-in search function that allow you to search for a security groups or user rights. See Figure 3-1
-
In the System Rights tab of the List of Security Access section, select the access group to filter from the drop-down list.
-
Tab to the next field and insert the keyword to filter, for example, Posting.
-
Click Filter to display the access rights that contain the keyword.
-
The return results are exportable to Microsoft Excel. To export, click the Export to Excel to export the Security Access Rights.