4 Groups
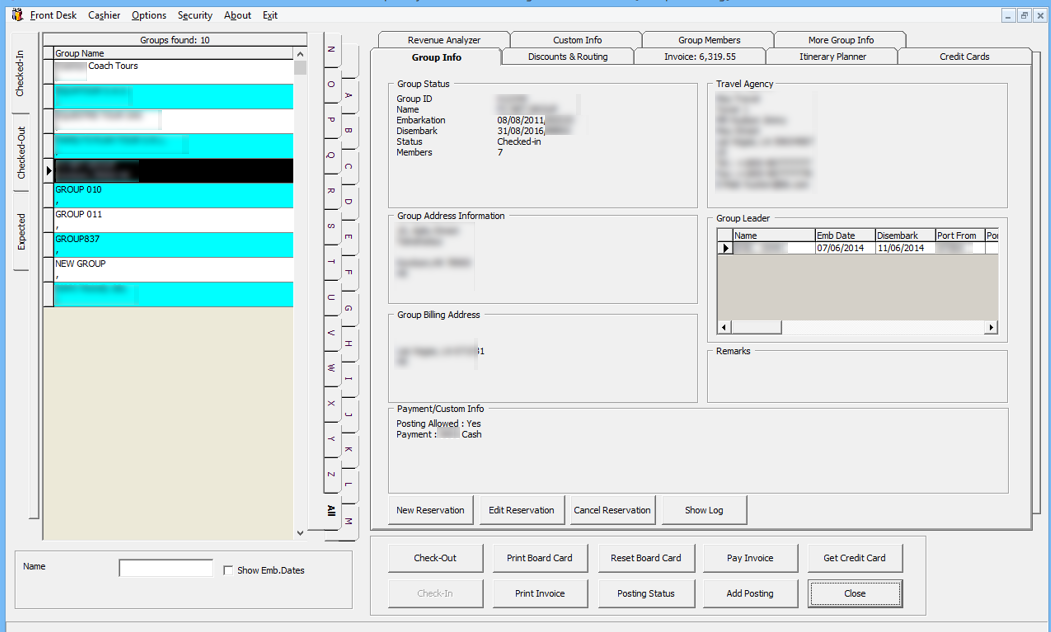
Passengers travelling in a group can be easily identified by assigning a group ID and group leader to the parties. Apart from travelling together, these groups usually have a preset itinerary, other special arrangements, and a group billing account. These arrangements are set up and accessed from the Management, Cashier, Groups drop-down menu.
Figure 4-1 Group Handling
Creating New Group Account
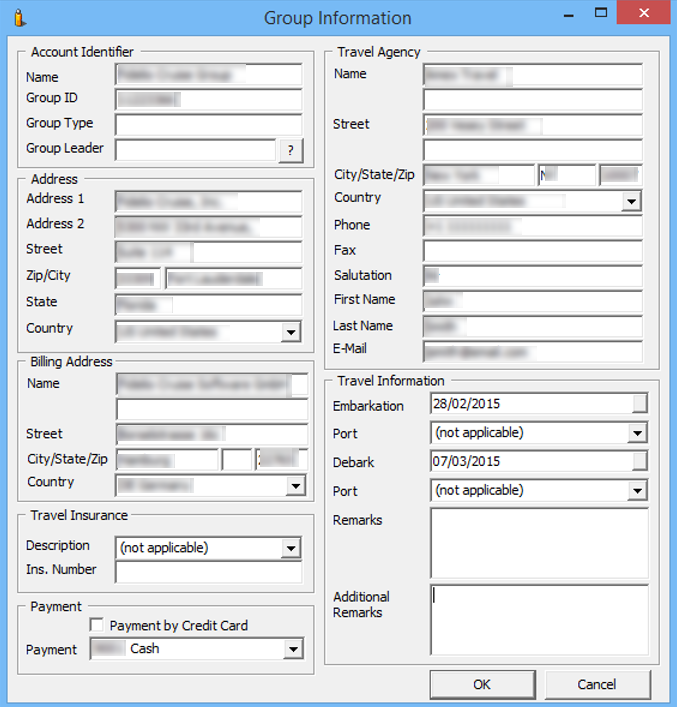
A group account containing a group ID, billing address, travel information, and payment type is created prior to adding its group members.
Figure 4-2 Group Information Window
- Select the Group Info tab from the Group Handling window.
- In the Group Info tab, click New Reservation.
- In the Account Identifier section, enter the Group name, Group ID, Group Type and then select the Group Leader.
- Insert all relevant information in Address, Billing Address, and Travel Agency.
- In the Travel Information section, select the Embarkation/Disembarkation Date and Port from the drop-down list and then click OK to save.
Editing a Group Account
-
From the Search panel, select the Group Account and then click the Edit Reservation.
-
Click OK to save the changes.
Cancelling a Group Account
-
From the Search panel,s select the Group Account and then click the Cancel Reservation.
-
At the Cancel Reservation prompt, click OK to reconfirm.
Discounts & Routing Tab
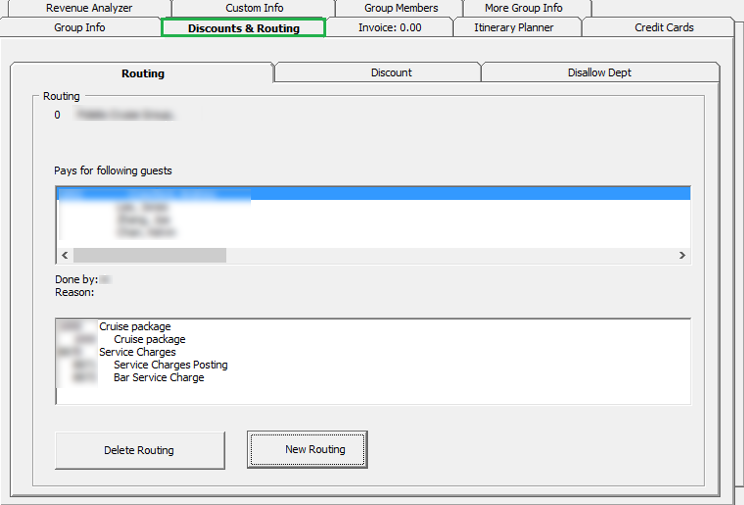
Special billing arrangements for the group such as Routing, Discounts, and Disallow Department are set up in the Discount & Routing tab.
Setting Up Group Routing
A routing can be set for the entire group members or individually from the group members list.
Figure 4-3 Discounts & Routing
-
Navigate to the Discounts & Routing tab and click New Routing.
-
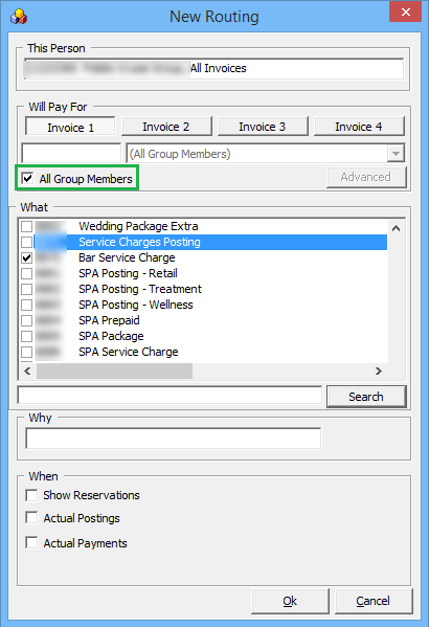
In the Routing window, select the Invoice to route and select All Group Members to route all members, or click Advanced to select an individual.
Figure 4-4 Group Routing
-
Select the department code to route and when to route the postings by checking the box beside the code.
-
Click OK to save the routing.
Setting up Discounts
Setting up Discounts
Discount set up in group account is identical to a guest discount. See Disc, Route, Pkg — SPMS Discount and MICROS Discount section for more details.
Setting Up Disallow Department
Disallow Department set up in group account is identical to Guest Disallowed Department. See Disc, Route, Pkg — Disallow Department for more details.
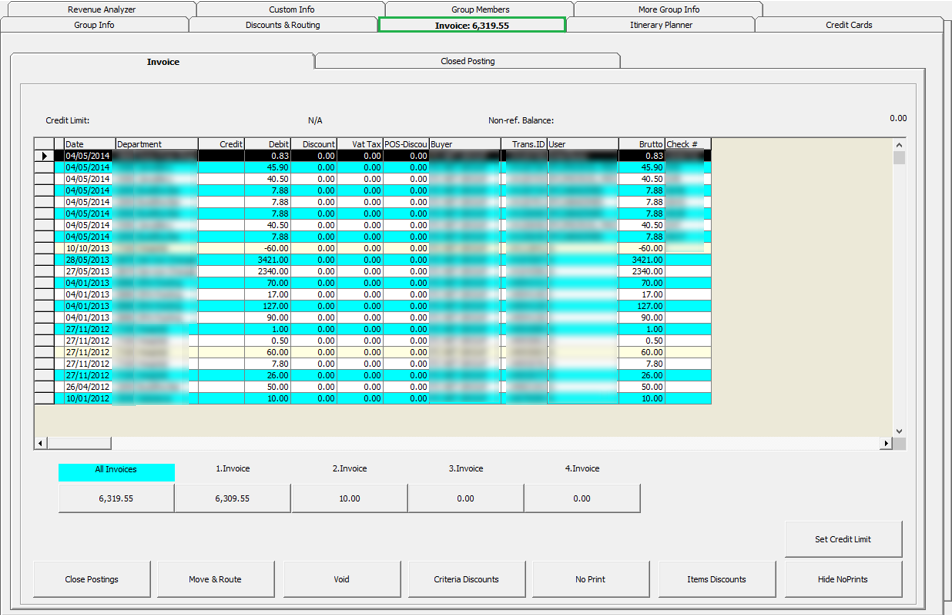
Group Invoice Tab
Unlike the Guest Invoice, the Group Invoice tab has two tabs: Invoice and Closed Posting. All Closed Postings appear in the tab.
Functions within the Invoice tab works exactly the same as Guest Invoice. See Invoice Tab for more details.
Figure 4-5 Group Invoice Tab
Itinerary Planner Tab
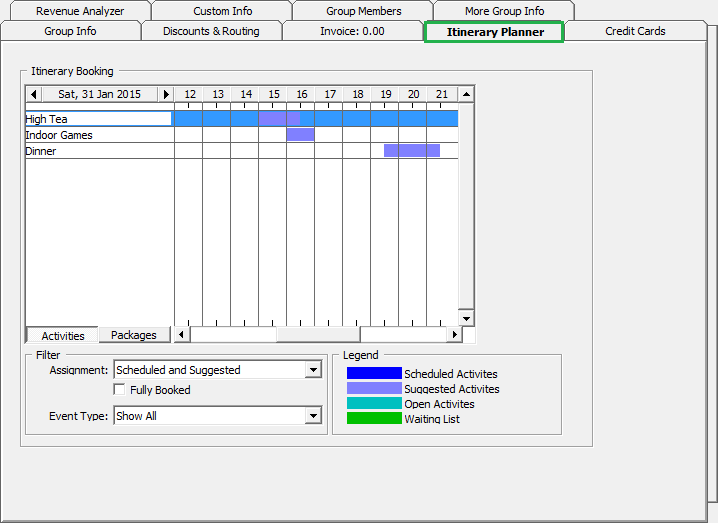
The Itinerary Planner tab displays the Excursion, Dining arrangements, or any activities available to the Group. These activities are configured in the Administration Module, Itinerary Setup.
Figure 4-6 Itinerary Planner Tab
Viewing an Available Itinerary
- Navigate to the Itinerary Planner tab.
- In the Filter section, select the information to display from the Assignment and Event Type drop-down lists.
- Information is shown by date in an hourly grid.
Group Credit Card
Registering a Credit Card in the Group Account is the same as Guest Handling, Get Card Function. See Get Credit Card Function for more information.
Group Members Tab
The Group Members tab lists all of the passengers who are linked to the Group ID. Member details are editable from this window.
Figure 4-7 Group Members Tab

Table 4-1 Field Definition of Group Member Tab
| Field | Description |
|---|---|
|
Cabin No |
Passenger cabin number. |
|
Status |
Booking status of the passenger. |
|
Embarkation Date |
Embarkation Date. |
|
Debark Date |
Debarkation Date. |
|
Guest Name |
Passenger name. |
|
Group Leader |
Group Leader of the group. |
- Select the group member name from the grid and then click Edit Information.
- Edit all the relevant information in the Edit Information window, and then click OK to save and return to the Group Members grid.
Adding Reservation to Group Account
You can add/remove Reservations from the Group Account using the Add to Group and Remove from Group functions. Refer Add to Group and Remove from Group for more details.
Assigning a Group Member as Group Leader
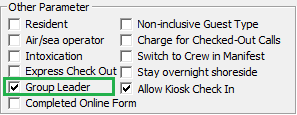
You can assign a member of the group as a Group Leader, and the system permits more than one Group Leader.
In order to assign the passenger as group leader, select the Group Leader check box in the Group Member tab, or click Edit Information and select Group Leader in the Other Parameter section.
Figure 4-8 Group Leader Assignment
Custom Info, More Group Info, Revenue Analyzer Tab
See Custom Info Tab, More Guest Info Tab and Revenue Analyzer Tab for handling these tabs.
Checking in Group Account
-
From the Expected tab of the Search panel, search for the group account.
-
Select the account and click the Check In button.
-
Select Yes at the Check-In Group prompt, and then click OK at the confirmation prompt.
Checking Out Group Account
A group account can only be checked out when the invoice is balanced.
- Retrieve the group account from the Search panel, Check Out tab and then click the Check Out button.
- At the Check Out prompt, select Yes to check out the account.
- If the account is unbalanced, the system prompts for the invoice to be settled before proceeding. Click OK to return to the guest account.
See Pay Invoice section for steps to settle an account.