5 Setting up SilverWhere Application Clients
There are different SilverWhere Application Clients based on the operational needs. The distributed clients are:
-
SilverWhere Desktop clients, used for desktop computers with the option to distribute the SilverWhere Database Installer executable
-
SilverWhere Mobile client, used for mobile devices
-
SilverWhere Secure Tools client, used for storing the database connection details
-
SilverWhere Interface client, used for synchronization between the Oracle Hospitality
SilverWhere Application Clients Prerequisites
-
Microsoft .NET Framework 4.8 features are enabled on the target machine
-
Minimum Oracle 12c Database client with ODAC is installed on the target machine. See topic Oracle Database Client and ODAC Installation
-
SAP Crystal Report runtime engine for .NET Framework (32–bit) version 13.0.x is installed on the target machine. See My Oracle Support Doc ID 2905534.1 for further information.
-
SilverWhere 9.1 release package is downloaded and available in the target machine. Refer to the Where to Download for download instructions
-
Ensure that the Windows Regional and Language Settings is configured to US/ UK and the language settings should be set to English on the target machine. This is to ensure that the functionalities are working as expected
-
Disable TLS 1.0 and TLS 1.1, and enable TLS 1.2. See Security Guide for more information
SilverWhere Application Clients Installation Steps
Install using the Setup.exe
SilverWhere Application Clients can be installed by running the setup.exe and left unattended until it completes the installation. Follow the instructions below to install the SilverWhere Application Clients:
-
Download the SilverWhere Installer. See topic Where to download
-
From the downloaded SilverWhere Installation File package, browse to the
\OHC SilverWhere 9.1 Clients Setupfolder and run the setup.exe with ‘Run as administrator’ privilege -
At the SilverWhere Installer Welcome window, click the Next button to navigate to the next screen
-
Select the applications you want to install on the machine
-
SW Desktop Applications
-
SilverWhere Database Installer
-
-
SilverWhere Mobile
-
SilverWhere Secure Tools
-
SilverWhere Interface
-
-
Click the Next button to navigate to the next screen and confirm the installation process by clicking on Install
-
The installation process is shown in the Status window. Upon completion of the installation process, click the Finish button to close the InstallShield Wizard
-
A shortcut is placed automatically to the desktop for each of the application clients, except for the SilverWhere Database Installer executable. It will be only placed to the
C:\Program Files (x86)\OHCSilverWhere\SilverWhere Clientfolder
Setting up SilverWhere Secure Tools Client
In order for the SilverWhere Application Clients to connect to the SilverWhere Database, you must configure the SilverWhere Secure Tools Client:
-
Follow steps 1 to 7 of Setting up SilverWhere Application Clients in order to install the client
-
Open the SilverWhere Secure Tools Client by right clicking on the icon on the desktop and selecting the ‘Run as administrator’ privilege
-
A message will be displayed as the database information cannot be retrieved. Confirm the message by clicking OK
-
Provide the database information and click on Apply. Confirm the success message by clicking OK
-
Open the SilverWhere Secure Tools Client by right clicking on the icon on the desktop and selecting the ‘Run as administrator’ privilege, then enter the user credentials for the Administrator user and click OK
-
This will launch the SilverWhere Secure Tools Client
Figure 5-1 Secure Tools Clients

-
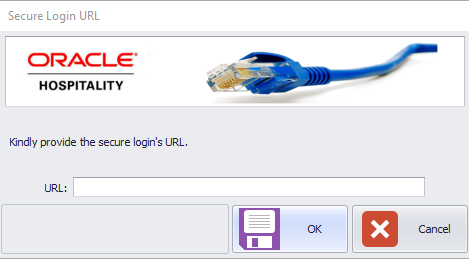
Click the Secure Web URL button to open the below window
Figure 5-2 Secure Login URL window
-
Enter the URL, for example:
IPWEBSERVICE /SWWeborFULLDEVICENAME/SWWeband confirm by clicking OK and then Cancel -
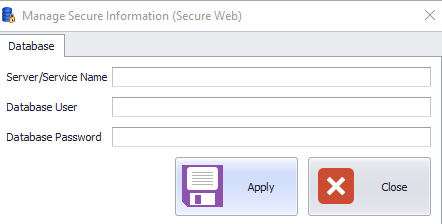
Click the Manage Web Secure Info button to open below window
Figure 5-3 Manage Secure Information (Secure Web) window
-
Enter the Database Connection details and confirm by clicking Apply
-
Repeat steps 6 and 7 and add the below to below for Server/ Service Name to create the entry for the SWMobile application:
(DESCRIPTION = (ADDRESS = (PROTOCOL = TCP)(HOST = AddServerAddress)(PORT = 1521))(CONNECT_DATA =(SID = AddSSID))) -
Click the Read Web Secure Info button to view all the configured database connection details
-
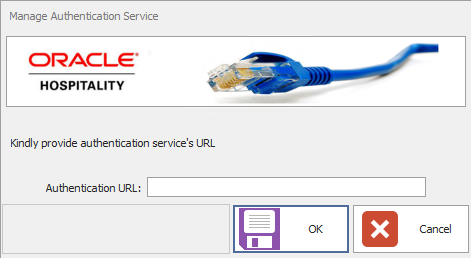
Click on the Manage Auth Service button to open the below window
Figure 5-4 Manage Authentication Service connection window
-
Enter the URL, for example:
FULLDEVICENAME/SWAuthenticationor<IP Address>/SWAuthenticationand confirm by clicking OK -
Complete the process by clicking on OK
-
Before you can continue the configuration in the SilverWhere Secure Tools client, we have to create a user for the newly created Authentication user group. Open the SilverWhere .Net Client by double-clicking on the icon on the desktop
-
Navigate to the System Setup tab, and click on the User Setup module
-
Select the Authentication user group, and click on Add User
-
Enter the user details for the authentication user, for example
USER ID = AUTH1, and click on Save -
Go back to the SilverWhere Secure Tools client or open it by double-clicking on the icon on the desktop.
-
Click on Manage Auth Info, select the first secure server from the drop-down menu and enter the user and user password for the authentication user (created in steps 16 to 19) in the Manage Authentication Information window
-
Complete the process by clicking Apply and then OK
-
Repeat steps 21 and 22 and select the second secure server from the drop-down menu
Other functionalities in the SilverWhere Secure Tools client are:
-
Update Secure Information:
-
To update the password of a Secure Info entry, click the Read Web Secure Info button and double click on the entry, and enter the password
-
-
Delete Secure Information:
-
To delete the Secure Info entry, click the Read Web Secure Info button, select the entry and press the Delete key on the keyboard
-
-
Verify Web Service Connection:
-
To verify the Web Service Connection, click the Verify Web Service Connection button and press Verify
-
-
Verify Auth Service Connection:
-
To verify the SWAuthentication Web Service Connection, click the Verify Auth Service Connection button and press Verify
-
Creating SilverWhere par files
In order for the SilverWhere Clients to connect to the SilverWhere Database, the SWSecurity.par, the SMSecurity.par, the SWWebSecurity.par file and the SWAuthService.par files have to be created. All files will be stored under the C:\ProgramData\SilverWhere folder.
SWSecurity.par file
The SWSecurity.par file is used by the Secure Tools Client and it gets created when opening the Secure Tools for the first time and entering the database information. See steps 6-7 above.
SWWebSecurity.par file
The SWWebSecurity.par file is used by the SilverWhere Client to connect to the database. Follow the instructions listed below in order to create the SWWebSecurity.par file:
-
Open the IIS Manager, select the SilverWhere Secure and SWMobile Web Service (e.g. SWWeb) and click on Restart
-
Click on Browse to launch the web browser
-
Click on MMSFunctions.asmx and then on Invoke to create the SWWebSecurity.par file
SWAuthSecurity.par file
The SWAuthSecurity.par file gets created when clicking Verify Auth Service Connection
for the first time and entering the database information. See steps 13 to 15 of Setting Up SilverWhere Secure Tools Client.
SWAuthInfo.par file
The SWAuthInfo.par file is used by the SilverWhere SWMobile Client to authenticate the SilverWhere Web Services. It is also being used by the SilverWhere Application Clients to connect to database (residing on a different VM). This file contains the authentication user credentials.
SMKeyInfo.par file
This file contains the key to encrypt/ decrypt the local SQLite Database, which is created during the initial launch of the SilverWhere SWMobile Client.
-
Delete the SMKeyInfo.par file
-
Delete the local database file in
\Users\CurrentUser \AppData\Local\SWMobile\Database\ SWDB9.1.0.0.db3 -
Restart the SilverWhere SWMobile Application
Note:
The connection to the SilverWhere Database is only possible when the Database TNS Connection for SilverWhere Secure and SWMobile Web Service is properly setup and with the correct SilverWhere Database password. The password is stored in a protected OHCSWSecurity.par file on SilverWhere Web Service Server in\Users\Public\Documents\Oracle Hospitality Cruise directory. This OHCSWSecurity.par file will be updated with the port number of the SWAuthentication web service and also the authentication information of the SWAuthentication web serviceSetting up SilverWhere .Net, SilverWhere and SilverWhere Reports Client
In order to configure SilverWhere .Net, SilverWhere or SilverWhere Report Client on the target machine, follow the instructions listed below:
-
Follow steps 1 to 7 of Setting up SilverWhere Application Clients to install the client
-
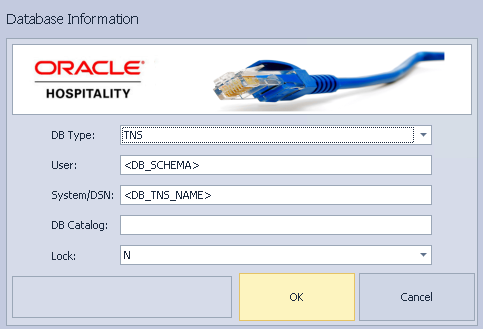
Open the SilverWhere Client application by double clicking on the icon on the desktop
Figure 5-5 Database Information Window
-
Select the DB Type and enter the User and the System/DNS. Confirm by clicking on OK
-
Enter the URL in the Secure Login Window, for example:
IPWEBSERVICE /SWWeborFULLDEVICENAME/SWWeb(same as was used for Configuring SilverWhere Secure Tools Client - Step 6) and confirm by clicking OKFigure 5-6 Secure Login URL — SilverWhere .Net Client
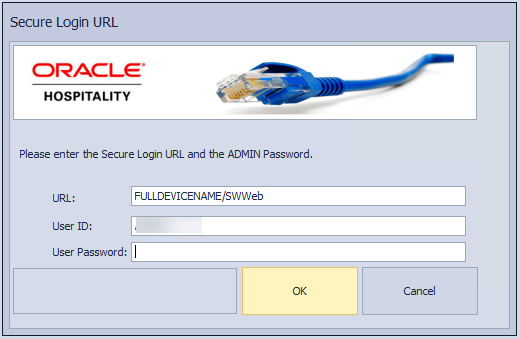
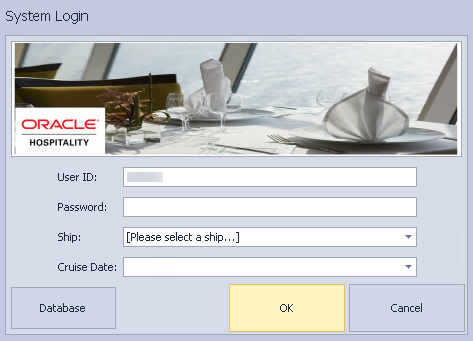
Figure 5-7 System Login Window — SilverWhere .Net Client
-
Enter the ADMIN user details given in Setting Up New SilverWhere 9.1 Database - Step 10 and click the OK button to login to the application
-
Open the SilverWhere or SilverWhere Report application by double clicking on the icon on the desktop
Setting up SilverWhere Mobile Client
In order to configure the SilverWhere Mobile Client on the target machine, follow the instructions listed below:
-
Follow steps 1 to 7 of Setting up SilverWhere Application Clients to install the client
-
Open the SilverWhere Mobile Client by double clicking on the icon on the desktop
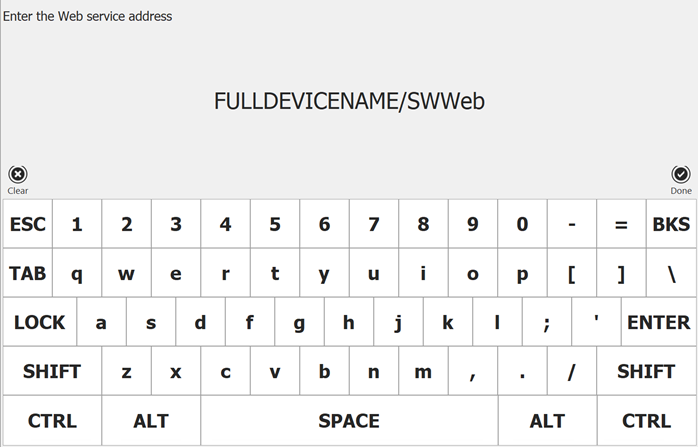
Figure 5-8 Web server address screen
-
Enter the web service address, for example:
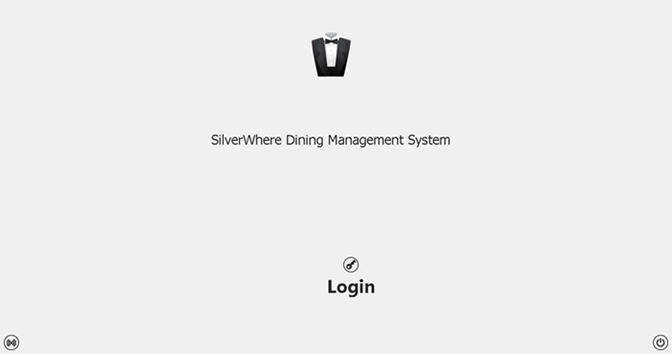
IPWEBSERVICE /SWWeborFULLDEVICENAME/SWWeb, same as it was used for Setting up SilverWhere Secure Tools Client (step 6) and confirm by clicking DoneFigure 5-9 SilverWhere Mobile Login Screen
-
Click on Login, enter the User Credentials and press DONE to login to the SilverWhere Mobile Client
Setting up SilverWhere GDF Interface Client
The SilverWhere GDF Interface consists of two parts, namely the GDF Configuration executable and the GDF Templates. Oracle Hospitality Cruise provides the GDF Templates, for the purpose of data synchronization and can be configured based on the operational needs. You have to import them using the GDF Configuration executable.
SilverWhere GDF Interface Prerequisites
-
Microsoft .NET Framework 4.8 features are enabled on the target machine
-
Minimum Oracle 12c Database client with ODAC is installed on the target machine. See Oracle Database Client and ODAC Installation
-
SilverWhere 9.1 release package is downloaded and available in the target machine. Refer to the Where to Download for download instructions
SilverWhere GDF Interface configuration
In order to configure the SilverWhere GDF Interface on the target machine, follow the instructions listed below:
-
Follow steps 1 to 7 of Setting up SilverWhere Application Clients in order to install the client
-
Open the SilverWhere GDF Interface Client by double clicking on the icon on the desktop
-
See General Dynamic Interface Guide for more information on how to configure the interface
Note:
Upgrade of ODAC
If you are upgrading ODAC on the server where GDF is installed, ensure to run the ‘Include_EntityFramework_dll.bat’ to register the Oracle.Managed.DataAccess.EntityFramework.dll on the server.