- DSR Cloud Installation Guide
- Installation
- DSR Installation on OL8 and KVM
- Creating and Installing OCDSR VMs through KVM GUI
2.3.2 Creating and Installing OCDSR VMs through KVM GUI
This procedure installs DSR VMs NO, SO, and MP using KVM GUI.
Note:
This installation procedure is only applicable for each VM, that is NO, SO, MP and so on.Prerequisites:
- Installation of DSR on Oracle Linux OS through KVM must be performed.
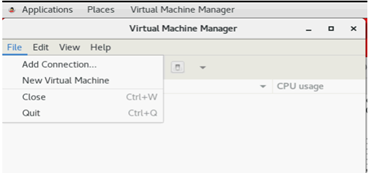
- To log in to the host machine and open the Virual Machine, run
the following command:
virt-managerFigure 2-19 Virtual Machine Manager
Note:
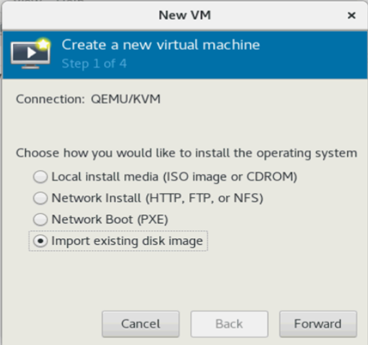
Ensure X11 forwarding is enabled before runningvirt-managercommand on CLI. - To create a new Virtual Machine, on Virtual Manager GUI, click File, and then New Virtual Machine and select Import existing disk
image.
Figure 2-20 Creating a New VM
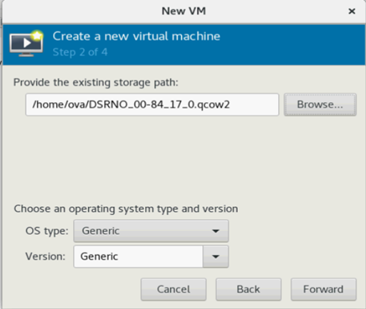
- To select the image file, select the qcow2 image by browsing
the
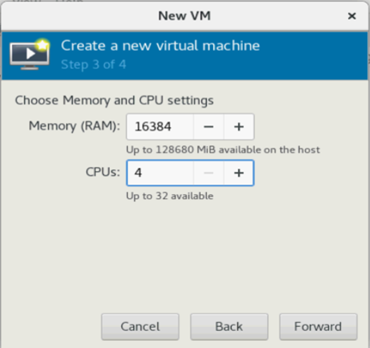
/home/ovalocation and click Forward. - For each VM, select the RAM and vCPUs as required by resource
profile and click Forward.
- To verify and customize VM, perform the following steps:.
- Update the VM name and select Customize configuration before install.
- Select XMI bridge under
Network selection and click
Finish.
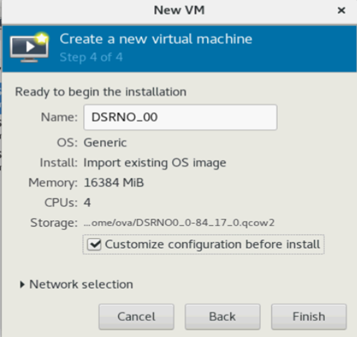
- For XMI bridge, modify the Device model to virtio.
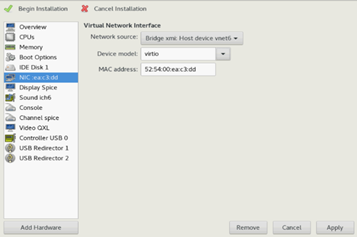
- To customize the network configuration, perform the following
steps:
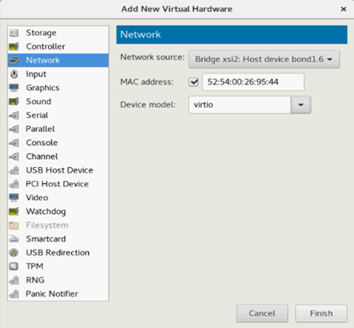
- On the next screen, click Add
Hardware and configure as
following:
- Under Network source, choose IMI Bridge.
- For NO and SO, choose IMI bridge only.
- For MP, add XSI1, along with IMI by repeating this step.
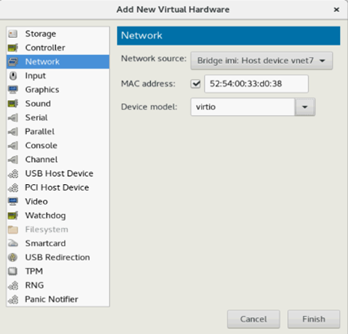
- Click Finish.
- For MP, add XSI1 and XSI2 bridge.
For XSI1 bridge:
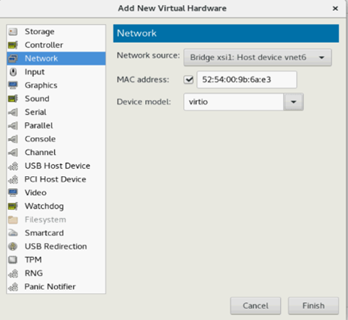 For XSI2 bridge:
Note:
For DSR Topology it is recommended to add all interfaces on each VM, even when the VM does not require that interface or does not use a VLAN.This is to use a standard when the topology is created from NOAM GUI.
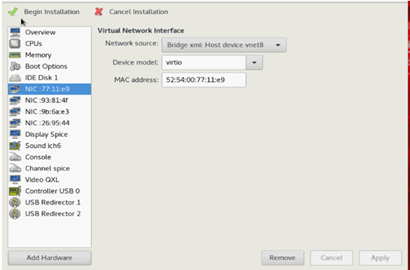
DSR VMs XMI eth0 IMI eth1 XSI1 eth2 XSI2 eth3 Add all interfaces as needed. Once the other networks are added, the NICs appears.
- On the next screen, click Add
Hardware and configure as
following:
- After adding all bridges, verify and begin the VM
installation.
- To disable the TSO GSO features for SBR server, see Disabling TSO GSO features for SBR server.
