Entering Supplier Identifying Information
To enter supplier identifying information, use the Supplier Information component (VNDR_ID) and the Supplier User component (VENDOR_USER).
Use the VNDR_ID_EXCEL component interface to load data into the tables for this component.
Note: There is another Supplier Information component interface (VNDR_ID) used by the Supplier Enterprise Integration Point (EIP) for loading suppliers into the PeopleSoft Payables and PeopleSoft Purchasing supplier tables. You can use the Supplier EIP to import supplier information from PeopleSoft Payroll, PeopleSoft Student Administration, and external systems using XML messaging and to publish supplier information to these PeopleSoft and external systems. You can also use the VNDR_IMPORT application engine process to import suppliers from a flat file into the PeopleSoft Payables and PeopleSoft Purchasing supplier tables. These import processes are described in another set of topics.
This section discusses how to add new suppliers and enter identifying information. It also discusses how to specify VAT registration details and add supplier attachments.
|
Page Name |
Definition Name |
Usage |
|---|---|---|
|
VNDR_ID1 |
Enter identifying information for a supplier, including the supplier name and short name, classification, status, persistence, withholding and VAT eligibility, relationships with other suppliers, duplicate invoice checking settings, and additional identifying elements required for reporting to government agencies. |
|
|
VNDR_VAT_RGSTRN |
Specify VAT registration information for all the countries with which the supplier is registered to do business. |
|
|
VAT Defaults Setup (value-added tax defaults setup) Page |
VAT_DEFAULTS_DTL |
Specify and review VAT default settings at the supplier level. |
|
Service VAT Treatment Defaults Setup (service value-added tax treatment defaults setup) Page |
VAT_DEFAULTS_DTL |
Specify and review VAT default settings for VAT on services at the supplier level. |
|
General Information - General Info Page |
CUST_GENERAL1 |
Define bill to customer information. The Bill to Customer Details link is only available if you have the option to automatically create bill to customers from the Supplier component. |
|
VENDOR_USER |
Identify users who are authorized to access supplier information. |
|
|
VNDR_ATT_SEC |
Add supplier attachments. |
When you add a new supplier, the system prompts you to enter a supplier ID, which is the primary key to the supplier tables; the supplier ID is a unique identifier that you can use to locate specific supplier information. Depending on how you set up your autonumbering defaults on the Supplier Set Control page, you enter either your own unique supplier ID or let the system assign one for you. Each supplier belonging to a SetID must have a unique number for its supplier ID. If you have enabled autonumbering, the supplier ID appears as NEXT on the search page. The system assigns a sequential ID number after you enter the supplier information and save the page.
Note: The system validates imported suppliers when you use the Supplier component interface (VNDR_ID_EXCEL) and the Supplier Enterprise Integration Point (EIP). In addition to delivering the Supplier EIP as application messages, the system can also deliver the supplier as a web service. It does not perform validations when you use the VNDR_IMPORT Application Engine process.
When you are adding a new supplier to PeopleSoft Payables, you must specify information for these fields:
Field or Control |
Description |
|---|---|
SetID |
Select a SetID, or click the drill-down button to look up a SetID. |
Supplier ID |
If you have elected to have the system assign supplier IDs, Next appears by default in this field; otherwise, enter a supplier ID in this field. |
Persistence |
Select a persistence level for this supplier. Values are: One Time, Permanent, Regular, and Single Payment Supplier. Note: If you specify a persistence level of Single Payment Supplier when you add a new supplier, the first page in the Supplier Information component that you enter is the Single Payment Supplier page. If you are creating a one-time, permanent, or regular supplier, you first access the Identifying Information page. |
Field or Control |
Description |
|---|---|
Check for Duplicate |
When adding a supplier, click to check for duplicate suppliers before you save the supplier that you are adding. You must enter duplicate supplier checking options on the Supplier Set Control page to enable duplicate supplier checking. If you also select the Check for duplicates at save option on the Supplier Set Control page, then the system automatically checks for duplicates when you save the supplier. When you select the Check for Duplicates button, the system searches for suppliers that are duplicates. If there are not duplicate suppliers, a message indicates that there were no suppliers matching the duplicate check criteria. If there are duplicates, the View All page appears and provides a list of all duplicate suppliers and a link to the applicable supplier component/page. The page is dynamic and displays the field option values that were selected for duplicate checking. |
Financial Sanctions edit |
Click to validate the supplier against financial sanctions lists (for example, the SDN list). This button only appears if financial sanctions is enabled at the installation level, and the SDN Validation at save check box is not selected on the Supplier Set Control page. Also, this button only appears for suppliers with a financial sanctions status of Cleared or Valid. |
Use the Identifying Information page (VNDR_ID1) to enter identifying information for a supplier, including the supplier name and short name, classification, status, persistence, withholding and VAT eligibility, relationships with other suppliers, duplicate invoice checking settings, and additional identifying elements required for reporting to government agencies.
Navigation:
This example illustrates the fields and controls on the Suppliers - Identifying Information page (1 of 3). You can find definitions for the fields and controls later on this page.

This example illustrates the fields and controls on the Suppliers - Identifying Information page (2 of 3). You can find definitions for the fields and controls later on this page.

This example illustrates the fields and controls on the Suppliers - Identifying Information page (3 of 3). You can find definitions for the fields and controls later on this page.

When you are adding or modifying a supplier, you can validate the supplier against a financial sanctions list on a real-time basis. The Financial Sanctions edit button only appears if financial sanctions is enabled at the installation level, the SDN Validation at save check box is not selected on the Supplier Set Control page, and the supplier has a financial sanctions status of Cleared or Valid.
Field or Control |
Description |
|---|---|
Supplier Name 1 and Supplier Name 2 |
Enter the supplier's name. There are two lines for the supplier name (supplier name 1 and supplier name 2), in case you're dealing with divisions, subsidiaries, or other complex organization entities that require detailed identification. If the system is tracking supplier name changes, when a new effective-dated change occurs, the new supplier short name, name 1, and name 2 values are automatically updated in these fields. Note: An error message is displayed on saving the supplier information, if a duplicate supplier name is detected. To enable this option, select the Check for duplicates at save check box on the Supplier Set Control page. |
|
If you enabled alternate characters in your user preferences and want to enter alternate characters for the supplier, click the Alternate Name button next to either of the supplier name fields to enter or display alternate characters on the page that appears. Note: This button appears on the page only if you have enabled the option on the User Preferences - Overall Preferences page. |
Classification |
Select the supplier's classification. Values are: Attorney: Indicates that the supplier is an attorney. Employee: Assign this classification to suppliers only if they are company personnel. HCM (PeopleSoft Human Capital Management): Indicates that the supplier is a third-party supplier from the PeopleSoft Human Capital Management (HCM) system, such as an insurance carrier or taxing authority. Selecting this value activates the HCM Class field. Supplier: Most suppliers are suppliers. |
Check for Duplicate |
Click the Check for Duplicate button to check for any duplicate supplier names. If any duplicate entries are present, an error message is displayed with all the duplicate Supplier IDs along with the View Duplicate Suppliers hyperlink. The message also displays duplicate Registration IDs with View Duplicate Supplier / Bidder Registrations hyperlink if duplicate exists for supplier and bidder registrations. To know more, see Check for Duplicate. |
HCM Class |
Select a human resources class. This field is available for entry only if you select HCM in the Classification field. If you use HCM in conjunction with PeopleSoft Payables, select one of the following values to define HCM suppliers. Most of these classifications define third-party suppliers who need to be paid the amounts that were deducted from employee paychecks in the HCM software (benefits and payroll). Deduction amounts from these systems, consisting of both employee and employer contributions for third parties, are paid through accounts payable as standard supplier vouchers. Garn Pay (garnishment payee): Indicates that the supplier is a garnishment payee—that is, the recipient of garnishments such as child support or alimony payments. Gen Deduct (general deductions): Indicates that the supplier receives general deductions such as union dues, health club dues, stock purchase contributions, credit union deposits, and so on. Gen Prov (general provider): Indicates that the supplier is a general provider. Ins Prov (insurance provider): Indicates that the supplier is an industrial insurance board provider. Nat'l Prov (national provider): Indicates that the supplier is a national health service provider. Part Prov (partner provider): Indicates that the supplier is an implementation partner provider. Tax Col (tax collector): Indicates that the supplier is a tax collector. |
Persistence |
Select the supplier's persistence. Values are: One-Time: Select for suppliers you know you will use only once. You can enter only one voucher for this supplier, after which the supplier status changes to Inactive automatically. Note: A one-time supplier is different from a single payment supplier in that a one-time supplier adds rows to the supplier tables. A single payment supplier does not affect supplier tables and is used as the default master supplier for single payment vouchers. Permanent: Select for suppliers you know your organization will always use, even if not on a frequent basis. You can create an unlimited number of vouchers for this supplier. The supplier is not purged from the system unless you specifically request that they be archived in a supplier archive request. See Archiving Data. Regular: Select for a supplier only if you don't mind that it is removed from the system once activity for the supplier stops for a designated period. You can create an unlimited number of vouchers for this supplier. However, if there is no activity for the supplier by the as of date in a supplier archive request, the supplier is purged from the system. Note: If you select Single Payment Supplier as the persistence when adding a supplier, the system opens the Single Payment Supplier page, on which you can set up the supplier options that you want to appear by default on single payment vouchers. |
Supplier Status |
Displays the supplier's status. You can change the status if you have supplier processing authority defined on the Procurement - Supplier Processing Authority page. Values are: Approved: If you have authority to approve suppliers, the system automatically assigns a status of Approved to the supplier when you create the supplier. The system does not recognize a supplier as approved unless an authorized payables or purchasing user enters or approves it. Use the Supplier Processing Authority page in the User Preferences component to define supplier approvals. See Approving Suppliers. Inactive: If you have the authority to inactivate suppliers you can select this option. Users cannot enter new vouchers for this supplier. To Archive: If you have the authority to inactivate suppliers you can select this options. Users cannot enter new vouchers for this supplier; the supplier is purged from the system. Note: Since archiving a supplier is similar to inactivating a supplier—users cannot enter new vouchers for this supplier—you must have the authority to inactivate suppliers to set the status to To Archive. Unapproved: If you do not have the authority to approve suppliers, another user needs to approve the supplier before users can enter vouchers into the system for this supplier. |
Attachments (0) |
Click this link to access the Supplier Attachment page where you can add one or more attachments related to a supplier. You can use attachments as a means of capturing additional information about the supplier without maintaining paper files. The link displays the number of attachments for the supplier. You can upload and view a variety of documents, including Microsoft Word and Adobe Reader documents, as well as Microsoft Excel, PowerPoint, and Access files. Attachments are read only files. You can edit these files and load them again to make changes. |
VAT Registration |
Select when entering VAT-applicable suppliers, to activate the Registration, VAT Default, and VAT Service Treatment Setup links. This check box appears only if you selected the Display VAT Flag check box on the Supplier Set Control page. |
Registration |
For VAT-applicable suppliers, click to open the VAT Registration Details page, on which you can enter VAT registration information for the supplier. |
VAT Default |
For VAT-applicable suppliers, click to open the VAT Defaults Setup component to review and, as applicable, enter VAT settings for the supplier. Note: You must save the supplier before you can access the VAT Defaults Setup component for the supplier. |
VAT Service Treatment Setup |
If you are using services VAT treatment, click to open the Services VAT Treatment Drivers Setup component, to review and, as applicable, enter services VAT treatment settings for the supplier. Note: You must save the supplier before you can access the Services VAT Treatment Drivers Setup component for the supplier. |
|
View/Update Primary Email |
Click to add, view, or modify the primary access email ID. If the supplier is created from Register supplier/bidder, the email ID entered during the supplier/bidder registration will be transferred to the supplier master. If you remove the primary email ID, a message prompts you to enter the email ID before saving. This is a warning message that an email ID is required to generate the access code. The user can save the supplier master for now and add the email ID later. Note: The analysis and award process begin when a new bidder submits the bid. At that point, the bidder becomes a supplier. Once the award is posted and the purchase order is created, a supplier ID is also generated with the primary email ID. Note: If both Authority to Enter and Authority to Approve check boxes are enabled on the Procurement - Supplier Processing Authority Page, View/Update Primary Email link appears and the approver can view or edit the primary email ID. If the Authority to Enter check box is disabled and Authority to Approve check box is enabled on the Procurement - Supplier Processing Authority Page, the approver can view the primary email ID in read only mode. The above configuration is valid only if Enable Access Code for User Authentication check box is enabled on the Supplier Request System Setup - General Page. |
Withholding |
When entering withholding or 1099 suppliers, select to enable withholding for the supplier. You specify withholding options on the Withholding Supplier Information page. Note: While the Withholding option and the Withholding Supplier Information page are available to you to make updates after you have defined your suppliers, the most efficient way to handle withholding suppliers is to make sure that you mark them as withholding when you first enter them. If you do, all vouchers that you enter for withholding suppliers are automatically flagged for withholding reporting as you enter them into the system. |
Supplier Audit |
Select to enable audit capability for the individual suppliers. The check box will not be available for editing if the Supplier Audit option is disabled at the SetID level. User can enable audit at an individual basis or for all suppliers. Note: The users can enable or disable the audit feature only if they are granted permission on the Supplier Processing Authority page. |
Open For Ordering |
Select to certify the supplier for purchasing goods and services. If this check box is deselected, you cannot enter purchase orders (POs) for this supplier in PeopleSoft Purchasing. |
Review SAM Information |
Click this link to access the SAM Entity Inquiry Page. |
Approval History |
Click to access the Additional Voucher Information page, where you can view approvals for the supplier. |

Supplier Relationships
Field or Control |
Description |
|---|---|
Corporate Supplier and Corporate Supplier ID |
Select to associate the supplier that you are creating with a corporate supplier. Select a corporate supplier ID. |
InterUnit Supplier and InterUnit Supplier ID |
Select to identify this supplier as an interunit supplier. Specify the business unit that represents this supplier and select an interunit supplier ID. |
Supplier Hierarchy |
Click this link to access the Supplier Visualization page. The Supplier Visualization page displays the supplier hierarchy in a graphical presentation. |
Create Bill-To Customer
Field or Control |
Description |
|---|---|
Create Bill To Customer |
Select if you want the system to automatically create a bill to customer upon saving the supplier. The bill to customer is created with default information. To view the bill to customer that was created use the Additional ID Numbers section of this page. The default value is defined on the Installation Options - Purchasing page. |
Support Team Code |
Select a support team for this bill to customer. |
Collector |
Select a collector for this bill to customer. |
Credit Analyst |
Select a credit analyst for this bill to customer. |
Note: After the bill to customer is successfully created the Create Bill-To Customer group box will no longer appear on the page. To modify the bill to customer, use the Bill To Customer Details link under the Additional ID Numbers section of this page.
Additional ID Numbers
Enter information-only additional identifiers for the supplier in the Additional ID Numbers collapsible region. The data for the region is not used for processing, but may be required for reporting purposes.
Field or Control |
Description |
|---|---|
Customer ID |
If this supplier is also a customer, enter the valid receivables ID. If you automatically create a bill to customer from this page, this field displays the bill to customer that the system automatically created. |
Bill To Customer Details |
Click this link to access the General Information component for this bill to customer. Use this component to complete the definition of the bill to customer. |
Our Customer Number |
Enter the number by which your supplier identifies you as the customer. |
ISO and SEPA Information |
Click this link to view the ISO and SEPA Information page. You can provide the information that will be used in ISO and SEPA formats. The information includes Issuer, Identification and either an ISO Code List under which the identification was issued or a Proprietary Scheme Name under which the identification was issued. You must designate one issuer as the default that will be populated on the ISO and SEPA format. See the product documentation for PeopleSoft Banks Setup and Processing and PeopleSoft Financial Gateway. |
Type |
Associate the supplier with a reporting entity by selecting the type of number that you are adding. PeopleSoft delivers some ID numbers with the system, but you can also add your own. Examples of the types of ID numbers that you might want to add for the suppliers include: ACN: company number - Australia. CCM: municipal registration number - Brazil. CGC: company tax registration number - Brazil. CPF: Ind tax registration number - Brazil. DB: DUNS Number (With Edit) DNS: DUNS number (No Edit). DP4: DUNS + 4 Suffix. FIC: fiscal ID - company - Italy FII: fiscal ID - indiv - Italy GLN: global location number. IE: state registration number - Brazil. NIC: NIC number - France. NIF: fiscal ID number - Spain. PEP: PEPPOL ID. PEPPOL is an e-invoicing network that allows you to send/ receive e-invoices. SRN: SIREN number - France. SRT: SIRET number - France. TIN: tax identification number. W2: W2 identification number. Note: PeopleSoft recommends you inactivate the type fields that you are not using. This will assist in preventing the wrong selections from being made. For additional information on Peppol, see Staging Voucher E-invoice Files Using the Data Export Import Utility. |
ID Number |
Enter the ID number provided by the reporting entity for the supplier. Depending on the type of number that you select, different fields are available for entry. If you select a DUNS Number (With Edit) number, for example, you activate the SetID and DUNS Number fields. If you select DUNS Number (No Edit) number you activate the ID Number field and the Credit File check box. If you select DUNS + 4 Suffix number you activate the ID Number field only. In the ID Number field enter the 4 digit suffix. If you enter another type of number, you activate the ID Number field. The system can also use the ID number to verify a supplier when using the self-registration feature for suppliers. To access the feature navigate to . Using this component you can specify which ID number type and ID number to validate against if and when you enable suppliers to create their own users that are tied to the supplier ID during the supplier registration process. The system stores identification numbers for suppliers at the supplier and supplier-location levels, but only uses IDs at the supplier level for validation. Identification numbers are optional, and you can only use one ID number per supplier. For ID numbers with PEP as the Type, the ID number is 4 digit country code followed by an 11 digit unique identifier. For example, 0001: 00000000001. |
Credit File |
Select this check box if a D&B credit file exists. This check box is only available if you select a type of DNS (DUNS number (No Edit). |
To access the General Information - General Info page, click the Bill To Customer Details link on the Identifying Information page.
Duplicate Invoice Settings
Enter duplicate invoice checking parameters in the Duplicate Invoice Settings collapsible region.
The options in the Duplicate Invoice Settings region are the same as those defined in the Payables Options component (BU_CTLB). In the Payables Options component, you define these options for the business units sharing a SetID; here, you define them for the supplier.
(USA) Specifying Government Classifications
Enter government classifications required for reporting by some U.S. organizations in the Government Classifications collapsible region.
In the U.S., companies report information about the classification of suppliers with whom they do business to the government; they are also sometimes required to report similar information to their customers. Suppliers receive certain classifications of certification—for example, Small Business - Hispanic Woman Owned—from various government sources.
Note: You must define government sources and classifications on the Government Certifications - Sources page and the Government Certifications - Classifications page before you can select them at the supplier level.
Field or Control |
Description |
|---|---|
EEO Certification Date (equal employment opportunity certification date) |
Enter the supplier's EEO certification date. |
HUB Zone (historically underutilized business zone) |
Select if the supplier qualifies for this classification. The HUBzone Empowerment Contracting program provides federal contracting opportunities for qualified small businesses located in distressed areas. Fostering the growth of these federal contractors as viable businesses, for the long term, helps to empower communities, create jobs, and attract private investment. HUB Zone qualifications can give suppliers preferential treatment when procurement contracts are awarded. Governmental agencies have a goal of awarding contracts to HUB-Zone-qualified suppliers based on certain percentages. Customers might use this field for reporting compliance in awarding business to HUB Zone businesses. |
Source |
Enter the supplier's certification source. Each supplier can have multiple sources, and each source can have more than one effective-dated record that captures the certification number, begin date, expiration date, and government classification of the supplier's government certifications. |
Cert Nbr (certificate number) |
Enter the number of the certificate that your supplier received from this source, verifying that the supplier is qualified for this government classification. |
Begin Dt (begin date) and Expire Dt (expiration date) |
Enter the start date and expiration date for the certificate. |
Gov Class (government classification) |
Enter the type of government classification for which your supplier qualifies. |
Standard Industry Codes (Standard Industry Codes)
Enter standard industry classification (SIC) codes required for reporting by some governments in the Standard Industry Codes collapsible region.
Depending on your organization's reporting requirements, you can apply SIC codes here for the supplier or on the Supplier Information - Location page for a supplier location. The information that you enter for the supplier location is informational only. The data is not used elsewhere in the system. The information that you enter for the supplier, however, is used for U.S. government compliance reporting. If you are not doing government reporting, you may choose to define these numbers at the supplier location only.
You can supply multiple types of industry codes for the same supplier. For example, a standard USA SIC code and a North American Industrial Classification System (NAICS) code can be defined for the same supplier. You can also supply multiple SIC codes for the same SIC type.
Note: The fields in the Standard Industry Codes collapsible region support the U.S. Government reporting requirements.
Field or Control |
Description |
|---|---|
SIC Type (standard industrial classification type) |
Select the appropriate type for the supplier. PeopleSoft provides you with the standard hierarchy of these codes from Australia, Canada, Germany, France, the U.K., and the U.S., and you can also add your own. Examples of SIC types that you might select include: AUS: Australia - New Zealand SIC code. CAN: Canadian NAICS codes. GER: German SIC codes. NAF: French SIC codes. SIC: U.S. SIC codes. UK: U.K. 92 SIC codes. USA: U.S. - NAICS codes. |
SIC Code |
In accordance with the SIC type that you select, the system provides an appropriate list of SIC codes. Select a code for the supplier. Based on the SIC information that you select, the system populates the Parent SIC Code field and the Description field. |
(USA) Additional Reporting Elements
Enter supplier information required for Federal Procurement Data Systems reporting in the Additional Reporting Elements collapsible region. These fields are government classification fields that are available for use in reporting.
Field or Control |
Description |
|---|---|
Common Parent's Name |
Enter a parent supplier name for this supplier ID. In this case, the common parent is the corporate entity that owns or controls an affiliated group of corporations that files its federal income tax returns on a consolidated basis, and of which this supplier is a member. |
Emerging Small Business |
Select if the supplier qualifies as an emerging small business. |
Common Parent's TIN (common parent's tax identification number) |
Enter the tax identification number for the common parent. This number is used to uniquely identify a business. Note: Common Parent’s TIN is not used in 1099 Withholding processing. |
Women-Owned Business |
Select if this supplier qualifies as a women-owned business. |
Type of Contractor |
Select the type of contractor that this supplier represents, such as a large business or education institution. The contract types are defined in Federal Acquisition Regulation (FAR) Part 16. |
Veteran |
Select to indicate that the supplier is a veteran-owned business. The veteran-owned small business program provides veteran-owned small businesses maximum practical opportunity to participate in the performance of contracts and subcontracts awarded by any federal agency. |
SDB Program (small disadvantaged business program) |
Select a small disadvantaged business program. A Small Disadvantage Business (SDB) program provides business development and federal contracting opportunities for small disadvantaged businesses that would not otherwise qualify for such programs. An SDB enables small businesses to compete in the federal contracting arena and helps expose them to a wider range of subcontracting opportunities that are typically available for large firms only. Programs of this nature are intended to help federal agencies achieve the government-wide goal of 5 percent SDB participation in prime contracting. |
Disabled |
Select to indicate that this supplier qualifies as a disabled supplier. |
Other Preference Programs |
Select a preferred socioeconomic program for use with this supplier. These programs are defined under FAR subchapter D - Socioeconomic Programs. |
HUBZone Program (historically underutilized business zone program) |
Select a HUB Zone program. The HUBZone Empowerment Contracting program provides federal contracting opportunities for qualified small businesses located in distressed areas. |
Size of Small Business |
If you selected the Emerging Small Business check box, select the applicable business size for this small business from the available options. |
Ethnicity |
Select an ethnic group that applies to the supplier. Values include: Asian, Black, Hispanic, Native, and Other. When you select the Other option, you can enter the ethnicity. |
Specify Ethnicity |
Enter an ethic group that best applies to the supplier. |
Financial Sanctions Status
Update the supplier financial sanctions status in the Financial Sanctions Status collapsible region.
The Financial Sanctions Status collapsible region appears on the Identifying Information page if you have enabled financial sanctions validation for Payables and eSettlements on the Financial Sanctions Options page of the Installation Options component.
Field or Control |
Description |
|---|---|
Financial Sanctions Status |
Displays all suppliers initially as Valid. The system updates the status every time it validates the supplier, whether it is at the supplier level, the voucher level, or the payment level. How the system processes suppliers, vouchers, and payments depend on the financial sanctions status of the supplier. Options include: Blocked: You manually set the status to Blocked when you confirm the supplier is an actual match to a financial sanctions list. Cleared: You manually set the status to Cleared when you determine the supplier is no longer requiring review or it is no longer requiring to be blocked. Note: You must enter a number in the Days before next validation field or select the Skip future validation check box so the system knows when to perform the next validation on this supplier. Review: The system sets this status when it finds a potential match on a financial sanctions list. You cannot manually set this status. Valid: The system sets this status initially or when it does not find a potential match on a financial sanctions list. You can also manually set this status from a Cleared or Blocked status if you determine the supplier to be valid. However, you cannot set this status from a Review status. |
Sanctions Status Date |
Displays the date when a user updates the financial sanctions status manually or initiates the validation process. |
Days before next validation |
Enter a number of days before the system validates the supplier. This field is only available if the financial sanctions status is Cleared. The maximum number of days you can enter is 999. Note: You must either enter a number greater than 0 in this field or select the Skip future validation check box if the financial sanctions status is Cleared. |
Skip future validation |
Select to skip future validation for this supplier. This field is only available if the financial sanctions status is Cleared. |
Sanctions Update User Id |
Displays the user ID of the person either manually updating the Financial Sanctions Status field or initiating the validation process. |
Comments
Use the Comments section to enter additional information about the supplier. You can scroll the comments, view them in a modal window, and perform spell checks for them.
Use the VAT Registration Details (value-added tax registration details) page (VNDR_VAT_RGSTRN) to specify VAT registration information for all the countries with which the supplier is registered to do business.
Navigation:
Click the Registration link on the Identifying Information page.
Field or Control |
Description |
|---|---|
Country |
Select the country, or countries, with which this supplier is registered to do business. The country or countries must be defined on the VAT Country Definition page as part of VAT setup before you can select them on the VAT Registration Details page. |
VAT Registration ID |
Enter the supplier's VAT registration ID for the country. It is not necessary to enter a VAT registration ID, but if you do, the system validates it against the algorithm for the country and issues a warning message if the number that you enter is not in the valid format for this country. Note: To ensure that no duplicate VAT registration IDs are entered into the system, the system checks for duplicate VAT registration IDs. An invalid VAT registration ID warning message appears if you enter a duplicate ID for the same country. |
Home |
Select to designate a country as the home country. This field is for your information only. Suppliers may also be registered to collect VAT in countries other than their home country. If this is the case, you must insert a row and enter the country code for each of these countries. |
Use the Supplier User page (VENDOR_USER) to identify users who are authorized to access supplier information.
Navigation:
Internal Users:
This example illustrates the fields and controls on the Supplier User page.
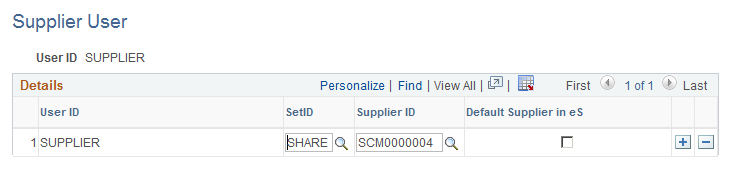
Associate (existing) supplier IDs to the user. If suppliers have registered online, then supplier IDs are automatically associated to the user ID.
Each user ID can be associated with one or multiple supplier codes. This enables the user to view and, with the proper permissions, maintain data for the associated suppliers. When the user logs in to PeopleSoft eSupplier Connection, the system determines to which supplier the user is associated. If the user is associated with multiple suppliers, the Select Supplier page lists the suppliers.
Use the Supplier Attachment page (VNDR_ATT_SEC) to add supplier attachments.
Navigation:
. Click the Attachments link.
This example illustrates the fields and controls on the Supplier Attachment page. You can find definitions for the fields and controls later on this page.
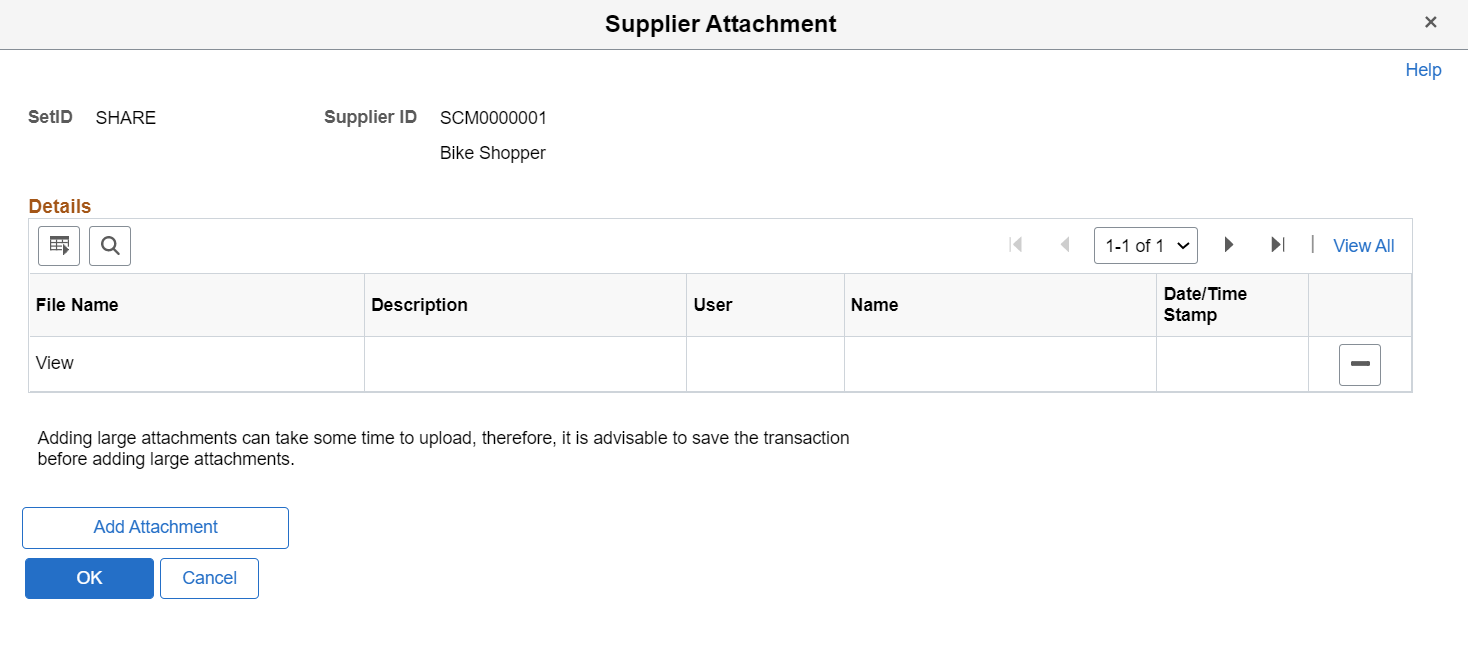
To upload attachments:
Click the Add Attachment button.
Another page appears, where you can browse for the files to upload.
Click the Browse button to locate the file from an external system.
Select the one or more files, and then click the Upload button.
The attachment appears in the File Name field. To view the uploaded attachment, click the file.
Field or Control
Description
File Name
Displays the name of the file as it was selected from the external location. You cannot change the file name here.
Description
Enter a description of the file.
User
Displays the logged in User Name.
Name
Displays the logged in user’s email id.
Date/Time Stamp
Displays upload date and time.
Delete
Click to remove an attachment.
Click the Check for Duplicate button on the Identifying Information tab to check for any duplicate Supplier Names. If any duplicate entries are present, an error message is displayed with all the duplicate Supplier IDs.
When user is trying to create a new Supplier who is already exists in the Supplier Master, View Duplicate Suppliers hyperlink appears. If, there is pending supplier registration with same Supplier Name, then View Duplicate Supplier / Bidder Registrations hyperlink appears.
Note: If duplicate supplier details are added, these hyperlinks appear on clicking the Check for Duplicate button. Alternatively, these hyperlinks also appear on clicking the Save button.
Navigation:
Select the View Duplicate Suppliers or View Duplicate Supplier / Bidder Registrations hyperlink on the Identifying Information tab.
Duplicate Suppliers Page
Use the Duplicate Suppliers Page (DUP_VNDR_SBP) to view the list of Suppliers who are already exist in the Supplier Master.
This example illustrates the fields on the Duplicate Suppliers page.
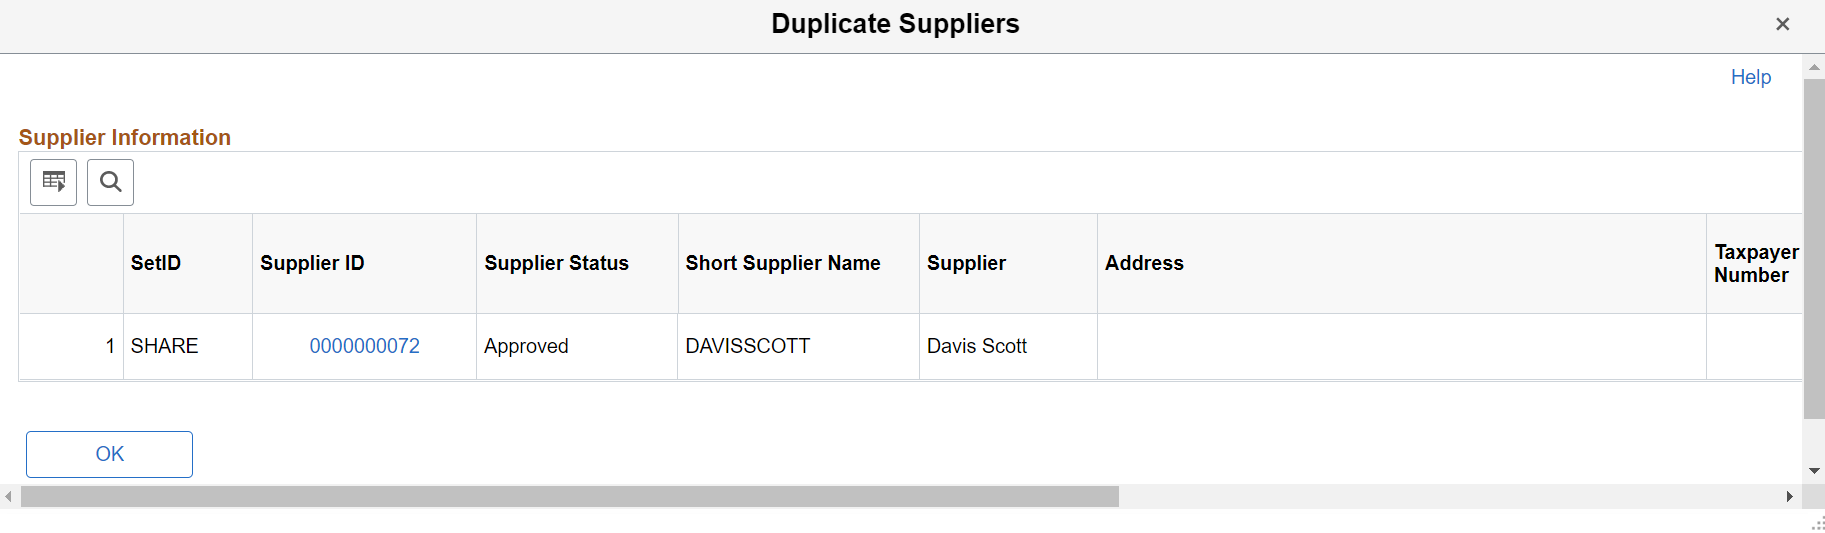
Click Supplier ID hyperlink to view the registration details.
Duplicate Supplier / Bidder Registrations Page
Use Duplicate Supplier / Bidder Registrations page (SUP_DUPCHECK_SBP) to view the detailed list of duplicate pending supplier registration with same Supplier Name.
This example illustrates the fields on the Duplicate Supplier / Bidder Registrations page.
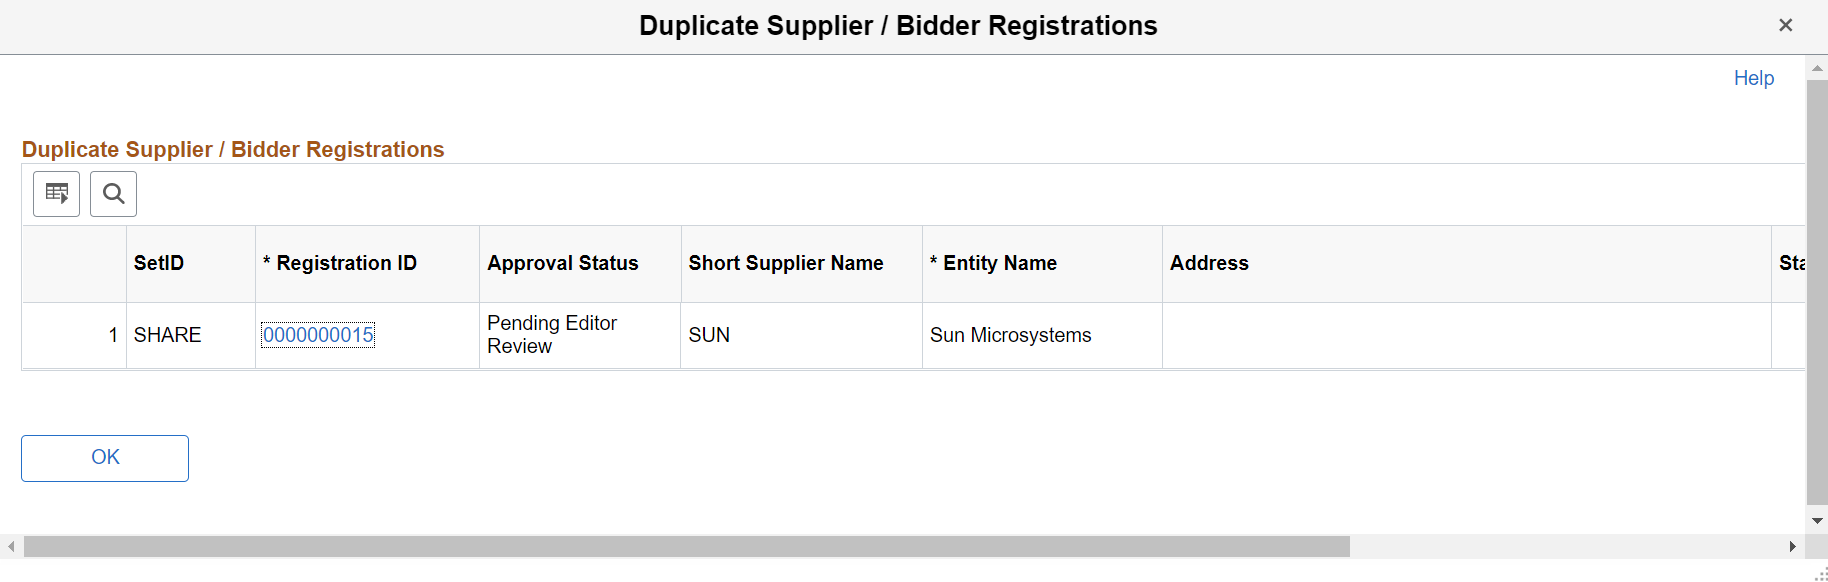
Click the Registration ID hyperlink to view more details about the registration.