Working with Digital Signatures
Digital signatures are cryptographically-based signature assurance schemes that make it possible for PeopleSoft Supplier Contract Management to provide full online contract document processing. They are often used in the context of public key infrastructure (PKI) schemes in which the public key used in the signature scheme is tied to a user by a digital identity certificate issued by a certificate authority, usually run by a third-party commercial firm.
Adobe and Microsoft Word Signature Methods
The Adobe and Microsoft Word signature methods support the ability to lock the Microsoft Word version of a contract and prepare an equivalent and separate PDF file or .docx file that the system uses to capture signatures only. You can run this prepare process and capture signatures in an internal or external order, as well as before, during, or after approvals for capturing internal signatures. After the contract or amendment has been executed, the Microsoft Word version of the latest document is made available again for the next amendment cycle.
Note: When you have the Document Types check box deselected on the Installation Options page, you cannot control the collection of digital signatures, such as before, after and during approvals, the same as you can when you have the check box selected.
Note: Preparing your system for digital signing and setting up digital signatures is described in the Understanding PeopleSoft Supplier Contract Management Setup topic.
Note: The requirement for using the .docx format is that all signers, both internal users and external suppliers, must use Microsoft Word 2007, or later version. Unlike the PDF format the .docx format is still a Microsoft Word document and in certain statuses can be edited. After the first signature, for example, the contract specialist is placed on the document and the .docx file can no longer be modified itself unless all signatures are cleared. Therefore, you should take care when using a .docx format to ensure that the contract specialist signs the document as part of the prepare process, and as a follow-up ensure that the document signatures have not been cleared by other users.
Internal and external users (supplier-side) who intend to sign a contract document or amendment can use digital signatures. You can route a document intended for digital signatures in several ways:
Internally where you can configure to route the document manually using a sequential list of users before, or after approvals or both before and after approvals. You can also route the document during approvals in which case any approver designated as required to sign will be provided a button to do so during approval.
Externally where you can capture needed signatures of prepared document before internal approvals by using the Send to Contacts button, or after approvals using the Send to Contacts or Dispatch buttons. When an external portal is enabled for suppliers, they can sign the document online instead of passing documents through emails.
The document type along with installation options control how the system processes and routes documents.
Adobe Sign and DocuSign Signature Methods
The Adobe Sign and DocuSign signature methods support cloud-based document approval lifecycle management. With these signature methods you can route documents, guide signatures and approvals, generate notifications, and store signed documents in a secure, cloud-based environment. The contract specialist can easily prepare the document (create signature fields) and route the document in one step—there is no need to export the document for preparation and re-upload it into the PeopleSoft application.
In addition, these signature methods enable you to employ multiple methods for authenticating the identity of signers—including password and social media account login—and enables document signing without logging into the PeopleSoft application.
This topic describes the process for using digital signatures with Adobe. The processes for Adobe PDF signatures and Microsoft Word 2007, or later version, are similar. However, the features within each process regarding signing a document may be different as specified by the software suppliers. When using Adobe PDF, most users should require only the Adobe PDF Reader and a digital certificate to sign a document after an administrator has enabled the signature rights using Acrobat Professional. Likewise, using a Microsoft Word docx format for signatures means each signer must be using Microsoft Word 2007, or later version, to add a signature. When using Microsoft Word 2007, or later version, the .docx format is used only for the purpose of a signature file. The Microsoft Word XML Document is always the file format used for editing.
After setting up and preparing to use digital signatures, you prepare and route documents using these steps:
Create a document with internal or external signing requirements.
Obtain any required approvals before sending the document for internal signatures.
This depends on whether the document type requires approvals before signatures.
Click the Prepare Document for Signature button on the Document Management page.
This also enables you to validate the internal and external lists of signers and to indicate if a signer is a visible signer. Click the OK button to convert the document into the signature format. The system creates the document, checks it out, launches the file and displays a message indicating what you should do to the file depending on whether it's a .docx or PDF. In the case of an Adobe PDF, you enable the usage rights for users with Adobe Reader so that they can sign documents. In the case of Word 2007 .docx file, you should certify the document and make the first signature to prevent editing of the document. In both cases the document is locked until the specialist checks in a certified document.
Note: If you are creating an Adobe PDF, the system displays a message that the document is pending certification that you need to enable Adobe usage rights. To ensure that the system opens the document in an Adobe PDF format, launch Adobe Acrobat Professional from the Start menu. After accessing the application, select and deselect the Display PDF in Browser check box. The setting applies to both Adobe Acrobat Professional and Standard and Adobe Reader to prevent the system from opening the PDF in a browser format.
This screen shot illustrates how a converted PDF file appears with its signature blocks:
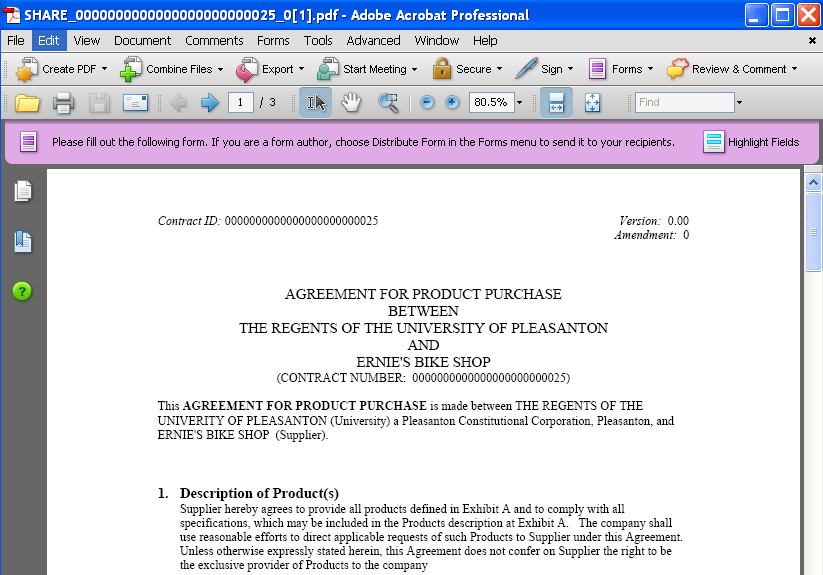
This is the second half of the example.
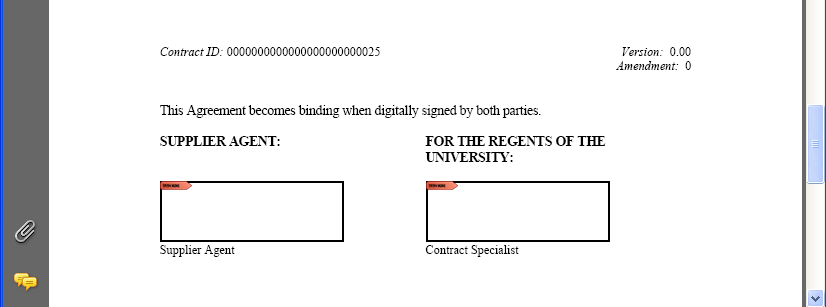
The digital signature blocks appear at the bottom of the page or wherever you add your signature fields. The system applies the visible digital signature to these blocks when the appropriate users sign the document.
Save the file.
Click the Upload Prepared Document button on the Document Management page.
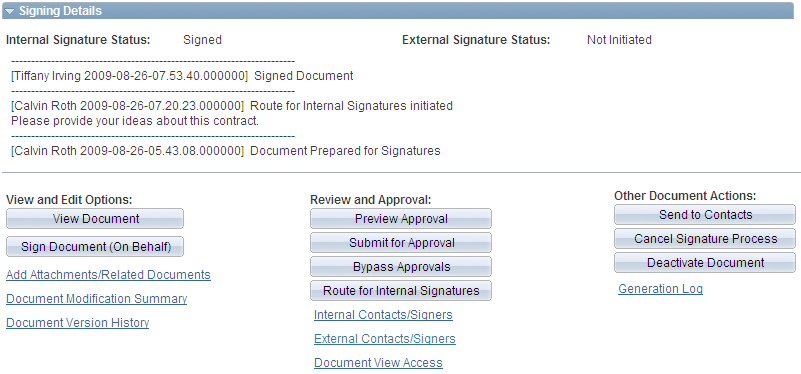
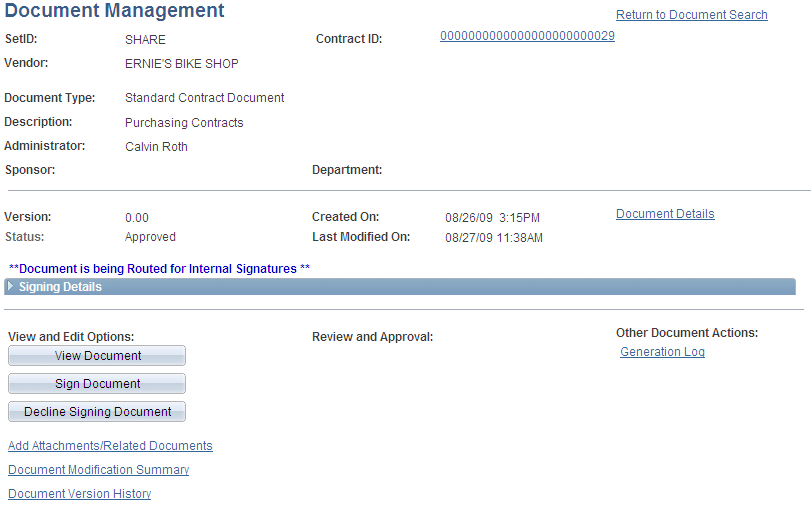
You can also view the document or cancel the signature process after preparing the document and before uploading it. After the document is uploaded, the system updates the document status to Prepared/Awaiting Signatures and provides the signing details for the document along with the options that appear next:
This example illustrates the fields and controls on the Document Management page with signing details.
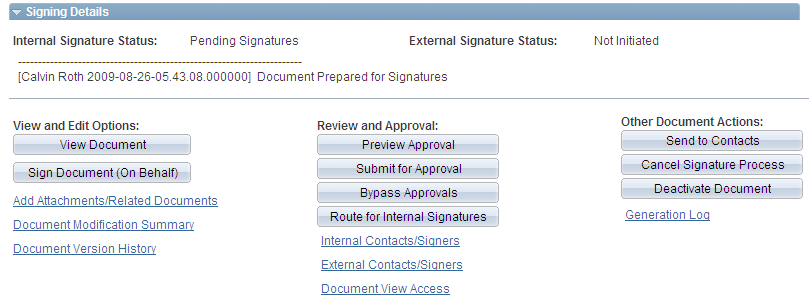
Contract administrators can use the Sign Document (On Behalf) button to access the document and sign it on behalf of another internal user. Click the Route for Internal Signatures button to send the document to internal users who are listed as signers for the document.
Click the Route for Internal Signatures button.
The internal signer accesses the document and applies the digital ID.
This example illustrates the fields and controls on the Adobe PDF signature. You can find definitions for the fields and controls later on this page.
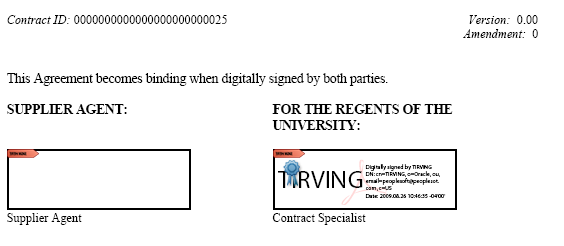
When the last internal signer signs the document, the system updates the internal signature status to Signed as shown in this example:
This example illustrates the fields and controls on the Document Management page with internal signature completed. You can find definitions for the fields and controls later on this page.
Depending on the signature flow, the contact administrator can, for example, send the document for internal approvals or send it for internals signatures before sending it to external users.
The contract administrator routes the document to external signers by clicking the Send to Contacts or Dispatchbutton, depending on where in the life cycle they wish to gather external signatures. .
Select Email and Online Signatures in the Delivery Method field.
This option is intended for use with the supplier portal. The system automatically inserts a URL in the Description field. You use this method to send the document to an external user to sign online. You can also lock the document and route it offline using email and upload it after receiving the signed document.
This example illustrates the fields and controls on the Send to Contacts page with URL for external users. You can find definitions for the fields and controls later on this page.
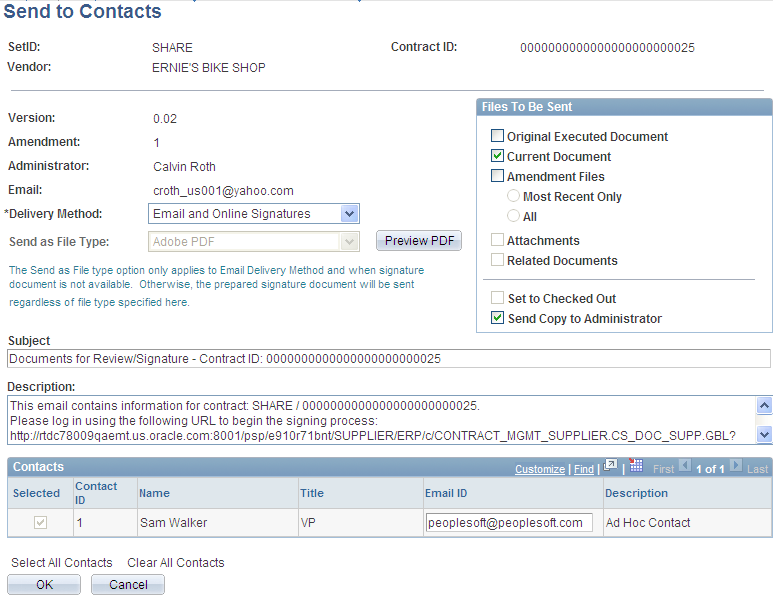
When suppliers receive the email, they can link back to the supplier portal and sign the document.
Click OK.
The system updates the Document Management page with the new signature process update as appears in this example:
This example illustrates the fields and controls on the Document Management page with signing updates. You can find definitions for the fields and controls later on this page.
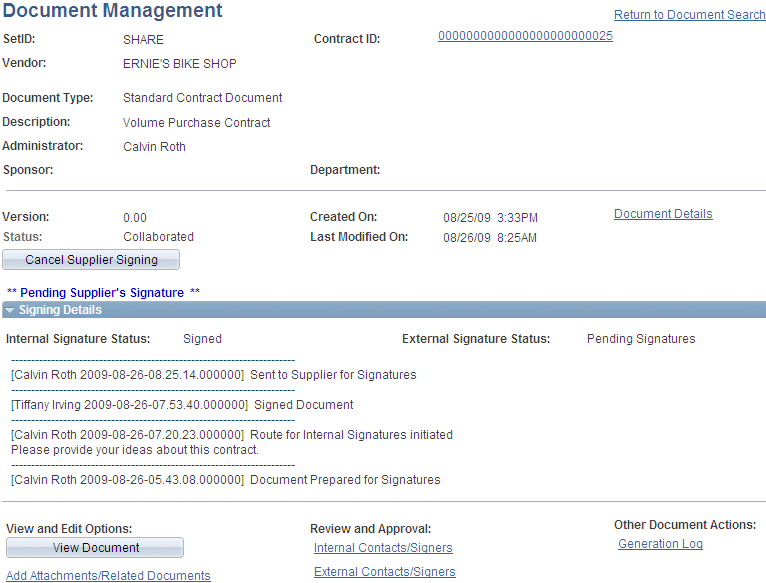
The updated information indicates that the document has been sent to an external user and is pending his signature. To stop the signing process for the supplier, click the Cancel Supplier Signing button.
You can define the level of external user access to executed documents. You use installation options to indicate if the user can view the document online, view only executed versions or all collaborated and executed documents.
After the external user signs and uploads the document, the system updates the document status.
The next example shows that the internal and external signature statues are Signed:
This example illustrates the fields and controls on the Document Management page with signing details. You can find definitions for the fields and controls later on this page.
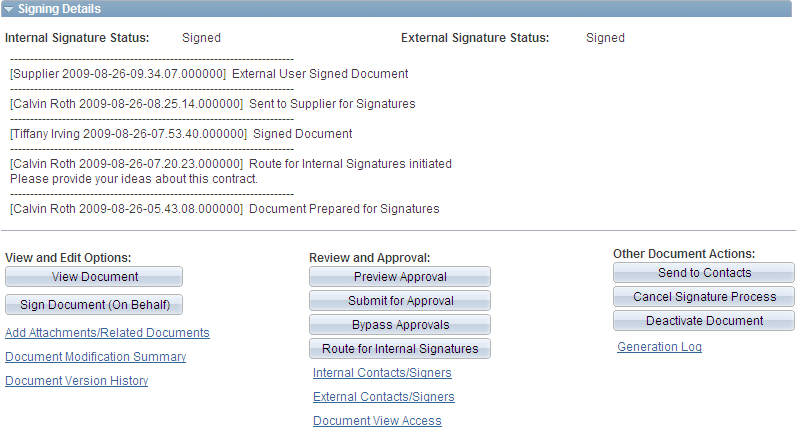
After a contract document is signed by external and internal user, you can continue with any other required actions to complete the document, or if needed, send it to the supplier user again.
Signing Internal Documents Using Digital Signatures from the Document Management Page
Use the Document Management page (CS_DOC_MAINT) to sign internal documents using digital signatures.
Navigation:
Click Worklist on the Home page, select the Sign Review value in the Work List Filters field, and click the document link.
This example illustrates the fields and controls on the Document Management page for internal signers. You can find definitions for the fields and controls later on this page.
The system displays the Document Management page with the document's status and provides a message that indicates the document is being routed for internal signatures. You must have a digital ID established to sign the document. You can establish the ID online using Adobe pages.
See Understanding Digital Signatures.
Use the Signing Details section to view the internal and external signature statuses, view any comments, and view the routing history of the document.
Term |
Definition |
|---|---|
Sign Document |
Click to launch the Microsoft Word .docx or Adobe PDF file and lock the file from any further actions. When the file opens, the system replaces this button with the Upload Signed Document button. |
Decline Signing Document |
Click to decline signing the document. The system displays the launch the Decline Signing Document page where you can enter comments about the action. |
To sign a document:
Click the Sign Document button.
The system opens the digital signature file.
Apply the signature using either the Adobe or Microsoft Word format and save the document.
Click the Upload Signed Document button.
The system checks the document similar to how it runs the check-in process. It updates the document status and provides a date and time stamp for the signer's row in the internal list of signers page. Signers can still view the document and perform tasks that are available on the page.
To cancel all signatures, click the Cancel Signature Process button on the Document Management page. Confirm that you want to cancel the signature process and to enter comments about the cancellation.
To cancel supplier signatures, click the Cancel Supplier Signing button on the Document Management page. This cancels the external signature process.
To cancel internal signatures, click the Stop Internal Signatures button on the Document Management page. This cancels the internal signature process.
To decline to sign a contract document, click the Decline Signing Document button on the Document Management page. You can enter a reason in the comments section.
After setting up digital signatures for the Adobe Sign signature method or the DocuSign signature method, you prepare, route, and sign documents using these steps:
Create supplier contract document.
Click the Prepare and Route for e-Signature button on the Document Management page. This opens the Send Documents for Signing page and enables you to add signers and authentication criteria, route the document, and send for signing.
See:
Specify document recipients, add authentication criteria, and send documents for signing using the Send Documents for Signing page.
Click Send.
The contract document is prepared (signature fields added) and recipients are notified by email. The email includes a hyperlink to access the document.
Adobe Sign has settings for sequential or parallel signing. Signers are notified to sign in the order recipients are entered, or by the Signing Order field in case of sequential order.
Signers access the contract document using a hyperlink provided in the email generated in the previous step. Signers do not need to sign into the PeopleSoft application to access the document and can sign it using their mobile device if they wish.
If authentication criteria was established for a recipient, the recipient is guided to an authentication page after clicking the hyperlink. Recipients must provide the appropriate information to access the document.
If delegation is allowed, the signer will have the option to delegate someone else to sign the document. A new signer is added to the document with “delegate” role, and an email notification will is sent to delegated signer. The sender is notified as well. Either the original signer or delegate signer can sign the document. Once one of them signed the document, signing status for the signer and its delegate is marked as signed.
If the signer selects ‘I will not e-sign,’ the signing process is cancelled. The sender is notified by email and signers can no longer access the document. The signature process is cancelled for the signer and the document status is changed to ‘Aborted’ with the signer status set to ‘Recalled.’
The contract administrator can track the status of documents pending signature using the Electronic Signature Polling page or the Get e-Signature Status field on the Document Management page.
See:
|
Page Name |
Definition Name |
Usage |
|---|---|---|
|
CS_DOC_MAINT |
Maintain documents and prepare and route documents for signing. |
|
|
CS_DOC_INT_CONT_SP |
Maintain internal contacts. |
|
|
CS_CONTACT_SEC |
Maintain external contacts. |
|
|
CS_DOC_DSPTCH_SEC |
Send documents to contacts. |
|
Page Name |
Definition Name |
Usage |
|---|---|---|
|
CS_DOC_ROUTE_SIGN |
Route documents for internal signatures. |
|
|
CS_DOC_PREPSIGN_SP |
Prepare documents for signature. |
Use the Route for Internal Signatures page (CS_DOC_ROUTE_SIGN) to route documents for internal signatures.
Navigation:
Click the Route for Internal Signatures button on the Document Management page.
This example illustrates the fields and controls on the Route for Internal Signature page. You can find definitions for the fields and controls later on this page.
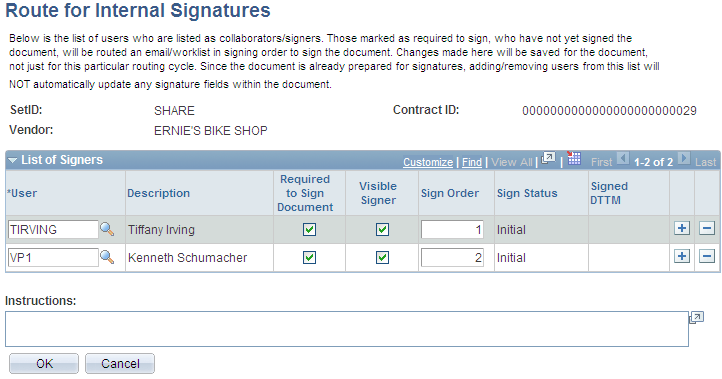
This page displays the internal users to whom the system will route the document for signature. The document is routed based on the sign order. You can add and delete signers. Use the Instructions field to provide additional signing information.
Field or Control |
Description |
|---|---|
User |
Select a user to include for the internal signature routing. |
Required to Sign Document |
Select to indicate that this internal user is required to sign the document. When you select this check box, the Visible Signer and Sign Order fields become available for entry. This field controls the visibility of the Sign Document button when the contract is routed to the user. When a user is not required to sign the document, then the user is considered a collaborator or viewer for the document and is not provided signing authority for the document. The user will not see the Sign button or be included in signature routings. |
Visible Signer |
Select to indicate that this internal user's signature will be visible on the contract document. The field is available if the Required to Sign Document check box is selected. Visible signers are those signers whose signature labels appear on a contract document. Unlike visible signatures, you can also set up a signer with an invisible signature. You can only see an invisible signature in the signature properties of the document, and not in the document itself. |
Sign Order |
Select to indicate that this internal user's signature will be visible on the contract document. The field is available if the Required to Sign Document check box is selected. If a user is not a visible signer |
Signed Status |
Displays the status related to whether a signer has signed a document. Values include: Initial Signed Pending Signature Replaced by Alternate Signed by Proxy Marked as signed Declined |
Signed DTTM (signed date and time) |
Displays when an internal signer has signed the document and indicates when the signer completed the document. |
Use the Prepare Document for Signatures page (CS_DOC_PREPSIGN_SP) to preparing documents for signature.
Navigation:
Click the Prepare Document for Signing button on the Document Management page.
This page provides you a chance to verify the list of internal and external signers before dispatching the document. You can review the signers and make sure that the list contains the correct people who need to sign the document. Internal signers must be in this to have access to the document and see the correct buttons. If you want to change the list, use the Internal Contacts List page or External Contacts page to make the changes.
The display of this button on the Document Management page also depends on the document type settings. When internal signatures have been enabled, you can define when a document should be ready for signing, such as prior to, during, or after approvals.
Click OK to convert the document to its proper format, either Microsoft Word or Adobe PDF. If you are preparing a PDF, before others can sign the document, you need to enable the usage rights for Adobe Reader. You can enable this in the document that was launched, save the document and upload it back into the system. The document will remain checked out in your name until you upload the prepared document.
Field or Control |
Description |
|---|---|
User |
Displays the user ID for an internal user. You use the Internal Contacts/Signers link on the Document Management page to define internal users collaboration and signing settings. The values you define on the Signing Settings tab appear on this page. |
Signing Title |
This field is optional and displays the title that was defined on the Internal Contacts List page for this user. You use the Signing Settings tab to define the signing title. The field is provided if you intend to bind it into the authored document. |
Visible Signer |
Displays as selected when this signer has been defined as a visible contract document signer on the Internal Contacts List page. Visible signatures appear on a contract document as opposed to invisible signers, who do not appear in the formal document. |
Sign Order |
Displays the sequence in which this user will sign the contract document. The system determines the signing order based on the order that you enter on the Internal Contacts List page. When routing the document manually for signatures outside of workflow approval, sign order values are used for sequential routing. |
External List of Signers
Use this grid box to view external signers and their attributes that have been defined on the External Contacts page. The values that you define on that page appear in this grid box.
|
Page Name |
Definition Name |
Usage |
|---|---|---|
|
CS_ESIGN_SEND |
Specify document recipients, authenticate identity, and send documents for signing. |
|
|
CS_ESIGN_SYNC |
Obtain the status of documents pending signature. |
|
|
CS_ESIGN_SEND |
Modify recipient information after a document has been submitted for signatures |
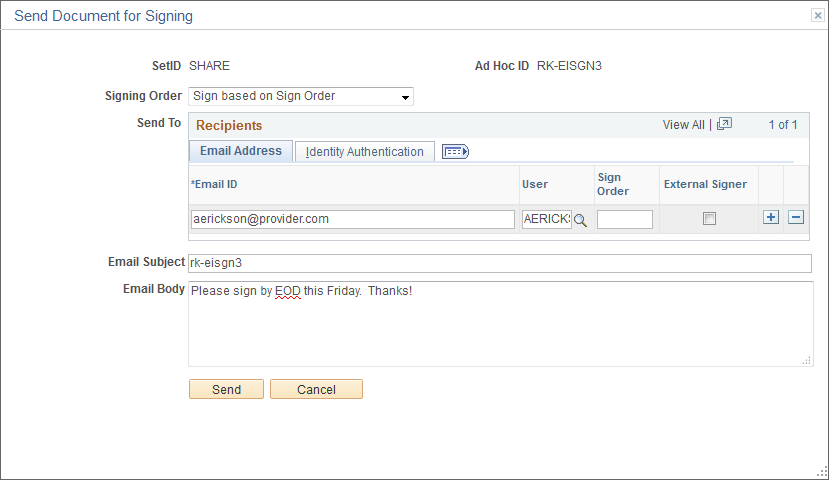
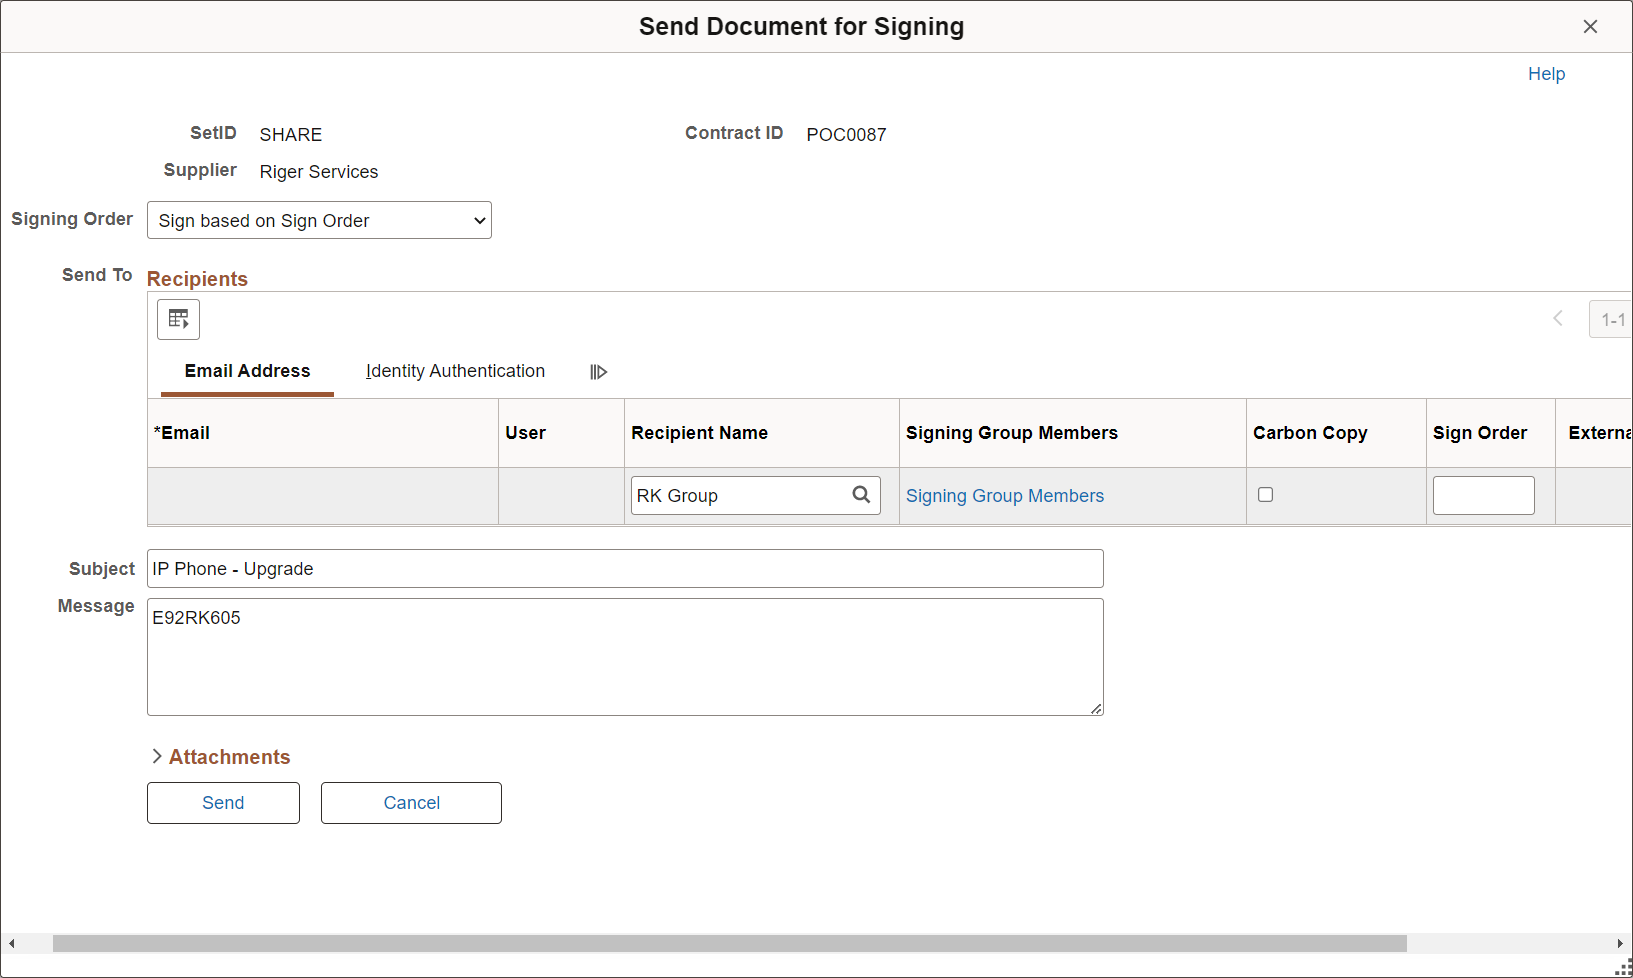
Use the Send Document for Signing page (CS_ESIGN_SEND) to specify document recipients, authenticate identity, and send documents for signing.
Navigation:
Click the Prepare and Route for e-Signature button.
Send Document for Signing page, Adobe Sign (1 of 2)
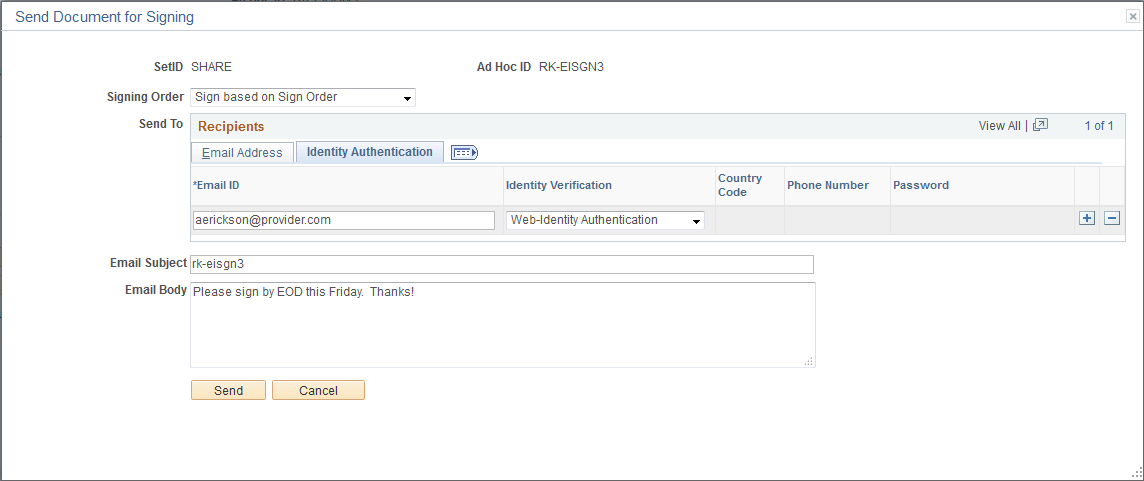
Send Document for Signing page, Adobe Sign (2 of 2)
Send Document for Signing page - DocuSign (1 of 2)
Field or Control |
Description |
|---|---|
Signing Order |
Select a signing order for the document recipients:
|
|
Enter an email address for the recipient. |
|
User |
Specify a signer for the document by entering their user ID. This field is optional. |
|
Recipient Name (DocuSign only) |
Specify a name for document recipient. This can be used for an individual recipient or signer, or signing group if it is set up in DocuSign. The prompt button displays a list of signing groups, if available. This field is required. If user ID is specified and you do not provide a value for Recipient Name, this field defaults to the name associated with user ID. |
|
Signing Group Members |
Select the Signing Group Members link to access the Signing Group Users page and view individual users associated with the signing group. Signing groups are defined in the DocuSign application. |
Carbon Copy (DocuSign signature method only) |
Select this option to send a copy of the document to the recipient. If this option is selected for a recipient, they do not sign the document. |
Sign Order |
Enter a numerical value representing the signing order for the recipient. If you selected ‘Sign based on sign order’ for the Signing Order field, this field is mandatory. |
External Signer |
Select this option to indicate the signer is external to your organization. If you select this option, the signer information is added to the External Contacts page. |
Identity Verification(Adobe Sign signature method only) |
Select a method to authenticate a signer’s identity. The authentication method is sent with the document when it is routed to Adobe Sign from PeopleSoft. The following authentication methods are available:
|
User Authentication(DocuSign signature method only) |
Select a method to authenticate a signer’s identity. The authentication method is sent with the document when it is routed to DocuSign from PeopleSoft. The following authentication methods are available:
|
Attachments |
Select the documents to be sent along with the contract document for signing. Note: Adobe Sign only accepts PDF, DOC, TXT and JPG file types as attachment. Documents of other file types is converted into a supported file format before it can be sent to Adobe Sign for signature. Multiple files can be attached. |
Send |
Select to send the documents to the reviewer. The reviewer receives an email with the selected attachments. Note: When you click the Review Documents link in the email, the SOAP API displays the contract and additional documents, whereas the REST API displays only the contract document. The additional documents are appended at the end of the contract document. Click the links to view them. |
Use the Electronic Signature Polling page (CS_ESIGN_SYNC) to obtain the status of documents pending signature.
Navigation:
Electronic Signature Polling page

Use the Electronic Signature Polling run control page to obtain the status of documents pending signature in order to update the document status in Supplier Contracts. You can search by a number of parameters, including Adhoc ID, Document Type, and Document Status.
Once the document has completed the signature process, the signed document will be retrieved back into Supplier Contracts from Adobe Sign or DocuSign.
PeopleSoft signature status is tracked at the document level and by signer.
Use the Edit Recipients page (CS_ESIGN_SEND) to modify recipient information after a document has been submitted to DocuSign for signatures.
Navigation:
Click the Edit Recipients button on the Document Management page.
Edit Recipients page (1 of 2)

Edit Recipients page (2 of 2)
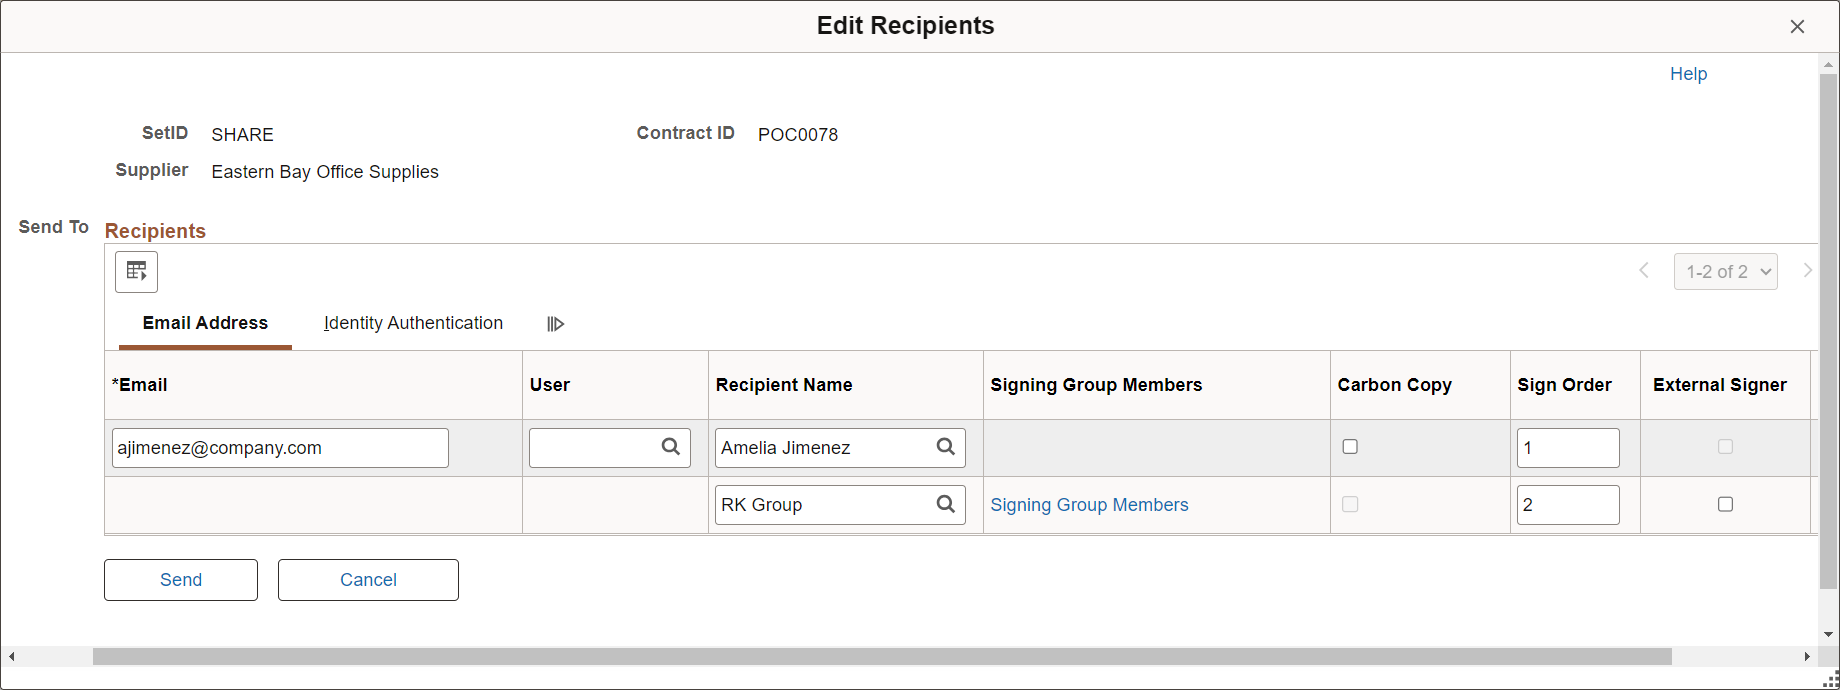
Use the Edit Recipients page to change the name or email address of a recipient, add or delete a signer, or change signing order.
You can specify a DocuSign signing group with multiple recipients using the Recipient Name field. You define Signing groups and associated users in the DocuSign account.
Use the Signing Group Members link to access the Signing Group Users page and view individual users associated with the signing group.
If a recipient has signed the document, you cannot modify their information.
See the Send Document for Signing Page for field definitions.
|
Field or Control |
Description |
|---|---|
|
Send |
Click to confirm your changes. If you modify an email address or delete a signer, the system revokes their access to the document and sends a confirmation email to the original address (if it is their turn to sign the document). For new recipients, the system assigns the users a signing role and sends a confirmation email (if it is their turn to sign the document). |