Managing Nodes
Cloud Manager supports on-demand scaling in OCI, which is the ability to scale up or down (horizontal scaling) by adding or removing nodes to an active running PeopleSoft environment as necessary. Using Manage Nodes, you can:
Add additional middle tiers to a running database or middle tier. (Scale up)
Middle tier nodes are added one at a time.
Multiple middle tiers (Application Server, Web Server, Process Scheduler Server and Windows) are supported.
Note: Add or remove node is not supported for full tier environment.
Remove middle tier node from an environment. (Scale down)
Add PeopleSoft Client.
Note: Multiple PeopleSoft Clients are supported.
Add a Search Stack node or share a search cluster.
Adding Search Stack node to an environment requires an IB domain that was configured in the environment by Cloud Manager. If not, the Search Stack option will not be available when adding a node through Manage Node option. In such scenario, add a new Middle Tier node with IB enabled and then add the Search Stack node.For information on using the Manage Node page for search clusters, see Sharing a Search Cluster Across Multiple Environments and Managing Search Clusters.
Search Stack supports two nodes:
If Elasticsearch (or OpenSearch) is already running in a node, Kibana (or OpenSearch Dashboards) cannot be installed in that node.
To install Kibana (or OpenSearch Dashboards), Search Stack is required. So the user has to provision Search Stack and Kibana (or OpenSearch Dashboards) in a new node.
Stop a node.
Start a node.
Adding Nodes
To add a node to a running environment:
Click the Related Actions button corresponding to the environment.
Select Manage Node.
Expand the Select Actions section if necessary, and select Add action.
Select Type.
Select the Operating System.
If the type is Middle Tier then there is an option to select an existing MT node from which configuration/custom configuration can be copied for the node being added.
Enter the required credentials and settings.
Click Submit and confirm.
Scale Up process status are:
InitiatingScaleup
ScaleUpInProgress
Running
ScaleupFailed
Navigation:
Click the Related Actions button corresponding to the environment. Select Manage Node. The Manage Node page is displayed.
This example illustrates the fields and controls on the Manage Node page for adding a Windows middle tier node.
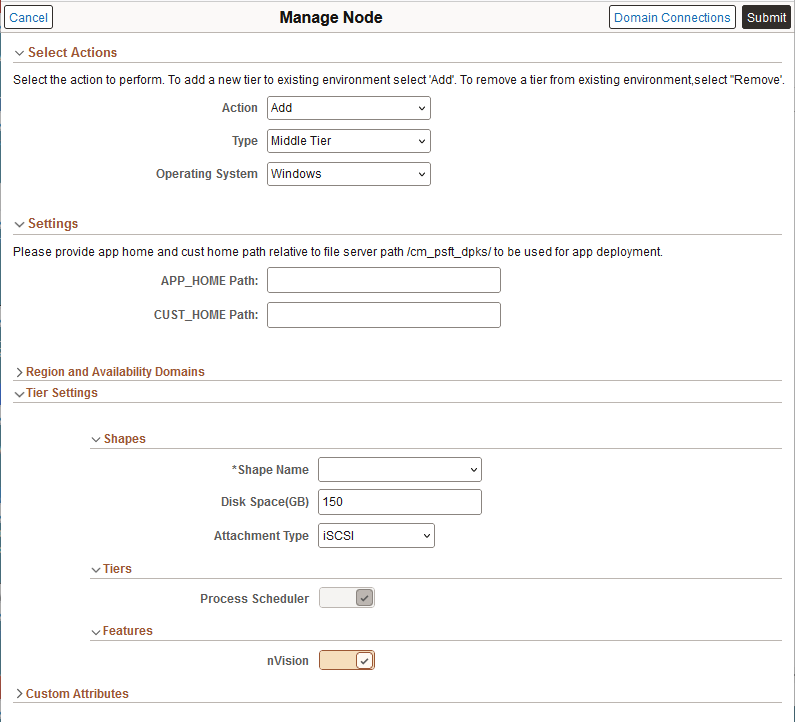
Note: Windows Middle Tier node is only supported for PeopleTools 8.57 and above. It is not supported on PeopleTools 8.55 or 8.56 environments.
The APP_HOME (Application home, or app home) and CUST_HOME (custom home, or cust home) paths are not mandatory when adding a Windows middle tier. However if you want to copy contents from the app home and/or cust home to the Windows middle tier perform the following:
Create a directory inside file server mount in the Cloud Manager. For example:
Create a directory ps_app_home_win inside /cm_psft_dpks.
Place the app_home contents as a zip file inside this directory.
Create a directory ps_cust_home_win inside /cm_psft_dpks.
Place the cust_home contents as a zip file inside this directory
Provide the path to app home (APP_HOME) and/or cust home (CUST_HOME). For example: ps_app_home_win and ps_cust_home_win.
When the Windows middle tier node is provisioned, the contents in the zip file will be extracted to the VM instance.
See Adding Windows Middle Tier Nodes.
When you add a node without copying configuration from an existing node, Cloud Manager fetches passwords from the password group that is mapped to the environment. Such auto-filled passwords cannot be edited from Cloud Manager.
Adding a Search Stack Node
This is an example of adding a search stack node to an environment.
This example illustrates the fields and controls on the Manage Node page for adding a Search Stack node.

You must select at least one feature. Elasticsearch and Kibana (or OpenSearch and OpenSearch Dashboards) can be added in the same node.
For information on adding a node for an environment with a search cluster, see Managing Search Clusters.
Refer to the section on Creating Topology for more information. See Adding Search Stack Nodes.
Adding a Middle Tier Node
This is an example of adding a middle tier node to an environment.
This example illustrates the fields and controls on the Manage Node page to add a Linux middle tier node.

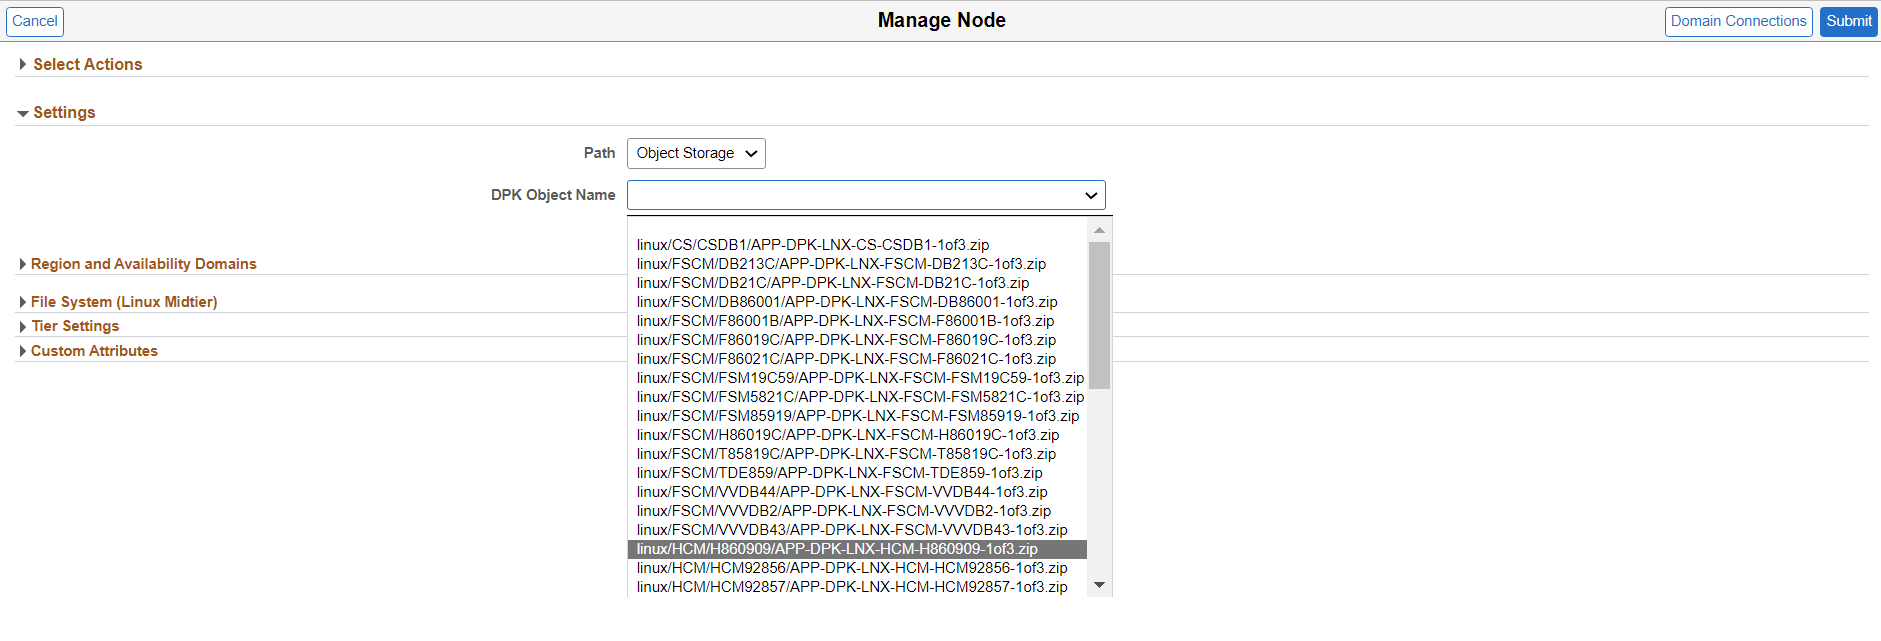
In the Settings section, select the location of the Application DPK.
Object Store
When you select Object Store, the DPK Object Name drop down list will display all the application DPK files in Object Store.
This example illustrates the fields and controls on the Manage Node page where the Application DPK location is Object Store.
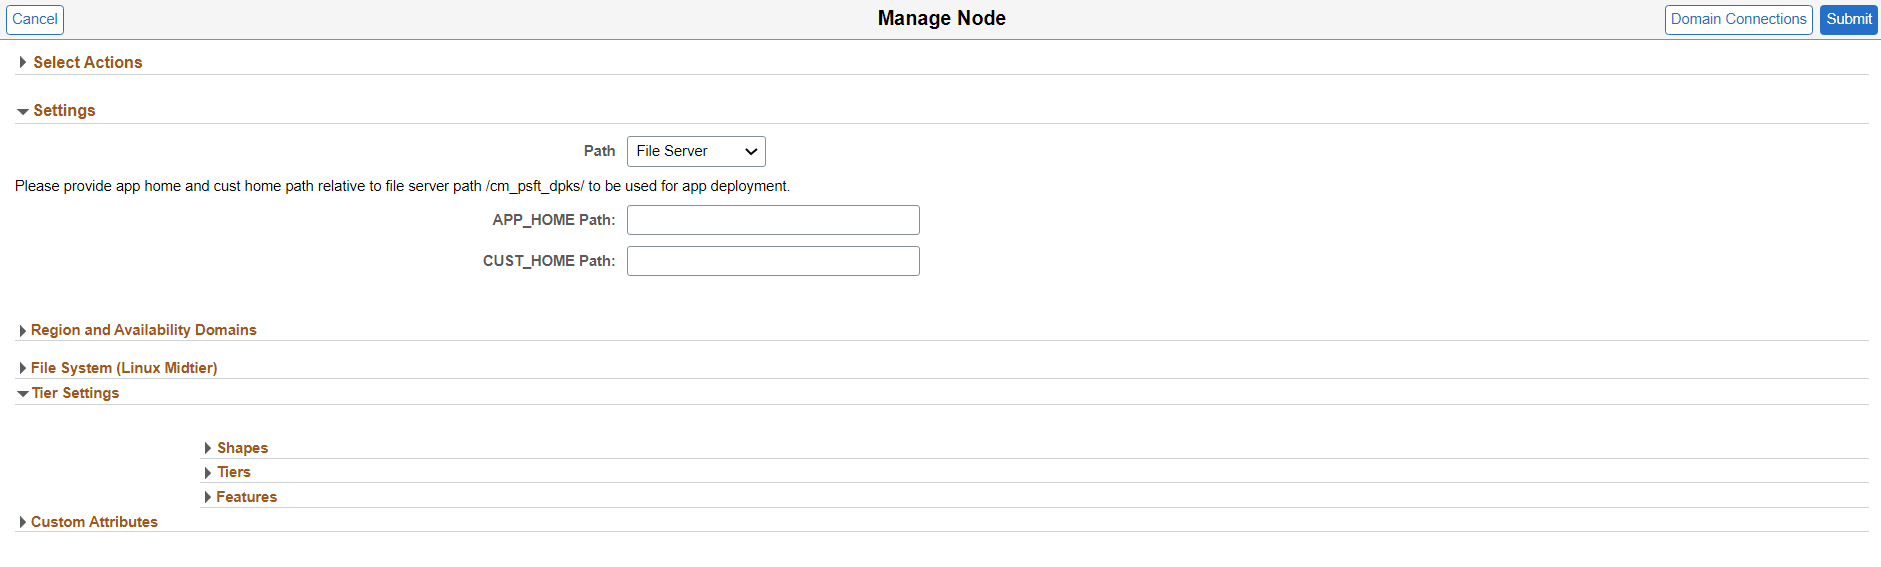
File Server
If you manually copied app home and cust home to the file server provide the relative path to the file server.
This example illustrates the fields and controls on the Manage Node page where the Application DPK location is File Server.
Adding Additional Middle Tier Nodes
This example illustrates the fields and controls on the Manage Node page for adding an additional Linux middle tier node.

Expand the sections.
|
Field or Control |
Description |
|---|---|
|
Action |
Available actions are:
|
|
Type |
Available Types are:
Note: The options are enabled based on which node is already available in the environment. |
|
Operating System |
Select either Linux or Windows. |
|
Domain Connections |
Configure connections between application server domains and web server domains. See Configuring Domain Connections section in Creating An Environment. |
|
Copy From |
If a middle tier exists for the environment, select the middle tier node from the drop down list. The configuration or custom configuration will be retrieved. |
|
Use Clone |
Enable this option to reuse the values for Regions and Availability Domains, Tier Settings, and Custom Attributes from the source node that is cloned. If you do not enable this option, you must configure the settings. |
|
Regions and Availability Domains |
Defaults to the Regions and Availability settings of the environment to which new node is being added. These fields are read only. |
|
Tier Settings |
Enter the required Shapes and Tiers. |
|
Custom Attributes |
Enter Credentials, General Settings, Network Settings, Network Security Group Settings, Fault Domain Settings and Domain Settings. Network Settings for compartment and virtual cloud network are read only. Select the subnet for the primary instance. |
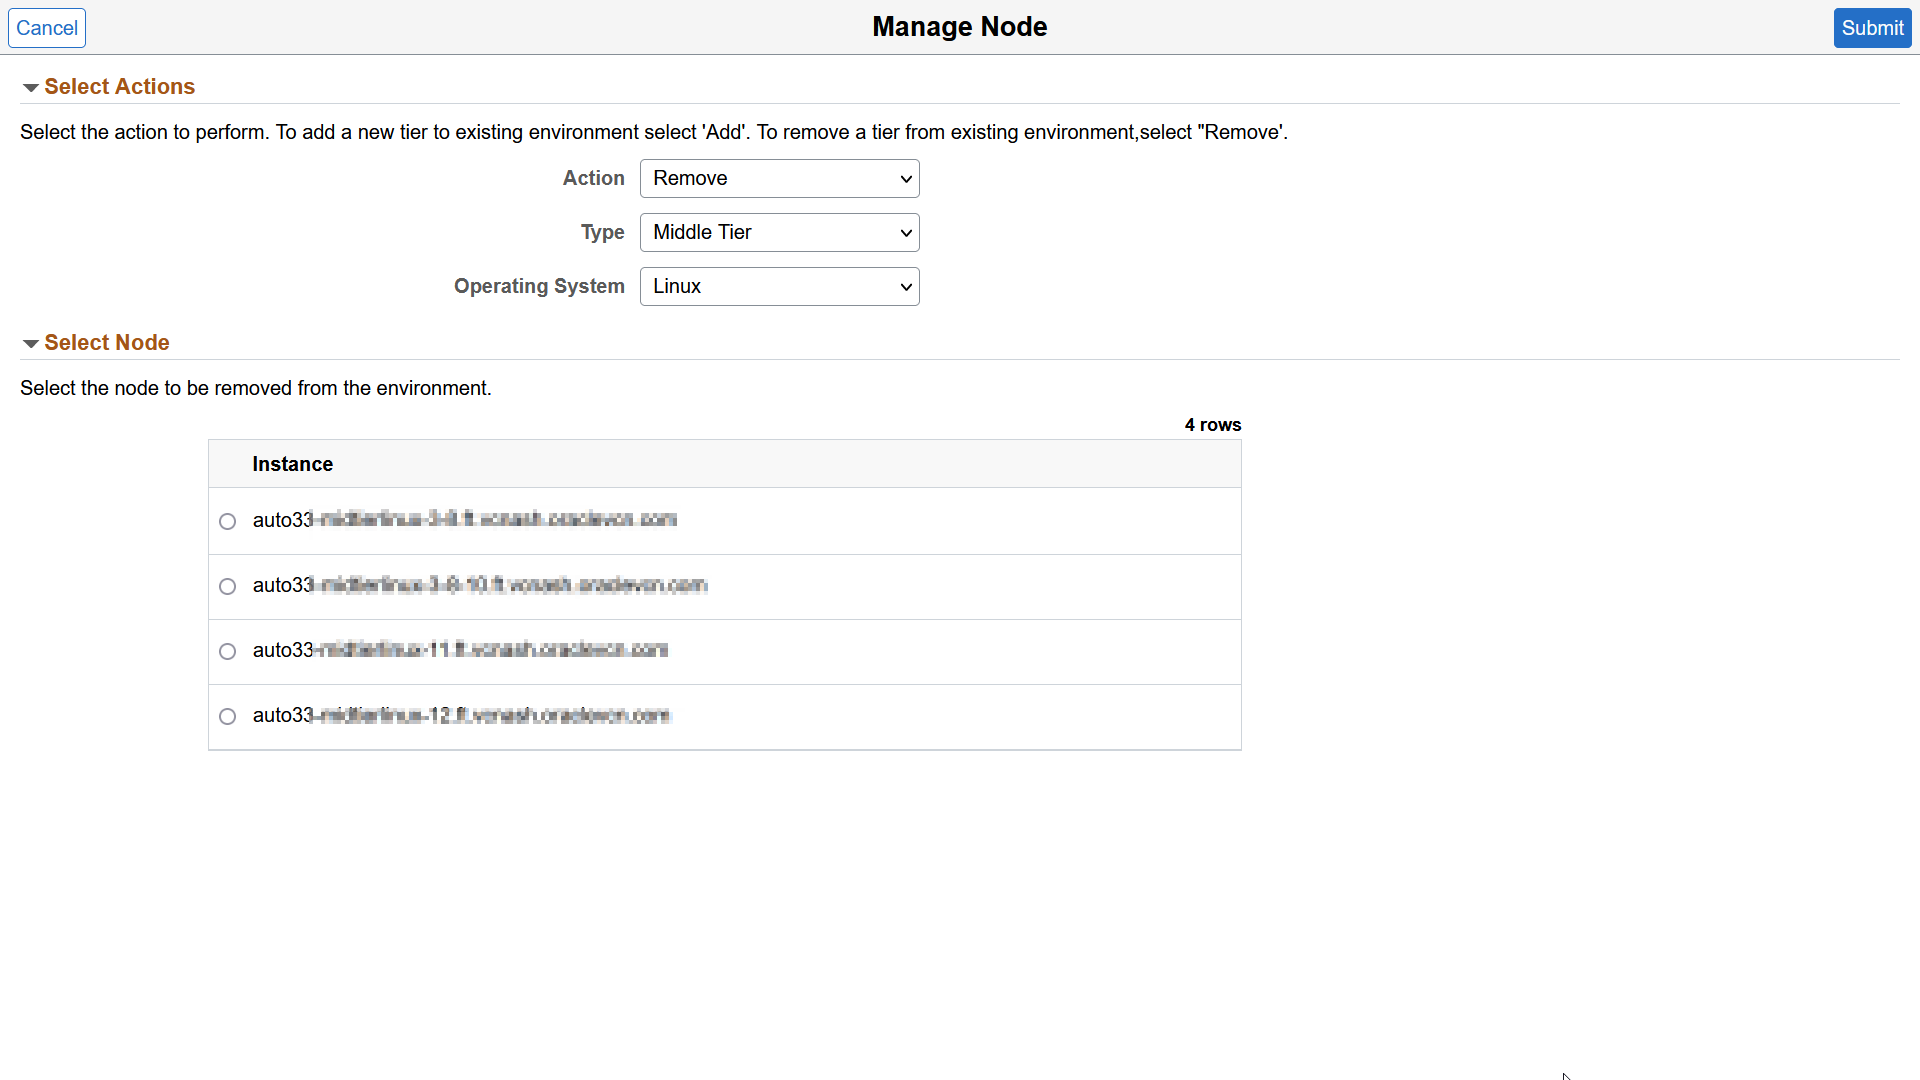
Removing Nodes
To remove a node:
Click the Related Actions button corresponding to the environment.
Select Manage Node.
Select Remove action.
Select Type.
Available Nodes will be displayed.
Note: Database node can not be deleted.
Select the node to remove.
Click Submit and confirm.
This example illustrates the fields and controls on the Manage Node page for removing a node.
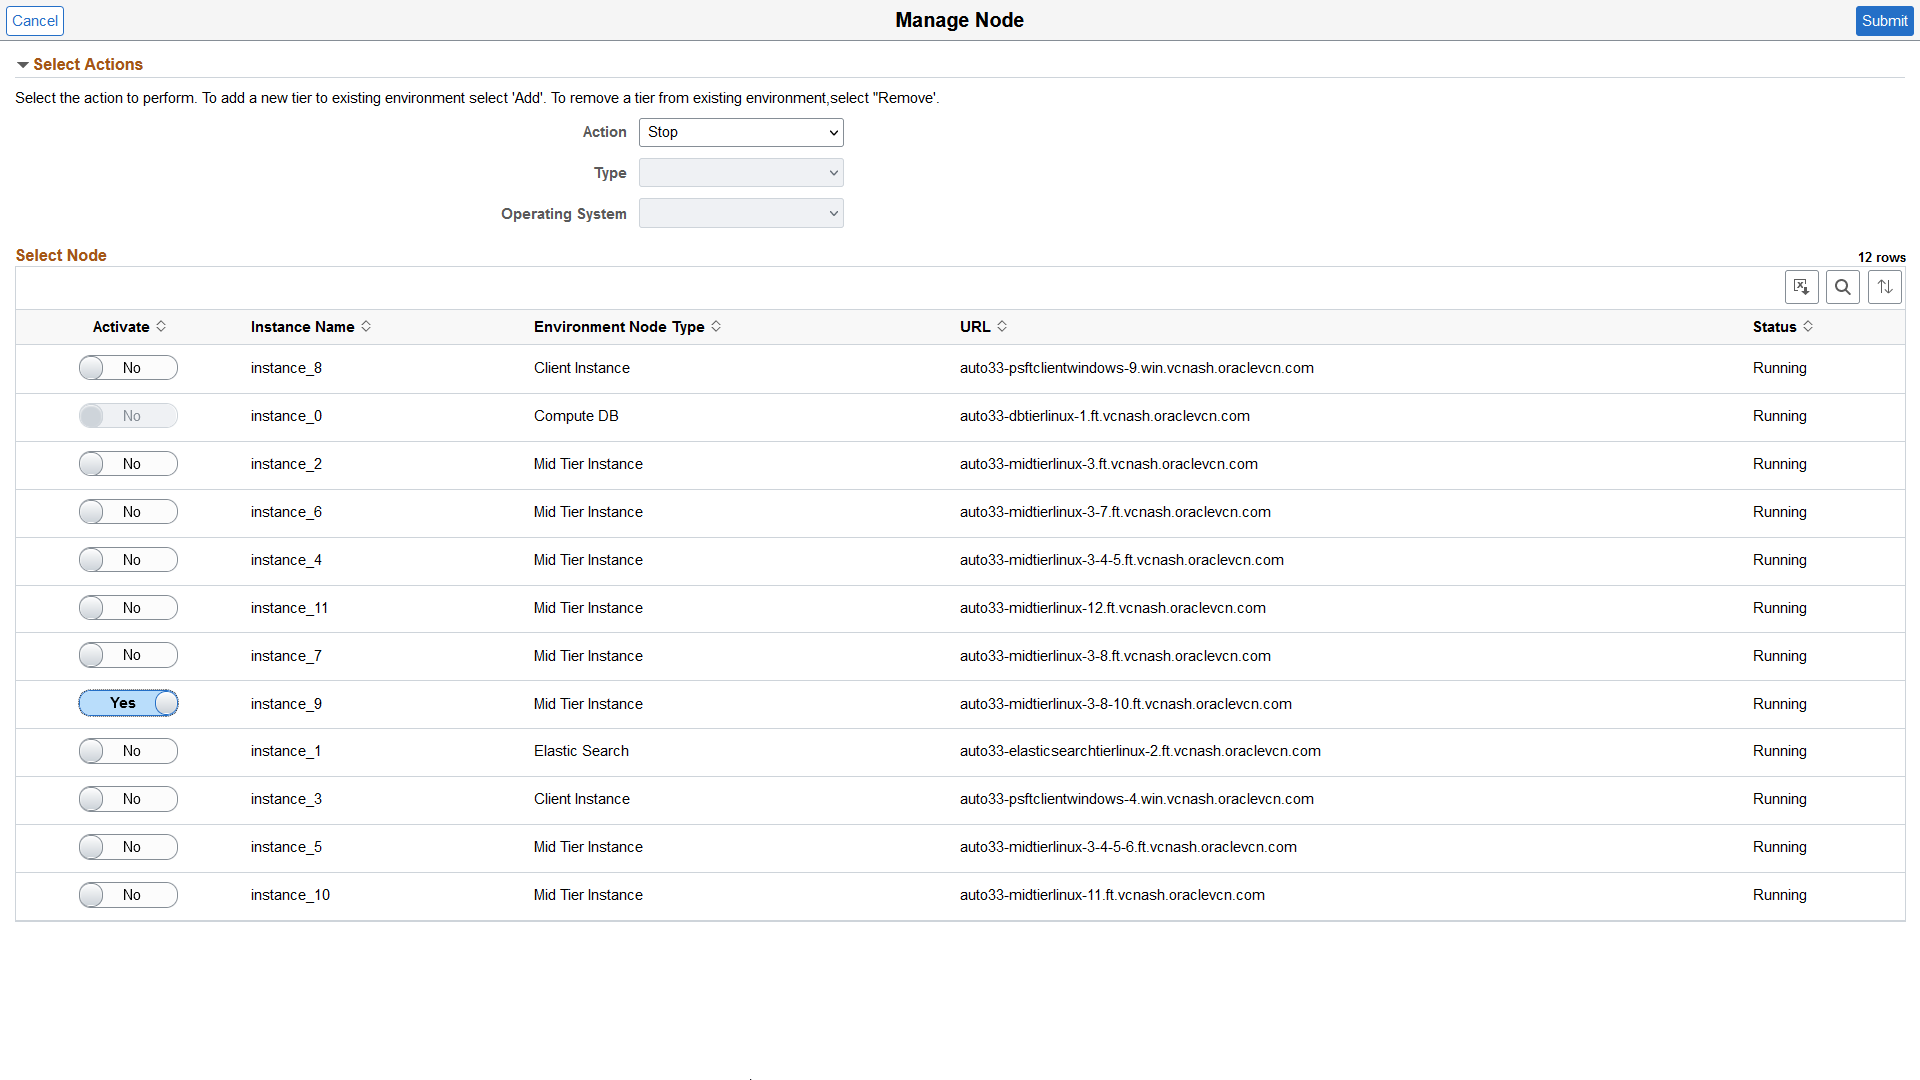
Stopping Nodes
To stop a node:
Click the Related Actions button corresponding to the environment.
Select Manage Node.
Select Stop action.
Available Nodes will be displayed.
Note: Database node can not be stopped.
Select the node or nodes to stop.
Click Submit.
This example illustrates the Manage Node page to stop a node.
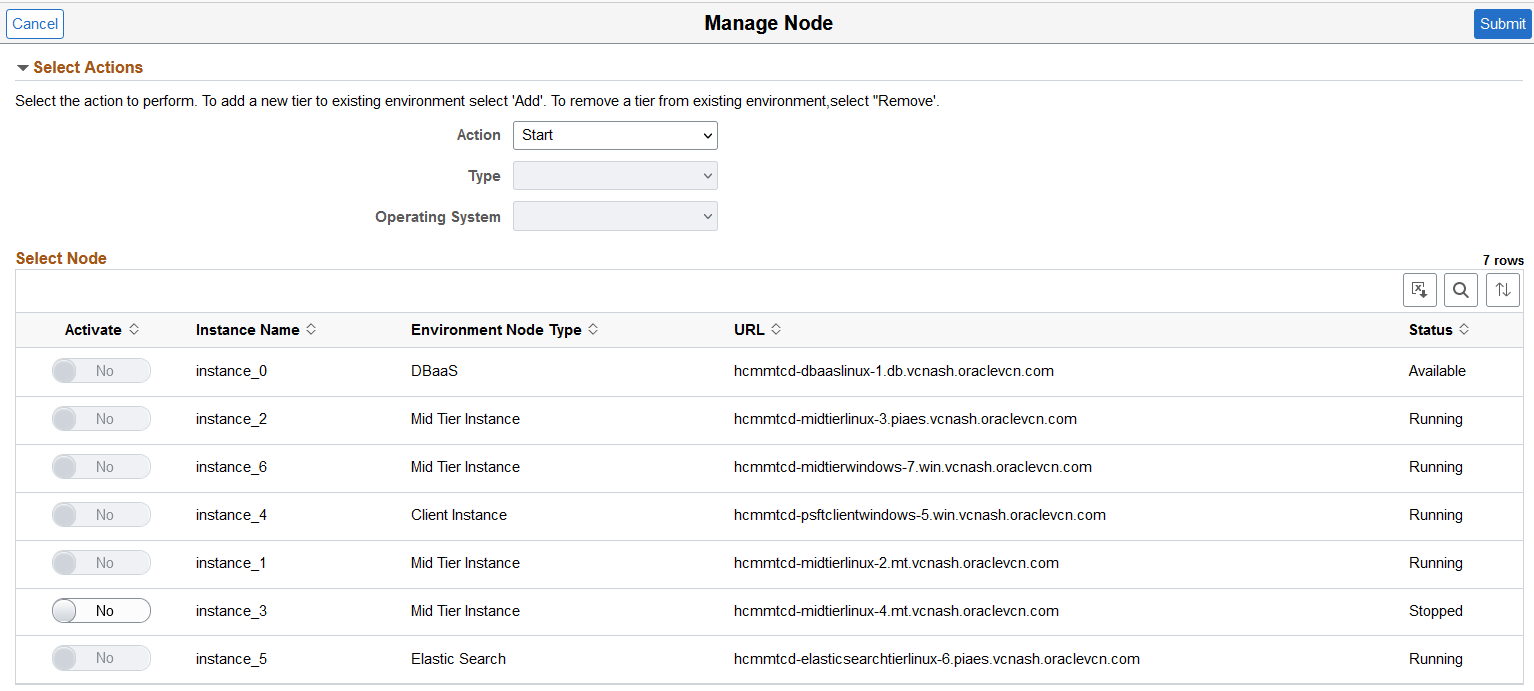
Starting Nodes
To start a node:
Click the Related Actions button corresponding to the environment.
Select Manage Node.
Select Start action.
The Activate toggle is available for any nodes in a stopped status.
Select the node or nodes to start.
Click Submit.
This example illustrates the Manage Node page to start a node.