Additional Configuration Tasks for All Infolets
This topic summarizes some additional configuration tasks that apply for all infolets. This topic is part of Configuring Data Visualization Components.
You must consider the following details about configuring dashboards to display any type of infolets:
-
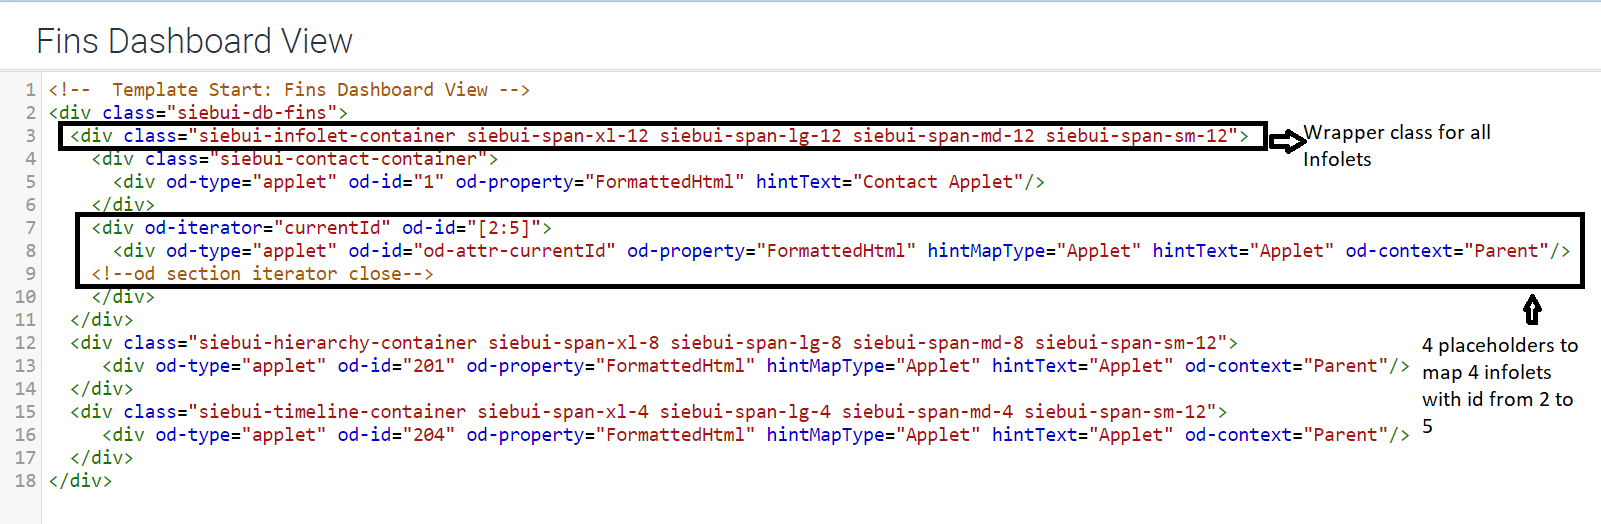
Mapping infolets to a view. The template file for the view on which infolets are to be displayed must have placeholders for each infolet. As shown in the example for Siebel Financial Services dashboard, the HTML code must be updated as follows:
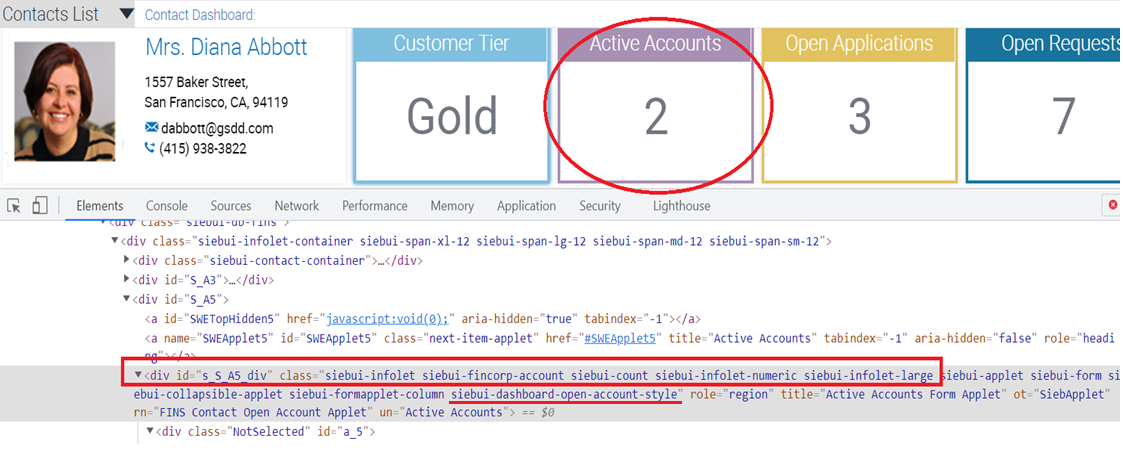
- Apply the framework div class siebui-infolet-container in the view template file.
For example, the wrapper class for all infolets, highlighted in the following
image, is as follows:
<div class="siebui-infolet-container siebbui-span-x1-12 siebui-span-lg-12 siebui-span-md-12 siebui-span-sm-12"> - Add placeholders for the required number of infolets. For example, 4 placeholders
to map 4 infolets with id from 2 to 5, highlighted in the following image, is as
follows:
<div od-iterator="currentId" od-id="[2:5]">
   <div od-type="applet" od-id="od-attr-currentId" od-property="FormattedHtml"
     hintMapType="Applet" hintText="Applet" od-context="Parent"/>>
<!--od section interator close->
- Apply the framework div class siebui-infolet-container in the view template file.
For example, the wrapper class for all infolets, highlighted in the following
image, is as follows:
-
Configuring view web template items for infolets. View web template items used to display infolets must use the correct applet mode for the mapped applet (infolet) to be displayed. The correct mode is shown for the applet web template in each of the infolet configuration topics.
-
View template items for infolets displaying a single field value or an aggregate value are mapped using Base mode.
-
View template items for form infolets and list infolets are mapped using Edit List mode.
The four infolets that are shown in the sample FINS Dashboard view are mapped with item identifiers 2, 3, 4, and 5, respectively.
View Web Template Item Applet Name Infolet Type Applet Mode Item Identifier 2
FINS Contact Information Applet
Form Infolet with 3 field values
Edit List
Item Identifier 3
FINS Contact Open Account Applet
Infolet showing Aggregation
Base
Item Identifier 4
FINS Contact Open Request Applet
Infolet showing Aggregation
Base
Item Identifier 5
FINS Contact Offers Applet
Infolet showing list of 3 records
Edit List
-
-
Configuring custom CSS style class for infolets. You can override all styles for an infolet based on the CSS class that is applied by the framework based on the entity to which it is mapped.
If the infolet is based on the Contact business component, then the server framework injects a class by name siebui-contact (siebui-<BC Name>). The server framework also takes care of any special characters in the business component name. The following are the some of the rules for converting the business component name to the CSS class name:
-
If the business component name has a space or a special character, then it is converted to "-" (dash).
-
If there are multiple special characters or spaces, one after the other, then all special characters and spaces are removed and only a single dash is substituted.
-
The entire name is converted to lower-case letters.
For example, assume a business component named Comm Package Item.Sequence Number (Sequence). The CSS styling implementation for this business component can be done as follows:
&.siebui-comm-package-item-sequence-number-sequence- { border: 5px solid @opportunity-color; .siebui-applet-header { background-color: #35ADC8; } } -
-
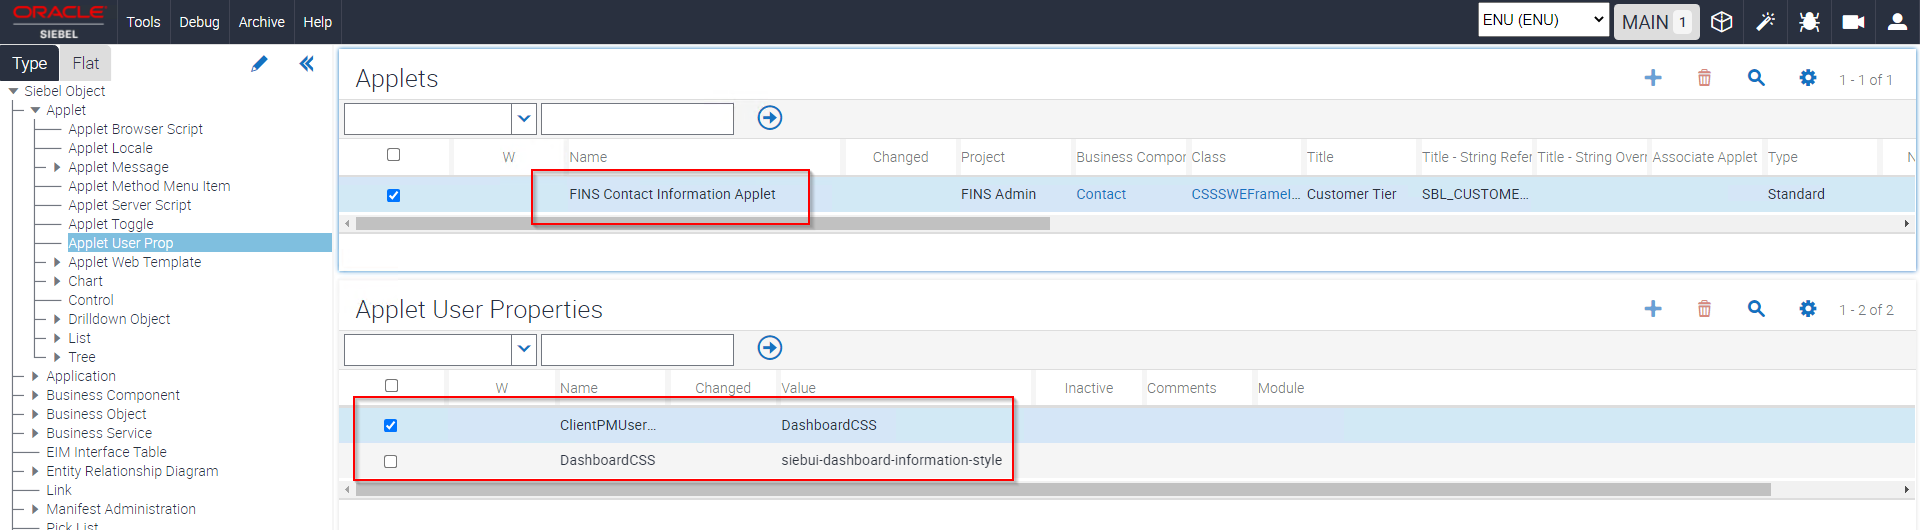
Adding a new CSS class through configuration. If two infolets are based on the same business component, then you can apply or override the styling on the applets by providing a new CSS class in an applet user property. For example, the following applet user properties must be configured for the infolet applet. This configuration is common for any type of infolet.
On a newly created applet, navigate to Applet User Prop. Create the following new records with the respective CSS class.
Name Value ClientPMUserProp
DashboardCSS
DashboardCSS
<Custom CSS class to be added>
The examples shown in the following images highlight the configuration required for adding a new CSS class (2).
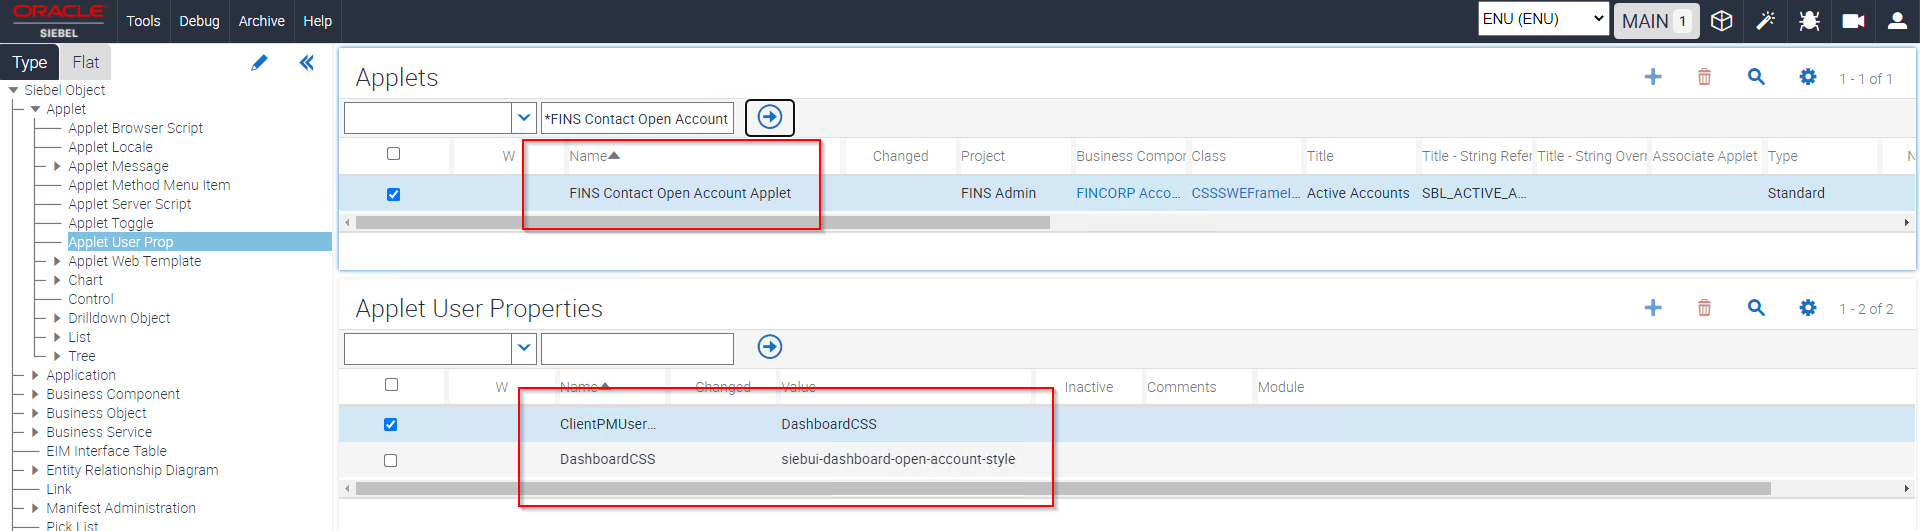
The following image shows that the new CSS class (2) was added on top of the existing style class.