Adding Notes and Attachments
This topic provides an overview of notes and attachments and discusses how to add notes and attachments to a case.
|
Page Name |
Definition Name |
Usage |
|---|---|---|
|
RC_CASE_NOTE |
Track notes and attachments that are related to cases. |
Recording notes and attaching files to those notes is often essential to a user's work. Notes are the primary method that is used to track case research and communications. If you exchange files with the caller, you need to associate those files with the case.
PeopleSoft CRM provides a standard interface for working with notes and attachments across all the components that require this functionality. On the Case page, you can use text trays and quick keys to auto-fill static and dynamic data to create notes about a case. The Notes page is enabled when delivered.
Note: Once a case is closed, you can add a note on the Notes page by clicking the Add Note button or on the Summary page by clicking the Add Note or Attachment button. You cannot enter a note on the Case page in the Add a Note section.
Adding Case Notes for Inbound and Outbound Email
If the ERMS application is licensed and installed, you can set up the system to automatically add notes to cases when inbound email are received and outbound email are sent for them. When the Add every notification as Note to the Associated Case option is selected, the system adds a note to the case for each email it receives and delivers using the information from the email, as described in this table:
|
Case Note Field Name |
Field Value |
|---|---|
|
Subject |
<Email subject> |
|
Details |
<Email body> |
|
Visibility |
All |
|
Note Origin |
Inbound, Outbound, Outbound AAF, Outbound Solution, or Outbound Notes |
|
Note Type |
Notification |
|
Date Added |
<Date and time of when the note was created> |
|
Added By |
|
|
Customer |
For inbound email: <customer who sent the email> For outbound email: <blank> |
|
Contact |
|
|
Employee |
|
Here are a list of scenarios where the system adds a case note when an email is received or sent from a case:
When an agent creates a case from an inbound email on the Recent Activities tab of the email workspace.
A case note for the inbound email is added to the new case.
When a case is created automatically from an inbound email (based on a setup option).
A case note for the inbound email is added to the new case.
When an agent associates an existing case to an inbound email from the email workspace.
A case note for the inbound email is added to the existing case.
When an agent sends an email response for an inbound email on the email workspace and the inbound email is associated with a case.
A case note for the outbound email response is added to the case.
When an agent sends an email response for an inbound email from a case.
A case note for the outbound email is added to the case.
When an agent sends an outbound email (not a response) from a case.
A case note for the outbound email is added to the case.
When a customer sends an email response (inbound email) for an agent's outbound email that is associated with a case.
A case note for the inbound email is added to the case.
When an agent sends one or more solutions by email from a case.
A case note for the outbound email is added to the case.
When an agent sends one or more notes by email from a case.
A case note for the outbound email is added to the case.
When an AAF policy sends an outbound email from a case based on a triggering event.
A case note for the outbound email is added to the case.
When an agent sends a reminder using the Set Reminder feature from a case.
A case note for the outbound reminder is added to the case.
Use the Notes page (RC_CASE_NOTE) to track notes and attachments that are related to cases.
Navigation
Image: Notes page (1 of 2)
This example illustrates the fields and controls on the Notes page (1 of 2).
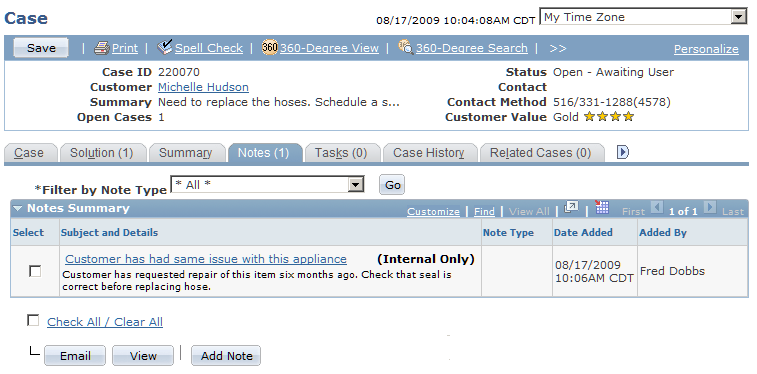
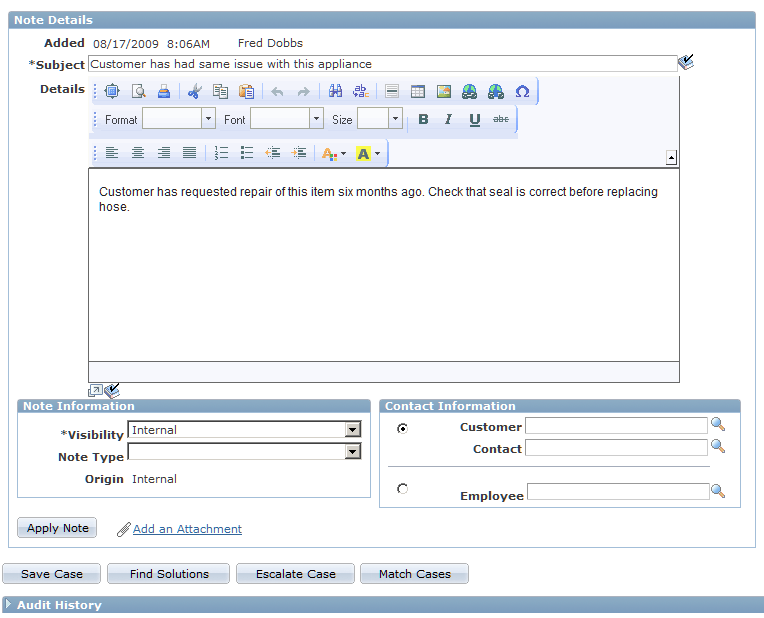
Image: Notes page (2 of 2)
This example illustrates the fields and controls on the Notes page (2 of 2).
The Notes Summary region of the page includes the following fields:
|
Field or Control |
Definition |
|---|---|
| Filter by Note Type |
Select a note type for the system to display notes by the selected note type in the Notes Summary section. Values are: All (default value) Comment Customer Call Notification Research |
| Subject and Details |
Click the subject link to view and edit details of the note in the Note Details section that appears subsequently on the same page. These values are not available for edit if the case note is created automatically after sending or receiving a notification. A paperclip icon after the subject indicates that the note has one or more attachments. |
|
Click this button to send an email based on the selected note(s). Any attachments for the note will be available to include with the email. After a notification is sent, the Case Summary page is displayed. Users can view the notification history in the Notes Summary section of the Case Summary page. |
|
| View |
Click this button to view details of the selected note(s) displayed as a separate page. |
| Add Note |
Click this button to add a note to the case. |
The Note Details region of the page includes the following fields:
|
Field or Control |
Definition |
|---|---|
| Subject |
Enter a summary description of the note. |
| Details |
Enter the main information for the note. |
| Visibility |
Select Internal to limit visibility of the note to internal workers: self-service users will not see this type of note. Select All to allow both internal workers and self-service users access to the note. |
| Note Type | |
| Origin |
Displays the origin of the case note.
|
| To/From |
Displays the sender or recipient email address for case notes of type Notification. If there are multiple recipients for an outbound email, the first 70 characters of all recipient email addresses will be displayed here. This information is only applicable to notification-specific case notes. |
| View Email |
Click to view the email message that is associated with this case note. This link appears if the case note is created for an inbound or outbound email that is received or sent for the associated case. |
| Visibility |
Select whether the note is visible to self-service users. Select All to show this note to both call center personnel and self-service users; select Internal (default value) to hide this note from self-service users. |
| Contact Information |
(optional) Enter the customer contact or employee for whom the note is created. |
| Add an Attachment |
Click this button to attach a file to the note. You will be able to add a description of any attachment that you add. You will also be able to control the visibility of the attachment to hide or display it to self-service users similar to the way that visibility can be controlled for the note. |
Agents can use text trays and quick keys to auto-fill static and dynamic data and create notes about a case.
Note: Static data is text that is part of text tray entry, such as “Customer resolved problem on their own.” Dynamic data includes tokens that the system dynamically resolves when the entry is used. For example, if you want to include the agent's name in a note, you could create a text tray entry such as “Contact {agent name}.” In this example, the text in brackets is the token, and the system substitutes the agent's name when the full text is applied.