Selecting, Printing, and Emailing Case Information
This topic provides an overview of print case functionality and discusses how to select, print, and email case information.
|
Page Name |
Definition Name |
Usage |
|---|---|---|
|
RC_PRINT_OPTIONS |
Change print options. |
|
|
RC_CASE_PRINT_VIEW |
Print and email case information. |
Because certain case data can be considered proprietary information, the PeopleSoft system provides the ability to select or deselect certain fields to display or not display on the Print Case page and in the email attachment.
When the user initiates an email action, the system prepares the attachment behind the scenes and automatically sends it to the attachment server without user intervention. The system formats the attachment to display in an arrangement and style that is very similar to the Print Case output.
The system saves the attachment, which is in HTML format, with a unique filename on the attachment server associated with correspondence management. The filename that is displayed to the user on the email page is Case NNNN Details.
Use the Case - Display Options page (RC_PRINT_OPTIONS) to change print options.
Navigation
Click the Change Display Options link on the Print Case page.
Image: Case - Display Options page
This example illustrates the fields and controls on the Case - Display Options page.
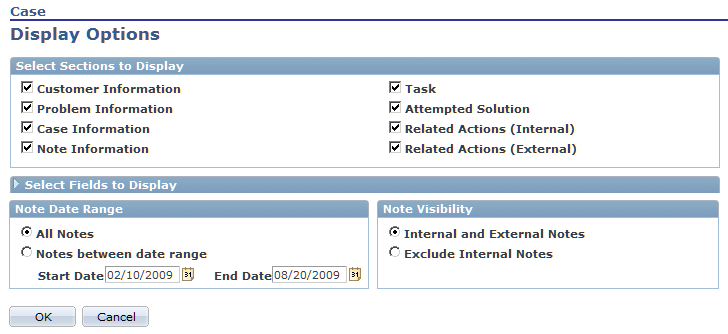
Clear or select the check boxes and radio buttons associated with the information that you want to print or email. Click OK. The system returns you to the Print Case page.
You can only print or email the sections that are listed on the Case - Display Options page. While the following sections are part of the Case component, the PeopleSoft system does not include these sections on the Case - Display Options page and you, therefore, cannot print or email this information using the print case functionality that the PeopleSoft system delivers:
Related Cases
Interested Parties
Attributes
Case History
Billing
Use the Print Case page (RC_CASE_PRINT_VIEW) to print and email case information.
Navigation
Click the Print button from the case toolbar.
Image: Print Case page (1 of 2)
This example illustrates the fields and controls on the Print Case page (1 of 2).
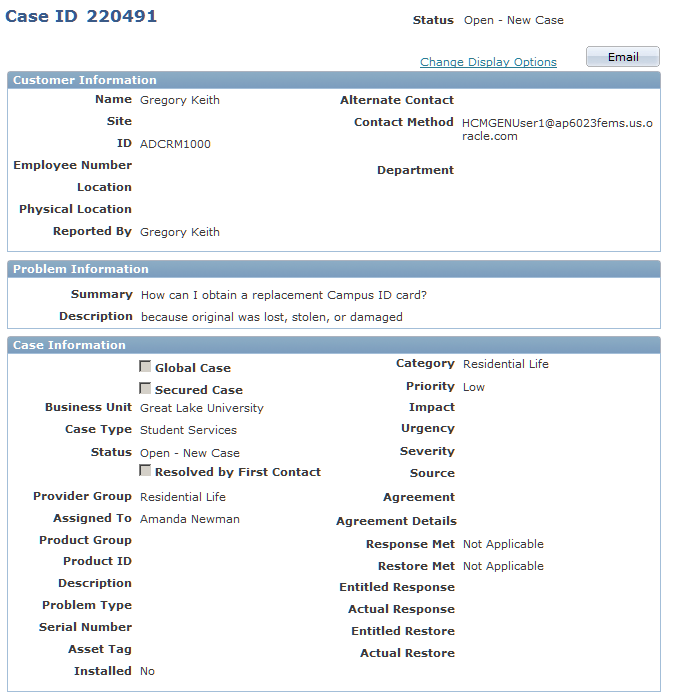
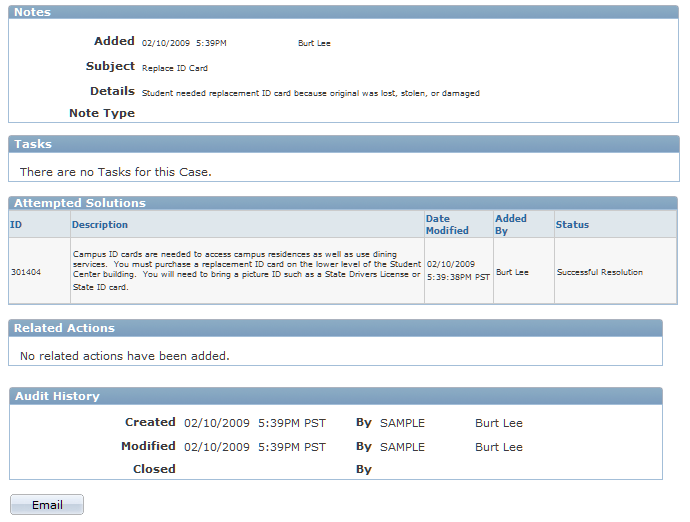
Image: Print Case page (2 of 2)
This example illustrates the fields and controls on the Print Case page (2 of 2).
To print case information, click from the toolbar on your browser page.
To email case information, click the Email button at either the top or the bottom of the page. The system displays the Outbound Notification page. Any attachments associated with the case will be available on the Outbound Notification page for inclusion with the email.