Working with the Agent Chat Workspace
These topics discuss how to work with agent chat workspace.
|
Page Name |
Definition Name |
Usage |
|---|---|---|
|
RB_CHAT_WIZARD |
Display the pages that you've defined to show here so that you can select a page whose URL you want to push to the customer. |
Access the chat workspace (click to accept an incoming chat request).
Image: Chat workspace
This example illustrates the fields and controls on the Chat workspace. You can find definitions for the fields and controls later on this page.
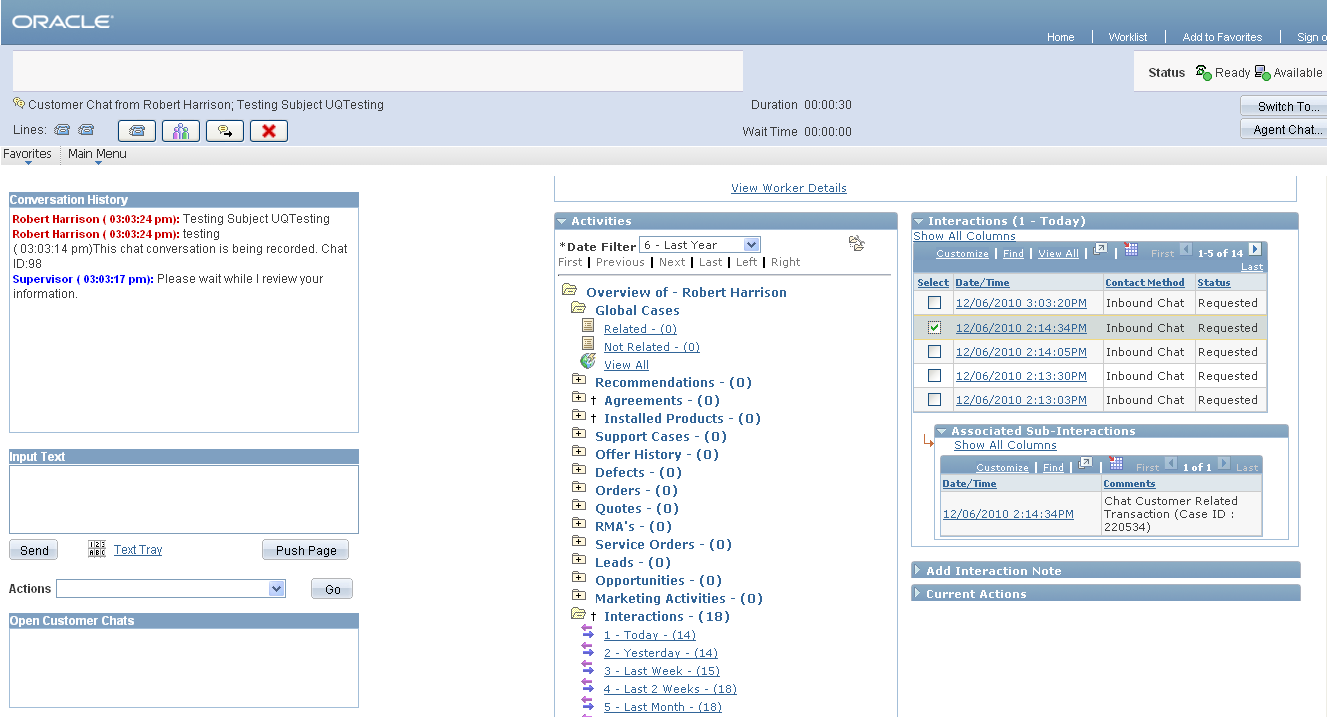
Depending on the accept and popup modes that are selected for agent-to-agent and agent-to-customer chat window types in the agent configuration, the agent may not be required to click the chat task notification that appears on the Multichannel Toolbar to accept the chat request. Typically, if both modes are automatic, the chat workspace appears with information about the new chat request that the system automatically accepts for the agent. If the popup mode is manual, a notification appears, and the agent can preview, click to accept, or reject (by not clicking) it.
The chat workspace consists of three sections where agents research, interact with customers, and perform chat-related actions: the Multichannel Toolbar, the agent chat window, and the agent popup page.
Unified Agent Desktop (UAD)
The UAD provides action buttons for agents to invite another agents to join the customer-to-agent chat (conference), initiate an agent-to-agent chat, transfer the session to another queue as needed, and end the session. It also displays statistics about the chat session for reference.
Agent Chat Window
|
Field or Control |
Definition |
|---|---|
| Conversation History |
Displays the ongoing chat dialog. Each response has a time stamp and is color-coded by participant for easy recognition. The system makes note in the dialog box when a chat action is performed (for example, when the password or chat log is sent to the customer, a web page is pushed to the customer) or the session is being transferred to another queue. |
| Input Text |
Enter the agent's response. In addition to entering text manually, agents can use the text tray feature to populate predefined messages by typing quick keys or using the Text Tray link. |
| Text Tray |
Click to open the Text Tray window to review a list of available messages and select one to use in the response. |
| Push Page |
Click to push the page that currently appears on the right side of the chat workspace to the customer. For example, the agent can push the Case search page to the customer who needs to look up a case during the chat session. Note that customers can view only those pages that they are authorized to see. |
| Actions |
Select an action to perform on the chat session. Options are:
|
| Open Customer Chats |
Displays all active chat sessions that the agent is currently processing. If any one of the sessions receives a response, a visual cue appears to alert the agent of the activity. |
Agent Popup Page
This section displays a CRM transactional page that is associated with the self-service page from which the chat session originates. Typically, it is the 360-Degree View page or the mini navigation page on which agents can search for multiple CRM objects. The page can also be the main page of any CRM object (for example, case, if the self-service page that it associates with pertains to that object).
When the agent selects the action to push a web page to the customer, the Push Web Page page appears:
Image: Push Web Page page
This example illustrates the fields and controls on the Push Web Page page . You can find definitions for the fields and controls later on this page.
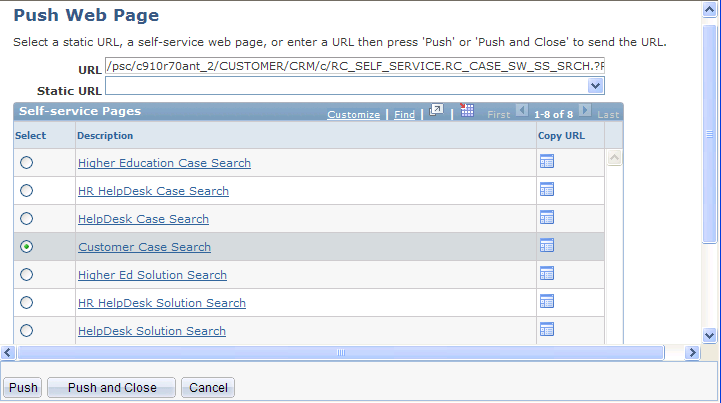
In addition to performing the push web page action, agents can also push a transactional page to customers by clicking the Push <transaction> button that's available (if agents are navigating transactions on the agent popup page section, for example, order). Currently, CRM supports the pushing of case and order pages using buttons.
After the URL has been pushed to the customer, a confirmation message appears in the Conversation History field.
|
Field or Control |
Definition |
|---|---|
| URL |
Enter the URL of a website to push to the customer. The page appears in a new browser window on the customer's workstation. Remember to enter http:// at the beginning of the URL. |
| Static URL |
Select a predefined URL to push to the customer's workstation. Define static URLs under the Chat Setting section on the Configure Agent - Multichannel Configuration page. See Configuring Agents. |
| Self-service Pages |
Select a self-service search page from the list to push to the customer's workstation. You establish the list of search pages on the Self-Service Page Mapping page. |
| Select and URL |
The URL of the corresponding page appears in the URL field automatically. You can edit the URL if you already know the application keys (such as an order ID) to the URL; the URL with keys directs the customer to the exact CRM transaction. |
| Description |
Click to access the search page of the corresponding CRM object. From the search page, agents can look up transactions that relate to the customer and select one that the customer would be interested in viewing. |
| Copy URL |
Click to copy the URL of the corresponding search page in the clipboard. The agent can paste the copied URL on a browser window or text file and modify it as needed. |
| Push |
Click to send the URL to the customer's workstation without closing the Push Webpage window. |
| Push and Close |
Click to send the URL to the customer's chat workstation and close the Push Webpage window. |
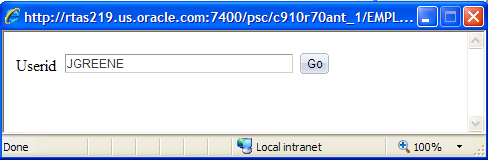
When the agent selects the action to email the user password to the customer, a window appears. The agent enters the user ID of the customer:
Image: Enter user ID window
This example illustrates the fields and controls on the Enter user ID window.
The Send Password window then appears:
Image: Send Password window
This example illustrates the fields and controls on the Send Password window.
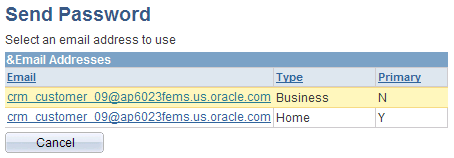
Click the customer email address to which the password is sent. This action resets the user's password to password. After the password has been mailed to the customer, a confirmation message appears in the Conversation History field.
Note: This implementation is delivered as an example on how user passwords can be retrieved. Customers should come up with their own design to obtain the user ID and make the modification in PeopleTools accordingly. Refer to this see reference for guidelines.
See Agent Chat Window.
When the agent selects the action to send the chat transcript to the customer, the Email Chat Log window appears:
Image: Email Chat Log window
This example illustrates the fields and controls on the Email Chat Log window.
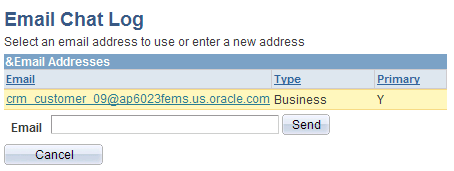
Select or enter the customer email address to which the chat log is sent. The agent can enter multiple email addresses in the field and separate them by commas. After the log has been mailed to the customer, a confirmation message appears in the Conversation History field.
Important! Sometimes, chat logs cannot be mailed to customers successfully because their line lengths exceed the default maximum line length that the mail server can accept. Check the text line setting of your mail server configuration and increase the number by the use of SMTP Service Extensions if needed.
When the agent clicks the Forward Chat button, the Transfer Chat to Queue window appears:
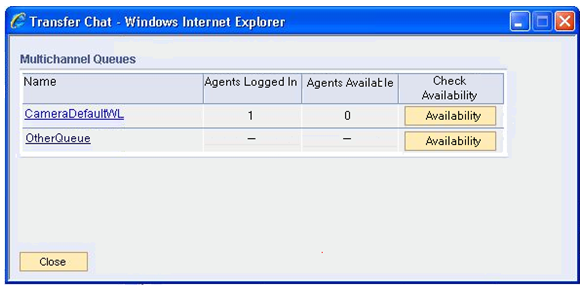
Image: Transfer Chat to Queue window
This example illustrates the fields and controls on the Transfer Chat to Queue window.
|
Field or Control |
Definition |
|---|---|
| Name |
Displays the list of queues to which the chat session can be transferred. Click the name of the queue that the chat session should go to start the transfer. When the transfer is completed, the current session ends automatically. The agent can categorize the chat session on the Multichannel Toolbar before closing the chat workspace browser window. |
| Agents Logged In |
Displays the number of agents who are currently logged on for the corresponding queue. This information is displayed after the agent availability check is performed. |
| Agent Available |
Displays the number of agents who are currently set to be available for the corresponding queue. This information is displayed after the agent availability check is performed. |
| Check Availability |
Click the Availability button to check for agent availability for the corresponding queue. The button label is changed to Checking while the check is in progress. When it is finished, the system displays the number of agents who are logged in and the number of agents who are marked as ready for the queue. If no statistics can be retrieved after the check process times out (30 seconds), a dialog box appears and relays the message back to the agent. The numbers are not updated automatically; when needed, click the button to refresh the data. Note: The Check Availability feature provides information on agent availability in queues so that when an agent thinks about forwarding a chat session to another queue, he or she can decide what to do based on the current state of the queue. Agents can, but do not have to, check for agent availability before they transfer chat sessions. Here is an example. Suppose that an agent is chatting with a customer and he thinks that he should forward the chat session a different queue so another agent from a specialized team can review the customer's request. After he checks for agent availability for that queue, he realizes that there is an agent currently logged on but the agent is not set to be available. With this information in hand, he can inform the customer of the situation and make recommendations. For instance, create a case for the customer and assign it to the target group, or continue forward the chat session on just in case someone becomes available momentarily (if the customer can wait). The system allows the transfer of chat sessions to queues that do not have logged-in or available agents currently. It provides flexibility because either agents are in the process of logging in or making themselves available, or managers who monitor queues can adjust staffing resources dynamically based on the real-time information they receive—have agents log into queues with tasks waiting to be reviewed. |
When the agent clicks the Conference button, the Conference Chat window appears:
Image: Conference Chat window
This example illustrates the fields and controls on the Conference Chat window.
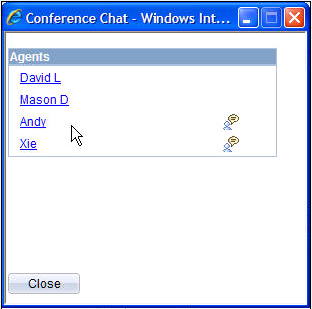
During a chat session, the agent can invite another agent to join the chat. The invited agent can interact with all participants to exchange ideas and discuss issues.
Click the agent's name to initiate the conference chat.
When the chat session is displayed to the invited agent, the chat history between the first agent and the customer appears as reference.
When the agent clicks the Agent Chat button, the Agent to Agent Chat window appears:
Image: Agent to Agent Chat window
This example illustrates the fields and controls on the Agent to Agent Chat window.
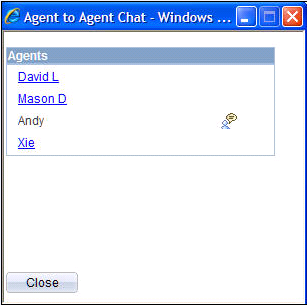
In addition to inviting an agent to start a three-way conferencing chat, the agent can initiate a chat session with another agent without the customer knowledge. The agents can discuss the customer's issue and later relay the information back to the customer.
When the agent ends a chat session, all fields on the agent chat window and chat buttons on the Multichannel Toolbar are disabled. The agent can categorize the session in the Category field that appears on the toolbar.
The selected category is available for viewing in the interaction created for the chat session.
See the product documentation for PeopleTools: PeopleSoft MultiChannel Framework.