Defining Catalog Content and Permissions
To define catalog content and permissions, use the Catalog Definition (RO_CATALOG) component.
|
Page Name |
Definition Name |
Usage |
|---|---|---|
|
RO_PRD_CATALOG |
Define catalog IDs and select default display templates to control the look and feel of catalogs; populate catalog cache tables. |
|
|
RO_CAT_CLONE |
Create copies of catalogs. |
|
|
RO_PRD_ASSOCIATION |
Define catalog content by direct or business rule association. |
|
|
RO_CAT_SEC |
Define user access and experience by defining membership lists. |
|
|
Membership List Page |
RSEC_MEMBER_SMRY |
Define memberships to enable visual access to catalogs. |
|
RO_NEST_CAT |
Link nested catalogs to a main catalog. |
|
|
RO_FEATURED_PRD |
Select products to be featured in catalogs. |
|
|
RO_RECOMMENDATION |
Select to show or not show recommendations. |
This section discusses:
Catalog generation.
Direct association.
Business rule association.
Security memberships.
Catalog Generation
PeopleSoft CRM enables you to generate catalogs dynamically based on rules that you define online. These rules determine which products appear in catalogs, who can access catalogs, and which products are featured in catalogs. You can also link products to catalogs and define user access by direct association using product IDs and user IDs.
Direct Association
You can associate both standard and featured products with catalogs by Direct association. Direct association enables you to link specific product IDs to one or more catalog IDs. Only products associated with a catalog ID can appear in the catalog.
Business Rule Association
Business rule association enables you to define a rule that is based on field values such as product brand, product category, and product group as well as other product attributes. For example, you could define a rule that specifies that only a specific product brand can appear or be featured in a catalog. If you want, you can include more than one attribute and value pair in a single product association rule. For example, you could use these two associations to create a catalog for Company X laptops and Company Z workstations:
Condition 1: Product category = laptop and brand = Company X.
or
Condition 2: Product category = workstation and brand = Company Z.
Each condition in the rule involves an association between two values, a product category and a brand, which are joined together using the where clause operator and. However, the relationship between conditions is based on the where clause operator or, meaning that any product that satisfies either condition 1 or condition 2 appears in the catalog.
Note: The system interprets rule conditions that are defined on the same row or scroll to be joined by the and operator and conditions that are defined on different rows or scrolls to be joined by the or operator.
Security Memberships
In PeopleSoft CRM, you can control user access to catalogs by specifying security memberships.
Security memberships enable you to specify which users or groups of users can have access to certain catalogs. For example, a company can have a membership list called Premier Customers that includes all of the premier customers in their system and a catalog named Premier Catalog that is specially prepared for premier customers. By specifying the Premier Customers membership list in the catalog definition, the catalog can provide special pricing and recommendations exclusively for this group of users. Similarly, you can define a membership list that includes all customers who are in the electronics industry in the California region and associate the list with a catalog of electronic products that is specific to the California region.
Note: Users cannot access catalogs that are defined with a security membership of the object type Role. Security membership lists for catalogs must contain Security objects of the types Customer or Person for users to access the catalog.
Use the Product Catalog page (RO_PRD_CATALOG) to define catalog IDs and select default display templates to control the look and feel of catalogs; populate catalog cache tables.
Navigation
Image: Product Catalog page
This example illustrates the fields and controls on the Product Catalog page.
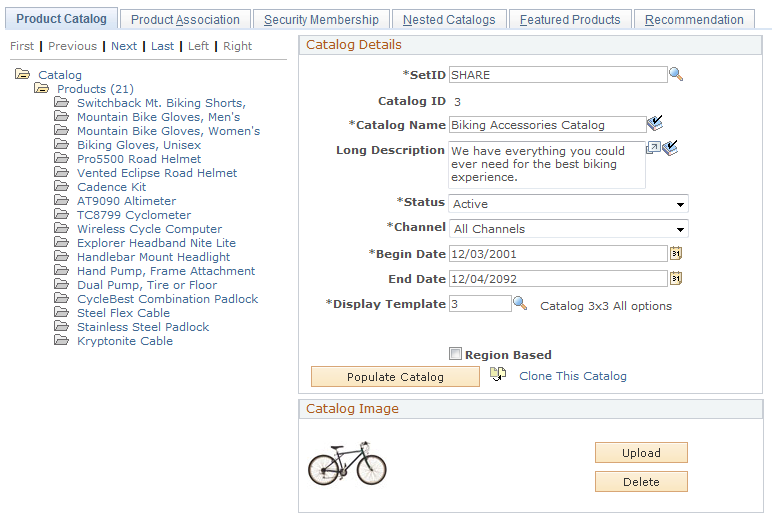
Catalog Tree Details
You can expand folders in the catalog tree as follows:
Expand the main Catalog folder in the catalog tree to display subfolders for products.
Expand the Products folders to see individual products in the catalog.
Each folder in the tree has a link associated with it. Inside the Products folder are links for individual products:
Clicking the Catalog link refreshes the tree display.
Clicking the Products link accesses the Product Definition component and lets you define products (logged on users must have access to the product definition to do this).
Clicking the link of any individual product accesses the product definition of the selected product.
Catalog Details
|
Field or Control |
Definition |
|---|---|
| Catalog ID |
If you are adding a new catalog, the system asks you to enter a SetID and Catalog Identification Number before you access this page. If the catalog number already exists, the system displays this message: The value you tried to add already exists. Select it below if you'd like to update it, or specify a new value in the fields above. To create a new catalog, enter a number in the Catalog Identification Number field that does not already exist. Catalogs do not use the PeopleSoft CRM autonumbering feature. |
| Catalog Name and Long Description |
Enter a name for the catalog. This name will appear in the catalog list. You can make the description appear on the catalog display page by selecting Show Long Description on the Display Template page. |
| Channel |
Select which channels to use to define access to catalogs. Values are: All: Select if the catalog will be accessed externally using the web as well as internally (for example, by CSRs). Internal: Select if the catalog is for internal use only. Web SS (web self-service): Select if the catalog is for external access using the web (for example, by customers who are purchasing products or services through a self-service transaction). Note: The channel that is being accessed depends on the portal that is being browsed. As delivered, the customer portal is considered external, and the employee portal is considered internal. |
| Begin Date and End Date |
Enter dates that specify the period during which the catalog is active. |
| Display Template |
Enter a display template to control the layout of products as well as the information and options that appear in the catalog. You can override the display template on the Security Membership page, per membership. Note: You must first define the display templates using the Catalog Template Setup component. |
| Region Based |
Select if the catalog is regional (sensitive to the geographical area of the user). When users accesses regional catalogs, they are prompted for a region, which could be the zip code of the ship-to area of service or installation, a state, a city name, or some other location, depending on how you define regions during implementation. This information can be used to dynamically hide products in the catalog that are not available in a particular area. Note: To define the regions in which specific products are available or unavailable, use the Regions Page in the Product Definition component. Product Sales regions are used for product filtering. Note: You can also attach regional restrictions at the user level as opposed to the product level. Geographic regions are used for user associations. To enforce regional restrictions use the security membership setup. For example, a membership might include all customers in the Southeast region. |
| Populate Catalog |
Click to populate cached information on which the tree in the left pane of the page is based. The tree refreshes automatically with the new information based on the catalog refresh. Note: This button calls the RO_CAT_PUSH1 Application Engine program, which populates the cache tables storing catalog data. |
| Clone This Catalog |
Click to access the Clone a Catalog page and clone the current catalog. |
Catalog Image
|
Field or Control |
Definition |
|---|---|
| Upload |
Click to upload an image to represent the catalog. You determine whether this image appears in online catalogs on the Display Template page. |
| Delete |
Click to delete the image. |
Use the Clone a Catalog page (RO_CAT_CLONE) to create copies of catalogs.
Navigation
Click the Clone This Catalog link on the Product Catalog page.
Image: Clone a Catalog page
This example illustrates the fields and controls on the Clone a Catalog page.
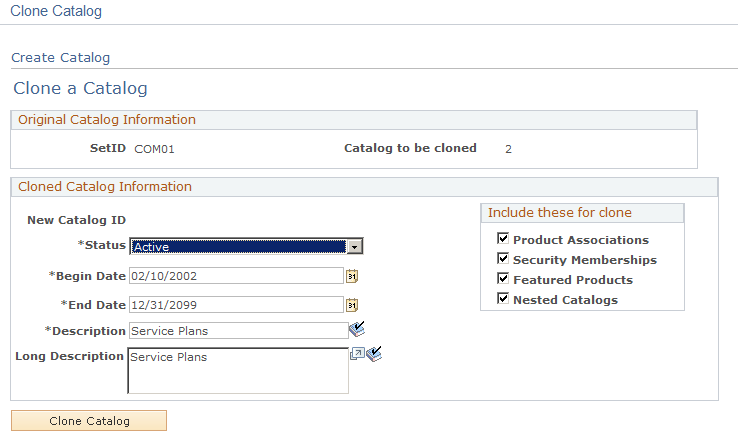
Original Catalog Information
|
Field or Control |
Definition |
|---|---|
| Catalog to be cloned |
Displays the name of the catalog that is being cloned. |
Cloned Catalog Information
|
Field or Control |
Definition |
|---|---|
| New Catalog ID |
Displays the new ID that the system assigns to the cloned catalog once you click Clone Catalog. |
| Begin Date and End Date |
Enter dates that specify the period during which the new catalog is active. |
| Description and Long Description |
Enter a description, which appears in the catalog list. You can make the long description appear on the catalog display page by selecting Show Long Description on the Display Template page. |
Include these for clone
|
Field or Control |
Definition |
|---|---|
| Product Associations |
Select to save all of the product associations from the original catalog to the new catalog. |
| Security Memberships |
Select to save all of selected membership lists from the original catalog to the new catalog. |
| Featured Products |
Select to save all of the featured product rules from the original catalog to the new catalog. |
| Nested Catalogs |
Select to save all of the nested catalogs from the original catalog to the new catalog. |
Use the Product Association page (RO_PRD_ASSOCIATION) to define catalog content by direct or business rule association.
Navigation
Image: Product Association page
This example illustrates the fields and controls on the Product Association page.
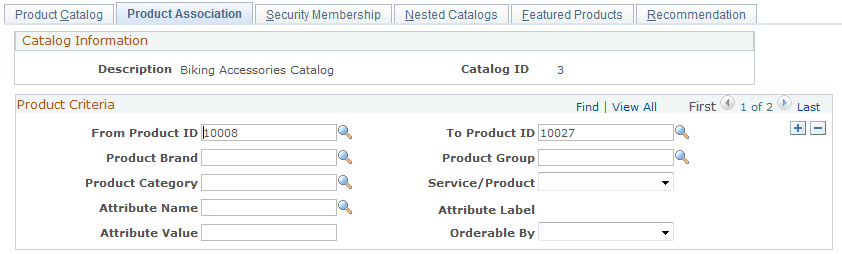
Note: You should populate the catalog by clicking the Populate Catalog button on the Product Catalog page after defining product associations.
|
Field or Control |
Definition |
|---|---|
| From Product ID and To Product ID |
Enter product IDs to link products to catalogs by direct association. To link an individual product rather than a range of products to a catalog, enter the specific product ID in the From Product ID field and leave the To Product ID field blank. Create new rows for each product or product range that you want to associate with the catalog. |
| Product Brand |
Enter a brand to create a business rule association based on that brand. For example, you could select only Brand A product for inclusion in a catalog. Note: Define brands on the Product Brand page. |
| Product Category |
Enter a product category to create a business rule association based on that category. For example, you could include in the catalog only products that fall within the category Trains. Note: Define product categories on the Product Category page. |
| Attribute Name and Attribute Item |
Enter an attribute name on which to base a business rule association, and enter the attribute value. For example, you could use the Material attribute to select items for inclusion in a catalog and specify that you want to include all products in the product group Shoes that are made of 100 percent leather (in this case, the attribute value would be Leather). Note: Define attributes using the Attributes component. Only attributes that are associated with products are available here. Associate products with attributes on the Attributes page in the Define Products component. |
| Product Group |
Enter a product group to create a business rule association based on that group. For example, you could include in the catalog all products in the product group Dishwashers. Note: Add products to product groups on the Product Groups page in the Product Definition component. |
| Service/Product |
Enables you to create a business rule association based on the definition of products. Select Product as the value. |
| Attribute Label |
Displays the description of the chosen attribute. |
| Orderable By |
Select a value to create a business rule association based on whether a product is universally available or available only to businesses or consumers. For example, you may want the catalog to include only products selected for businesses. Values are: All: Select to include products in the catalog that are available to both customers and businesses. Consumer: Select to include products in the catalog that are available to consumers. Business: Select to include products in the catalog that are available to businesses. Note: Set the Orderable By status of products on the Definition page in the Product Definition component. |
Conditional Clauses in Business Rule Associations
When you create business rule associations on the Product Association page, the conditions in the rule can be related to one another in one of two ways:
Using and operators
When conditions are joined by and operators, all individual conditions in the rule must be met before a product can be included in a catalog. For example, if you specify that the product brand Company X should be included in the catalog and that within this brand, only products in the product category Laptop Computers should be included, you are defining a rule based on an and operator. In this example, the product must be both a Company X brand and a laptop to be included in the catalog.
Using or operators
When conditions are joined by or operators, only one condition in the rule must be met before a product is included in a catalog. For example, if you specify that any product with the product brand Company X should be included in the catalog, as well as any computer in the product category Workstation (regardless of brand) should be included, you are defining a rule based on an or operator. In this example, if the product is either a Company X brand or a workstation, it will be included in the catalog (only one condition needs to be satisfied).
To associate conditions within a rule using the and operator, define all the conditions as part of the same scroll or row. For example, assume that you want to include only Company X workstations in a catalog. To do this, enter a product brand of Company X (condition 1) and a product category of Workstation (condition 2), but do not create a new row for each condition.
To associate conditions using the or operator, define each condition on a different scroll or row. For example, assume that you want to include all Company X products in the catalog (condition 1), as well as any workstation, regardless of brand name (condition 2). To do this, enter a product brand of Company X, create a new row on the Product Association page (click the Add Row button), and define the second condition by enter a product category of Workstation.
Use the Security Membership page (RO_CAT_SEC) to define user access and experience by defining membership lists.
Navigation
Image: Security Membership page
This example illustrates the fields and controls on the Security Membership page.
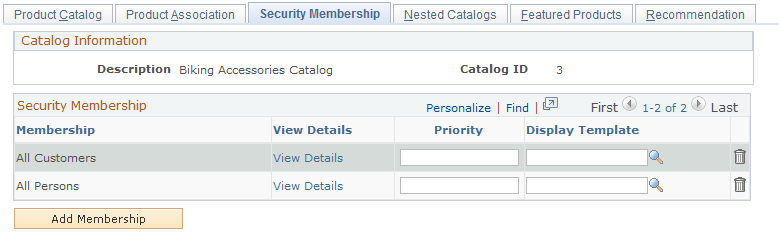
Note: If you do not define a membership list, no one will have access to the catalog.
|
Field or Control |
Definition |
|---|---|
| Membership |
Displays membership lists that are associated with a particular catalog. |
| View Details |
Select to view the membership details. |
| Priority |
Enter a number to indicate the order or priority in which you want the display templates to appear. For example, if display templates were defined for three different membership lists and a user belonged to more than one membership list, then the number you enter in this field would determine which display template an agent would use in conjunction with the catalog. |
| Display Template |
Enter a display template to override the default template that is selected at the catalog level (on the Product Catalog page). This template applies to users who meet the access requirements that you define. |
| Add Membership |
Select to add a new membership to the catalog security. |
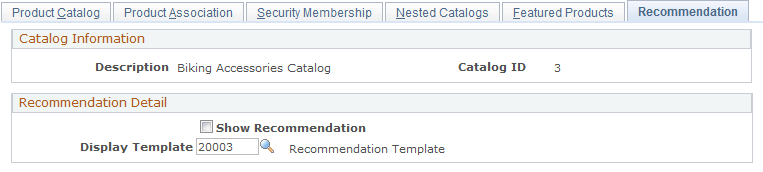
Use the Recommendation page (RO_RECOMMENDATION) to select to show or not show recommendations.
Navigation
Image: Recommendation page
This example illustrates the fields and controls on the Recommendation page.
Recommendation Detail
|
Field or Control |
Definition |
|---|---|
| Show Recommendation |
Select to show recommendations at runtime when users are looking for products on the Find Products page. |
| Display Template |
Select a display template to be used for presenting recommendations. |
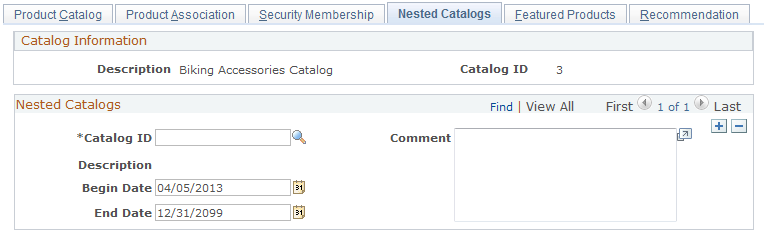
Use the Nested Catalogs page (RO_NEST_CAT) to link nested catalogs to a main catalog.
Navigation
Image: Nested Catalogs page
This example illustrates the fields and controls on the Nested Catalogs page.
|
Field or Control |
Definition |
|---|---|
| Catalog ID |
Enter the ID of the catalog that you want to nest within the main catalog that appears at the top of the page. |
| Begin Date and End Date |
Enter the dates for which the relationship between the nested catalog and the main catalog is valid. |
Use the Featured Products page (RO_FEATURED_PRD) to select products to be featured in catalogs.
Navigation
Image: Featured Products page
This example illustrates the fields and controls on the Featured Products page.
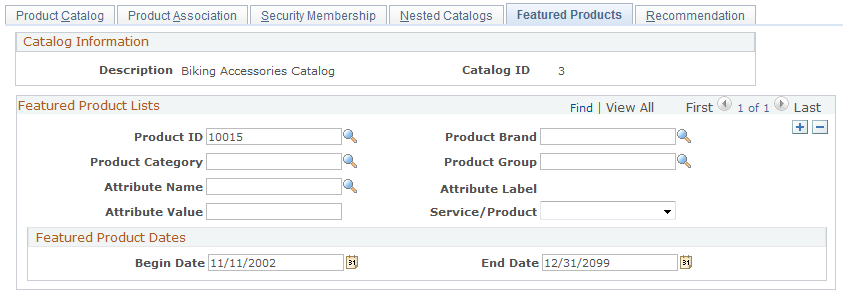
Note: A product cannot be featured in a catalog until you associate it with the catalog on the Product Association page. Only after you establish the association can you mark the product as Featured.
Featured Product Lists
|
Field or Control |
Definition |
|---|---|
| Product ID |
Enter a product ID to define that individual product as a featured product. Create a new row for each product that you want to feature. |
| Product Category |
Enter a product category to create a business for featuring products based on that category. Note: Define product categories on the Product Category page. |
| Attribute Name and Attribute Value |
Enter an attribute name on which to base the business rule, and enter the attribute value. For example, Material is an attribute that you could use to define featured items; you could specify that you want to feature all products in the product group Shoes that are made of 100 percent leather (in this case, the attribute value would be Leather). Note: Define attributes using the Attributes component. Only attributes that are associated with products whose group usage type is Information are available here. Note: Associate products with attributes on the Attributes page in the Define Products component. |
| Product Brand |
Enter a brand to create a business rule for featuring products based on that brand. For example, you could select all NIKE, Inc. products as featured products. Note: Define brands on the Product Brand page. |
| Product Group |
Enter a product group to create a business rule for featuring products based on that group. Note: Add products to product groups on the Product Groups page in the Product Definition component. |
| Attribute Label |
Displays the description of the chosen attribute. |
| Service/Product |
Enables you to define a business rule for featuring products based on the definition of products. Select Product as the value. |