Using a component to refine data
The Available Refinements panel and Search Box functions are specifically designed for refinement, but other components can allow you to click attribute values in order to refine the data.
When you click a value that is enabled for refinement, other components that are tied to data from the same data set are updated to reflect the change.
- See what you have refined by
- Remove refinements
See About the Selected Refinements panel.
Refining from a list of values
- To refine by an individual value, click that value
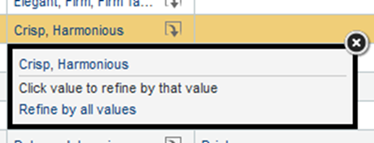
- To refine by all of the values, click the icon that displays after the list, then click Refine by all values.

If you can only refine by one value at a time, then the Refine by all values option is not displayed.
Selecting multiple values to refine by
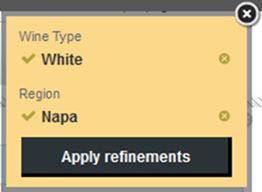
You can also create a list of values to refine by. You can select the values from different attributes and components, including components on different pages. For example, you could refine by a Region value displayed on a Results Table, and a Wine Type value displayed on a Summarization Bar.
To do this, Ctrl-click each value. The values must all be enabled for refinement. When you Ctrl-click a value, it is added to the list of values to refine by. You can also Ctrl-click a Refine by all values link to add all of the values to the list. As you navigate between pages, the list remains displayed until you either confirm or cancel the refinement.

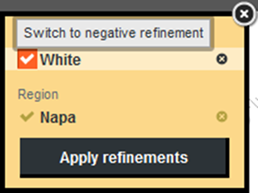
To toggle a selection between positive and negative refinement, click the icon in front of the value.

If the list of refinements does not match any records, Studio displays a warning message.
To remove a value from the list, click its delete icon. If you remove all of the values, then the list is closed.
By default, the list is either at the right of the page, if you selected the first value from a component, or immediately to the right of the Available Refinements panel, if you selected the first value from there. You can, however, use the top bar to drag the list to another location on the page.
The list only applies to the current page. If you navigate to a different page, the list closes automatically.
To refine the data using the selected values, click Apply refinements.
To close the list and cancel the refinement, click the close icon.
Date hierarchies and dimension cascading
Date/time values have an implicit hierarchy that uses the available subsets of date/time units. For example, if a component is currently displaying the year for a date value, then when you refine by a specific year, Studio could display data for the months of that year. If you then refine by a specific month, Studio could display data for the days of that month.
- When you refine by the country United States, the component displays data for all of the states in the United States.
- When you refine by California, the component displays data for cities in California.