Creating campaign actions
Actions are data transactions between Oracle Eloqua and Salesforce. The Campaign Actions page is where you create actions to send data to Salesforce when campaigns change status. These actions are used for sending newly created campaigns to Salesforce, as well as sending updates to existing campaigns to Salesforce (provided the Eloqua campaign has a Salesforce campaign ID).
Tip: To sync your campaign with Salesforce, check the Sync with CRM box in your campaign's advanced settings (open a campaign > Options > Campaign Settings > Advanced). The CRM Campaign ID field populates after Oracle Eloqua syncs with Salesforce for the first time. This field (CRM Id) is used as a unique identifier for campaign actions. Map at least one more field in addition to the CRM Id.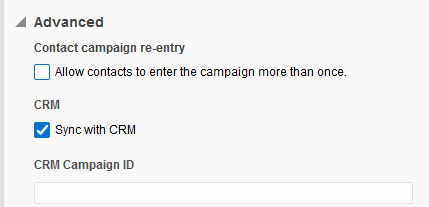
Campaigns in Salesforce may also be imported into Eloqua to allow for bi-directional updates between the two applications. When a campaign action is enabled, any campaign imports using different connections are automatically disabled.
Good to know
- Users can map the Salesforce URL field to the Eloqua Large Text and Text fields. Use the Large Text field if the value in your URL field contains more than 100 characters. Mapping the URL field to any other Eloqua field results in an error.
Prerequisites
To create a campaign action:
- In the Salesforce Integration app, click Campaigns.
- On the Campaign Actions tab, click Add Campaign Action and select a connection for which you want to create a new action.
- Complete the action details:
Note: Each action can map up to a maximum of 249 fields. See the Eloqua Developer Help Center for more information.

- Action Name: Enter a name for the action.
- Object Mapping: The Eloqua Object is set to Campaign and cannot be modified. To see available fields, select a top-level object from the Salesforce Object list.
- (Optional) Synchronize Campaign Member Status Values: If you select Campaign for the Salesforce Object, the Synchronize Campaign Member Status Values option displays. Enable this option if you want to synchronize Campaign Member status values to Salesforce Campaigns. The synchronization will occur after updates are sent from an Eloqua Campaign object to a Campaign Object in Salesforce. The Salesforce App will synchronize values defined under the "Display Name" column on the "Campaign Member Status Values" screen in Eloqua as Salesforce Campaign Member statuses, while removing any duplicate values.
Important: This feature is currently released under our Controlled Availability program. To request access to this feature, please log in to My Oracle Support and create a service request.
(Optional) Synchronize Campaign Member Status Responded Flag: If you select Campaign for the Salesforce Object, users can select the Synchronize Campaign Member Status Responded Flag. Enable this option if you want to set the Campaign Member Status Responded value to true for all Campaign Member Status Values synced from Eloqua. The synchronization will occur after updates are sent from an Eloqua Campaign object to a Campaign Object in Salesforce. Note that the Salesforce App will not sync the “Responded” column setting set in the Eloqua response rules. In addition, the Salesforce App will not alter the value of any Salesforce Campaign Member Status Values did not originate from Eloqua.
Important: This feature is currently released under our Controlled Availability program. To request access to this feature, please log in to My Oracle Support and create a service request.
- Update Salesforce Fields: The unique identifiers are automatically determined by the Eloqua and Salesforce objects in the object mapping section. The Eloqua unique identifier is CRM Id. You must add at least one additional mapping by clicking Add Field Mapping. For each set of fields, specify the Salesforce field that will be mapped to Eloqua contacts. Click the menu
 to delete the mapping, or switch the field type to static text, static date, or dynamic date.
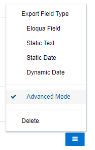
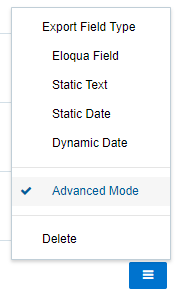
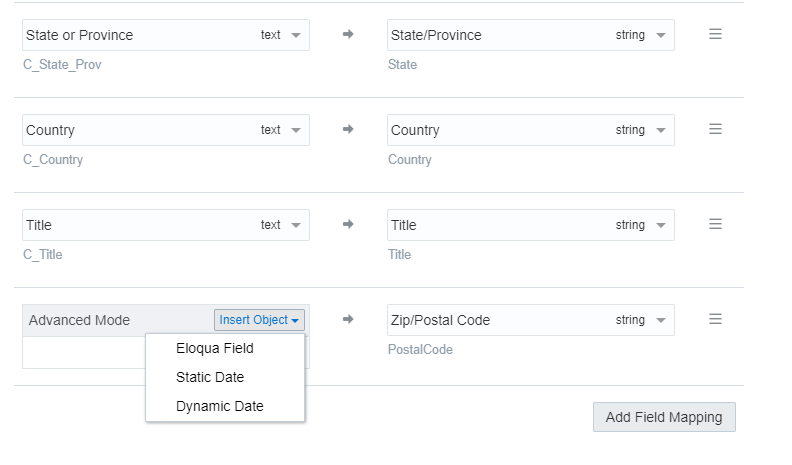
 - Update Eloqua Fields: The unique identifiers are automatically determined by the Eloqua and Salesforce Objects in Object Mapping. The Eloqua unique identifier is CRM Id. Add more mappings by clicking Add Import Field Mapping. For each set of fields, specify the Eloqua field that will be mapped to Salesforce contacts. Click the menu to delete the mapping or use Advanced Mode to switch a From Eloqua field type to static text, static date, or dynamic date.
- If you select Advanced Mode from the menu, you can enter multiple objects to be sent to a single Salesforce field: Eloqua Object, Date, or Dynamic Date. You can also type static text into the box as needed. For contacts, you can use Advanced Mode to select a Contact and its fields. For custom objects, the Advanced Mode allows you to select a custom object and its related Contact fields.

In Advanced Mode, concatenated Eloqua values can be mapped to Salesforce fields of the following types: reference, double, currency, text, string, ID type, and integer.
Important: If you are mapping fields that have boolean picklist values, Salesforce requires that your picklist values are represented as either True/False or 1/0
- Click Create Campaign Action and then click Close to return to the Campaign Actions page.

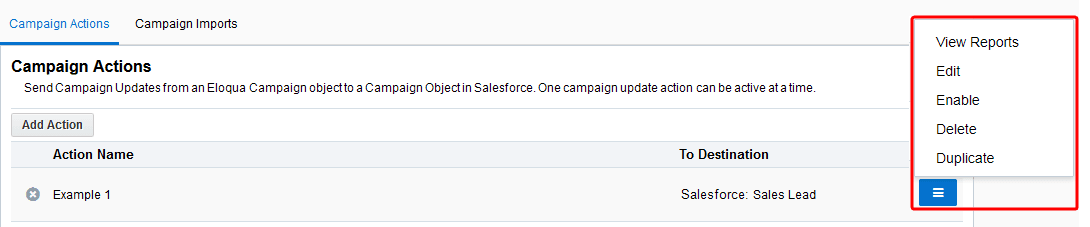
To modify an action, click its menu and choose and option. You can edit, enable or disable, duplicate, or view report data for the action. Only one campaign action can be enabled at a given time. Enabling a new action will disable an existing one. You can delete disabled actions.