Creating an event
Important: The Oracle Eloqua WeChat app has been removed from the Oracle Cloud Marketplace and is no longer available for download. For customers with the app enabled, the app will remain active in its current form until December 1, 2022, after which the app will be sunset and no longer be available for use.
Once you create your electronic ticket and authorize a mini program account to the Eloqua-WeChat Integrator app, you can create an event. You will need the following information:
- Event name
- Date duration
- Location
- An image to be displayed for the event that is < 2 MB
- An electronic ticket with a date range corresponding to your event so that you can select it from a list of tickets
- A mini program account already authorized to the Eloqua-WeChat Integrator app
Prerequisites
- Register a mini program account in your WeChat official account. For details, see WeChat's mini program documentation.
- Add the mini program in the Eloqua-WeChat Integrator app.
To create an event:
- In Oracle Eloqua, click the cloud menu
 icon on the right hand side to expand it.
 - From the Apps list, click WeChat Message Gallery.
The Eloqua-WeChat Integrator page is displayed.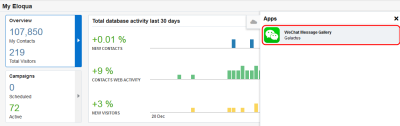
- If you have multiple WeChat official accounts, click the user profile icon
 in the upper-right corner and select a WeChat account from the list.
 - Click the Tickets & Events tab.
The Electronic Tickets page is displayed.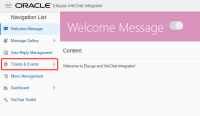
- Click the WeChat Event tab. The WeChat Event page is displayed.
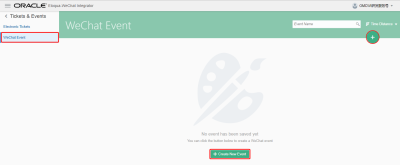
- Click Create New Event or the + button. The WeChat Event Configuration page displays the following required attributes:
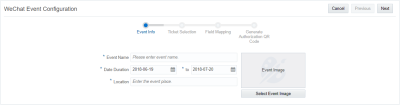
- Event Name: Enter a unique name for the event.
- Date Duration: Enter the start and end dates for the event. The date range of the event should include the date range of the corresponding electronic ticket.
- Location: Enter location details for the event.
- Select Event Image: Select a previously uploaded image (< 2 MB) or upload one.
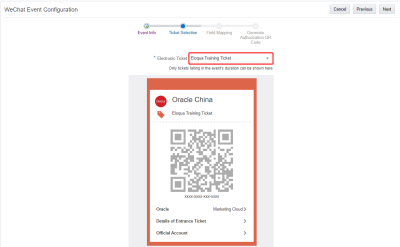
- Click Next. The Ticket Selection step displays an Electronic Ticket drop-down list.
- Select an electronic ticket from the list that matches the date range of the event. The ticket is displayed.
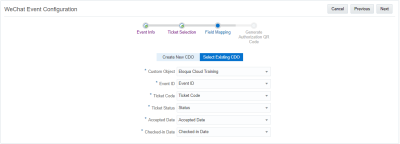
- Click Next. The Field Mapping step displays the following custom object (CDO) options:
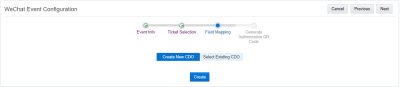
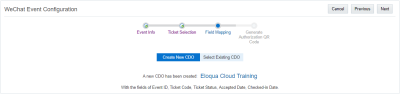
- Create New CDO: Click to generate a new custom object and automatically map fields to store registrants' records. If you click this option, a new custom object is created that has the same name as the event and includes the event ID, ticket code, ticket status, accepted date, and checked-in date fields.
- Select Existing CDO: Select a existing custom object and manually map its fields.
- Custom Object: Select one existing custom object to store registrants' records.
- Event ID: Select one field to store the ID of the event.
- Ticket Code: Select one field to store the code of the electronic ticket sent to the registrant.
- Ticket Status: Select one field to store the status of the WeChat electronic ticket.
- Accepted Date: Select one field to store the date and time when the registrant saved the electronic ticket in their WeChat client.
- Checked-in Date: Select one field to store the date and time when the ticket is successfully verified by the mini program ticket verification tool.
- Create New CDO: Click to generate a new custom object and automatically map fields to store registrants' records. If you click this option, a new custom object is created that has the same name as the event and includes the event ID, ticket code, ticket status, accepted date, and checked-in date fields.
- Click Next. The QR code step provides a list of verification mini programs.
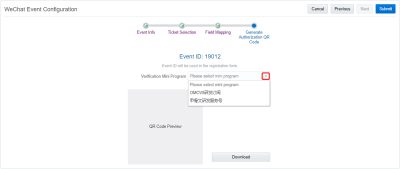
- Select a mini program from the list. An event ID and an authorization QR code are generated for accessing the ticket verification mini program.
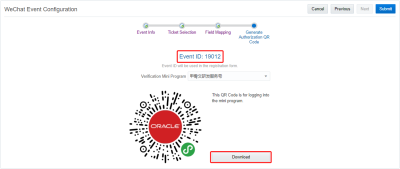
- Record the event ID so that you can use it when you create a registration form.
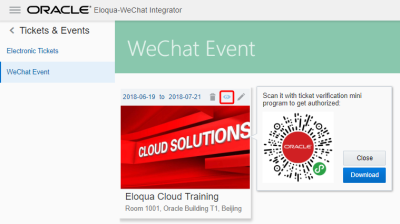
- You can click Download to save a copy of the QR code so that you can scan it with the ticket verification mini program after you submit the event.
- Click Submit. The event is created and it is displayed on the WeChat Event page. You can hover over its header to display the delete, preview, and edit icons.
- To display the event's QR code, click the preview icon.