Dynamic content examples

After you have familiarized yourself with the basics of creating dynamic content, take a look at some of the examples below. These are basic scenarios meant to help you start thinking about ways in which you can get creative with dynamic content.

Example: Prepend subject line content based on the email address

Certain email domains can route your marketing emails into a junk or secondary folder unless a key term exists in the subject line. This can impact first-look customer opportunities. Use dynamic content to prepend (or append) a key word or phrase in your subject line, which will appear only for a specific email address or domain.

To prepend subject line content based on the email address (or email domain):

  1. Leave the default rule blank, so that the keyword only populates in desired emails.
  2. Click the Add Rule An image of the Add button. button in the left pane, then write your content in the editor.

    Image of the dynamic content editor. The Add Rule button is highlighted in the upper-right corner, and the content field is highlighted in the middle-lower area. Example text is shown in the field.

  3. Click the Add Criteria An image of the Add button. button in the right pane, then select the Compare Contact Fields.

    An image of the lower-right corner of the dynamic content editor. The Add Rule Critera button is selected, and the Compare Contacts Fields criteria is highlighted in a pop-up menu.

  4. Configure the rule criteria it so that the rule applies to a specific email domain, then click Save.

    Image of the compare contact fields rule criteria that has been added to a rule. A pop-up configuration menu is open, showing the selected contacted field and the desired field information.

  5. (Optional) Configure additional rule criteria (if applicable), or add extra rules.

    Image of the dynamic content editor. Multiple rules have been added to this asset, and they are listed on the left pane. A single rule is highlighted, and the various rule criteria for that rule is displayed on the right pane.

  6. In the Design Editor:
    1. Click An image of the Settings icon to open the Settings panel then click Insert and select Dynamic Content.
    2. Search for the item and then double-click the item you want to add.
    3. Add any additional text to the subject line.

  7. Edit, save, and send your email when you are ready.

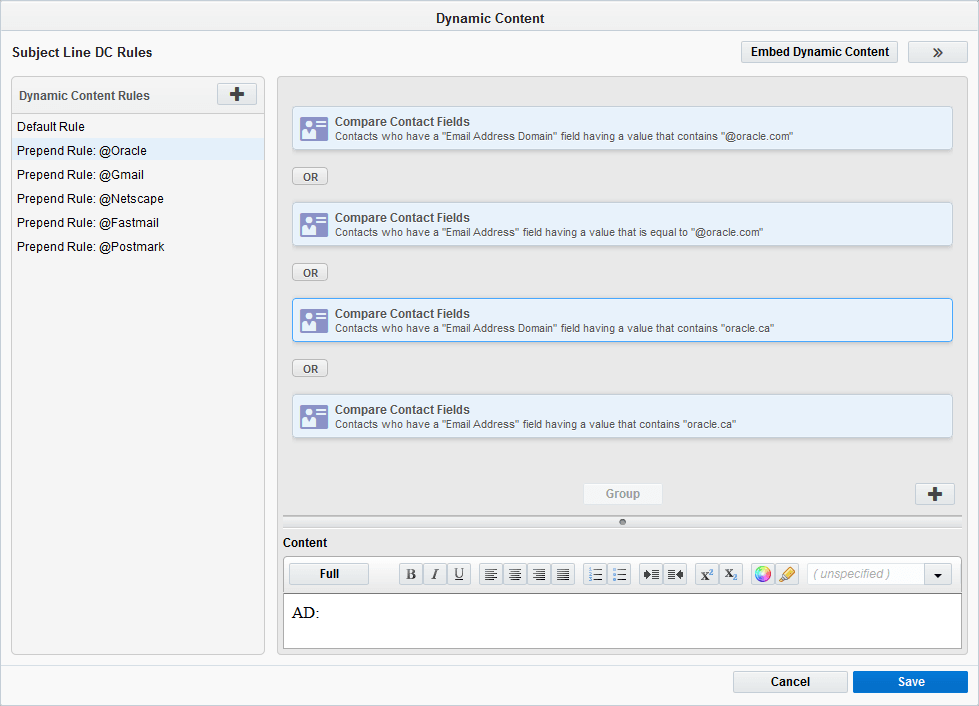
Alternative content will populate the subject line, but only for the specified addresses.

Tip: Create entire subject lines as dynamic content, and configure the content rules so that a different subject line displays based on a contact's job, city, or other relevant contact or custom object information. You can also use dynamic content in conjunction with a field merge to further personalize the subject line.

Example: Provide region-specific content for upcoming events

When hosting similar events across multiple cities or countries, provide attendees with details (time, location, directions) for the event nearest to them. From a single confirmation email, you can send Swiss contacts a link to a web page for the event in Bern, while attendees in the United States will receive a link to the San Francisco event web page, and so on.

To provide region-specific content for upcoming events:

  1. Click the Add Rule An image of the Add button. button in the left pane, write your content, and then click Full.
  2. Click the Hyperlinks tab, highlight your text, then select the Enable as Hyperlink option.

    An image of the Hyperlinks tab with Enable as Hyperlink selected.

  3. Type the link to the region-specific web page in the URL field, then click Back to return to the rule list.
  4. Click the Add criteria An image of the Add button. button in the right pane, then select the Compare Contact Fields rule criteria.

    Image zoomed in on the lower-right corner of the dynamic content editor. The Add Rule Critera button is selected, and the Compare Contacts Fields criteria is highlighted in a pop-up menu.

  5. Configure the rule criteria so that the rule applies to the specific city, zip code, or country, then click Save.

    An image of the Compare Contact Fields criteria.

  6. Repeat steps 1 through 5 to add rules for each event, and add links to the appropriate page in each rule.

    Tip: Set rules for a specific language when hosting an event in a region with more than one dominant language. You can configure separate rules for the same location, and filter for the preferred language (as indicated in the respective contact field).

    Image of the main dynamic content window. Three content rules for the city of bern are in the left pane, while rule criteria for both city and language are in the right pane.

  7. (Optional) If you anticipate that some email recipients will lack the field values to trigger a rule, consider adding content to your default rule. Link users to a form where those recipients can provide their information before receiving the proper event information. Alternatively, link users to a web page with links to region-specific events.
  8. Click Save, then add the dynamic content to your email.

Event attendees will receive information that is relevant only to them.

Example: Create content based on linked account information

Tailor your emails with content relevant to an account (company), and pique interest for recipients who work in that company.

For this scenario, we'll add a hyperlinked image to accompany an email for furniture resale. If the contact is linked to a company that specializes in a particular type of furniture, then the unique image will link to a section of your website featuring that type of furniture.

To create content based on linked account information

  1. Click the Add Rule An image of the Add button. button in the left pane, then click Full.
  2. Add your text, images, field merges, and hyperlinks as needed, then click Back.

    An image of a completed dynamic content.

  3. Click the Add Criteria An image of the Add button. button in the right pane, then select Compare Account Fields.
  4. Set the criteria to filter for a matching Company Name account field. If the contact is properly linked to a account with that contact field, the rule will apply, and the contact will see the unique content for this rule.
  5. Repeat steps 1 through 4 to add more rules, each with their own hyperlinked content, then click Save.

    An image of the Compare Account Fields criteria.

  6. In your email editor, click Dynamic Content and drag the content directly onto the text field (or source code). Learn more about adding dynamic content to an email.
  7. (Optional) Provide a generic version of your content for the default rule. Your hyperlinked image would instead link to the main page of your catalog, where visitors would browse for the type of furniture relevant to them.

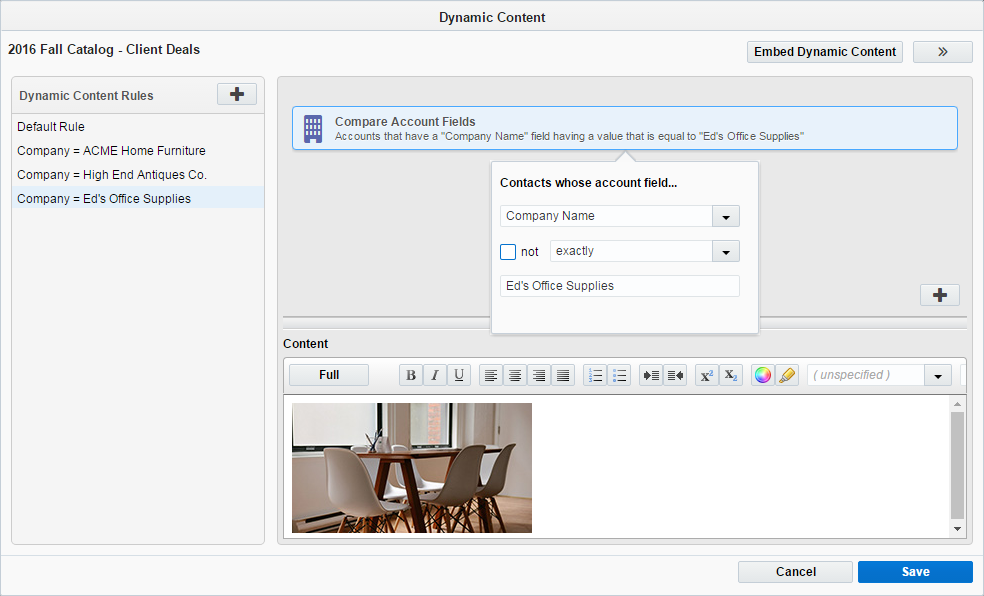
Recipients linked to an account will see information relevant to employment in that company.

Tip: If you have an established relationship with that company as a client, you might also include content such as links to company-specific offers and discounts.

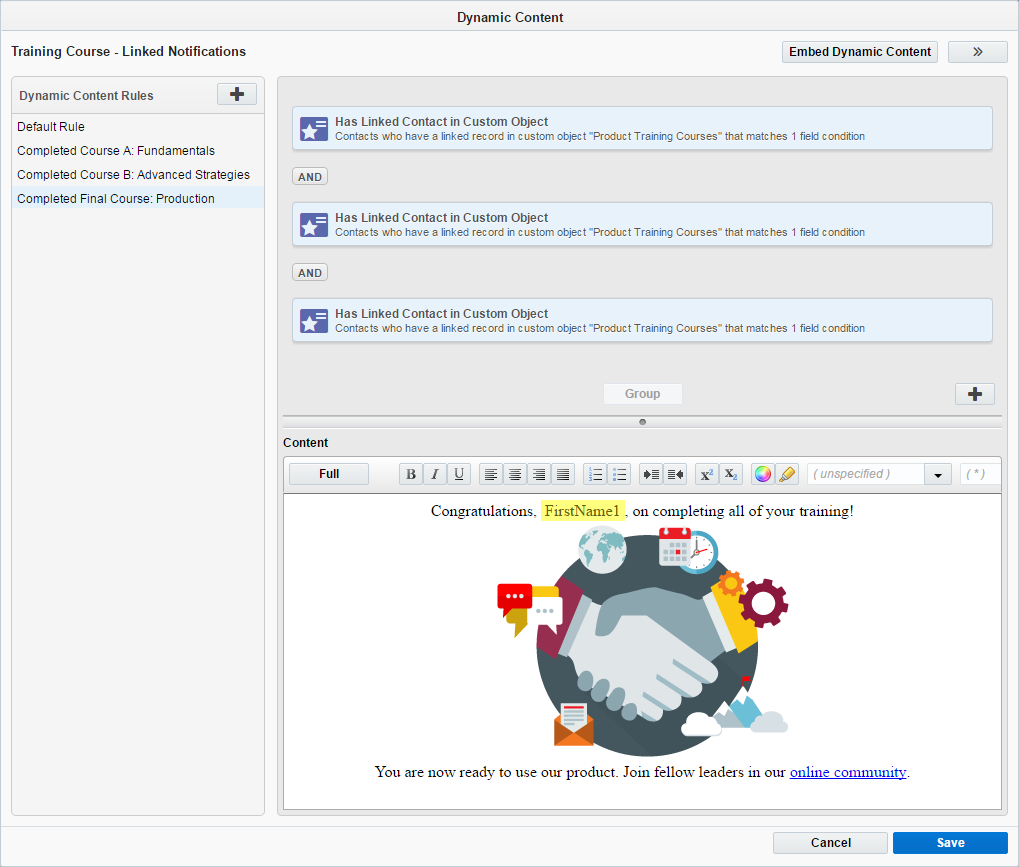
Example: Send training course notifications for linked contacts in a custom object

Notify clients about training courses that you're hosting online, using custom object field information to identify which courses they have already completed. You can also promote your training courses to new users, as well as send a congratulations for users who have completed everything.

To send training course notifications for linked contacts in a custom object:

  1. Provide content in the default rule for new or prospective users:
    1. With the default rule selected, click Full.
    2. Add images or text advertising your online training courses. For instance, "Head over to our online class portal to enroll in Course A: Fundamentals, and get started on your path to becoming a subject-matter expert!"

      Important: Be sure to provide at least one hyperlinked object that leads to the main page where new users can access your courses.

    3. Click Back to return to the rule editor.
  2. Add a new rule and tailor the content for users that have completed the first training course.
    1. Click the Add Rule An image of the Add button. button in the left pane, then click Full to open the full content editor.
    2. Add images or text advertising your online training courses.

      Example: "Good job on completing Course A: Fundamentals. When you're ready, continue your training with Course B: Implementation via the online class portal" where "online class portal" links to the main course listing, and "Course B" links to the specific source.

    3. Click Back to return to the rule editor.
    4. Click the Add Criteria An image of the Add button. button in the right pane, then select Has Linked Contact in Custom Object.
    5. Select the appropriate custom object and a custom object field. Then set the criteria so that the rule will apply when that field indicates that the linked contact has completed the course.

      An image of the Has Linked Contact in Custom Object criteria.

  3. Repeat step 2 and add rules and content for every level of course completion.
  4. Add a final rule with congratulatory message for completing all courses, and then click Save.

    An image of a completed dynamic content and the Save button.

  5. Insert your content to an email, and use that email in a multi-step campaign.

Learn more

Dynamic content

Creating dynamic content

Managing dynamic content

Embedding dynamic content in an external landing page

Component Library

Adding dynamic content to emails in the Design Editor

Creating dynamic subject lines in the Design Editor