Creating dynamic content
Important: To access the content editors in the Redwood experience, please log in to My Oracle Support and create a service request. After you have been granted access, turn on the Redwood experience.
Use dynamic content to change the content in an email or landing page depending on a field value in the contact record of the person viewing it. This allows you to show different content to different landing page visitors or email recipients based on attributes such as title, geographic location, income, industry, and more.
-
You can build dynamic content rules can be based on the following criteria:
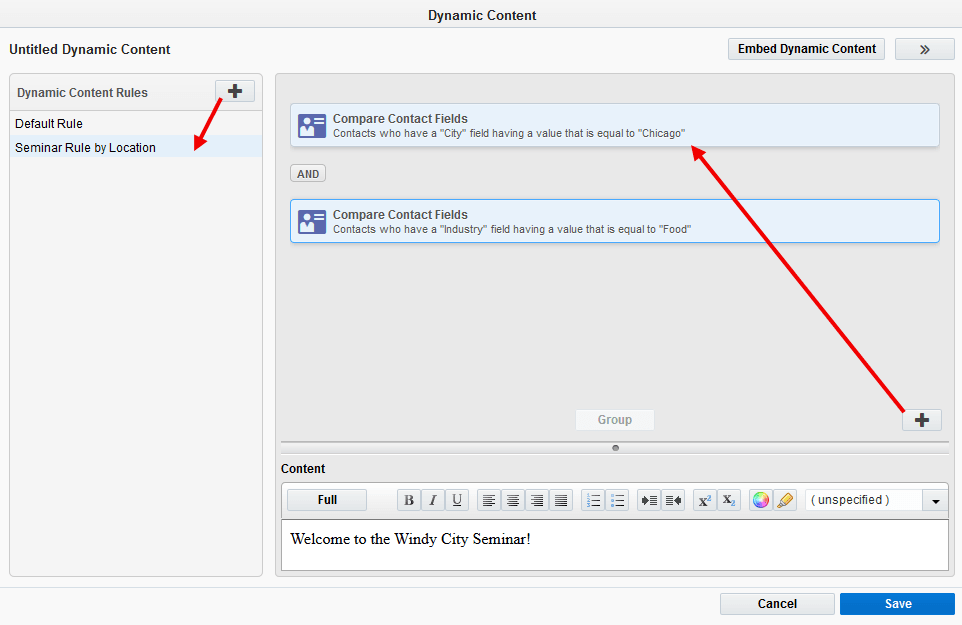
- Compare Contact Fields: The rule applies to contacts that match information entered into the respective contact fields. Learn more about contact fields.
- Compare Account Fields: The rule applies to accounts that match specific information entered into the respective account fields. Learn more about account fields
- Has Linked Contact in Custom Object: The rule applies to contacts that match specific information in a custom object record. Learn more about custom objects.
- Has Linked Record in Event: The rule applies to registrants associated with an event in your database. For example, this can include someone who registered for a webinar. Learn more about event management.
-
You cannot create dynamic content rules that search for a particular value in a large text field.
To create dynamic content:
- Navigate to Assets
 > Components, then click Dynamic Content.
 - Create a Dynamic Content
- In the classic UI, click New.
- In the Redwood experience, click Create and fill in the name and description in the create drawer.
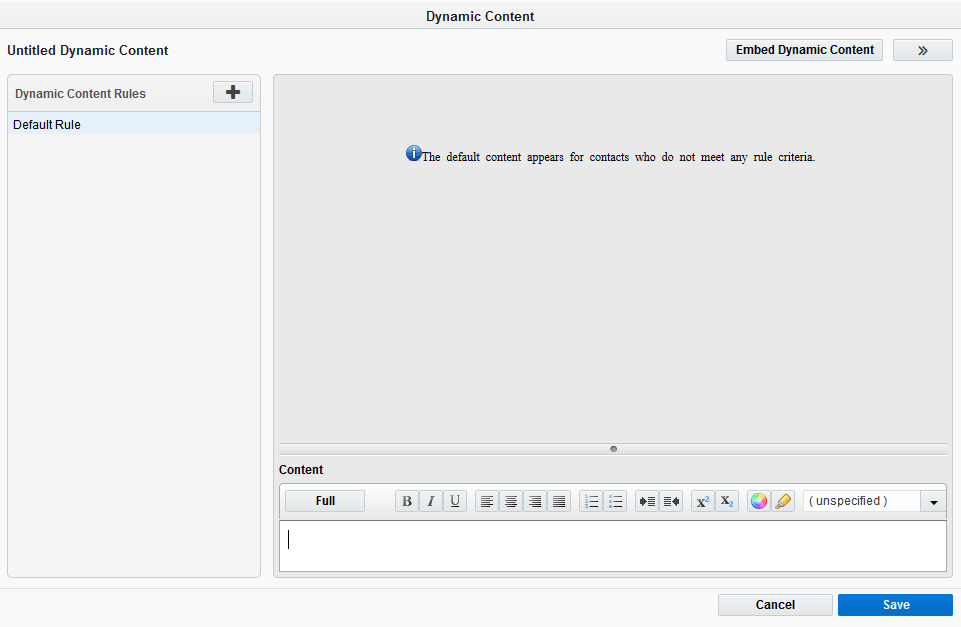
- Set up the Default content first. This content is displayed to contacts who don't meet any of the rule conditions.
Example: If the content is set by city, and there are rules to insert specific content for contacts from Chicago, then a contact from New York (or anywhere else) will see content specified by the Default Rule instead.
Classic UI
Redwood experience

- Create your default content.
- In the classic UI, use the Content area. If you want to add images, field merges, or hyperlinks, or edit HTML code, click Full to open the rich text editor. Learn more about Using the rich text editor.
- In the Redwood experience, click the Content tab on the left panel. Be sure that the Default Rule is selected from the Selected Rules drop-down.
- Begin adding your rules:
In the classic UI, click Add
 in the left panel to add a new rule to the list. Each new rule added to the asset will, by default, follow the naming convention Rule1, Rule 2, Rule 3, and so on. Rename a rule to make it more descriptive by double-clicking it.
 - In the Redwood experience, click the Rules tab on the left panel. Click
 and provide a rule name.
- Add criteria to your rule. Here is an overview of the types of criteria you can use.
- In the classic UI, click on the right panel, and then click the desired criterion. Double-click the criterion you added, then configure the criteria.
Example: In the image below, this dynamic content rule applies only to database contacts who live in Chicago and work in the Food industry.
In the Redwood experience, drag the desired criterion to the left pane and configure the criteria.

- In the classic UI, click
- Add additional filter criteria as needed.
You join the filters using a Boolean AND or OR comparison. To switch between AND or OR, click the operator label on the canvas.

When you use the AND operator, all filter criteria must be met in order to be included. When you use an OR operator, any of the filter criteria could be met in order to be included.
You can group filter criteria together.
- In the classic UI, click the first filter in the group you want to create, then press Ctrl and click the next filter in the group. After you have selected all the filters for the group, click Group.
- In the Redwood experience, click the checkboxes next to the filters you want to group together, then click Group.
Grouping helps ensure Eloqua reads your filters the way you mean like - like using brackets in math. For example, in the case where conditions look for contacts who live in Toronto, or live in Canada, and who have a custom object record (like a purchase or other action). By grouping the first two filters (city and country), Eloqua knows that it should look for contacts who live in Toronto or Canada, and who also have a custom object record. So, it works like this: (City is Toronto OR Country is Canada) AND has a custom object record.
- After building the rule, create the content.
- In the classic UI, select the rule in the right pane, then use the Content area to build your content. If you want to add images, field merges, or hyperlinks, or edit HTML code, click Full to open the rich text editor. Learn more about Using the rich text editor.
- In the Redwood experience, click the Content tab on the left panel. Be sure that the rule is selected from the Selected Rules drop-down. Then build your content.
- Repeat steps for each rule you want to add. The order of the rules is important. Eloqua evaluates the rules from the top down. If a contact doesn't meet any of the rule conditions, then the default content is used. To reorder the rules, click and drag the rule into the desired position.
- Configure the Settings and Permissions:
- In the classic UI, configure Settings and Permissions through Actions
 . Learn more about setting permissions.
 - In the Redwood Experience, click on the respective Settings and Permissions icons to configure them.

- In the classic UI, configure Settings and Permissions through Actions
- Click Save when you are finished.
After you finish:
-
If your content could appear in an email, check the results of the responsive validation tool. The tool identifies issues that could prevent the content from adapting to different screen sizes. The tool checks for tables, images that might not scale, and long text strings.
 indicates that there are no responsive concerns.
 indicates that there might be responsive issues. Click the notification icon to review the issues. Learn some tips on how to keep your email responsive.
If an image was identified as not being responsive, double-click the image and choose the Responsive setting.
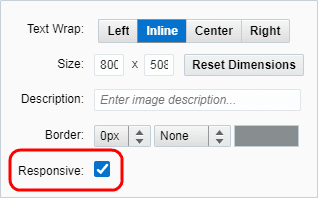
Learn more about keeping images responsive with this feature.
- If you need to edit the dynamic content, see Managing dynamic content
- Add the content to emails and landing pages.
- Preview the shared content in emails and landing pages through the email editor or landing page editor.
Tip: Send an email with your dynamic content to email addresses for test contacts that meet each of the different criteria. Check the emails to make sure that the proper dynamic content is being used for each.