13/42
Registering a Taleo Data Source
During Initial Configuration, Implementors specify the Cloud data source details.
Registering a Taleo Cloud Data Source
You use Configuration Manager to specify the data source details. Before you start, log in to Configuration Manager using the Web link and user name supplied to you by Oracle Cloud Support.
Prerequisites: You must have the Taleo Cloud source details.
- In Configuration Manager, select the Define Business Intelligence Applications link in the System Setups area on the Tasks pane.
- Click the Add icon (
 ) to register a new source system using the Register Source dialog.

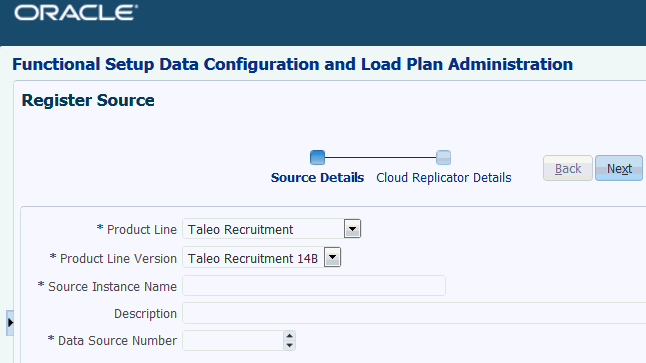
- At the Register Source dialog, specify the following details:
- Product Line — Select your source system type. For example, Taleo Recruitment.
- Product Line Version — Select the data source version that is deployed.
- Source Instance Name — Enter a short readable name to identify this data source in Configuration Manager.
- Description — (Optional) Enter a short description to help Administrators and Implementors identify and use this data source in Configuration Manager.
- Data Source Number — Enter an integer or use the spinner to specify a number to identify data in the OTBI-Enterprise data warehouse. This number must be unique within Configuration Manager. The number 999 is reserved, and should not be used.
- Click Next to display the Cloud Replicator Details dialog.

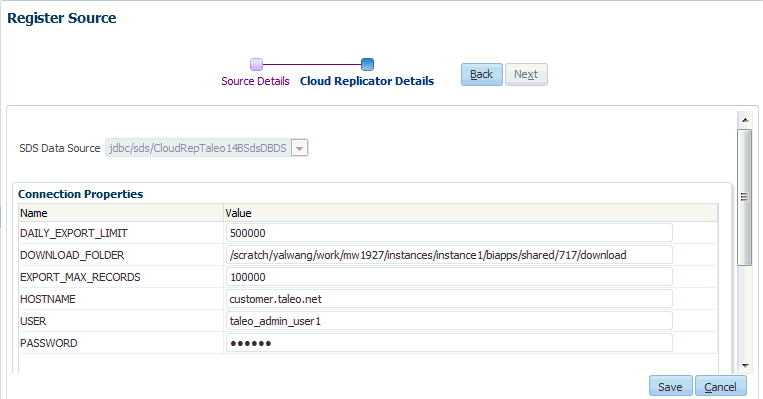
- At the Cloud Replicator Details dialog, specify connection properties,:
Specify the following details:
- For
HOSTNAME, specify the Taleo hostname, for example, customer.taleo.net.
- For
USER and PASSWORD, specify the Taleo user account and password that you created in the Taleo application based on the default user type System Integration (Administrator WebTop). For more information, see Roadmap for setting up security in OTBI-Enterprise in Oracle Cloud Administering Your Deployment for Oracle Transactional Business Intelligence Enterprise.
- Click Save.